CP-842E-842ME System Reference-SYS-CP842-10E.pdf - 第208页
System Installation and Upgrade >> System Installation 7-2 SYS-CP842-1.0E [Main] Screen Set the [Main] screen items as shown below . System T ime and System Date Select this item and input the current ti me and dat…
System Installation
and Upgrade >> System Installation
SYS-CP842-1.0E 7-1
7. System Installation and Upgrade
System installation and upgrade procedures are described in this part.
7.1 System Installation
The following procedure should be followed when installing both the system and appli-
cation software.
Note: Always transmit Proper data to the host computer before installing the system software. All
data is cleared from the machine during installation.
7.1.1 BIOS Settings
Verify the BIOS settings as described below before reinstalling Windows NT and the
system applications.
1 Connect the keyboard to the connector at the front of the machine.
2 Turn the machine power on. When the message Press <F2> to enter SETUP
displays, press the [F2] key on the keyboard to display the BIOS setting screen.
•Use the left and right arrow keys to switch between menu screens.
•Use the up and down arrow keys to select the desired item.
•Press [ENTER] to display submenus. (At the System Date and System Time
settings, the [ENTER] key is used to switch between the Hour, Minute,
and Second settings.)
•Use the [-]/[+] keys or the SPACE key to change setting values shown in brack-
ets.
•To return to the [Main] menu, press the ESC key.
An explanation of the necessary settings follows.
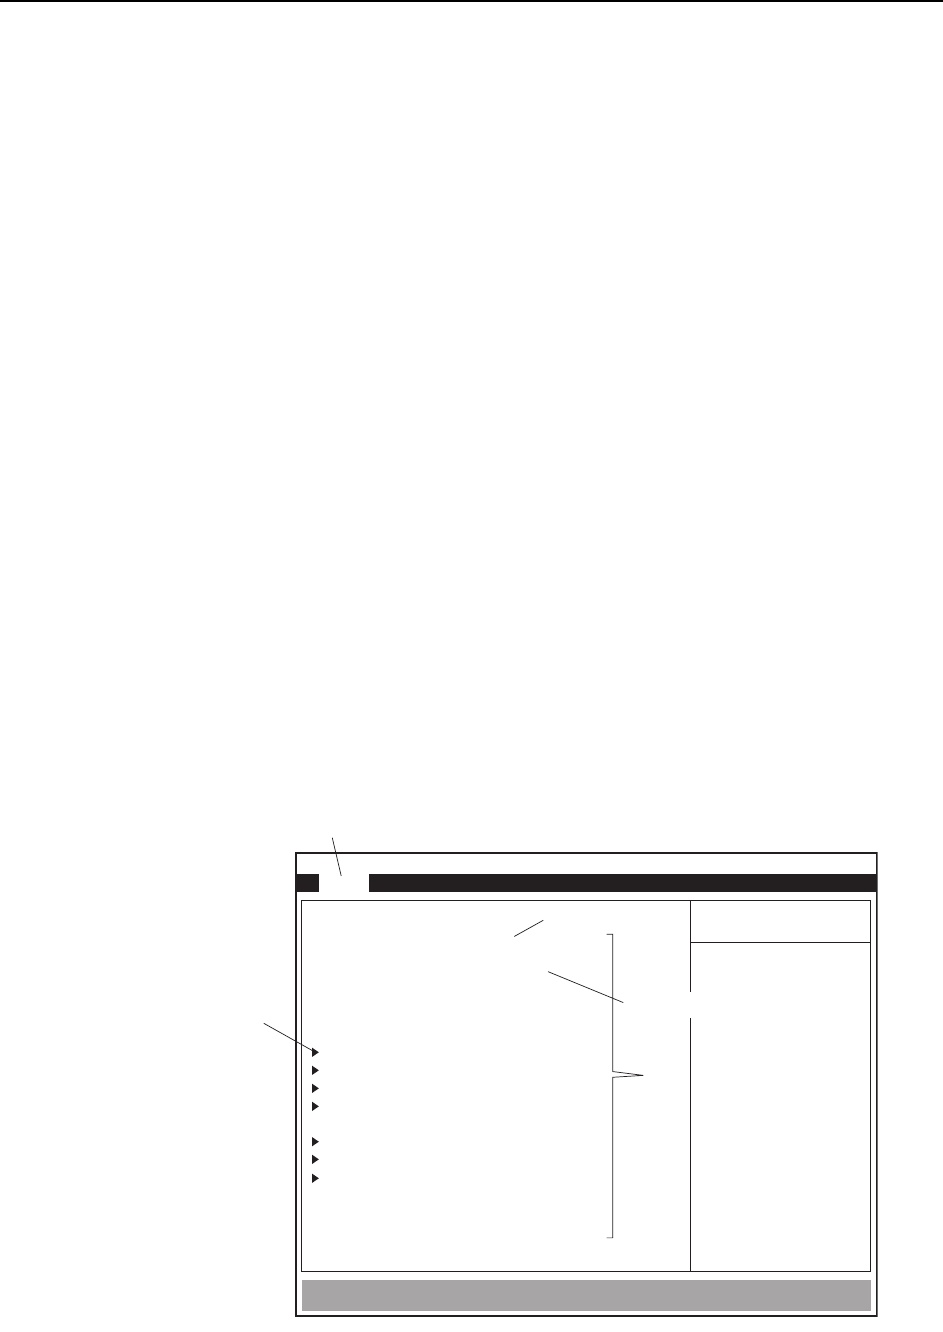
PhoenixBIOS Setup Utility
Main
System Time:
System Date:
Legacy Diskette A:
Primary Master
Primary Slave
Secondary Master
Secondary Slave
Cache Memory
Boot Options
System Memory:
Extended Memory:
[16 : 17 : 18]
[04 / 12 / 2000]
[Disabled]
[6007Mb]
[None]
[CD-ROM]
[None]
640 KB
261120 KB
Advanced Power BIOS Boot Exit
UBE Shadow Control
Menu
Submenu item
CP7S5001
Item
Time, minute, second
Month, day, year

System Installation
and Upgrade >> System Installation
7-2
SYS-CP842-1.0E
[Main] Screen
Set the [Main] screen items as shown below.
System Time and System Date
Select this item and input the current time and date using the [TAB] key to move
between items. Time is input from the left in 24 hour mode. The date order is month,
day, year.
Legacy Diskette A: Disabled*
Primary Master 6007 MB (Hard disk size)
Primary Slave None
Secondary Master CD-ROM
Secondary Slave None
Cache Memory Leave as default.
Boot Options
UBE Shadow Control
To specify the [Primary Master], [Primary Slave], [Secondary Master], and [Secondary
Slave] settings, go to the sub-menu by selecting the desired item and pressing [Enter].
If the power switches on when the initial Type setting item is set to Auto, the hard
disk will be recognized, and the correct settings will be specified automatically.
* : When the machine is equipped with the optional floppy disk drive the item Legacy
Diskette A must be set to 1.44/1.25MB 3 1/2.

System Installation
and Upgrade >> System Installation
SYS-CP842-1.0E 7-3
[Advanced] Screen
Specify the [Advanced] screen settings as shown below.
I/O Device Configuration
PCI Configuration
Installed O/S: Other
Reset Configuration Data: Yes*1
Secured Setup Configurations:No
Large Disk Access Mode: DOS
PS/2 Mouse: Auto Detect
Legacy USB Support: Disabled
Halt on Watchdog Timer:Disabled
Watchdog Timer Interrupt:Auto
Go to the ‘‘I/O Device Configuration sub-menu by selecting the item and pressing
[Enter], then verify that the settings are as shown below.
Local Bus IDE adapter: Both
Serial port A: Auto
Serial port B: Auto
Parallel port: Disabled
Floppy Disk controller: Disabled*2
Onboard Ethernet controller: Enabled
Onboard USB controller: Disabled
Note: *1 : The Reset Configuration Data item is reset to No when the BIOS settings are completed,
and must therefore be set to Yes each time the BIOS Settings screen is displayed.
*2 : Set the “Floppy Disk Controller” to “Enabled” when using the optional floppy disk drive.
Go to the ‘‘PCI Configuration sub-menu by selecting the item and pressing [Enter],
then verify that the settings are as shown below.
PCI IRQ line 1: 11
PCI IRQ line 2: 5
PCI IRQ line 3: 10
PCI IRQ line 4: 9