4OM-1429-008_w.pdf - 第115页
1-54 0707-001 (9) Put the flat ring replacement jig on the roller on the oscillating side (outside of the machine). Push only the flat ring downward by hand and insert it into the groove of the roller . Flat Ring Fig. 4A54…
1-53
4.4 Procedure of Flat Ring Replacement
(6) Use the inner holes of the cut unit fixing jig with the tape clamp
being closed and attach the jig with the bent portion being
directed upward.
Fig. 4A52
WARNING
Pay close attention to the cutter blade during the maintenance
work.
•
Lack of attention will result in a hand injury, etc.
Wear gloves and take the greatest care in performing the work.
•
Be sure to attach the fixing jig to the cut unit during the
maintenance work for safety purposes.
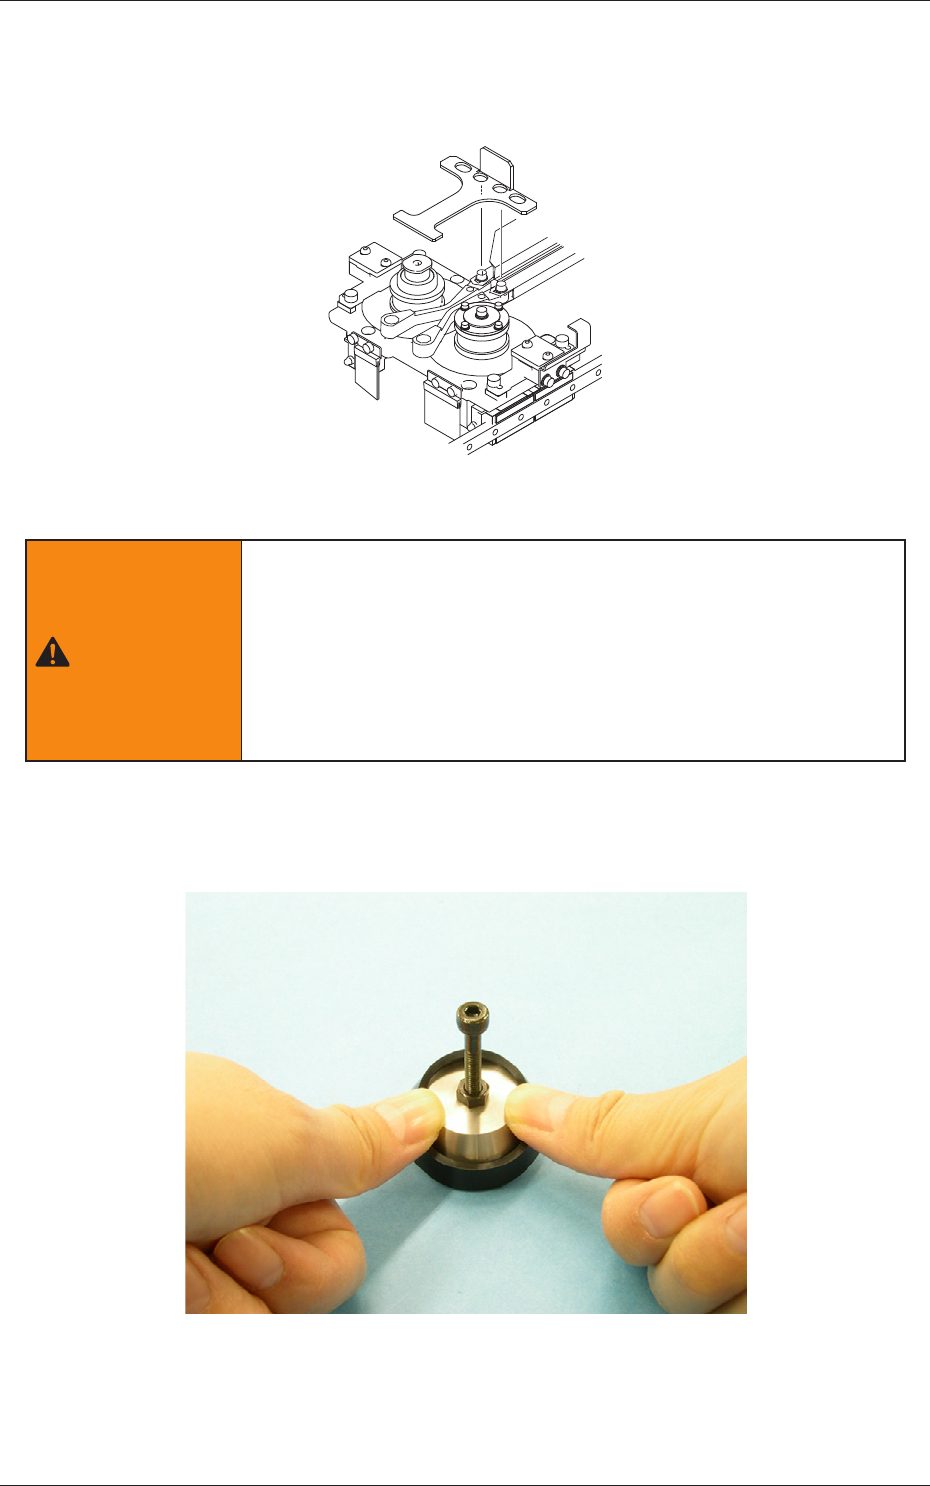
(7) Cut the used flat ring with a cutter on market and detach it.
(8) Attach the flat ring to the flat ring replacement jig.
Fig. 4A53
0712-002
1-54
0707-001
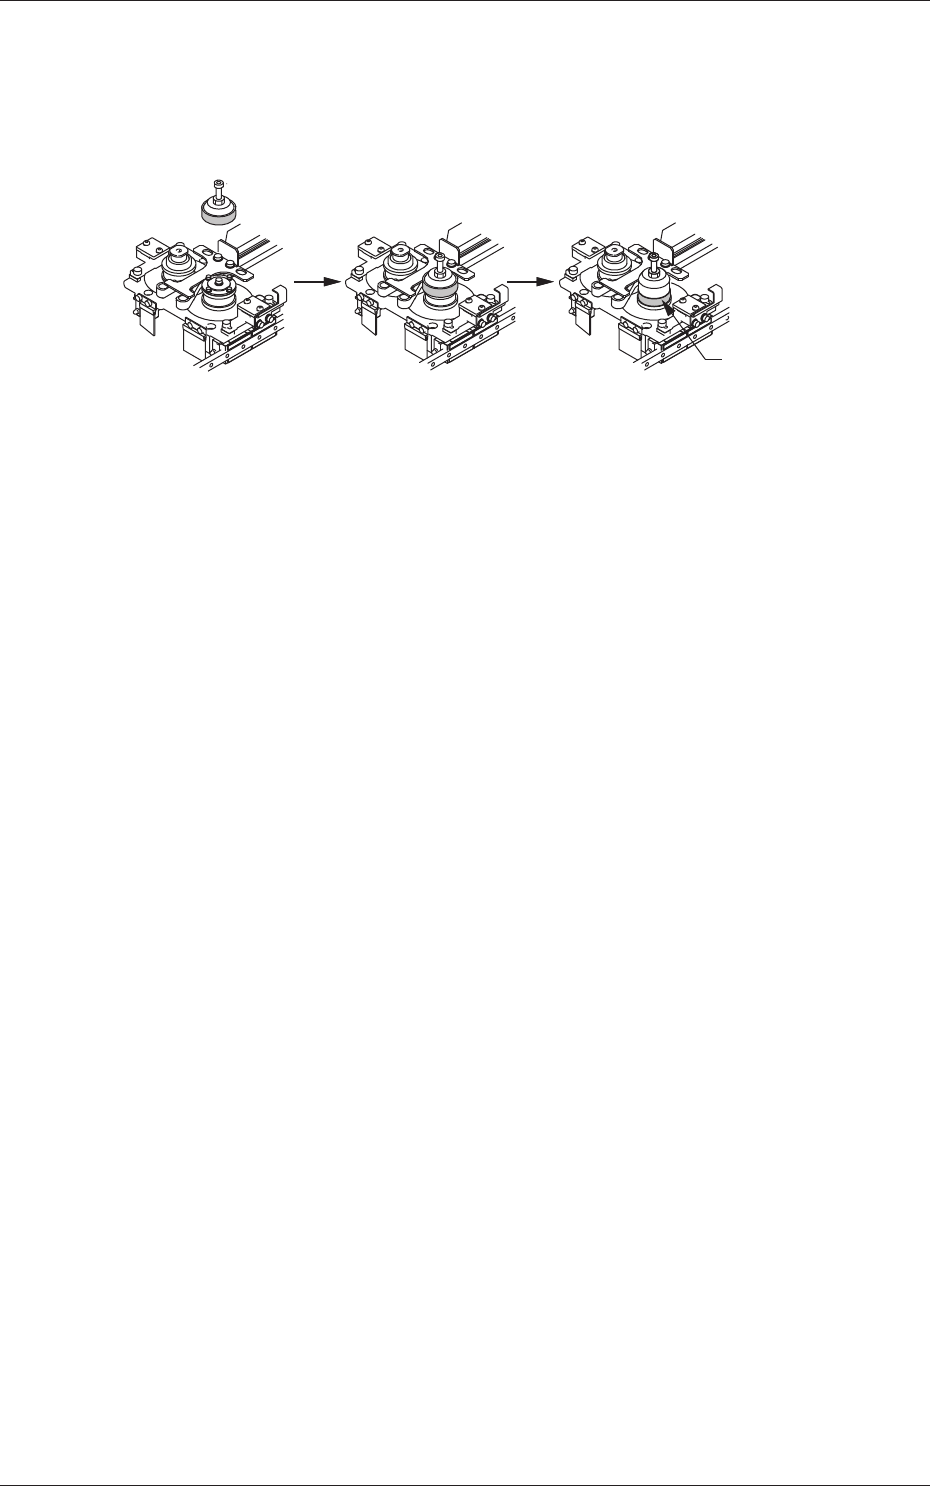
(9) Put the flat ring replacement jig on the roller on the oscillating
side (outside of the machine).
Push only the flat ring downward by hand and insert it into the
groove of the roller.
Flat Ring
Fig. 4A54
(10) Pay attention to the cutter blade and detach the flat ring
replacement jig.
(11) Attach the tape guide and the transparent cover.
4.4 Procedure of Flat Ring Replacement

1-55
4.5 Lubricating Procedure onto the Linear Guide Oil Filler
Port
•
Lubricating Timing: Every three months
•
Preparation for lubrication
•
Hand Grease Gun
KH-120 (Maker : Yamada Yuki)
•
Type N
(Maker : THK)
(Part No. : 630 061 7467)
•
DAPHNE EPONEX GREASE No.1
4.5 Lubricating Procedure onto the Linear Guide Oil Filler Port
0707-001