Vermes MDS 358X user Manual.pdf - 第88页
Operation VTK - TR -BA- 072e - 1 - User Manua l MDS 358X S eries 77 7.13.1 Heater and MD C Y ou can ac tivate the heat er via t he heat er submenu in t he MDC menu (see pic ture b elow). Use the [enter] and arro w keys t…
Operation
76
VTK-TR-BA-072e-1 - User Manual MDS 358X Series
7.13 Dispensing with a Heater
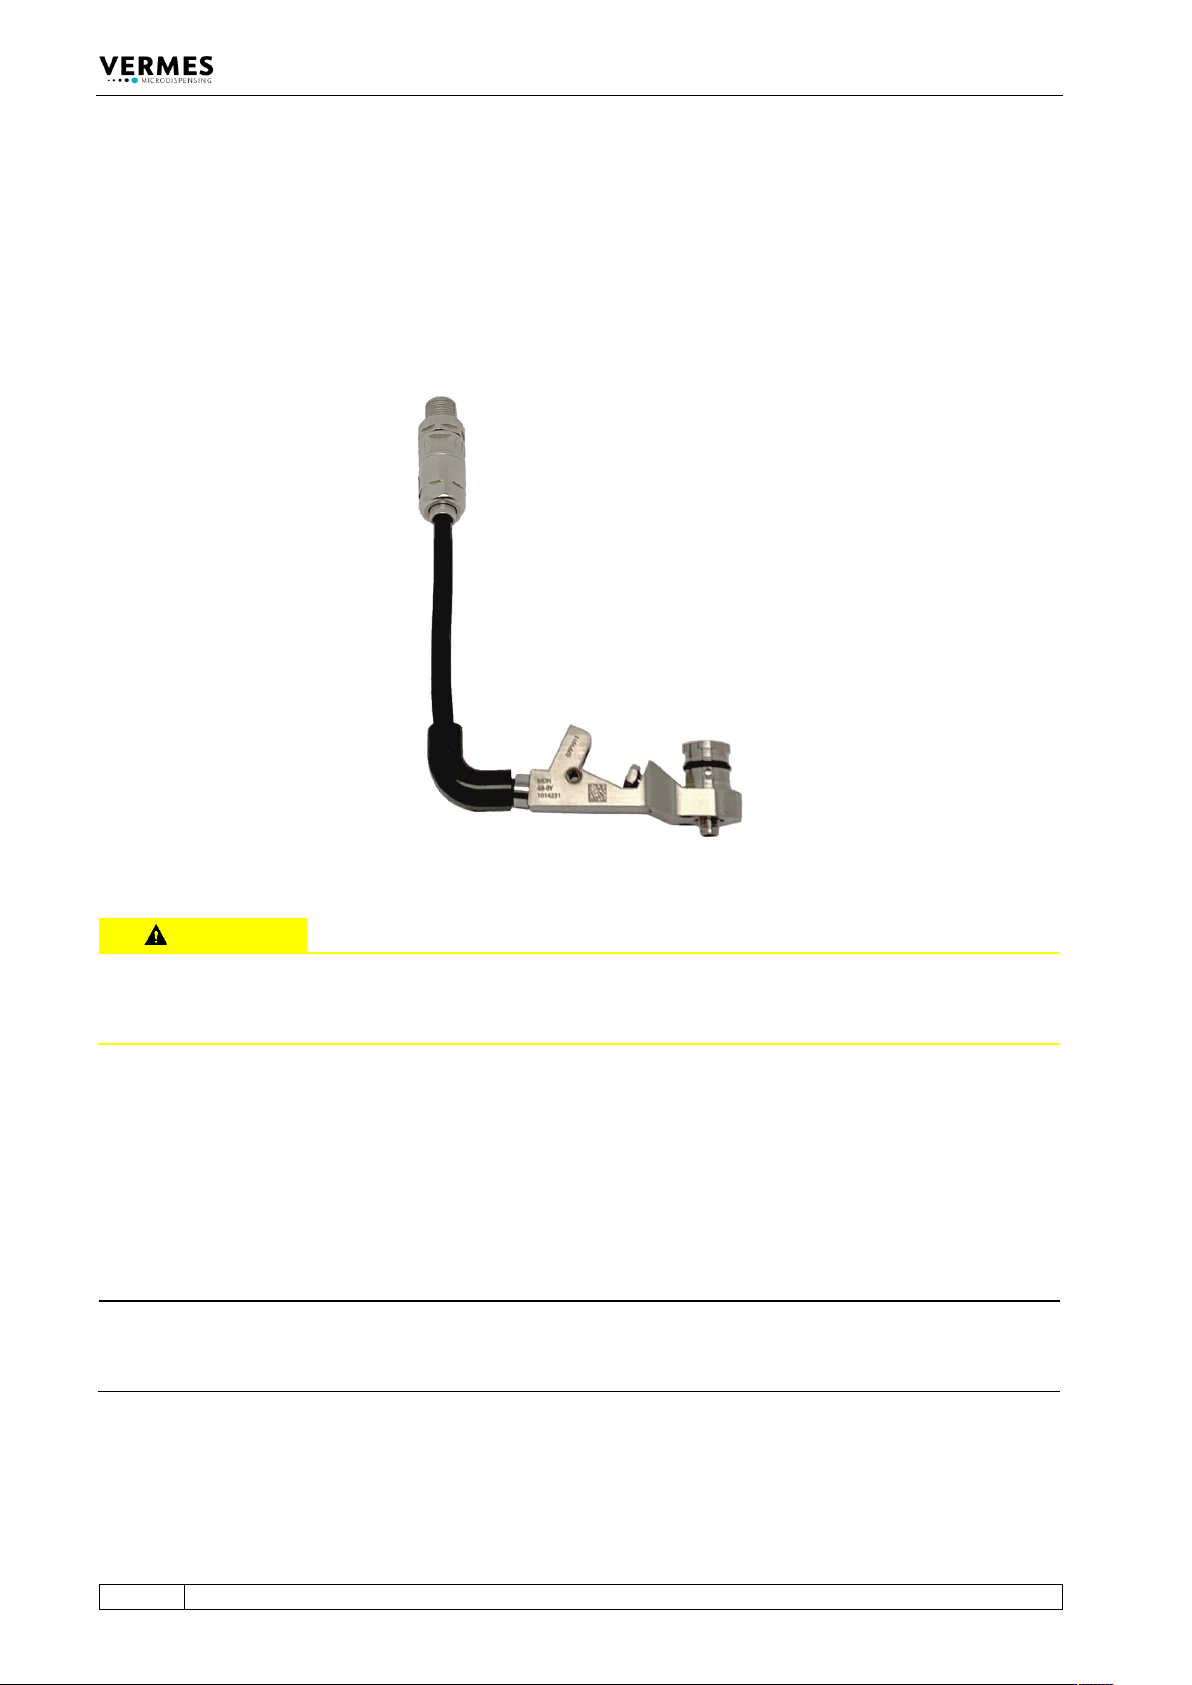
The Microdispensing System MDS 358X can optionally be equipped with a nozzle heater. One
option is the MDH-48-BY (see Fig. 56). If a heater is connected to the system, the main menu
shows the current temperature (in °C) instead of “Ready”. More detailed information about the
menu, while using a heater, you can find in paragraph 7.13.1, page 77 and paragraph 4.5.3.2,
page 31.
Fig. 56: MDH-48-BY
CAUTION
High temperatures, danger of burns
The nozzle heater can reach very high temperatures (e.g. of up to 180 °C with MDH-48-BY). Do
not touch this area during operation. Afterwards only touch it once it has cooled down.
With a heater, you can control the dynamical viscosity of the fluid to be dispensed. For some
liquids, dispensing without heating is impossible. Heating may also be required to ensure a
constant process temperature, or when the dispensing has to take place above room
temperature.
Information how to mount a heater you can find in paragraph 6.2, page 45. You then need the
heater cable 48 V, to connect the heater to the MDC (see paragraph 6.3.3.4, page 53).
INFORMATION
Adjust deactivates heater
If you perform an adjust while the heater is activated, the heater is deactivated automatically.
You have to switch the heater ON again after the adjust, if you need it in your application.
Operation
VTK-TR-BA-072e-1 - User Manual MDS 358X Series
77
7.13.1 Heater and MDC
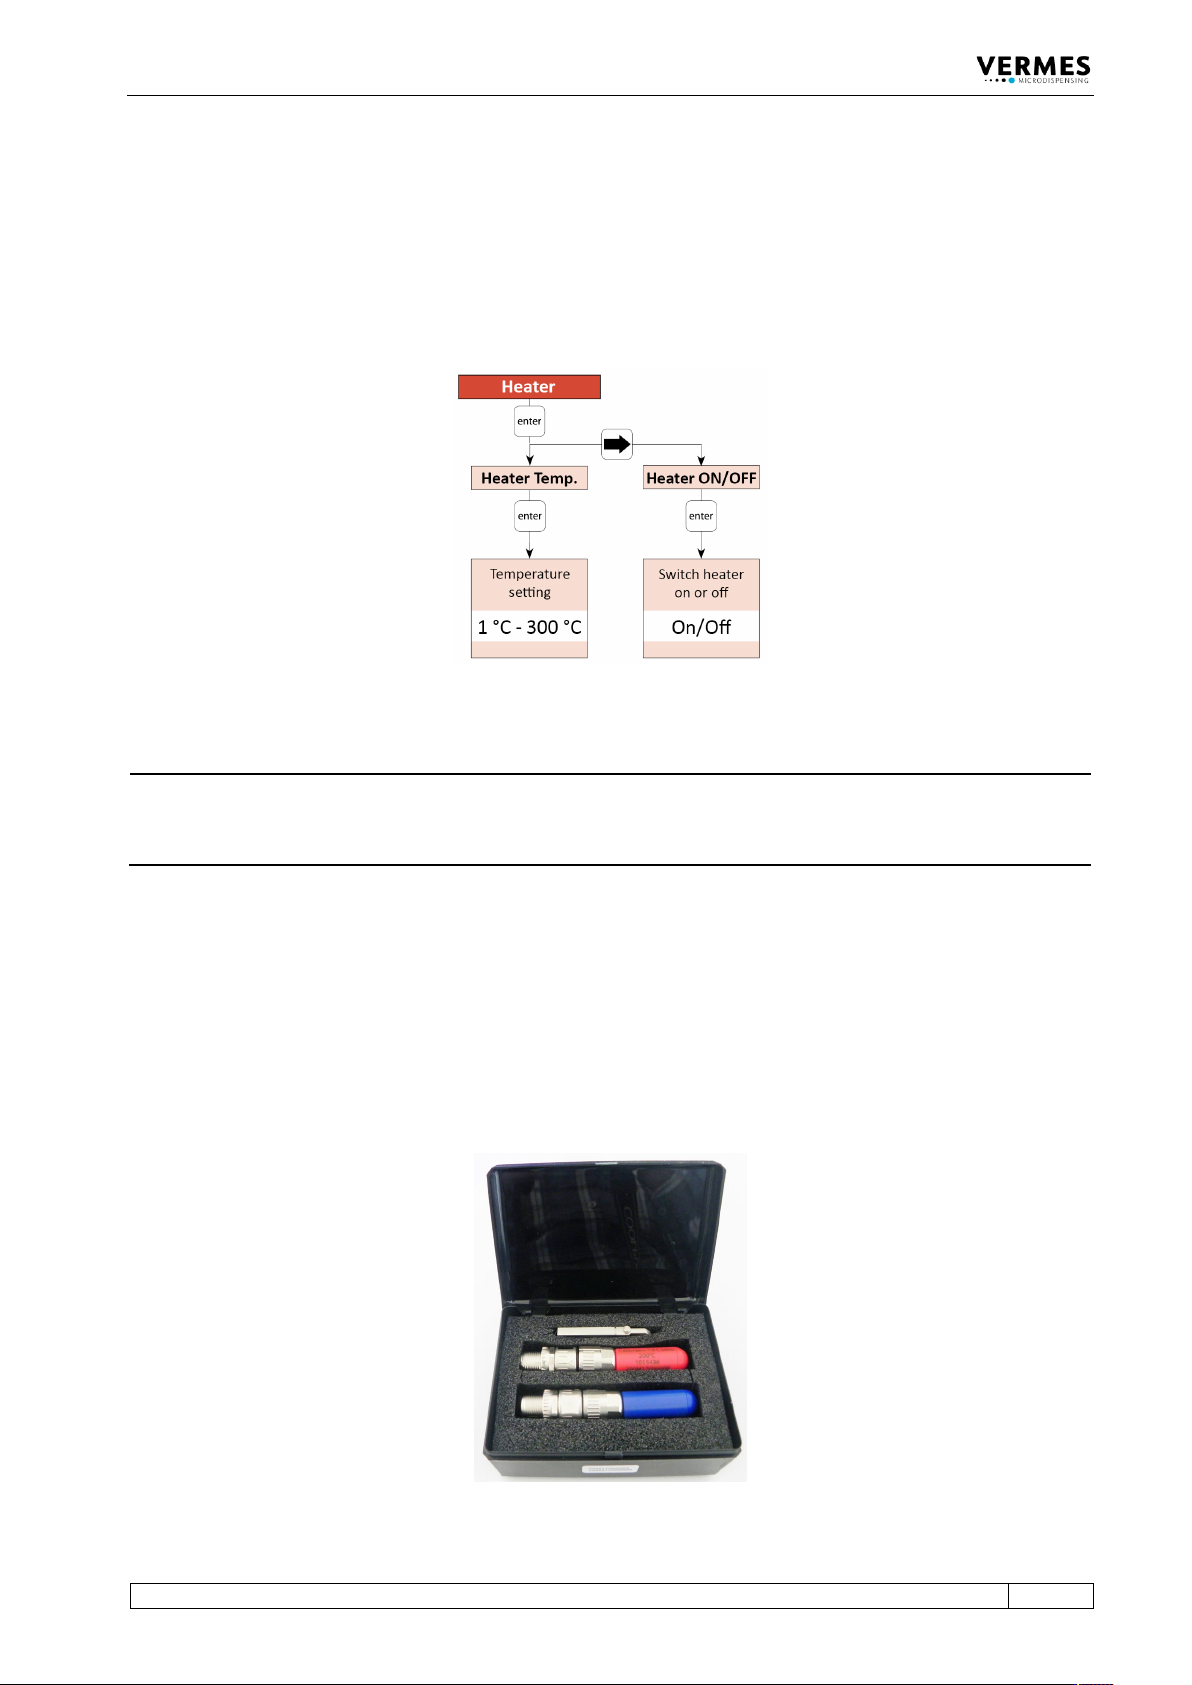
You can activate the heater via the heater submenu in the MDC menu (see picture below). Use
the [enter] and arrow keys to navigate down to the submenu “Heater” in the menu
“Cooler/Heater”. Here you can switch ON the heater (menu item “Heater ON/OFF”) and set the
temperature (menu item “Heater Temp.”). The possible temperature range depends on the
connected heater (e.g. for MDH-48-BY it lies between 10 °C and 180 °C). (Further information
about the menu of the control unit you can find in paragraph 4.5, page 27.)
Fig. 57: Submenu Heater
INFORMATION
Control heater via serial commands
The heater can also be controlled via the serial interface. The relevant commands and
information can be found in paragraph 8.1.2.2, page 88.
7.13.2 Calibration of the Heater
You should calibrate the temperature settings of your heater in regular intervals. We recommend
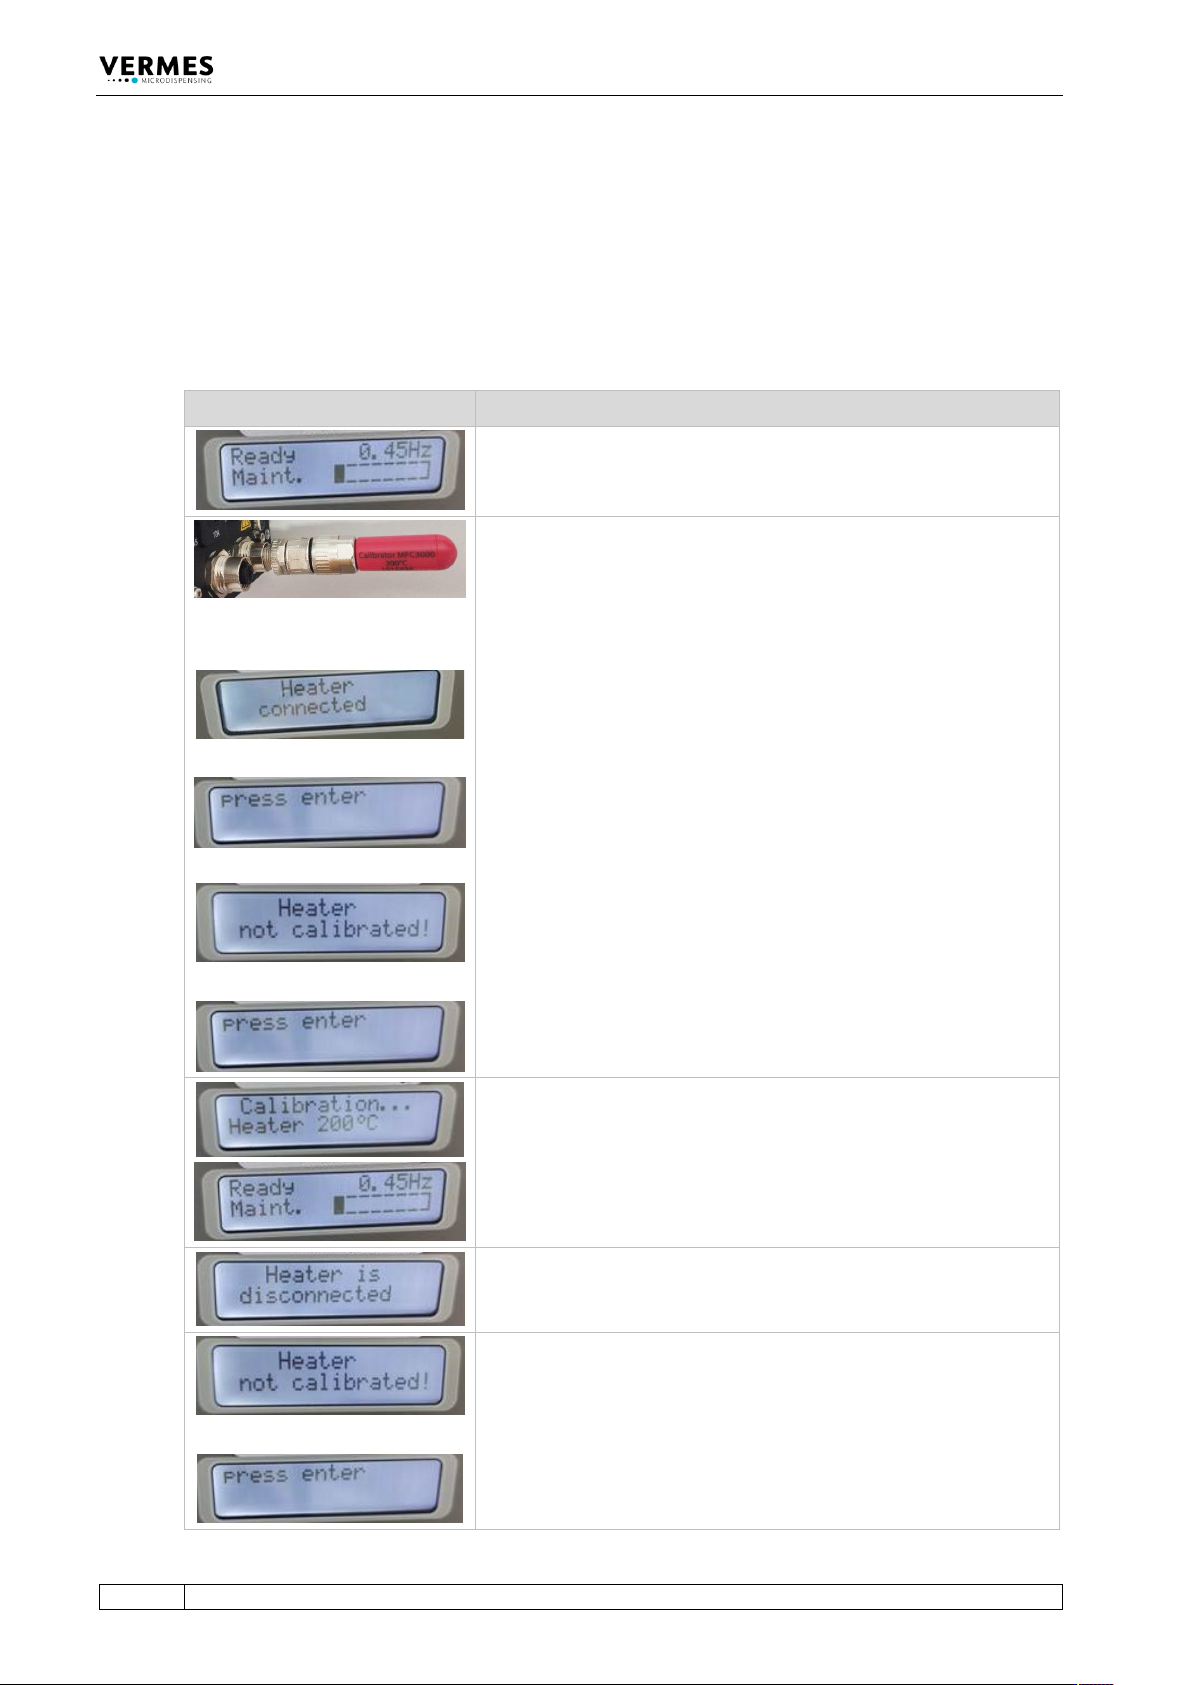
to do the calibration once a year. VERMES Microdispensing offers a calibrator set (Calibrator set
for MFC 3000, order no. 1015434, see Fig. 58). The set contains two calibrators for different
temperatures:
Calibrator MFC3000 – 20°C (blue, as single product order no. 1015437)
Calibrator MFC3000 – 200°C (red, as single product order no. 1015436)
Fig. 58: Calibrator Set
Operation
78
VTK-TR-BA-072e-1 - User Manual MDS 358X Series
You do not need the additional USB flash drive coming with the calibrator, if you work with an
MDC 3500. The USB flash drive is only for other devices.
You have to calibrate your heater twice, once at 200 °C and once at 20 °C. You always have to
calibrate at both temperatures, since the old values are deleted the moment you start a new
calibration. It does not matter, in which order you perform the calibrations, as long as you use
each calibrator exactly once.
The following table shows you how to perform the calibration.
Picture Explanation
Preparation
The MDC is connected with a microdispensing valve, but not with a
heater. Start up the MDC. The starting menu appears in the display.
+
or
+
Step 1 (First Calibrator gets connected)
Connect the calibrator MFC3000 – 200°C.
Important Note!
Make sure to screw the calibrator tight enough.
There are now two possibilities.
If the MDC had been calibrated before, the message “Heater
connected” appears in the display. The display then switches
between this message and the message “Press enter”.
If the MDC had not been calibrated before, or if there was an error
during the last calibration attempt, the message “Heater not
calibrated” appears. Similar to the case above, the display switches
between this message and the message “Press enter”.
Press the [Enter]-key.
Step 2 (First calibration is running)
After several seconds, in the display appears the message
“Calibration … Heater 200°C”.
Wait until the display jumps back to the starting message.
Step 3 (First calibrator screwed off)
Screw off the calibrator. In the display, you get the message “Heater
is disconnected”.
+
Step 4 (Second Calibrator gets connected)
Connect the calibrator MFC3000 – 20°C.
Important Note!
Make sure to screw the calibrator tight enough.