2500_Users_Manual.pdf - 第110页
Task s and Ki ts ProM aster 25 00 User Manua l 3-35 Describing a Kit When TaskLink enters this dialog box the cursor is in the Description entry field. Enter a des cription of up to 40 print able characters. Specify Sour…
Tasks and Kits
3-34 ProMaster 2500 User Manual
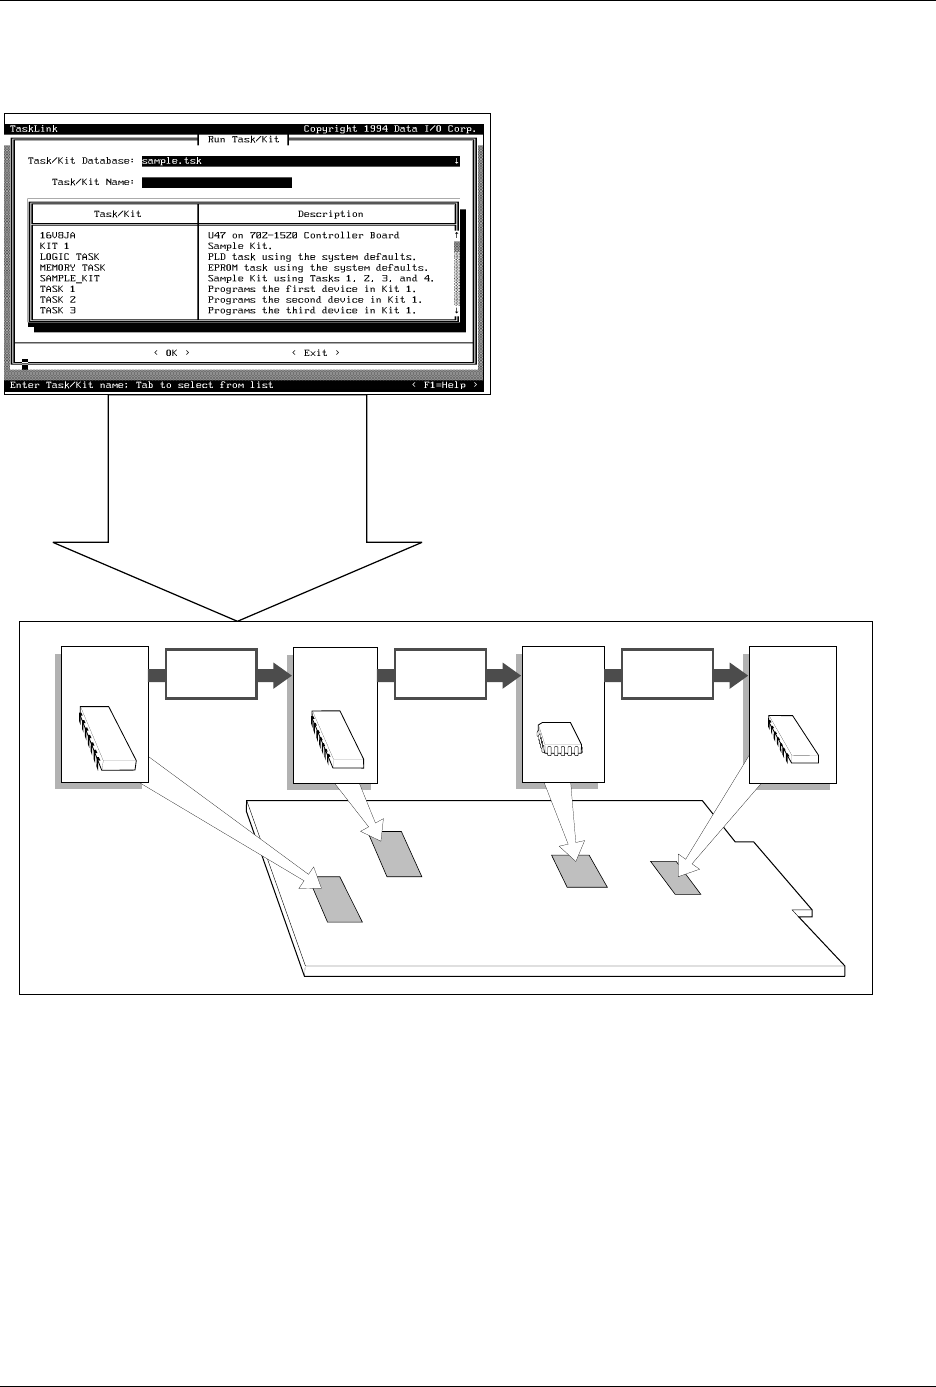
Figure 3-23
Kits are a Series of Tasks in a Single Job
1958-2
Run Kit
Perform all Tasks in Kit
Number of Kits to Build
Session I.D.
Device
Process
•
•
•
•
•
Specify
Task 1
Task 2
Task 3
Task 4
Message
~0001
Message
~0002
Message
~0003
Tasks and Kits
ProMaster 2500 User Manual 3-35
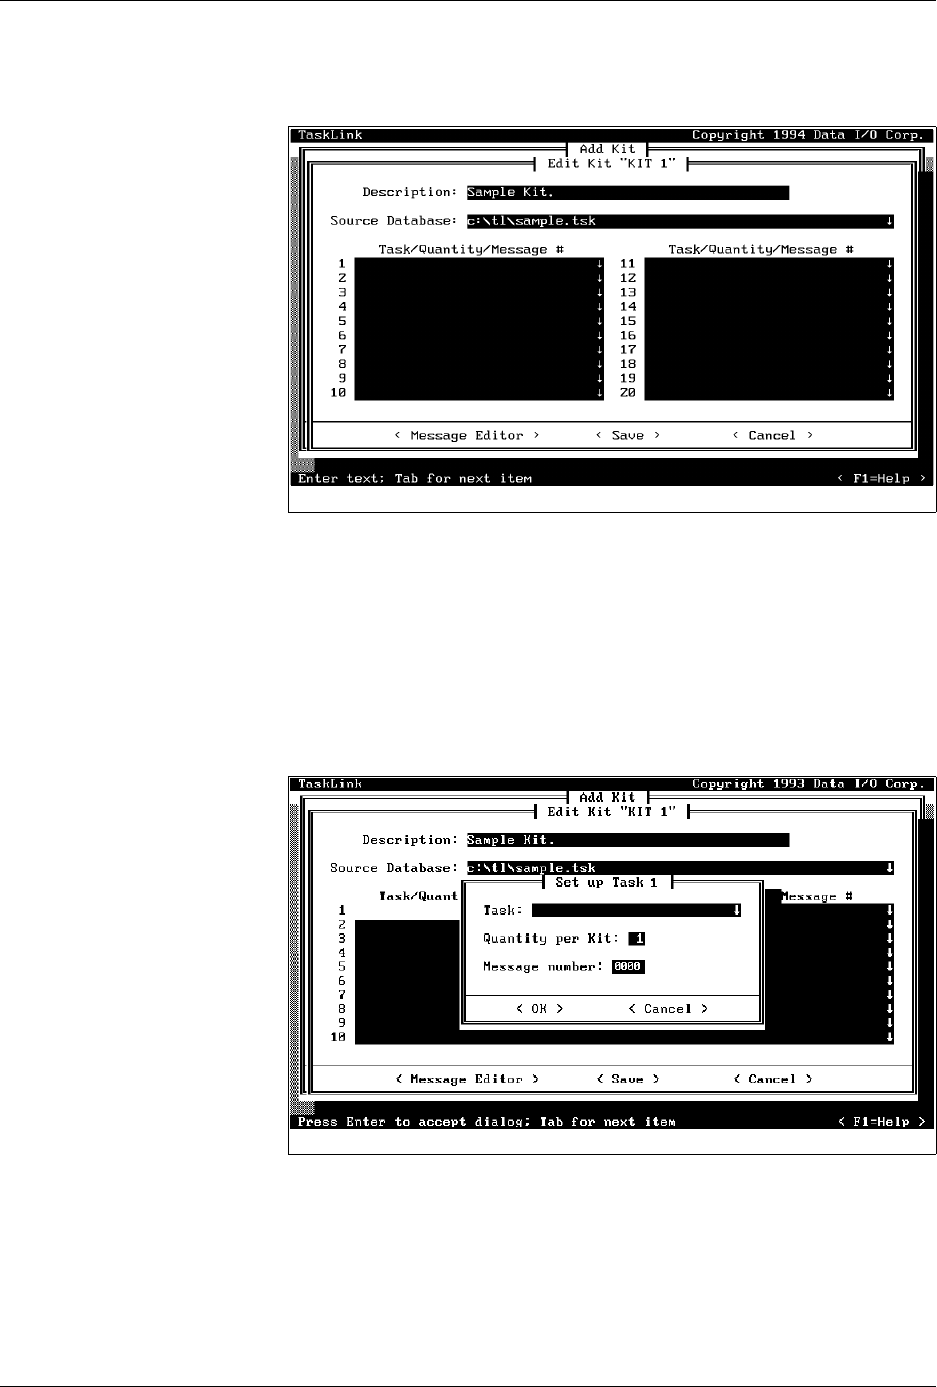
Describing a Kit
When TaskLink enters this dialog box the cursor is in the Description
entry field. Enter a description of up to 40 printable characters.
Specify Source Database
The Source Database is the
xxxx.tsk
file containing all the Tasks you
include in the Kit you are creating. A Kit can only access one
Source Database. To change to a different Source Database, enter the path
and filename in the Source Database entry field, or press
F2
and TaskLink
displays a list of files. Move the screen cursor to highlight the filename.
Press
↵
to accept the new database file.
Selecting Tasks for the Kit
Move the screen cursor to the first line in the Task/Quantity/Message #
entry box and press
↵
to access the Set up Task dialog box (see Figure 3-
25).
Enter the name of the Task you want your Kit to run first, or press
F2
to
choose from a list of files displayed by TaskLink.
Move the screen cursor to highlight a Task and press
↵
to select it for your
Kit. When you select a Task, TaskLink displays the selected Task in the
Task entry field.
Figure 3-24
Edit Kit Screen
Figure 3-25
Naming the First Task in the Kit
Tasks and Kits
3-36 ProMaster 2500 User Manual
Set Number of Devices to
be Processed
Press
T
AB
to move the cursor to the Quantity per Kit entry field. In most
cases you will leave this at the default value of one, which means that one
device with this data will be placed on each board.
Set Message Number
Move to the
Message number
entry field and enter a four-digit number
corresponding to a screen message you will create. TaskLink will display
that message to prompt the operator between the end of one Task and the
start of the next (see Figure 3-25). For more information on entering the
specific message, refer to the description of the Message Editor in the next
section.
Note: Message is an optional feature. If you don’t want TaskLink to display a
message before running the next Task, enter zeros (0000) in this field.
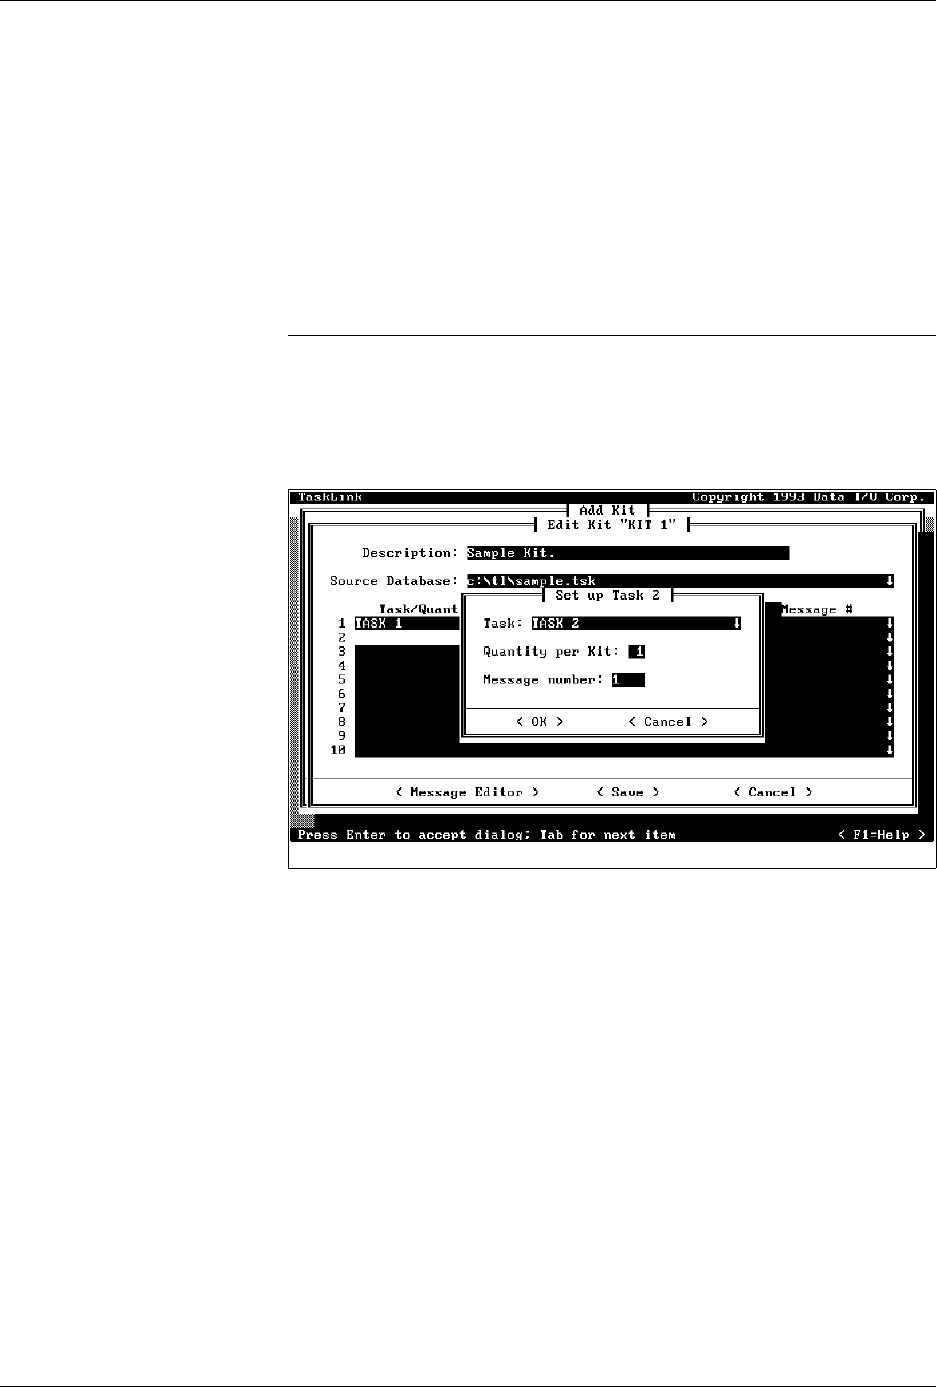
To add the next Task to this Kit, move the cursor to line 2 in the
Task/
Quantity/Message #
entry box and repeat the process. In Figure 3-26,
Task 2 has been selected and message number 1 has been entered.
Message Editor
Once you have specified an ASCII editor in the
Set Message Editor
option of the
Options
menu (refer to the Set Message Editor section on
page 3-30), you can access your editor by selecting the
< Message Editor>
pushbutton in the Edit Kit dialog box.
TaskLink runs the selected ASCII editor and looks for a file called
tl.msg
.
After the editor has opened the
tl.msg
file, type the tilde (~) followed by
the four digits used in the Message number entry field (see Figure 3-26).
Press
↵
to get to the next line.
Figure 3-26
Adding the Second Task to the Kit