2500_Users_Manual.pdf - 第74页
Insta llation a nd Se tup ProM aster 25 00 User Manua l 2-31 8. Ins tall the device sh ield, lower the ma in plat e, and then tighten th e corner screws. 9. Plug in t he power cord an d turn on the 2500 . 10. Check the n…

Installation and Setup
2-30 ProMaster 2500 User Manual
Installing a 2500
Firmware Update
The 2500 firmware will be updated periodically to add new operating
features. The update replaces the EPROM in location
U15
and/or
U43
on
the handler controller board.
CAUTION: To avoid possible damage to the system components, this
procedure should be performed only by a qualified service
technician. Observe all antistatic precautions while
performing this operation.
Follow these steps to install a firmware update to the 2500. To reduce or
prevent possible damage to these static-sensitive devices from ESD, wear
your antistatic wrist strap when performing this procedure.
1. Turn off the 2500 and remove the power cord.
2. Remove all devices from the tracks and all tubes from the tube
holders.
3. Unscrew the two corner screws that hold the main plate to the 2500’s
base.
4. Lift the main plate to expose the 2500’s interior, and remove the
internal device shield.
WARNING:To prevent the hood or main plate from accidentally
falling shut, be careful not to jar the 2500 when they are
raised.
5. Locate the U15/U43 EPROM on the handler controller board (refer to
the controller board layout in Figure 2-20 and Appendix C).
6. Use an IC remover tool to carefully remove the current DIP firmware
device from its socket.
7. Install the new firmware device in the socket, being careful not to
bend any of the device leads. Make sure that pin 1 is properly
oriented.
Installation and Setup
ProMaster 2500 User Manual 2-31
8. Install the device shield, lower the main plate, and then tighten the
corner screws.
9. Plug in the power cord and turn on the 2500.
10. Check the new firmware version by going to the Optics diagnostic
test (see page 5-32). The front panel displays the new firmware
version as
U15 REV XXX
and
U43 REV YYY
.
Note: You must perform the
ProMaster Package Update
in TaskLink after
installing new firmware in the 2500.
Updating the Package
Types in TaskLink
The new 2500 firmware may have added a new package type not
supported on the old version. Complete the following steps to update
TaskLink with the new package type so that it will appear as an option on
the TaskLink screens.
1. From the TaskLink main screen, select the
Utilities
option.
2. From the Utilities pull-down menu, select
ProMaster Package
Update
.
3. Press
↵
to begin the update.
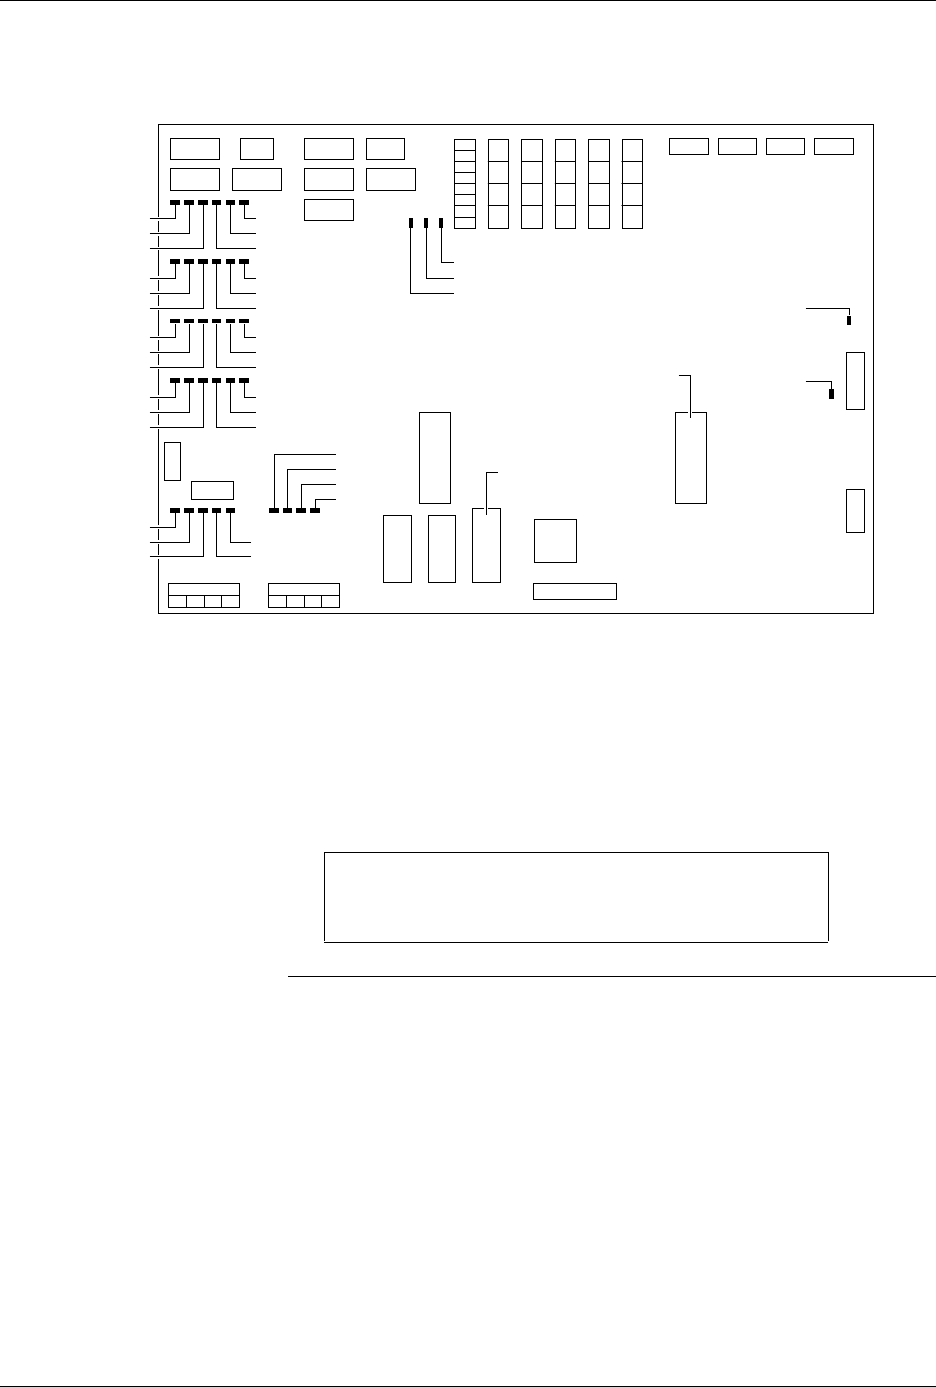
Figure 2-20
Location of Firmware EPROMs on the Main Controller Board
OPTIC TEST - ADC = 200 - VAC = 23
11100000001111101111111100 ENC = 13107
| | | | | U15 REV 1.00
5 10 15 20 25 U43 REV 1.00
1955-2
+5V
-12V
+12V
+36V
+90V
CR111
CR75
CR99
CR51
CR87
CR63
CR112
CR76
CR100
CR52
CR88
CR64
CR113
CR77
CR101
CR53
CR89
CR65
CR114
CR78
CR102
CR54
CR90
CR66
+24V
S8
S7
S5
S6
S2
S3
S1
S4
U15
EPROM
U43
EPROM

Installation and Setup
2-32 ProMaster 2500 User Manual