2500_Users_Manual.pdf - 第229页
Troubleshoo ting ProM aster 25 00 User Manua l 6-7 The beam mo ves quickly. To avoid i njury, keep your hands, hair, and loose clo thing away from t he path of the beam.

Troubleshooting
6-6 ProMaster 2500 User Manual
Troubleshooting Flow Charts
These troubleshooting flow charts help you do the following:
• Isolate the area where the problem is occurring.
• Determine whether a malfunctioning component or assembly
requires cleaning, adjusting, or replacement.
• Go to the page in the manual that describes the appropriate
procedure.
The following flow charts are included on the following pages:
Power-up Failures.........................................................................................6-8
Beam Does Not Pick Up Device Correctly...............................................6-10
Beam Does Not Insert Device Correctly...................................................6-12
Programming Failures................................................................................6-14
Label Printing Problems.............................................................................6-16
Label Application Problems.......................................................................6-18
Beam Does Not Deliver Device Correctly................................................6-22
WARNING:Do not perform any procedure that requires you to lift the
main plate of the 2500 unless you are a service technician
trained on electromechanical equipment.

Troubleshooting
ProMaster 2500 User Manual 6-7
The beam moves quickly. To avoid injury, keep your
hands, hair, and loose clothing away from the path of the
beam.
Troubleshooting
6-8 ProMaster 2500 User Manual
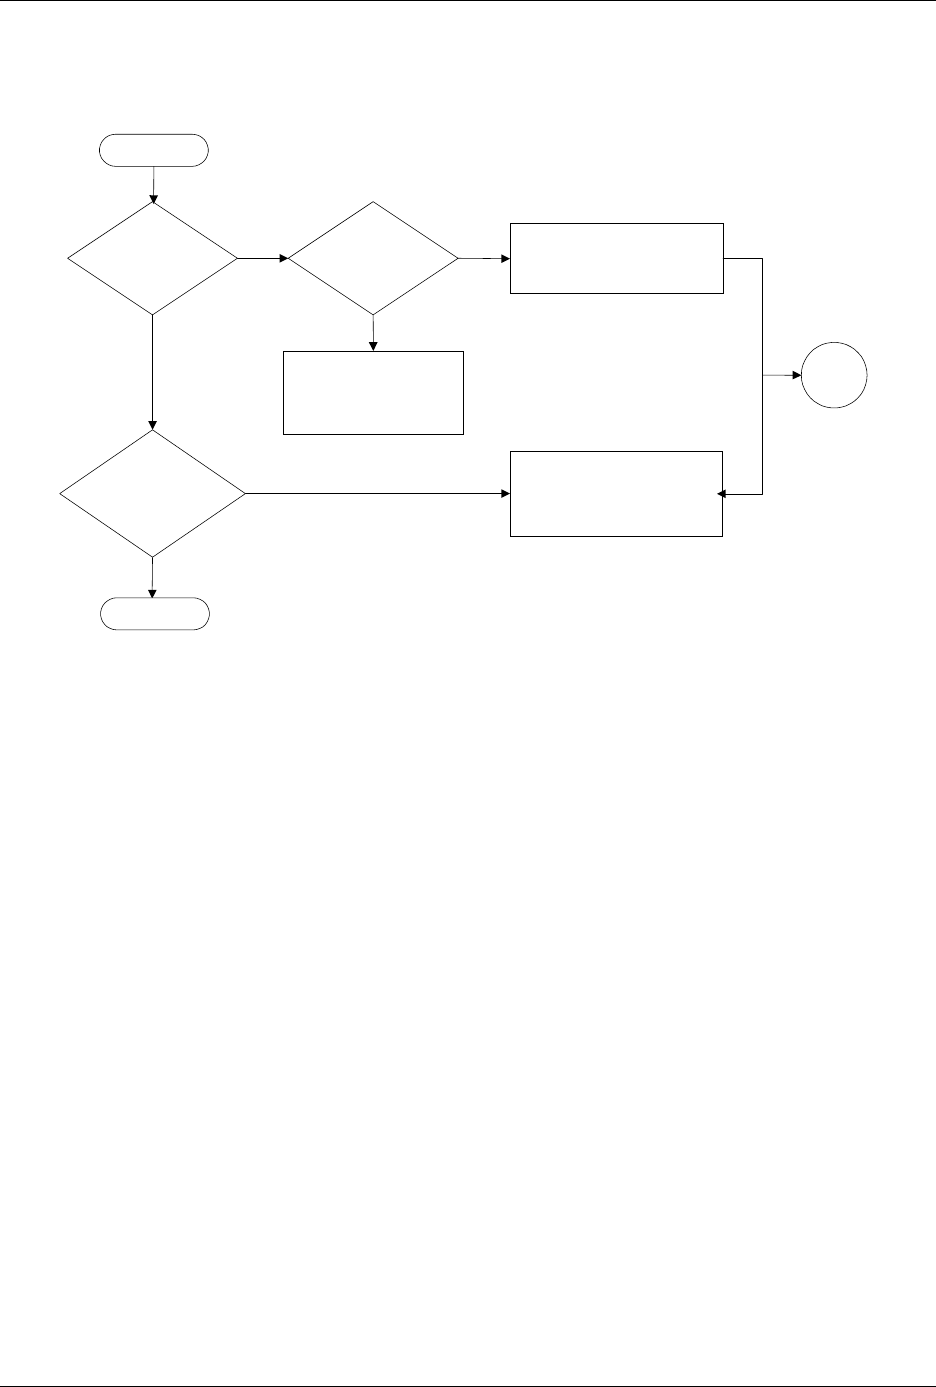
Figure 6-1
Power-up Failures (page numbers are in parentheses)
Does
2500 power up in
remote or local
mode?
Does
2500 display
handler
message?
Does
PE* unit communicate
with TaskLink?
Check main fuse (7-2)
Check Toroid & controller
board power supplies (5-13)
Record message & try to
solve problem.
If unsuccessful, call
Customer Support.
Check RS-232C cable
connection (2-16, 2-19)
Check PE reference voltages
(5-51)
* PE = Programming Electronics
Yes
No
Yes
No
Yes
No
Start
Go to
Start
End