SME_Jig_User_Guide(Eng_Ver1).pdf - 第44页
3-12 User's Guide For Tape Fe eder Calibration Jig 3.3.3. Inspection of Part Supply Accuracy of Feeder (Inspection) After installing the ta pe feeder on the calibration jig, i nspect the part supply accuracy of the …
3-11
Tape Feeder Calibration
box and take the following measures:
w If the measurement value is greater than 40,000,000
If the inspection result of the part supply accuracy is 'NG', perform an overhaul of
the feeder. If the inspection result of the part supply accuracy is 'OK', perform an
overhaul of the corresponding feeder after using it until its feeding count becomes
60,000,000.
w If the measurement value is greater than 60,000,000
Perform replacement and overhauling of the components related to the part supply
accuracy of the feeder.
Caution
The recommended feeding count differs depending on the
tape feeders. Mange the lifetime of the tape feeder referring
to .
3. After checking the firmware of the feeder displayed in the <Firmware Version>
caption box, if the following conditions are not met, update the feeder firmware using
the firmware saved in the USB provided when purchasing the calibration jig.
w Tape feeder using an old main board: Firmware version of 1.26 or above
w Tape feeder using a new main board: Firmware version of 2.10 or above
Memo
For more details regarding the feeder’s firmware update, refer to "4.2.
Tape Feeder Firmware Upgrade".
4. Check whether 'OK' is displayed in the <Sensor Initialize> caption box. If 'NG' is
displayed in the <Sensor Initialize> caption box, initialize the feeder sensor referring
to the "3.4.2. Tape Feeder Sensor Initialization".
5. Check whether 'OK' is displayed in the <Mapping Done> caption box. If 'NG' is
displayed in the <Mapping Done> caption box, initialize the feeder sensor referring to
the "3.4.2. Tape Feeder Sensor Initialization".
6. The <Pitch> caption box shows the pitch set to the current tape feeder.
3-12
User's Guide For Tape Feeder Calibration Jig
3.3.3. Inspection of Part Supply Accuracy of Feeder (Inspection)
After installing the tape feeder on the calibration jig, inspect the part supply accuracy of
the feeder referring to the following procedure (based on the SME 8mm feeder):
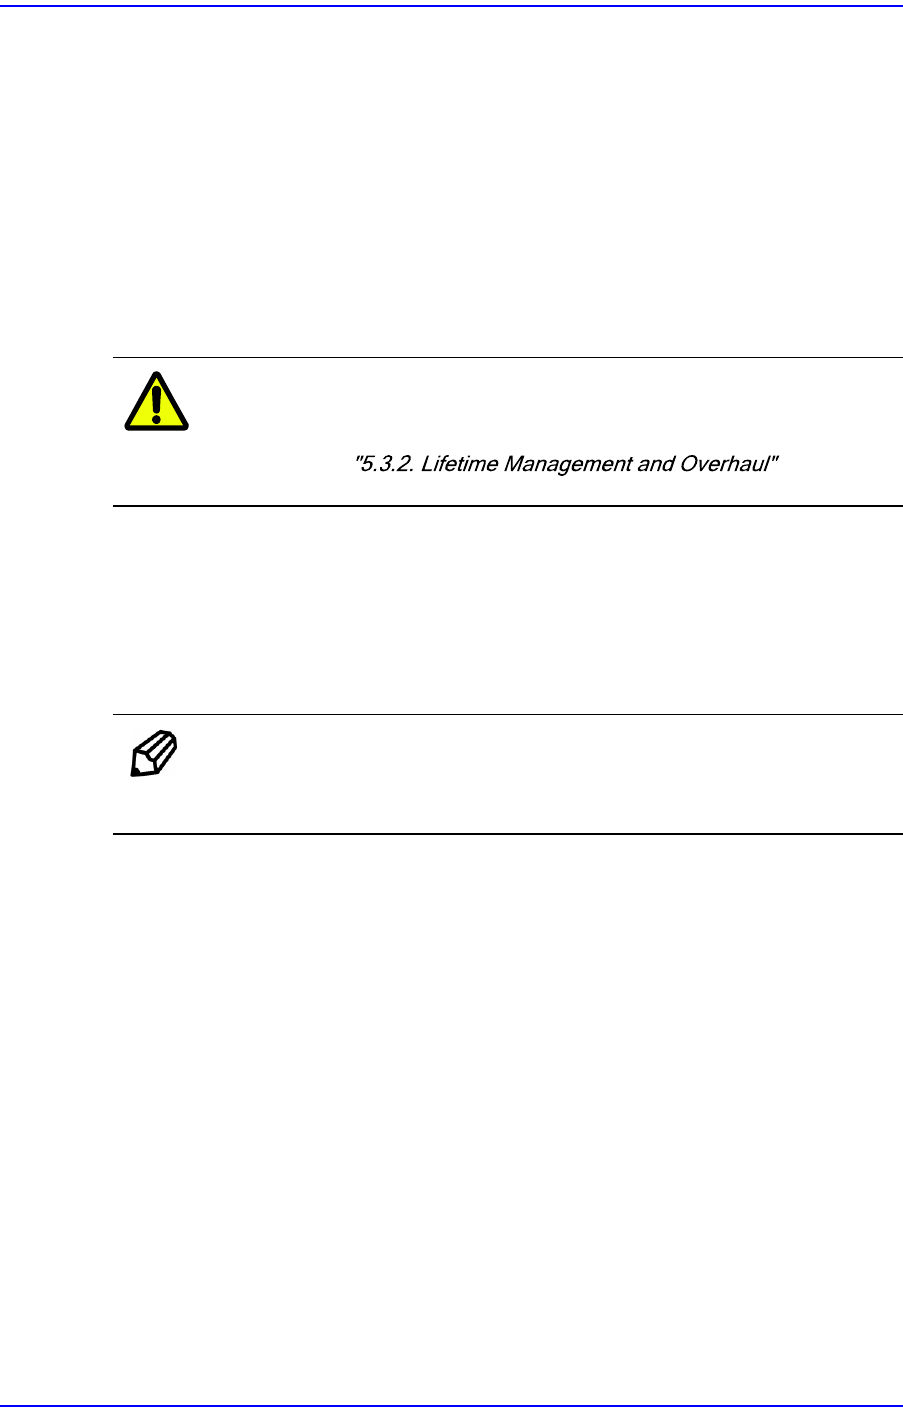
1. Insert the master tape into the feeder while lifting up the tape guide of the feeder and
have the sprocket engaged in the transfer hole of the master tape.
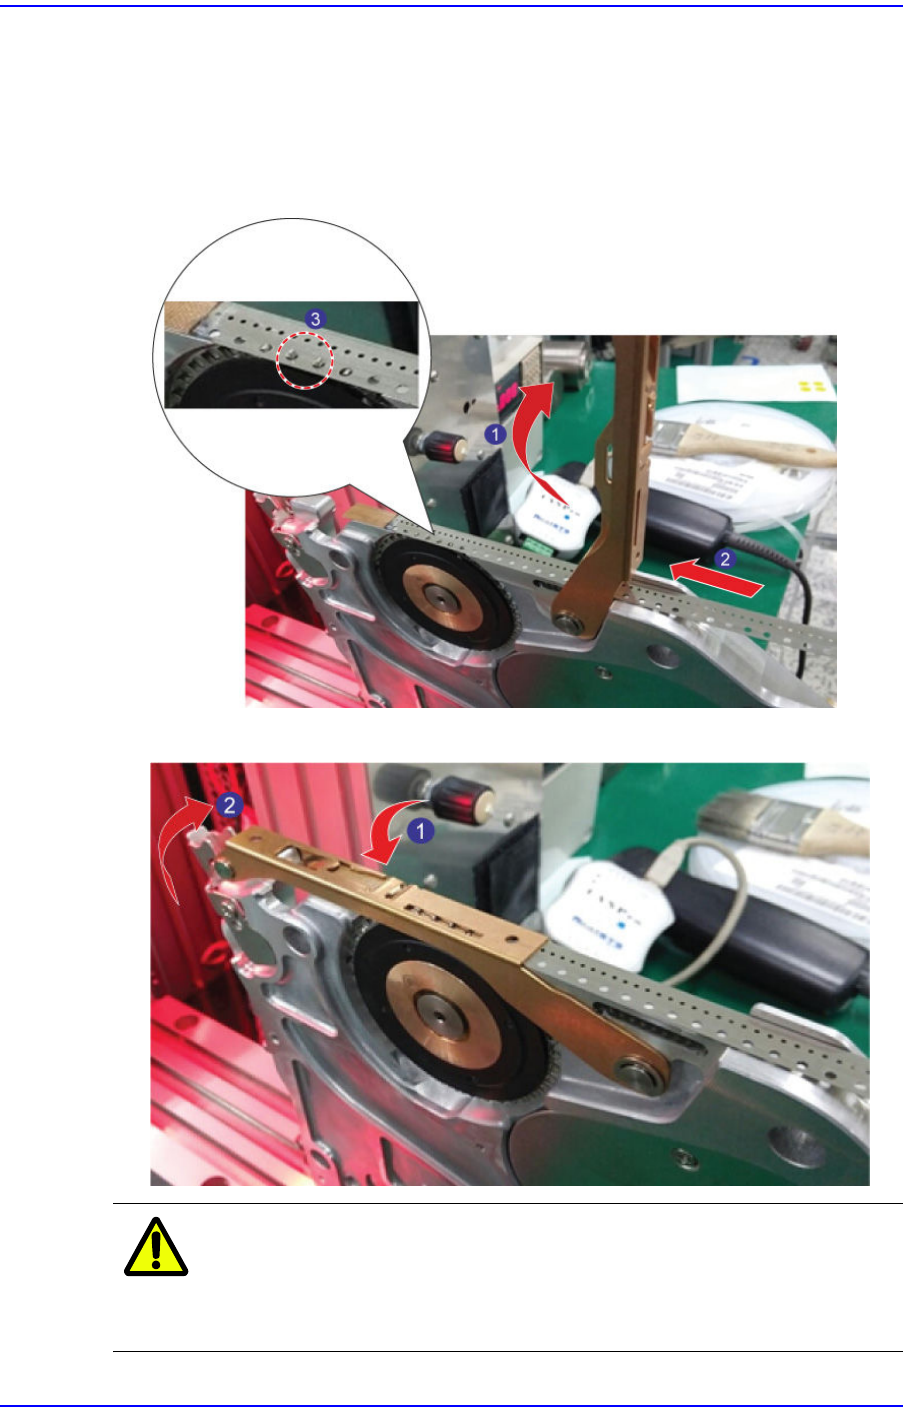
2. Move the tape guide down and secure the locker.
Caution
When moving down the tape guide, exercise care not to
have the transfer hole of the master tape dislocated from, or
stabbed by, the sprocket.
3-13
Tape Feeder Calibration
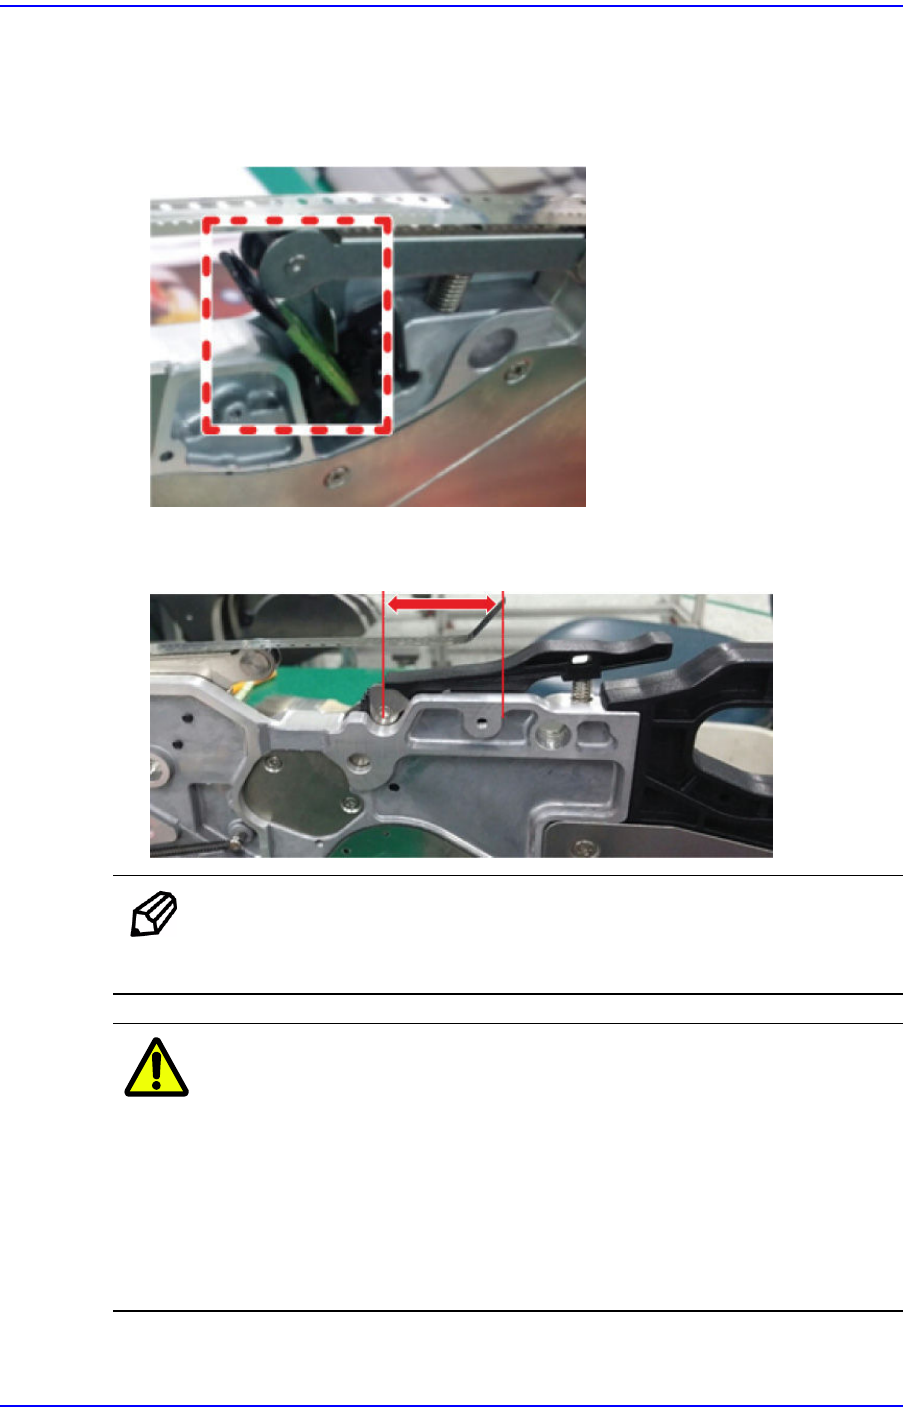
3. In order to check the part supply accuracy of the feeder, the origin of the feeder must
be found first. Since the master tape has no vinyl cover, insert the empty carrier tape
with no parts into the drain gear section of the feeder and have the empty carrier tape
detected by the vinyl detection sensor.
4. Feed the master tape so that the bent section at the end of the master tape will be
placed on the drain gear.
Memo
When performing a mapping inspection, set the master tape position
in the same manner.
Caution
We are not responsible for defective mapping and part
supply accuracy defects of the feeder due to overuse
(exceeding 150 times of use) of the master tape.
After using the master tape more than 150 times, replace it
without fail.
If the master tape is damaged or deformed, dispose of it
immediately.