SME_Jig_User_Guide(Eng_Ver1).pdf - 第70页
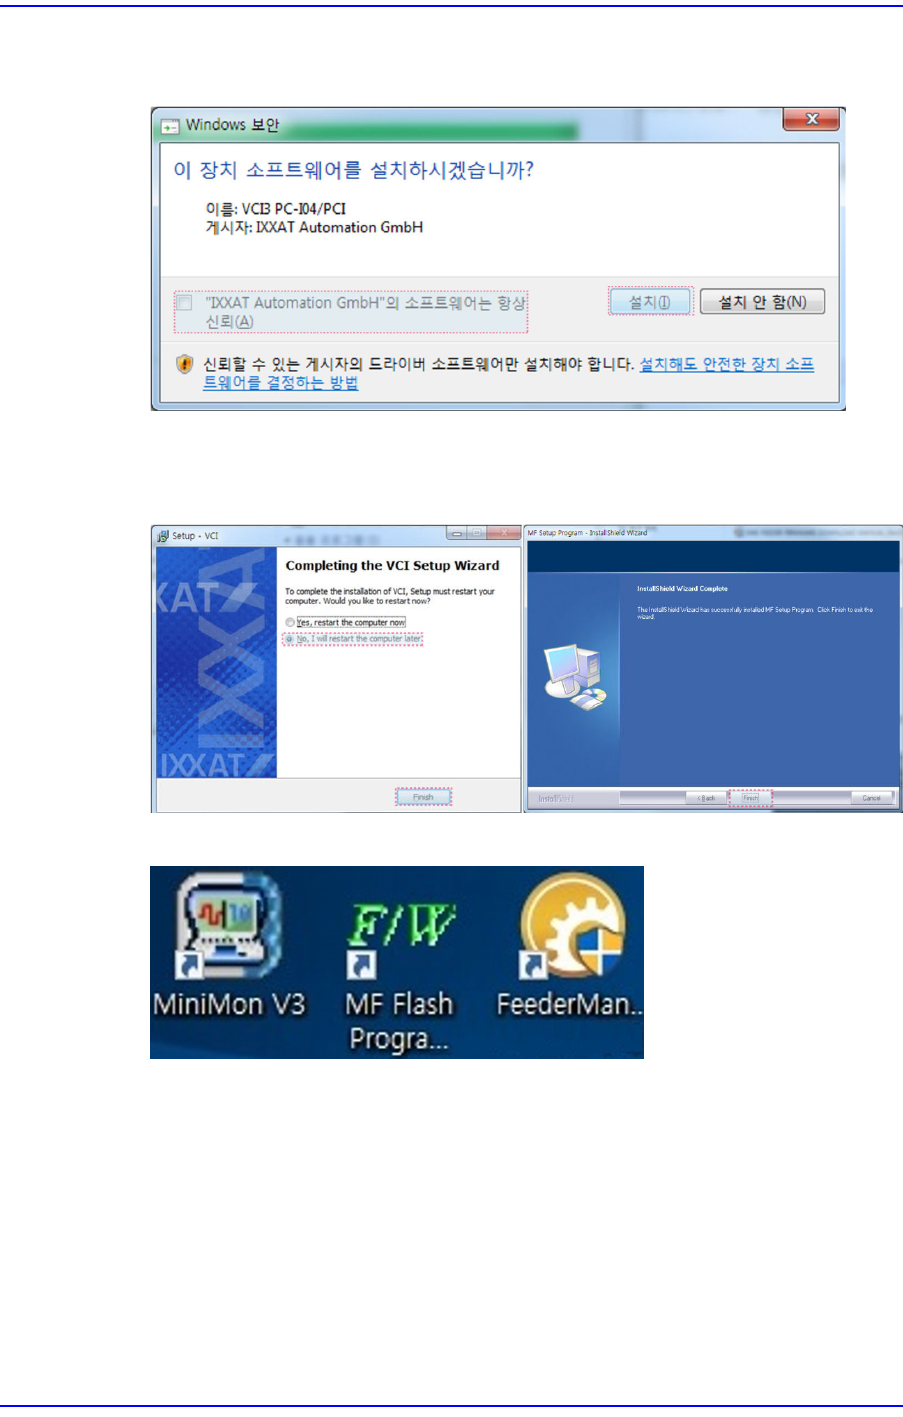
4-12 User's Guide For Tape Fe eder Calibration Jig 24. Select the <"IXXA T Automation GmbH" software is always credib ility (A)> check box and click the <Install> button. 25. Click the <Fini…
4-11
Program Installation
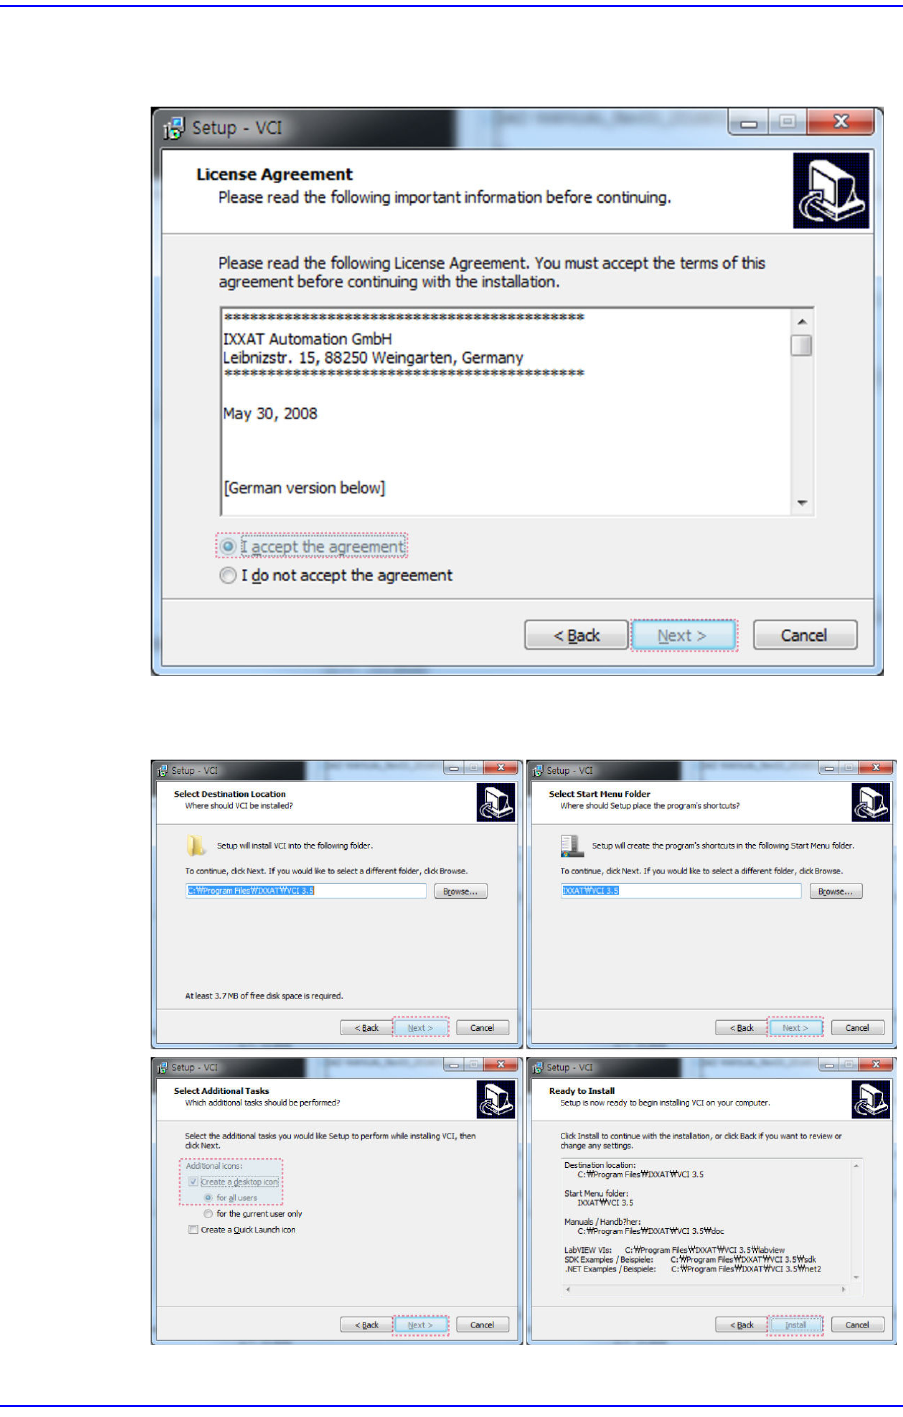
22. Select the <I accept the agreement> option button in the ’VCI License Agreement’
dialog box and click the <Next> button.
23. Click the <Next> button or <Install> button until the ’Windows Security’ dialog box
appears.
4-12
User's Guide For Tape Feeder Calibration Jig
24. Select the <"IXXAT Automation GmbH" software is always credibility (A)> check
box and click the <Install> button.
25. Click the <Finish> button after selecting the <No, I will restart the computer later>
option button, and click the <Finish> button once again to finish the driver
installation.
26. Once the driver is installed in the PC, three icons are created in the desktop.
w MiniMon V3
Unnecessary icon. Delete it from the desktop.
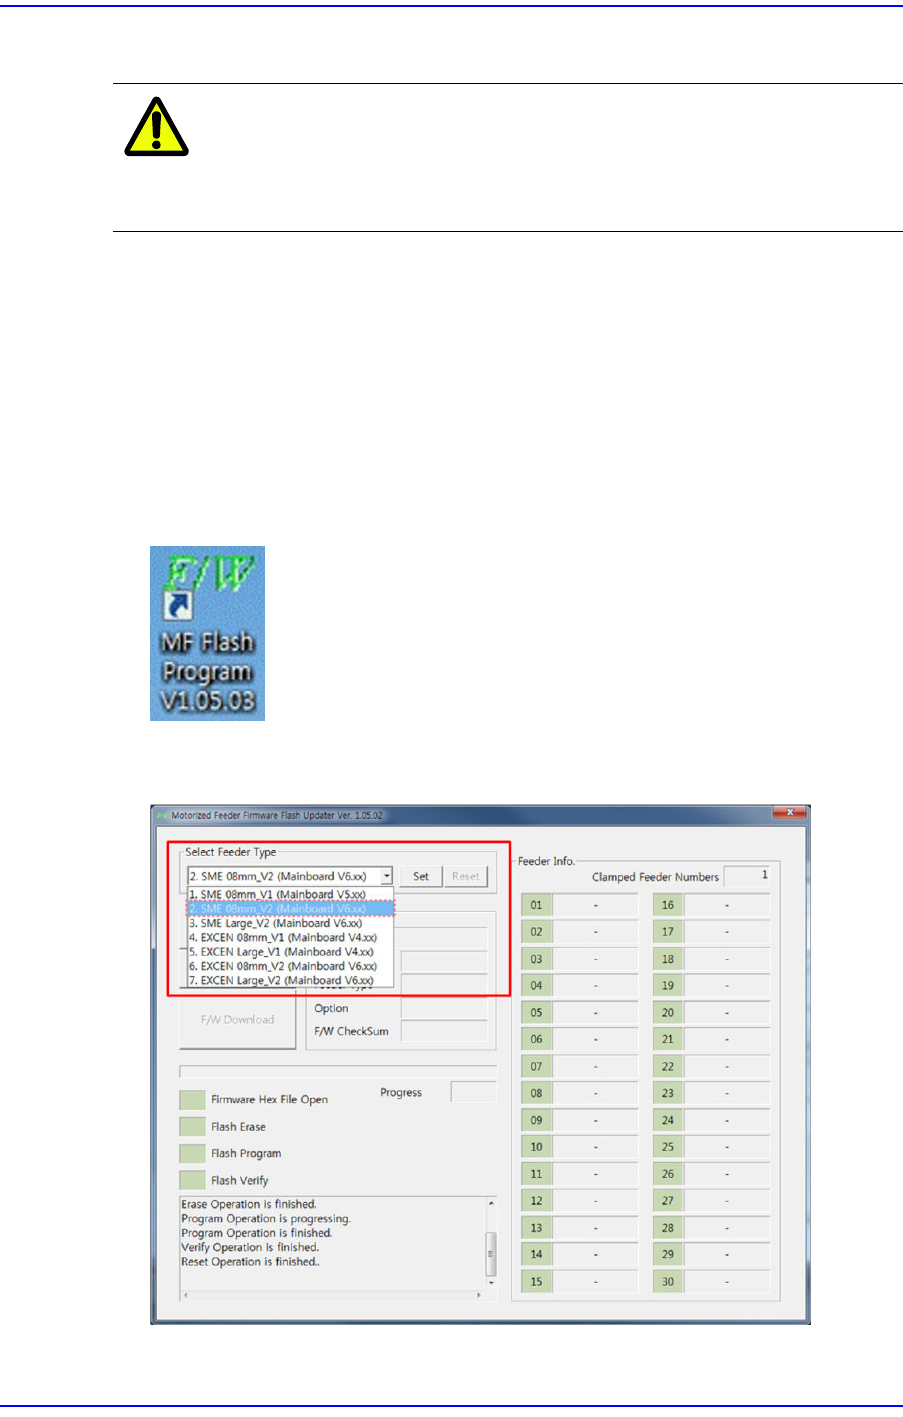
w MF Flash Program
Refers to the icon to execute the tape feeder firmware upgrade program.
w Feeder Management Program
Refers to the icon to execute the calibration jig program.
4-13
Program Installation
4.2. Tape Feeder Firmware Upgrade
Caution
The calibration jig program must be installed in the PC first.
Install the jig program in the PC first referring to "4.1.
Installation of Calibration Jig Program".
In order to use the feeder calibration jig, the tape feeder main board firmware version must
be the latest version provided by us. The versions that can be supported by the firmware
are as follows:
w Tape feeder using an old main board: Firmware Version 1.26 or above
w Tape feeder using a new main board: Firmware Version 2.10 or above
If the version is not the latest, upgrade the feeder main board firmware in the following
order:
1. Execute the ’MF Flash Program V1.05.03.exe’.
2. Select the tape feeder for which the firmware is to be upgraded from the combo box in
the <Select Feeder Type> area.