SME_Jig_User_Guide(Eng_Ver1).pdf - 第55页
3-23 Tape Feeder Calibration Memo If the vision s ystem fails to recognize the master tape hole, set the threshold referring to Step 5 in "3.3.3. Inspecti on of Part Supply Accuracy of Feede r" . Caution We are…

3-22
User's Guide For Tape Feeder Calibration Jig
3.4.3. Mapping Inspection (Mapping)
If the part supply accuracy of the feeder is not good or the feeder sensor is initialized,
perform mapping inspection as follows:
1. Insert the master tape into the tape feeder referring to Steps 1~4 in "3.3.3. Inspection
of Part Supply Accuracy of Feeder".
2. Insert the master tape into the feeder and set the Home Offset and then move the
transfer hole of the master tape inside the vision recognition area.
w <Home Offset> Edit Box
Set the Y offset so that the transfer hole of the master tape will be inside the vision
recognition area.
Increasing the Home Offset value will move up the master tape transfer hole in the
vision window and reducing the Home Offset value will move down the master
tape transfer hole.
Memo
When changing the Home Offset value, it is recommended that the
changed Home Offset value will not exceed 50 compared to the
existing Home Offset value.
w <Apply> Button
In order to apply the set offset in the <Home Offset> edit box, click this button.
3-23
Tape Feeder Calibration
Memo
If the vision system fails to recognize the master tape hole, set the
threshold referring to Step 5 in "3.3.3. Inspection of Part Supply
Accuracy of Feeder".
Caution
We are not responsible for defective mapping and part
supply accuracy defects of the feeder due to overuse
(exceeding 150 times of use) of the master tape.
After using the master tape more than 150 times, replace it
without fail.
If the master tape is damaged or deformed, dispose of it
immediately.
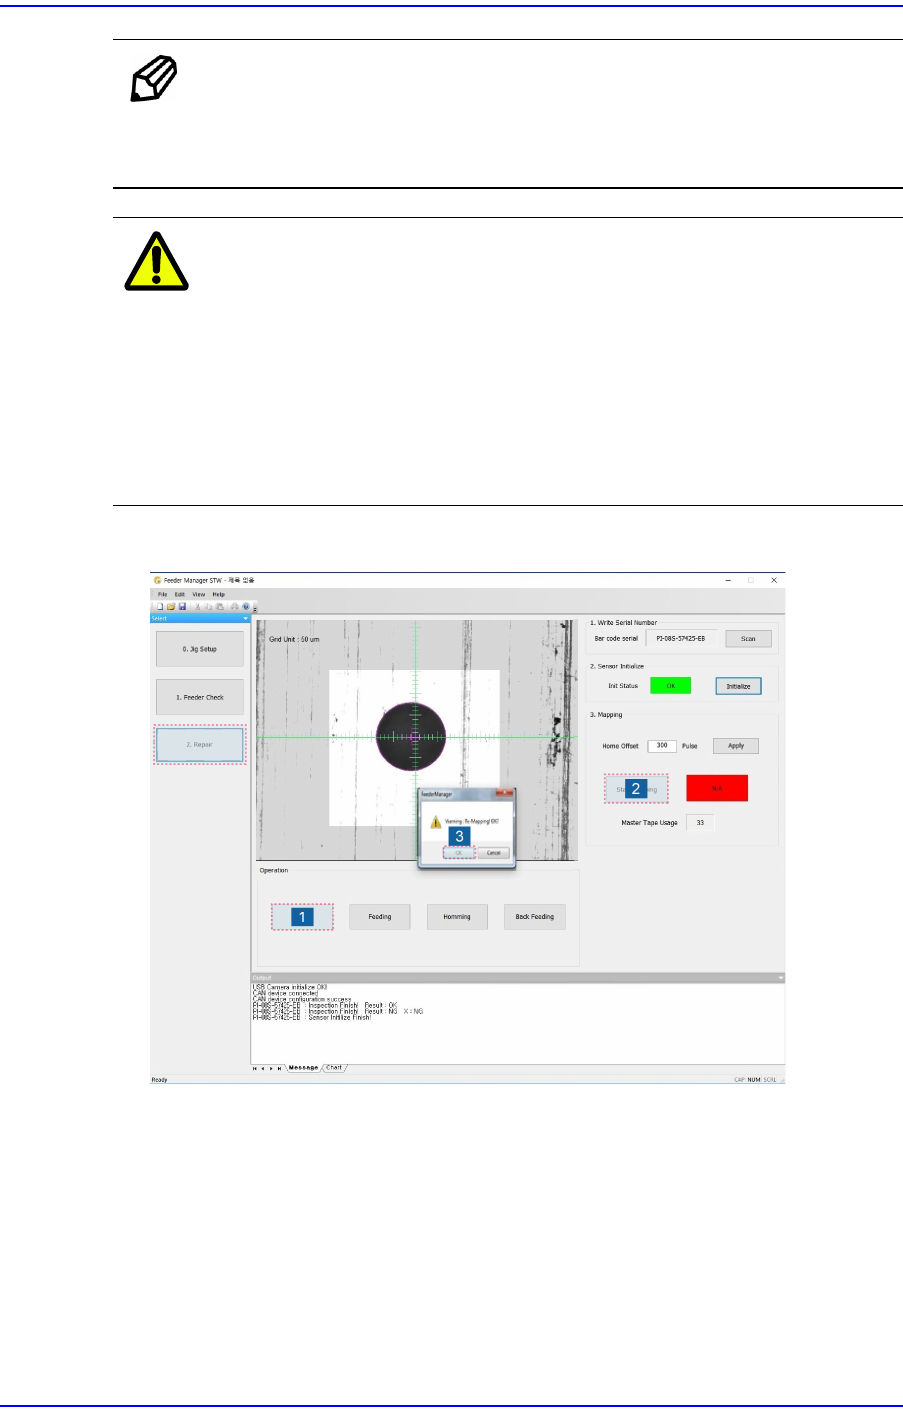
3. Perform mapping inspection in the following order:
1) Check whether the hole position is correctly recognized repeatedly by clicking the
<Grab> button 3~5 times. When the origin of the master feeder hole changes in
the vision window, adjust the threshold of the master tape again.
2) Press the <Start Mapping> button to start mapping inspection.
3) When there is existing mapping data, a message confirming whether to perform
mapping inspection appears again. Clicking the <OK> button will delete the
existing mapping data.
3-24
User's Guide For Tape Feeder Calibration Jig
Caution
If the feeder hole position recognized by the vision system
is found to be incorrect by clicking the <Grab> button, a
serious problem may occur. Set the origin of the tape feeder
referring to .
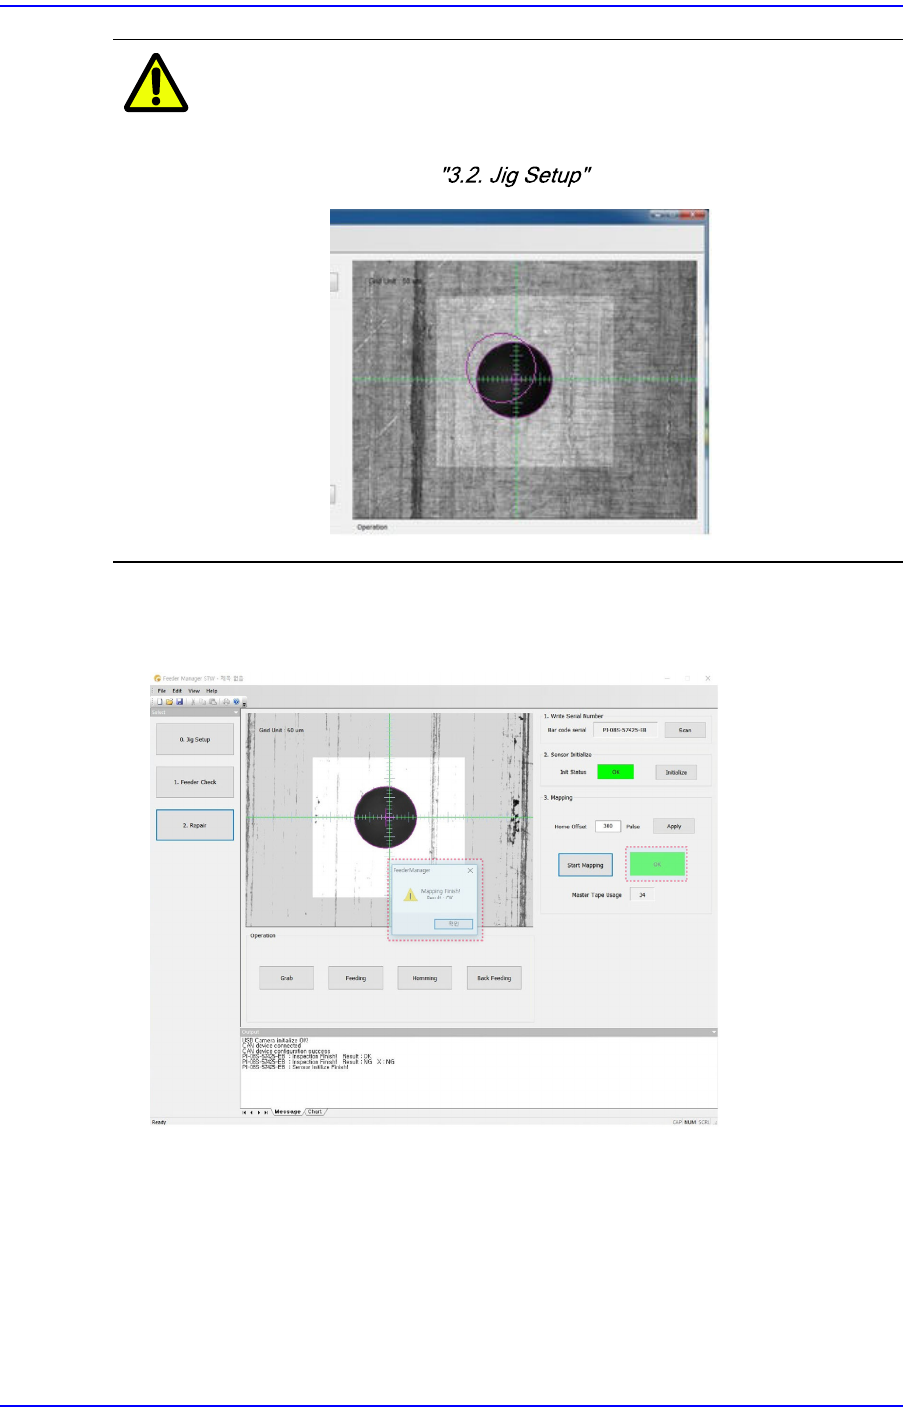
4. Once the inspection is completed, the mapping inspection result is displayed.
Figure3.3 When Inspection Result is Good