SME_Jig_User_Guide(Eng_Ver1).pdf - 第73页
4-15 Program Installation 4. Click the <F/ W File Open> button. 5. Select the fi rmware Hex file. Memo The "V0210" section in the Hex fil e name in the No. 5 step means that the firmware version is "…
4-14
User's Guide For Tape Feeder Calibration Jig
Caution
When upgrading the tape feeder main board firmware,
performing upgrade after selecting an incorrect feeder type
may cause a malfunction of the feeder. Set the feeder type
referring to the following:
w SME 8mm_V1(Mainboard V5.xx): Firmware version 1.xx (SME
8mm old main board)
w SME 8mm_V2(Mainboard V6.xx): Firmware version 2.xx (SME
8mm new main board)
w SME Large_V2(Mainboard V6.xx): Firmware version 2.xx (SME
new, large main board)
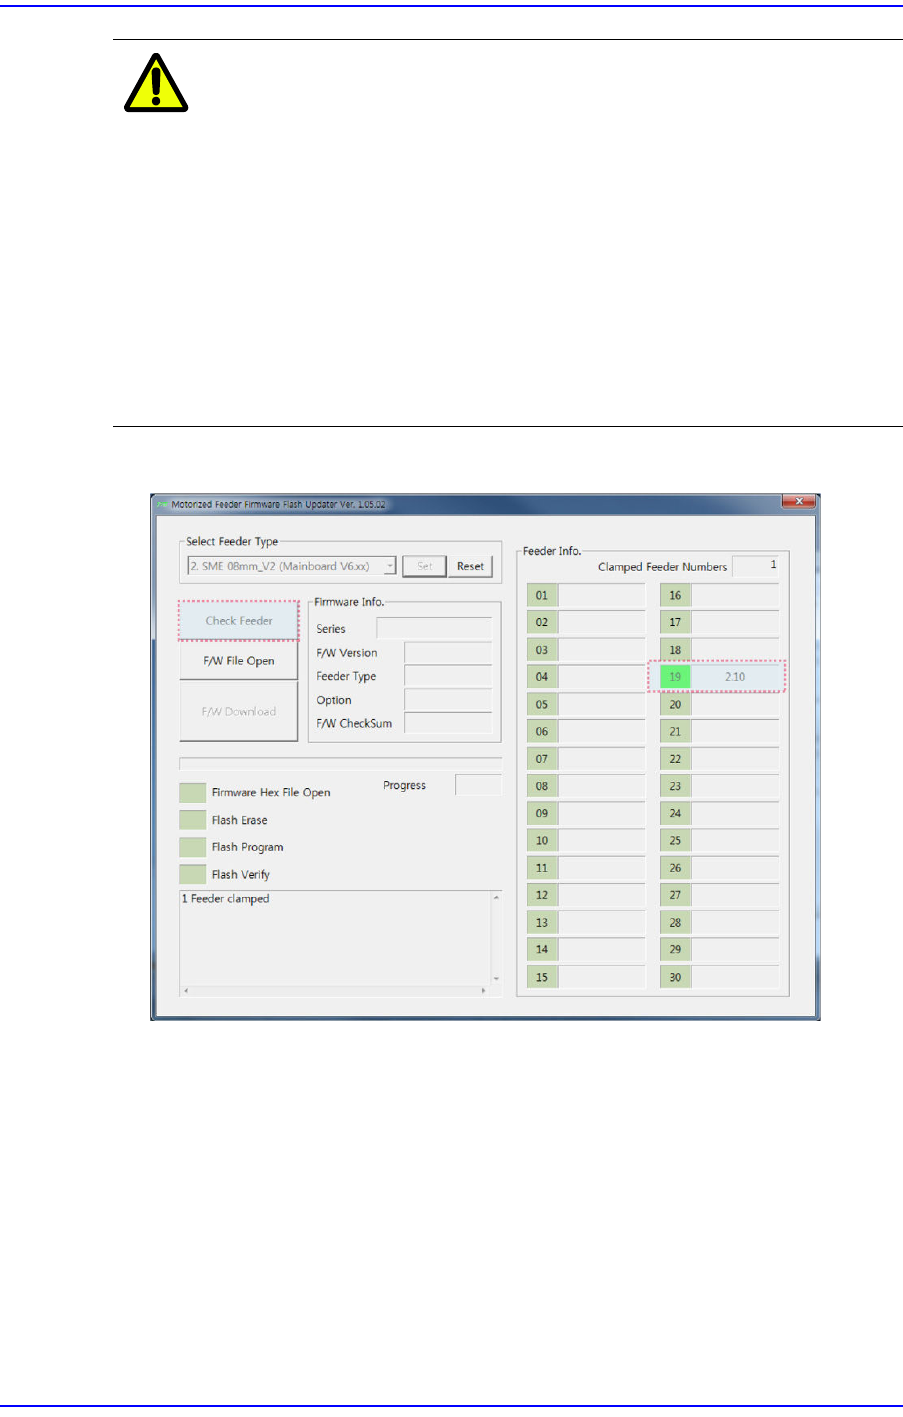
3. Click the <Check Feeder> button to check the firmware version of the installed feeder.
4-15
Program Installation
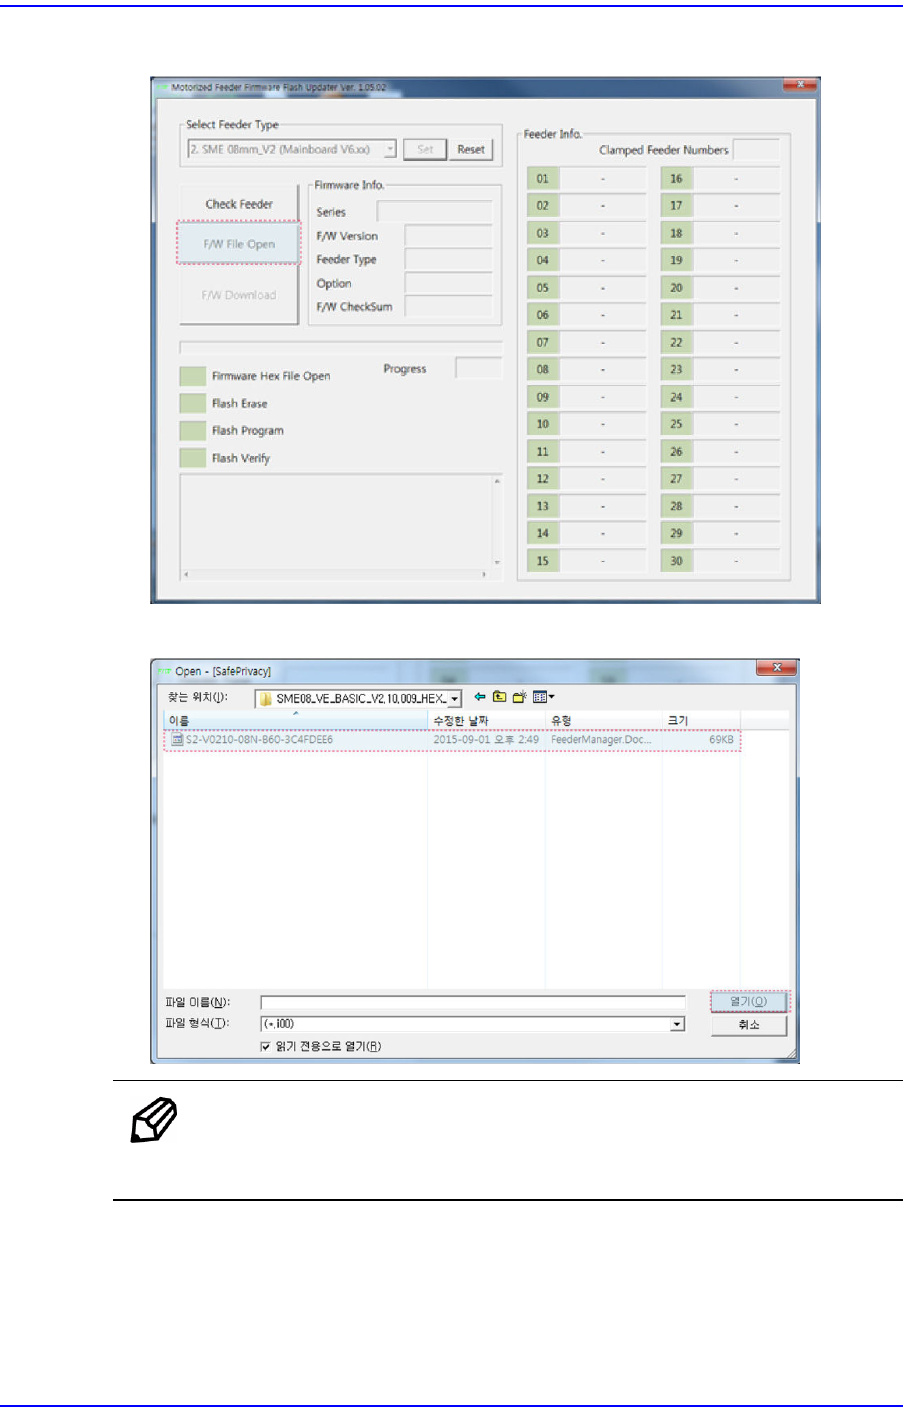
4. Click the <F/W File Open> button.
5. Select the firmware Hex file.
Memo
The "V0210" section in the Hex file name in the No. 5 step means
that the firmware version is "2.10".
4-16
User's Guide For Tape Feeder Calibration Jig
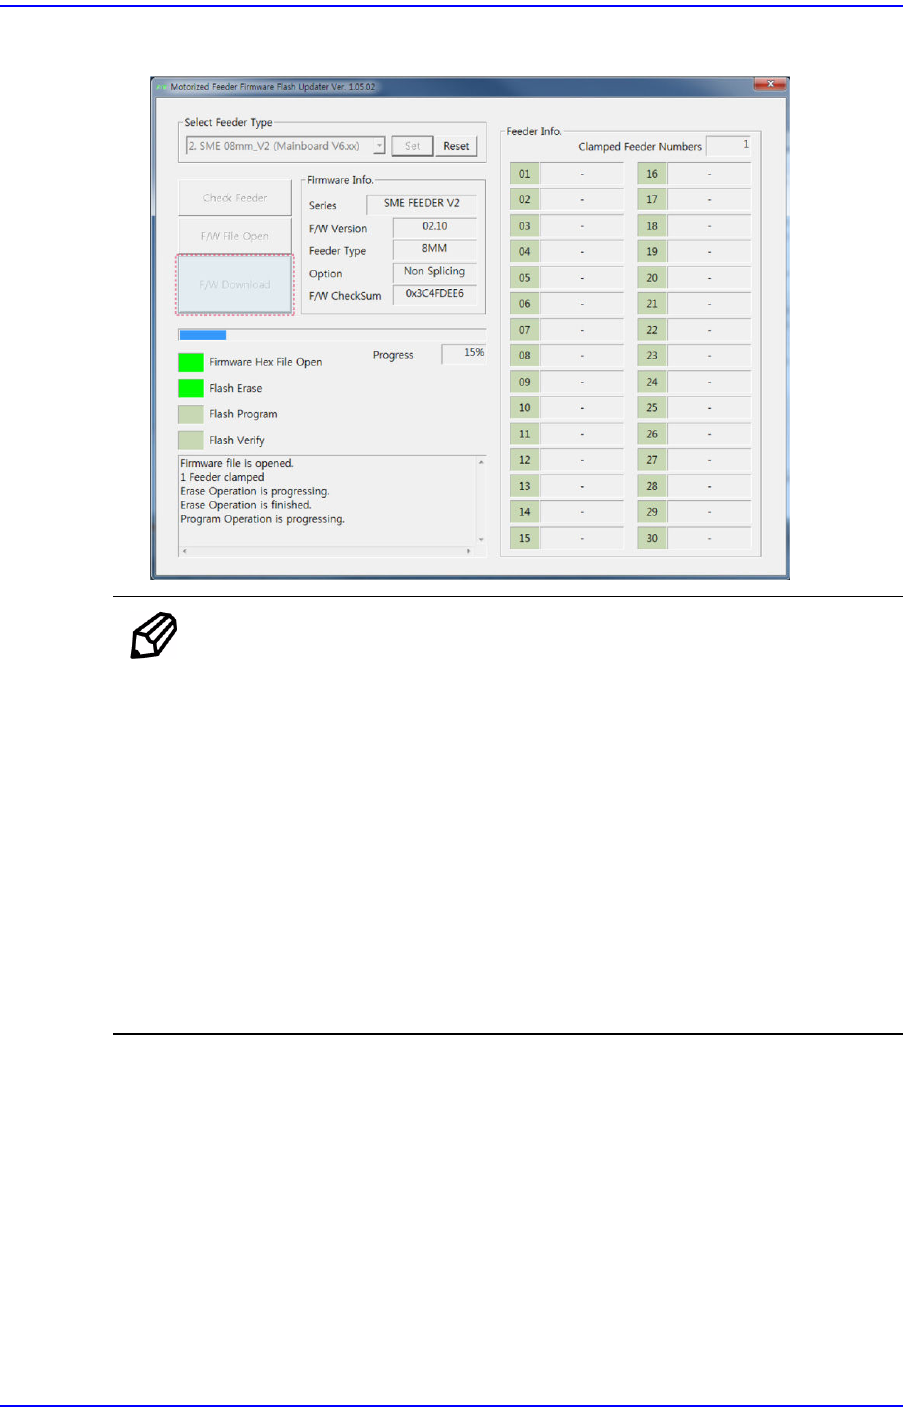
6. Click the <F/W Download> button to upgrade the firmware.
Memo
According to the firmware upgrade progress, the status of the tape
feeder is displayed as follows:
w When the firmware version of the tape feeder is 2.xx
Flash Erase: The tape feeder status LED is displayed in white.
Flash Program: The tape feeder status LED blinks in white.
Flash Verify: The tape feeder status LED is displayed in white.
w When the firmware version of the tape feeder is 1.xx
Flash Erase: The tape feeder status LED is displayed in blue.
Flash Program: The tape feeder status LED blinks in blue.
Flash Verify: The tape feeder status LED is displayed in blue.
7. Finish tape feeder firmware upgrade. Then after checking whether the entire program
status display area has turned green, remove the tape feeder from the feeder base.