SME_Jig_User_Guide(Eng_Ver1).pdf - 第86页
5-10 User's Guide For Tape Fe eder Calibration Jig Figure5.5 Usage Count of Master Ta pe in the <J ig Setup> Tab w <Master T a pe Usage> Area When performing mapping inspection or par t supply accuracy i…
5-9
Maintenance
5.5. Master Tape Usage Management
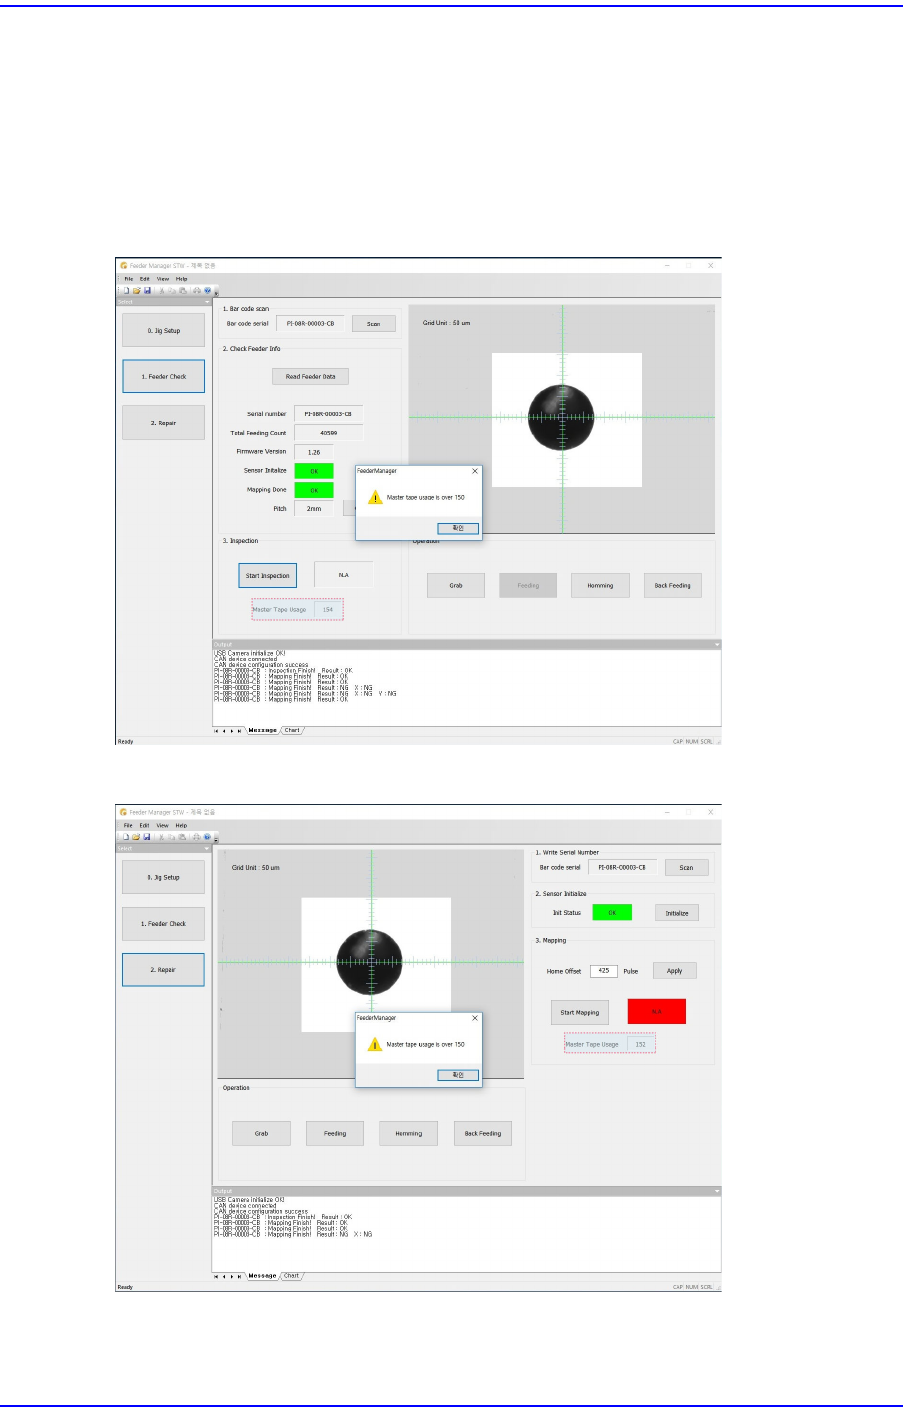
If the usage count of the master tape exceeds 150 times, an alarm occurs automatically in
the calibration jig program.
It is possible to check the usage count of the master tape in the calibration jig program.
Figure5.3 The usage count of the master tape exceeds the set usage count when inspecting the
supply accuracy
Figure5.4 Usage Count of Master Tape Exceeds the Set Count When Mapping

5-10
User's Guide For Tape Feeder Calibration Jig
Figure5.5 Usage Count of Master Tape in the <Jig Setup> Tab
w <Master Tape Usage> Area
When performing mapping inspection or part supply accuracy inspection using the
master tape, the usage count in the <Master Tape Usage> area increases.
w <Reset> Button
It is possible to reset the usage count of the master tape. If the usage count of the
master tape exceeds 150 times, replace the master tape with a new one, and click the
<Reset> button to reset the usage count to 0.
Caution
Our company is not responsible for mapping defects and
supply accuracy defects that occur due to usage count of
the master tape exceeding 150 times. The master tape
must be replaced after using it more than 150 times.
If the master tape is damaged or deformed, dispose it
immediately.
5-11
Maintenance
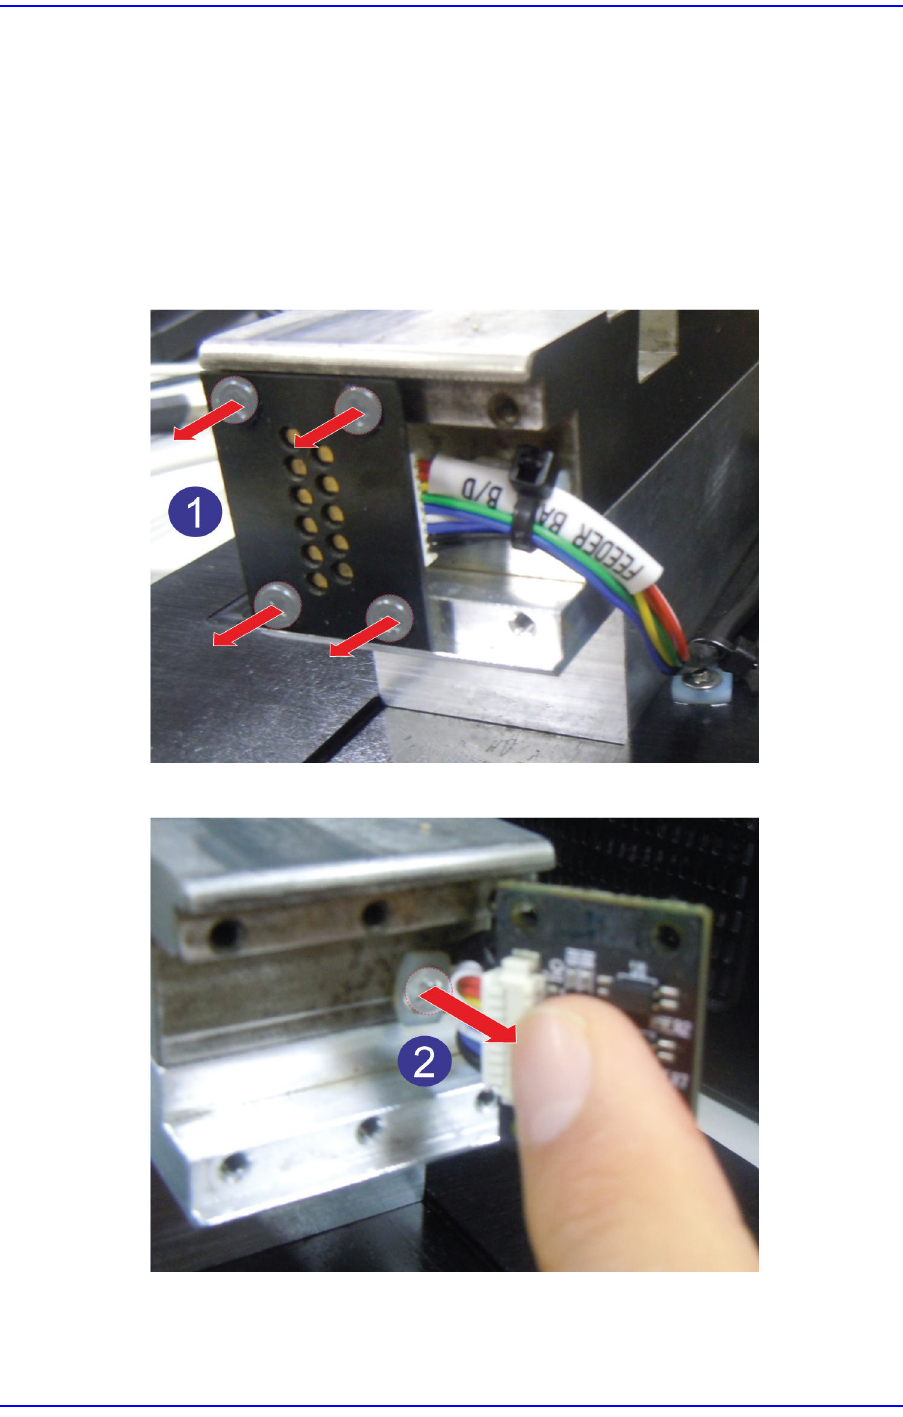
5.6. Feeder Base Board Replacement
It is recommended to replace the feeder base board after installing and removing the feeder
on/from the feeder base slot 10,000 times. When the feeder installation/removal count
exceeds 10,000, problems with feeder communication and the power supply may occur
depending on the customers' operation environment. Replace the feeder base board
referring to the following figure:
1. Remove 4 sets of bolts fixing the feeder base board using a crosshead (Phillips)
screwdriver.
2. Remove one bolt fixing the tie mount using a crosshead (Phillips) screwdriver.