1OPERATION_.pdf - 第98页
2.3 Power Supply 2.3 Power Supply 2.3 . 1 Confirmation of Correct Power Supply and Air Pressure Confirm that the power supply and the air pressure are set as follows . • Power Source : 200 V AC , 3 - Phase # Air Pressure…
2.2
Notes
on
Handling
Touch
Screen
(
4
)
Precautionary
Item
at
Power
-
Up
Do
not
turn
on
the
power
switch
of
the
touch
screen
while
touching
any
part
of
the
screen
.
Otherwise
,
normal
navigation
on
the
touch
screen
cannot
be
expected
.
A
CAUTION
•
With
the
operation
power
ON
,
clean
the
touch
screen
by
pressing
the
[
PNL
CHANGE
]
button
on
the
other
operation
panel
first
.
0003
-
003
ACP
01
EOP
2
-
7
2.3
Power
Supply
2.3
Power
Supply
2.3
.
1
Confirmation
of
Correct
Power
Supply
and
Air
Pressure
Confirm
that
the
power
supply
and
the
air
pressure
are
set
as
follows
.
•
Power
Source
:
200
V
AC
,
3
-
Phase
#
Air
Pressure
:
0.39
MPa
(
4
kgf
/
cm
2
)
as
Main
Pressure
0.29
MPa
(
3
kgf
/
cm
2
)
as
Subordinate
Pressure
0.05
-
0.08
MPa
(
0.5
-
0.8
kgf
/
cm
2
)
as
Air
Blow
Pressure
•
Use
of
Dry
and
Clean
Air
If
water
,
oil
,
cylinder
,
etc
.
)
of
the
component
placement
machine
,
it
may
result
in
a
breakdown
of
the
machine
.
Water
,
oil
,
or
dust
entrained
in
the
vacuum
route
will
also
cause
an
error
such
placement
.
Dry
and
Clean
Air
Water
:
Dew
Point
一
17
°
C
or
lower
(
Atmospheric
Pressure
)
:
0.1
mg
/
m
3
or
less
(
ANR
)
Dust
:
Solid
Material
0.01
^
m
or
less
dust
enters
the
pneumatic
equipment
(
an
air
or
deviation
in
component
component
mischuck
or
as
Oil
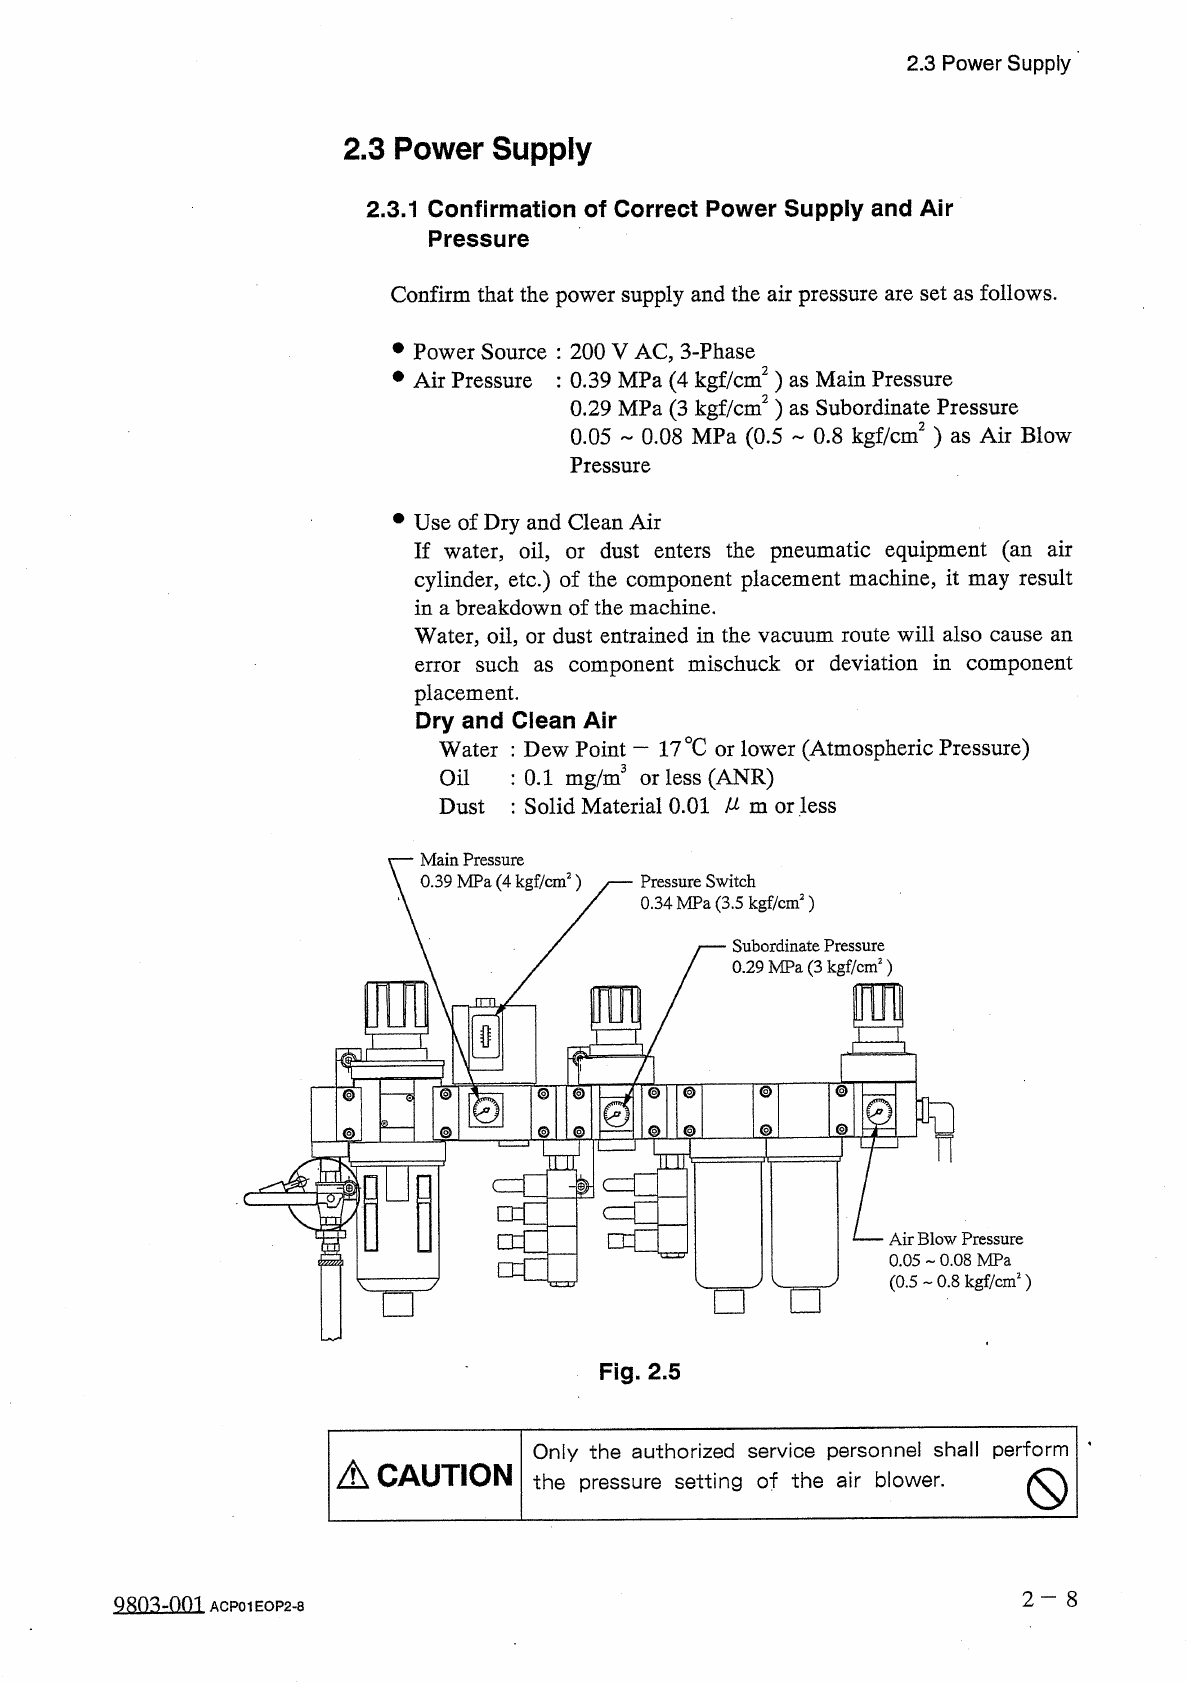
Main
Pressure
0.39
MPa
(
4
kgf
/
cm
2
)
Pressure
Switch
0.34
MPa
(
3.5
kgf
/
cm
2
)
Subordinate
Pressure
0.29
MPa
(
3
kgf
/
cm
2
)
_
_
rm
§
I
1
@
@
©
■
O
©
©
o
a
©
0
©
@
©
J
cm
Sons
c
=
r
□
d
Air
Blow
Pressure
0.05
-
0.08
MPa
(
0.5
-
0.8
kgf
/
cm
2
)
□
□
O
Fig
.
2.5
Only
the
authorized
service
personnel
shall
perform
the
pressure
setting
of
the
air
blower
.
A
CAUTION
Q
2
-
8
QRO
^
-
nm
ACP
01
EOP
2
-
8
2.3
Power
Supply
2.3
.
2
Power
Up
the
Machine
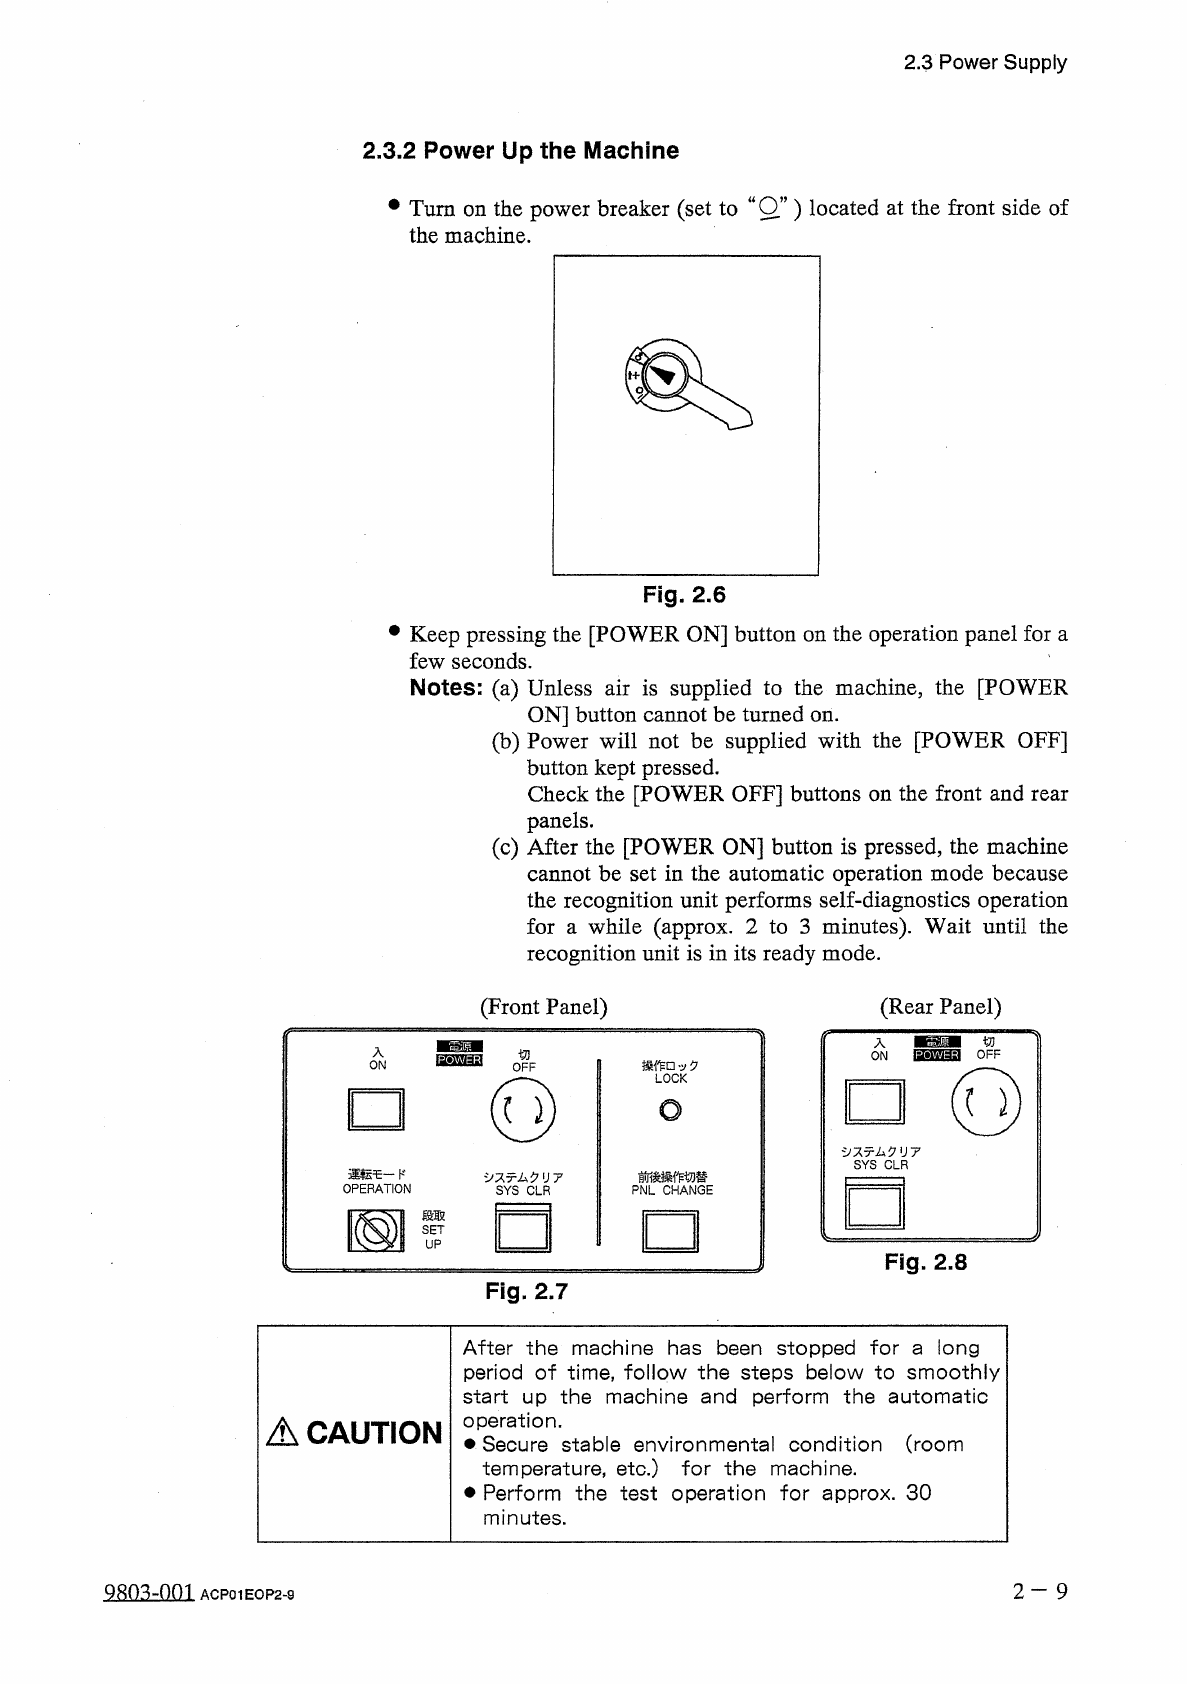
•
Turn
on
the
power
breaker
(
set
to
wOw
)
located
at
the
front
side
of
the
machine
.
Fig
.
2.6
•
Keep
pressing
the
[
POWER
ON
]
button
on
the
operation
panel
for
a
few
seconds
.
Notes
:
(
a
)
Unless
air
is
supplied
to
the
machine
,
the
[
POWER
ON
]
button
cannot
be
turned
on
.
(
b
)
Power
will
not
be
supplied
with
the
[
POWER
OFF
]
button
kept
pressed
.
Check
the
[
POWER
OFF
]
buttons
on
the
front
and
rear
panels
.
(
c
)
After
the
[
POWER
ON
]
button
is
pressed
,
the
machine
cannot
be
set
in
the
automatic
operation
mode
because
the
recognition
unit
performs
self
-
diagnostics
operation
for
a
while
(
approx
.
2
to
3
minutes
)
.
Wait
until
the
recognition
unit
is
in
its
ready
mode
.
(
Front
Panel
)
(
Rear
Panel
)
/
f
-
ON
切
OFF
'
v
0
LOCK
(
Q
)
O
夕又
x
厶夕
1
J
7
SYS
CLR
運転乇一卜
'
OPERATION
前後操作切替
PNL
CHANGE
夕又亍厶夕
II
7
SYS
CLR
段取
國
SET
UP
Fig
.
2.8
Fig
.
2.7
After
the
machine
has
been
stopped
for
a
long
period
of
time
,
follow
the
steps
below
to
smoothly
start
up
the
machine
and
perform
the
automatic
operation
.
•
Secure
stable
environmental
condition
(
room
temperature
,
etc
.
)
for
the
machine
.
Perform
the
test
operation
for
approx
.
30
minutes
.
A
CAUTION
2
—
9
ACP
01
EOP
2
-
9