3_AVS-V2_MCT-UM-internal_EN_07-2019.pdf - 第149页
ASM AVS - U SER M ANUAL P AGE 149 OF 182 5.3.5.3.9 Assign g roup colo rs • C hoose f unct ion » G roups « . • Y ou c an assig n an y co lor you like to eac h gro up, by using t he fo llow ing d ialo g. Bas ical ly a ll 2…
ASM AVS - USER MANUAL
PAGE 148 OF 182
5.3.5.3.7 »From Stage Pos«
With the function »From Stage Pos«, you are able to place components at the location of the
camera.
• Move the camera with the function »Move Stage« to a position on your glass board.
• After the camera has reached the position, you can push the button »From Stage Pos«.
• Now you get a new component in the center of the closest 4 dots group.
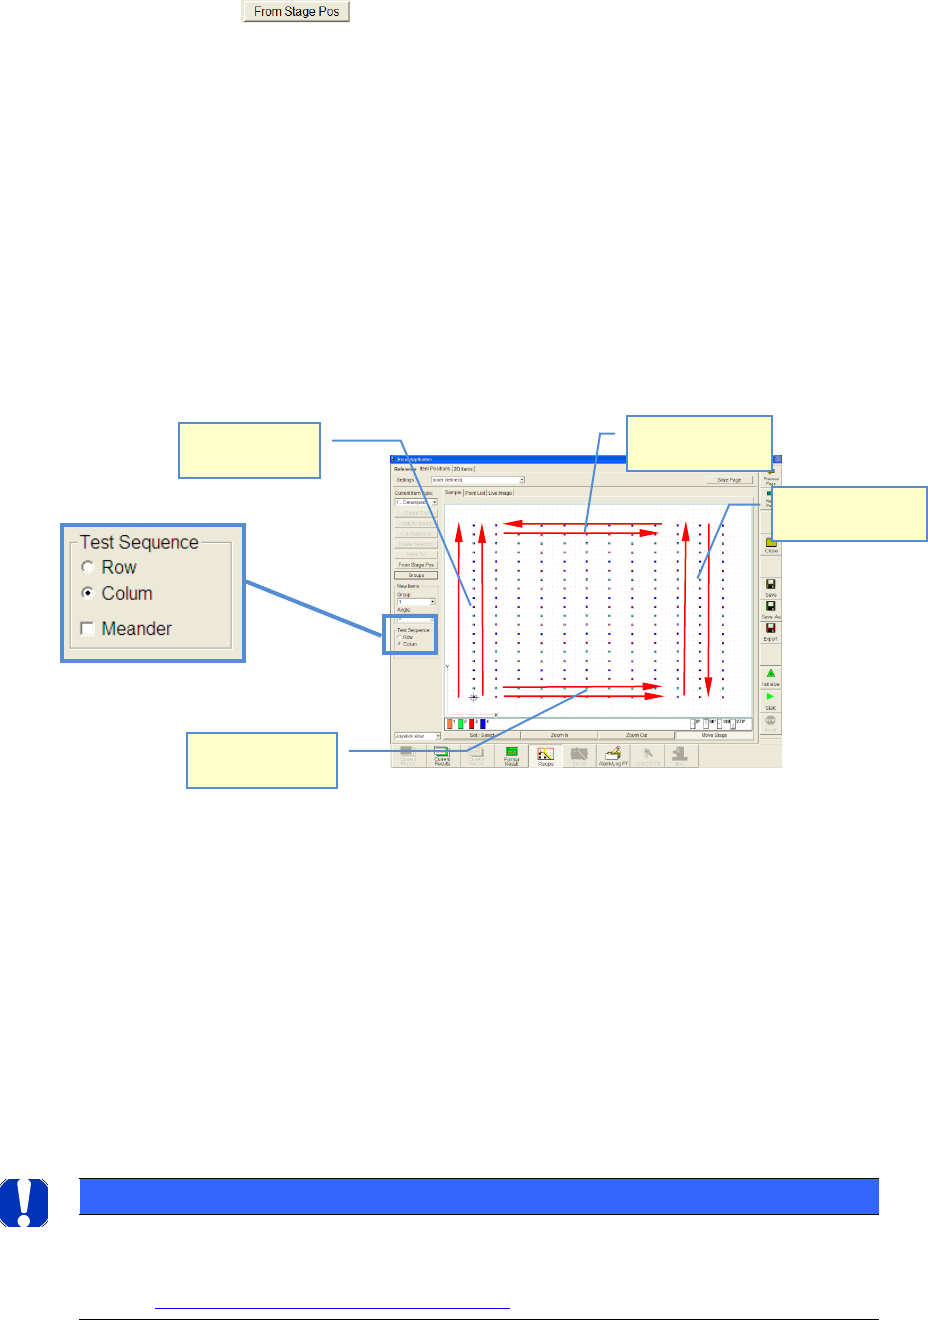
5.3.5.3.8 Adjustment of measurement sequence
• You have created a recipe (measuring plan).
• Now, you can adjust the measurement sequence.
• »Row« means: Measurement starts from the lower left side (component nr. 1). The cam-
era will be moved row by row and starts always to measure from the left side
• »Column« means: Measurement starts from the lower left side (component nr. 1). The
camera will be moved Colum by Colum and starts always to measure from the lower side
• The camera returns to the next component again, seen in a horizontal direction and moves
along the column in the same direction again
• »Meander« means: If a row or a column was measured, the camera does not return to the
next component again next to the 1st component but it moves along the next row or col-
umn in an opposite direction
NOTICE
The order of the measuring is mirrored again to 100% in the graphic "single value diagram". Therefore pay
attention at the interpretation of the graphic to the measuring order!
See also 6.4.2 Notes on evaluating the Single Value chart:
Test Sequence:
Row+Meander
Test Sequence:
Colum+Meander
Test Sequence:
Colum
Test Sequence:
Row
ASM AVS - USER MANUAL
PAGE 149 OF 182
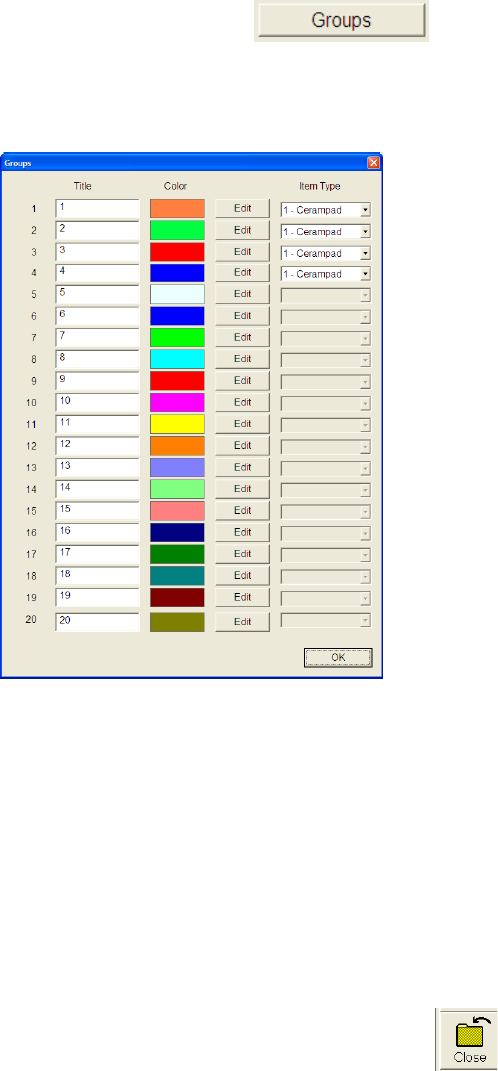
5.3.5.3.9 Assign group colors
• Choose function »Groups«.
• You can assign any color you like to each group, by using the following dialog.
Basically all 20 groups are visible in the dialog window but only the used groups have as-
signed a component.
5.3.5.4 Storage of a Recipe (measuring plan)
Once you have created or changed a recipe, you can save the recipe.
Save all the recipes into the folder: »C:\ ASM AVS Data\Recipe«.
In this folder you have to create a sub folder with the desired name of your recipe.
To find the recipes again, it is helpful to use names that are showing information about the
content of the recipe, like »20x12_Cerampads_4 Groups_0-270degr«.
Use the same name for the new sub folder as well as for the file name.
Exit the Siscan Application with the button »Close«!
You come back to the » ASM AVS Software«, automatically.
There you have to edit some parameters to add the recipe into the Database.
ASM AVS - USER MANUAL
PAGE 150 OF 182
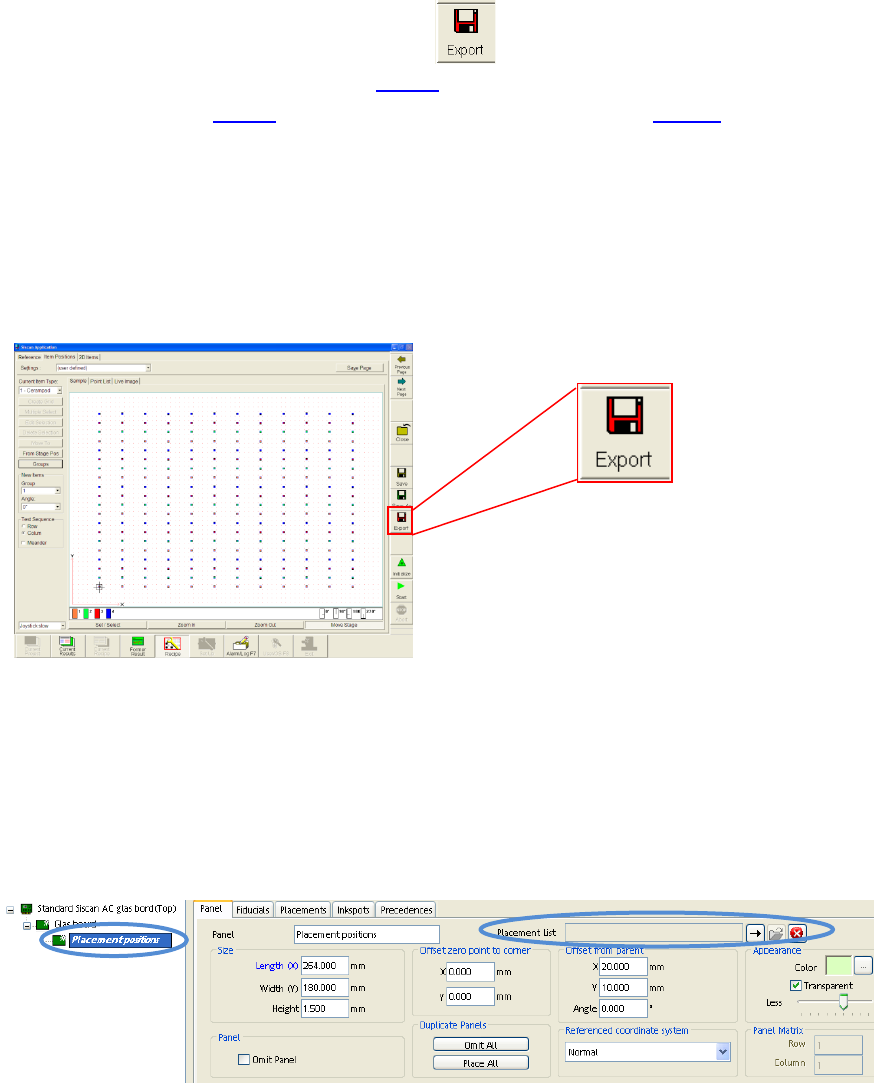
5.3.5.5 Export of the Recipe Data (CAD Data)
After the glasplate was choosen, like in 4.3.5.1, the components (Items) are loaded
into the recipe like in 4.3.5.2 and components place in a layout like in 4.3.5.3, the
data can be exported, to import it as placement positions into a SIPLACE Pro PCB de-
scription.
A Textfile is created which you can import into Siplace Pro via the
»ASCII Centroid Import Wizzard«.
You find this function in the »Recipe Editior«.
Finally this placement list has to be inserted in the template board
»Standard ASM AVS glass board« into the last sub panel called »Placement posi-
tions«.
See picture below