3_AVS-V2_MCT-UM-internal_EN_07-2019.pdf - 第86页
ASM AVS - U SER M ANUAL P AGE 86 OF 182 5.2.24.1.2 New Project – Machine In the se v iew t wo impor tant se tti ngs h as to be co nfigu red . (1) T rans port Lan e: Onl y in case o f a doub le con veyo r, y ou m ust sele…
ASM AVS - USER MANUAL
PAGE 85 OF 182
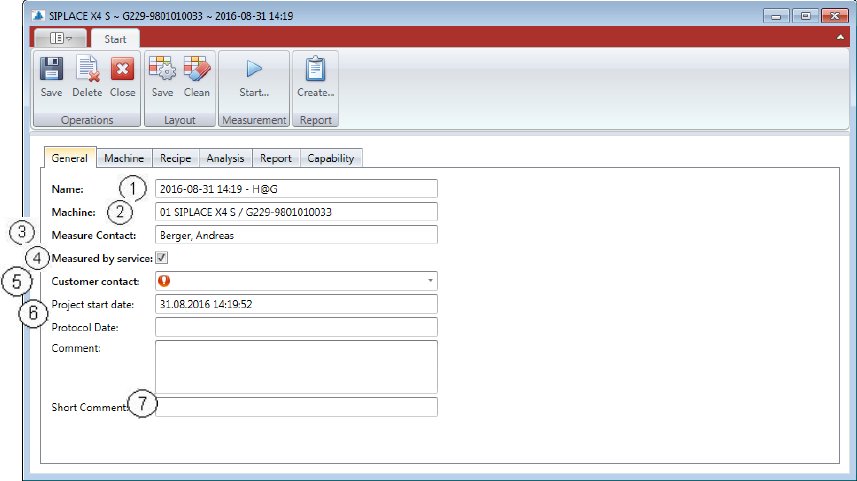
5.2.24.1.1 New Project – General
On the first tab of the window you find the “General Information”
(1) Project name:
e.g.: 2015-10-15 14:18
(2) Machine:
e.g.: 01 SIPLACE SX1 / M008G-98010024 (line pos., machine type, Serial No.)
(3) Measure Contact:
It’s always the user who was logged in.
(4) Measured by service:
If this checkbox is activated, a Customer contact can be selected from a list below. If the
checkbox is not activated, the user is supposed to be a customer and therefore no fur-
ther contact is necessary to be selected.
(5) Customer contact:
If the measurement is carried out by the service, a contact must be selected at the cus-
tomer, to whom you hand out the report finally. This contact must already exist in the
database.
(6) Project start date and Protocol date:
Two time stamps in the protocol are set automatically. One is the start date of the pro-
ject and the other one is the Protocol Date, which is set after a report is saved.
(7) Comment and Short Comment:
The comment will not be taken in any project name or protocol.
But the short comment offers the possibility to expand the project name.
The text length is limited to 20 characters.
This text is appended to the end of the project name.
ASM AVS - USER MANUAL
PAGE 86 OF 182
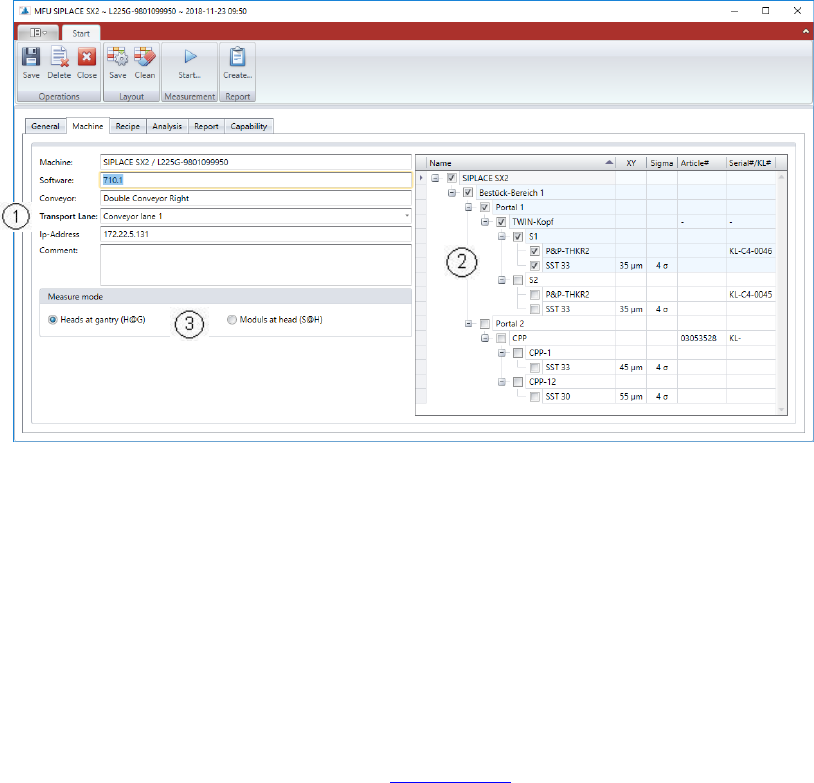
5.2.24.1.2 New Project – Machine
In these view two important settings has to be configured.
(1) Transport Lane:
Only in case of a double conveyor, you must select, either this project covers the
measurement of conveyor lane 1, conveyor lane 2, or both.
(2) Head and Camera:
In the right area of the window you must configure, which head/camera combination you
want to measure with this project.
If you select the checkbox with the camera name, all the other checkboxes in the chain
up to the gantry are automatically checked too.
(3) Measure Mode:
Description of “Measure Mode” see 5.2.18.12 (6).
The Recipe List on the next page is automatically filtered by that parameter, since this is
a significant parameter for the Recipe description.
ASM AVS - USER MANUAL
PAGE 87 OF 182
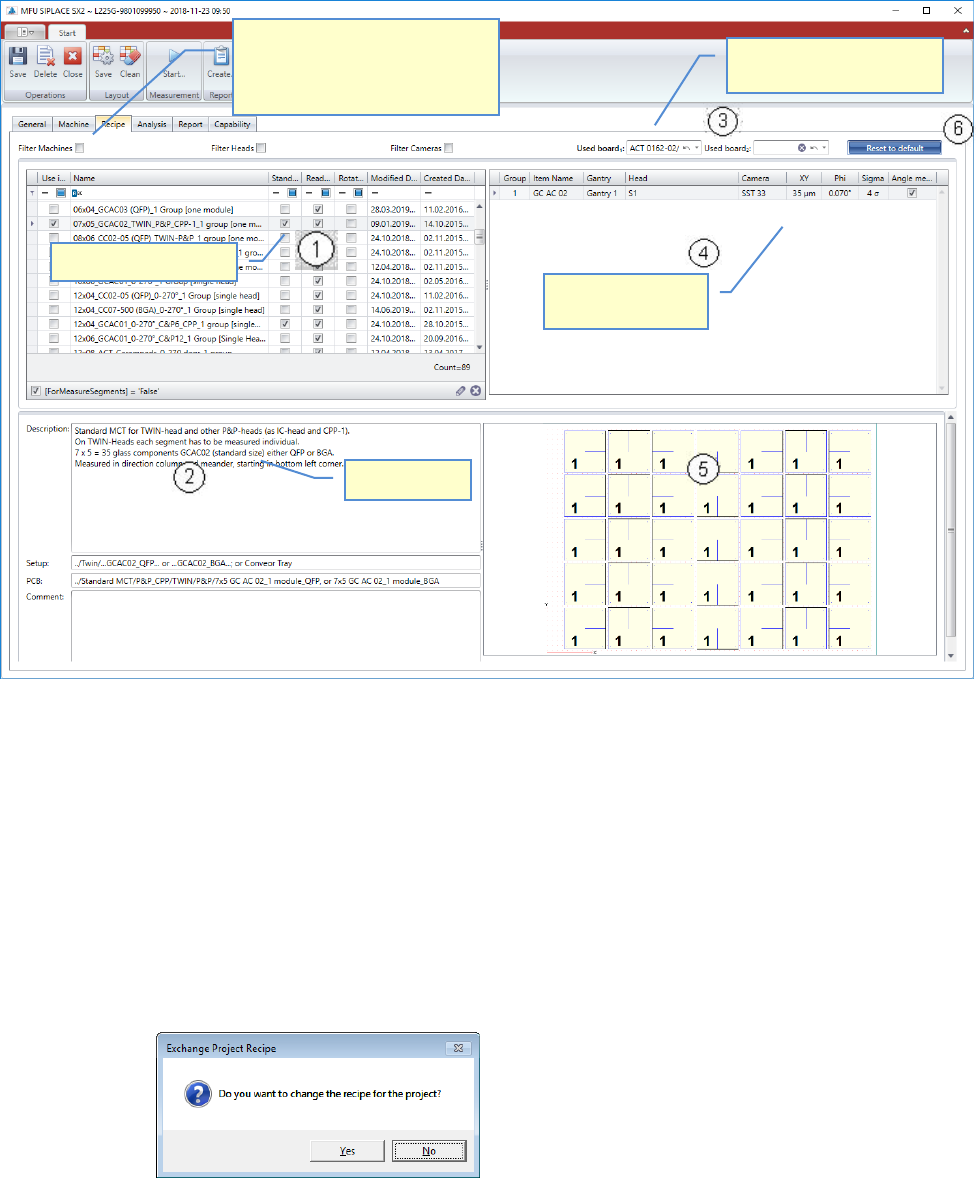
5.2.24.1.3 New Project - Recipe
In this step, you must select the recipe that is to be used to perform the measurement.
(1) Recipe selection:
The content of the list is depending on the filter settings on top of the list, as well as on
the Measure Mode set in the Machine Tab.
You can reduce the content by setting the filters.
Highlight a line, to see the recipe details below the list.
To select a recipe for using in the project, activate the checkbox on the left end of the
line. If you activate the checkbox for a recipe, this recipe is assigned to the project.
If a recipe was already selected before, the software asks you for changing the assign-
ment!
(2) Details and information:
In this area you find a detailed description of the recipe which is highlighted above.
You can also read the information about the required setup and PCB data in Siplace Pro,
which you must schedule to the line.
List of valid recipes.
Filter for Recipes, to reduce the list
below. The list is already filtered
completely by default. Deselect
single filters to expand the list.
Select the Board that you
use for the measurement.
Item, Gantry, group
assignment!
Recipe Details