印刷机通用说明书(中英文版) 450+.pdf - 第102页
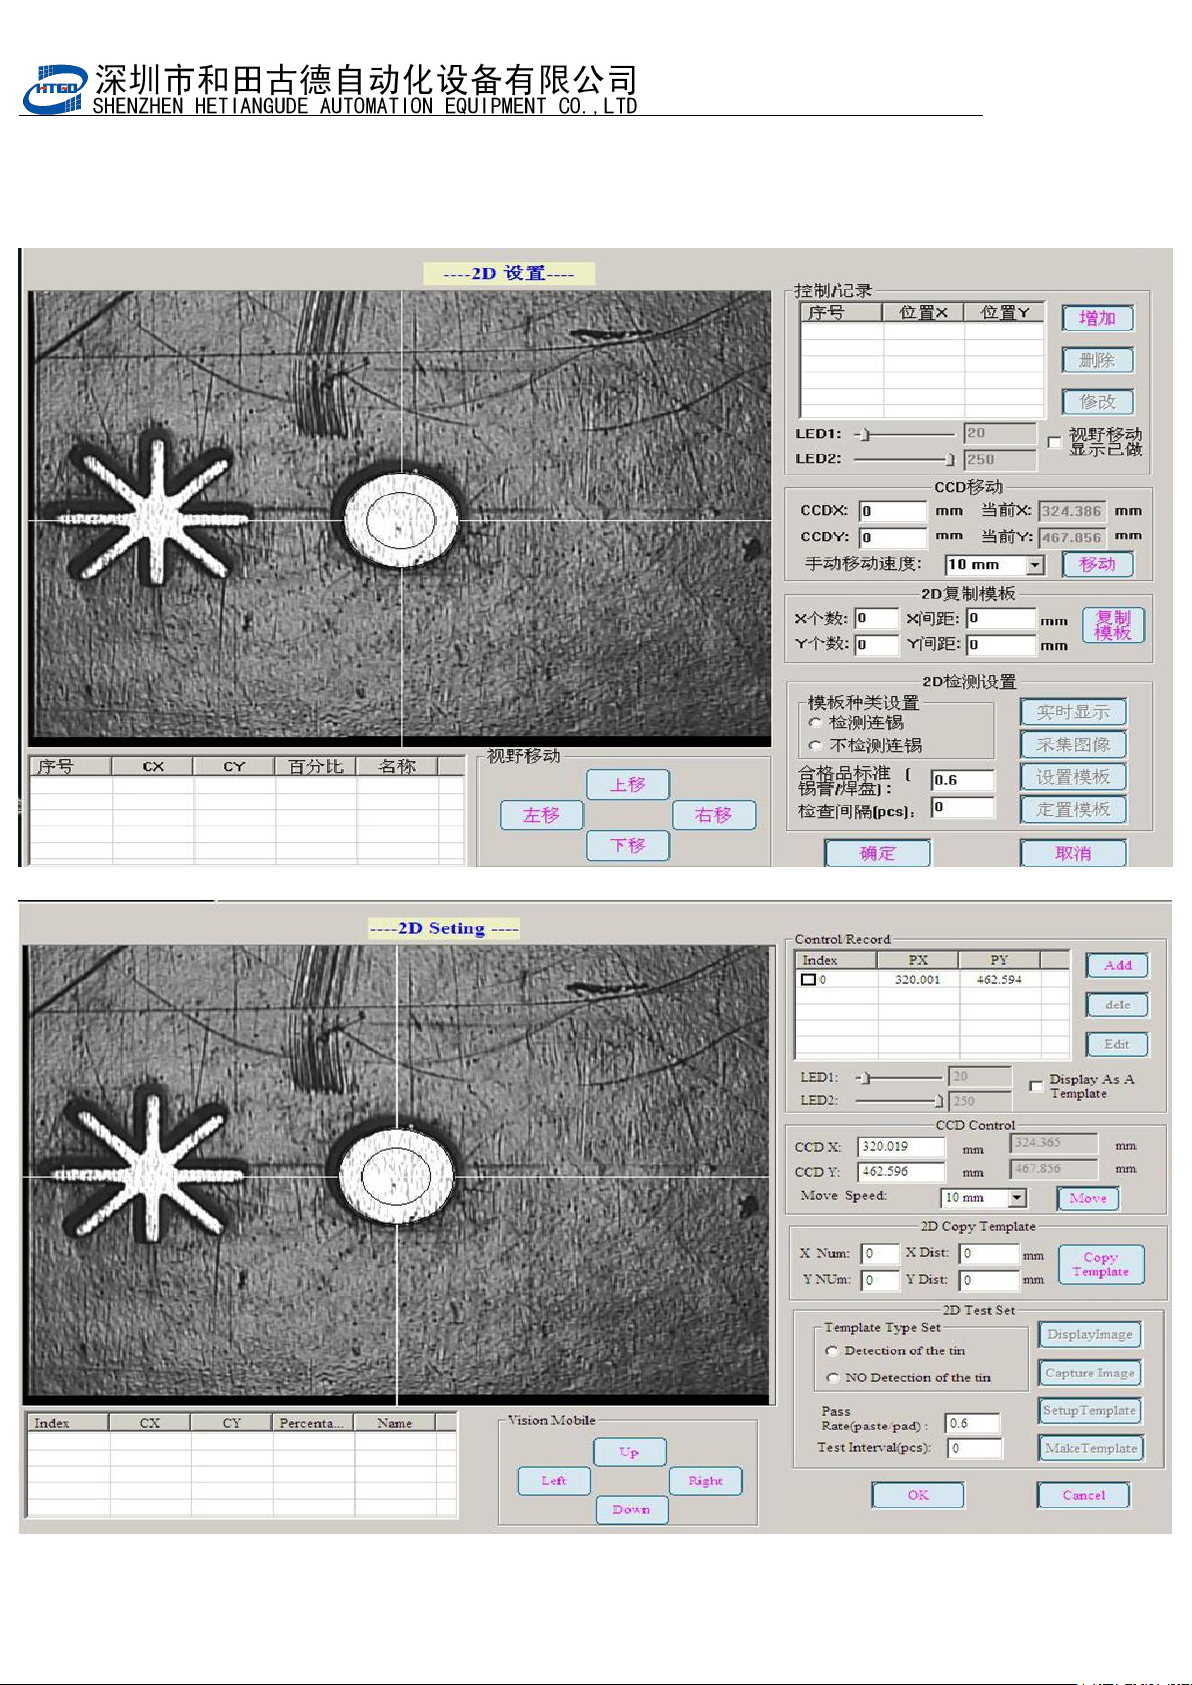
- 102 - 2 点 击 2D 检查 模 板设 置 , 进入 2D 检测界面。 Click “2D 检查模板设置 ”(2D insp ection temp late setting) button and enter into 2D inspection in terface. 图 6-2 ( 2D 检测界面) Pix 6-2(2D insp ection interface)
- 101
-
第六章
2D
锡膏检测操作说明
Chapter 6 Operating introduction of 2D solder paste inspection
2D锡膏印刷质量检查与分析功能,对偏移,少锡,漏印,连锡等印刷不良问题能快速检测, 检查印
刷效果,并确保印刷质量
2D solder paste printing quality check and analysis function can inspect fast on printing fails,
such as the offset, insufficient solder paste, missing printing and solder paste bridging etc. It
can check the printing performance and insure the printing quality.
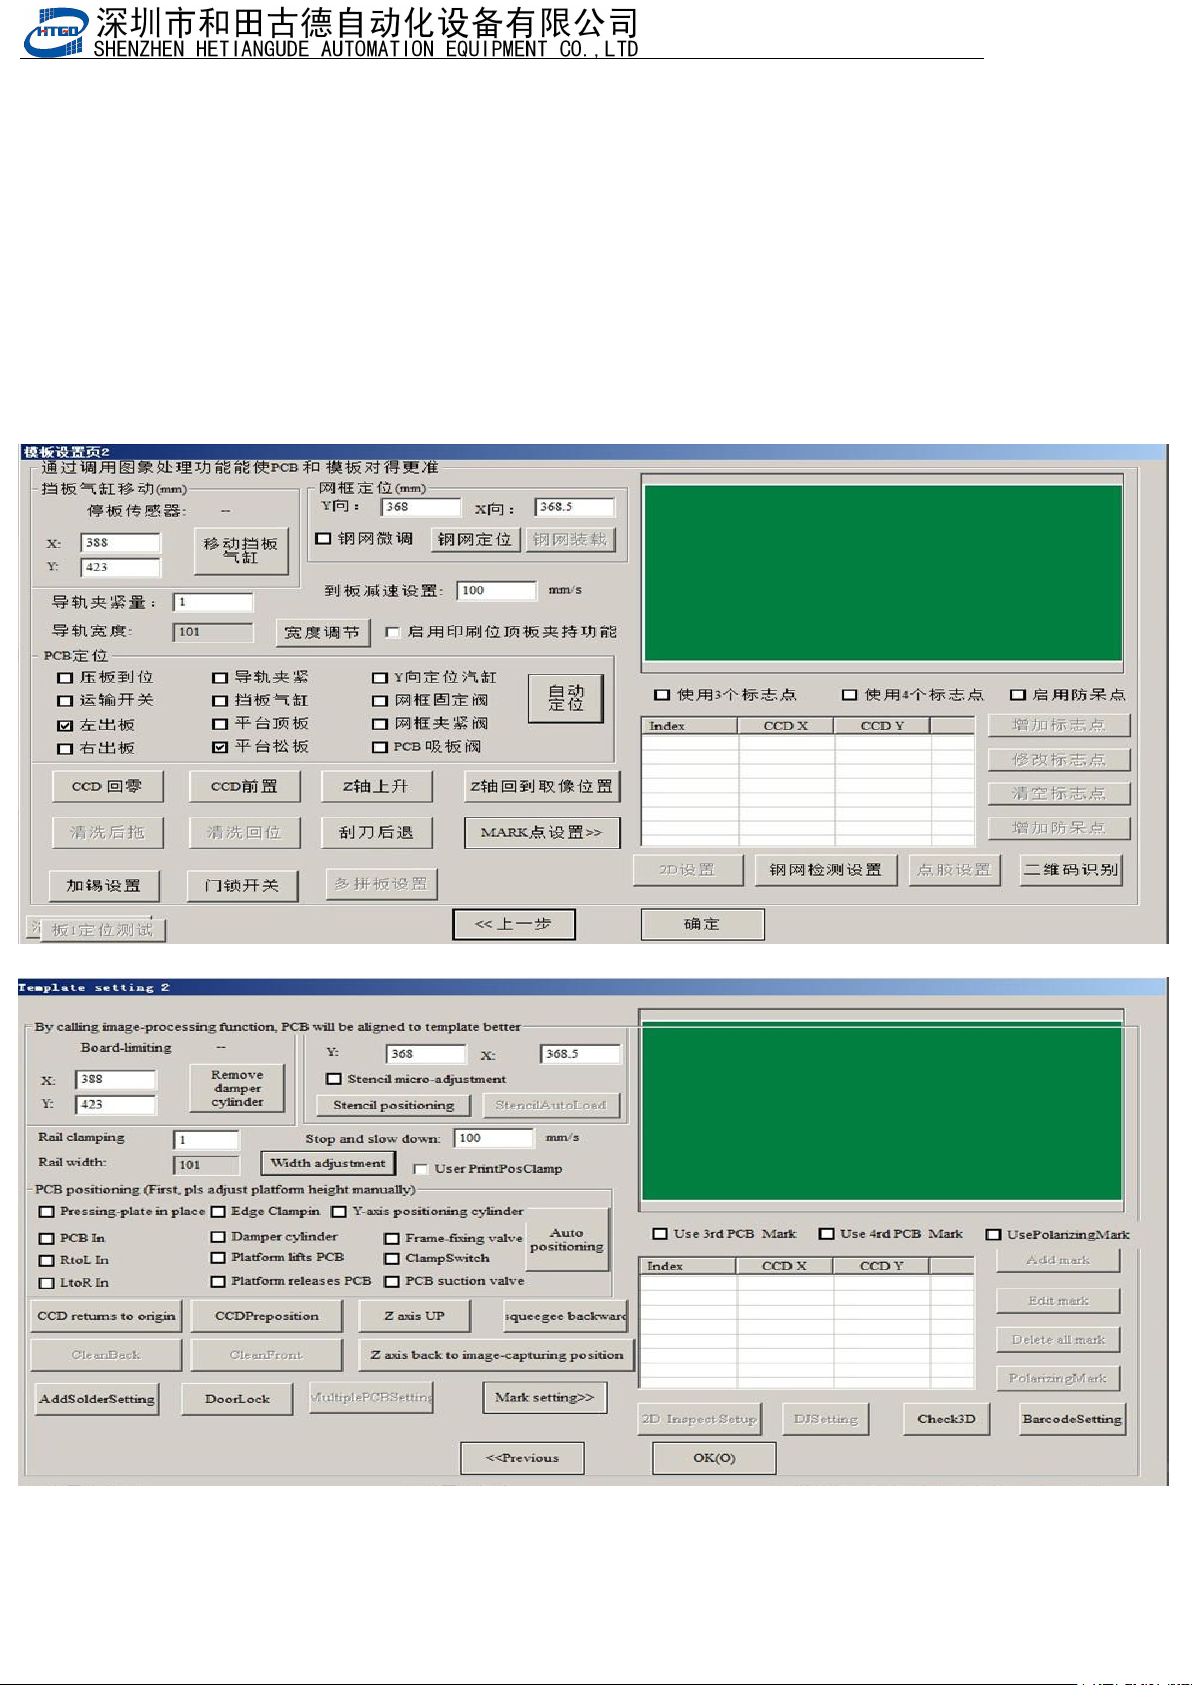
6.1.1 .进入 2D 检测界面,建立检测点。Enter into the inspection interface of 2D.
1.打开做好的程序,然后重新抓捕标志点
Open the program and recapture remark.
图
6-1
(模板设置页
2
)
Pix 6-1(Template setting page 2)
- 102
-
2 点击 2D 检查模板设置,进入 2D 检测界面。
Click “2D
检查模板设置
”(2D inspection template setting) button and enter into 2D
inspection interface.
图 6-2(2D 检测界面)
Pix 6-2(2D inspection interface)
- 103
-
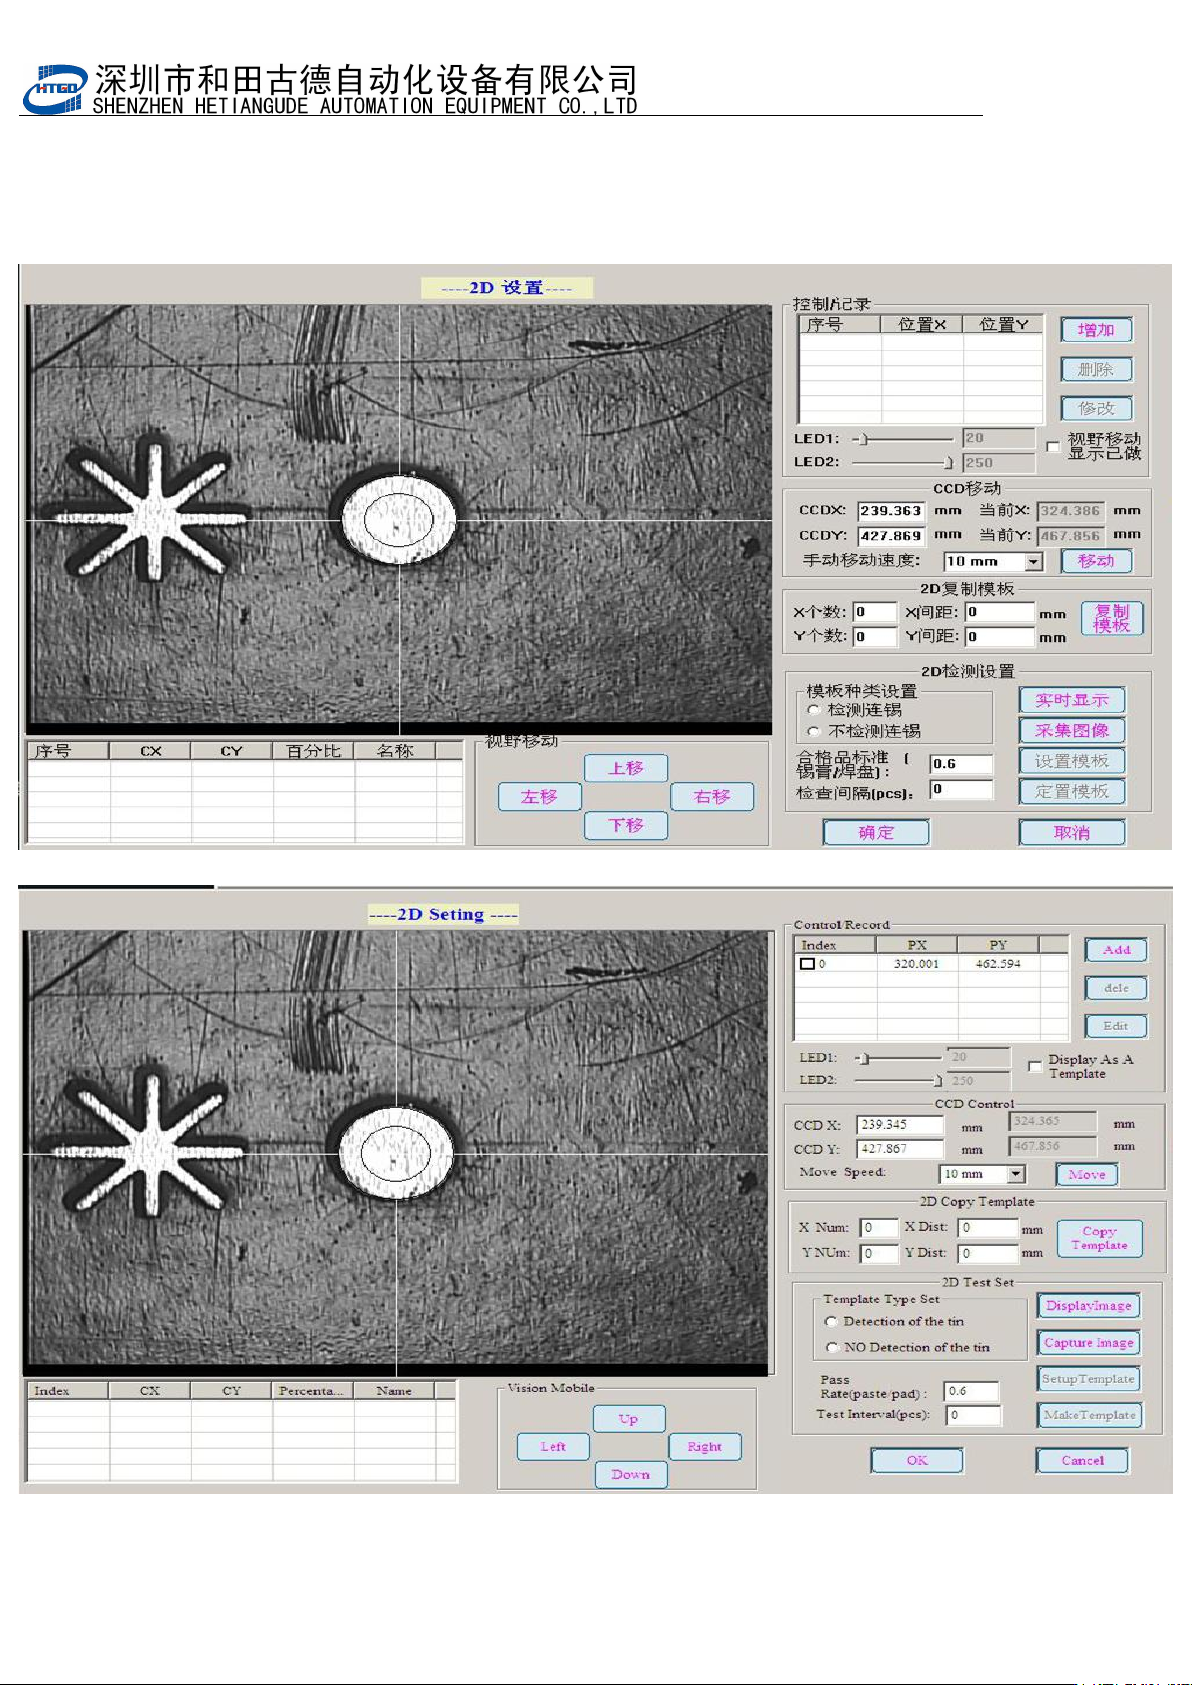
3.
点击增加记录,建立检测点。点击实时显示,并调整
LED1
与
LED2
光源,使图像达
到图中效果。
Click “ 增 加 记 录 ”(add record) button and build inspection spot. Click “ 实 时 显
示
”(real-time display) button. Adjust the light source of LED1 and LED2 and make the
image achieved the performance in the below pix.
图
6-3
(实时显示界面)
Pix 6-3(real-time display interface)