印刷机通用说明书(中英文版) 450+.pdf - 第83页
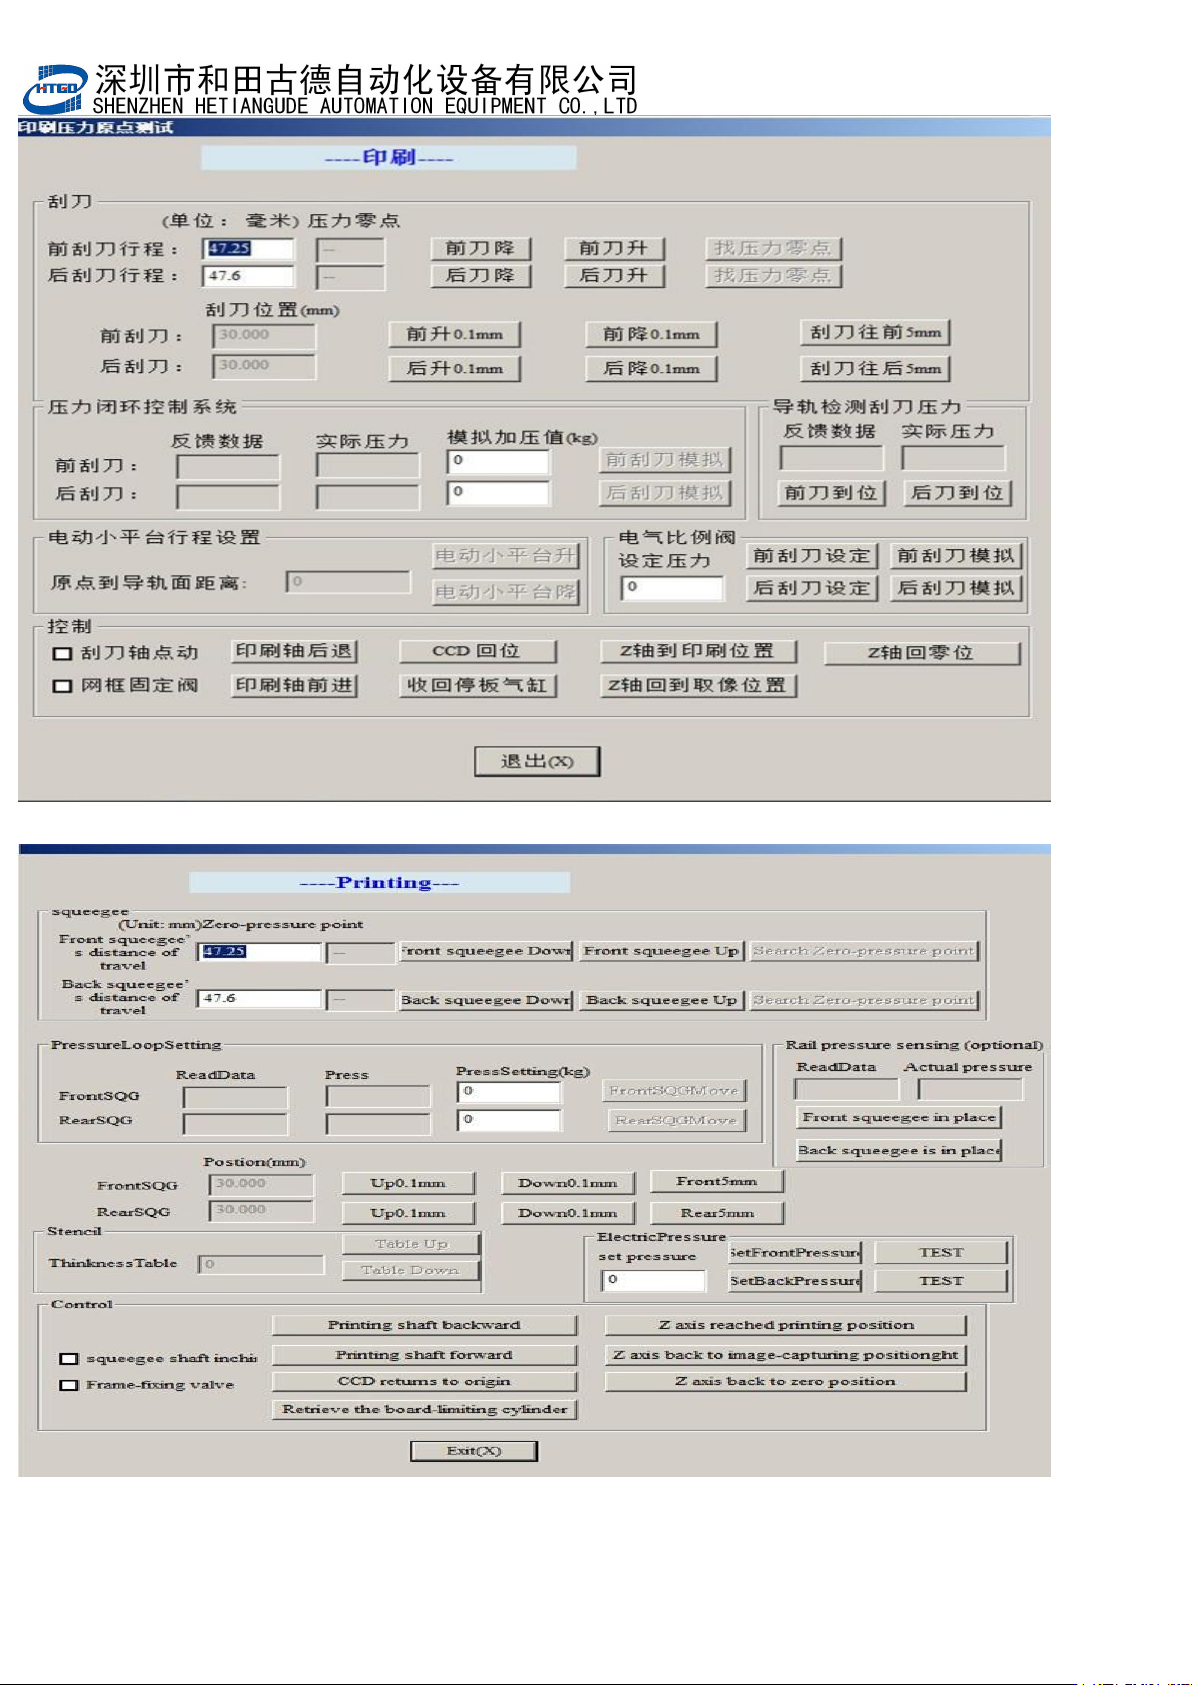
- 83 - 12 : :刮 刀 设 置按 钮。 单击 该 按 钮后 如图 4-13 ,在 此 界面 可设 置 前后 刮 刀压 力零 点位 置; 程序 编 辑完 成后 将 PCB 放置在运 输导轨中间 段,点 击 “ Z 轴 到 印 刷 位 置 ” , 选 择 “ 刮 刀 轴 点 动 ” 后 点 击 “ 印 刷 轴 后 退 ” 或 者 “ 印刷轴前进 ” ,使 要 测 试 的刮 刀处 于 PCB 位置,点击待测试刮刀的 “ 找压 力 零…

- 82
-
11
:
:人工清洗按钮。单击该按钮后如图
4-12
;
: Manual cleaning. The interface in the pix 4-12 will be displayed
by clicking this button.
图
4-12
(人工清洗)
Pix 4-12 (manual cleaning)

- 83
-
12:
:刮刀设置按钮。单击该按钮后如图 4-13,在此界面可设置前后刮刀压
力零点位置;程序编辑完成后将
PCB
放置在运输导轨中间段,点击
“
Z
轴
到印刷位置
”
,选择
“
刮刀轴点动
”
后点击
“
印刷轴后退
”
或者
“
印刷轴前进
”
,使要测试的刮刀处于 PCB 位置,点击待测试刮刀的
“
找压力零点
”
,刮刀会自动下降到接触钢网后停止,再同样测试另一
个刮
刀,完成后升起刮刀并将
Z
轴回到零位,点击退出完成刮刀测
试。
: Scraper setting. The interface in the pix 4-13 will be displayed by
clicking this button. Operator can setup the zero point position of front
and back scraper pressure. After the program has been edited, place
the PCB on the middle section of the transmission rail. Click “Z axis
lifts up to the printing position”button, select “the movement of scrape
axis point” and click “printing axis moves back” button or “printing
axis moves forward” button. Place the tested scraper in the PCB
position. Click “search the pressure zero point” button of the tested
scraper, the scraper will decline automatically to the stencil position
and stop after touching with the stencil. And test another scraperwith
the same method. After finishing another scraper, lift up the scraper
and let Z axis return to the zero position. Click “退出”(exit)button,
then finish the scraper test.
- 84
-
图 4-13(刮刀设置)
Pix 4-13(scraper setting)