88242361-04-01 Vol 1 DEK TQ TECHNICAL REFERENCE (1).pdfPDFA.pdf - 第122页
7 PRINT CARRIAGE MODULE 7.3 CALIBRATIONS 122 TECHNICAL REFERENCE MANUAL DEK TQ 04/2021 14. Select Temperature Offset . 15. Calculate the difference between the temperature gauge and the machine display. NOTE If the digit…
7 PRINT CARRIAGE MODULE
7.3 CALIBRATIONS
TECHNICAL REFERENCE MANUAL DEK TQ 04/2021 121
7.3.3 Temperature Offset
The calibration ensures the accuracy of the on-board sensor. The offset also compensates for the
difference in temperature between the sensor location and the print medium on the stencil.
Before carrying out this calibration procedure ensure a stencil is fitted to the machine.
1. Open the front cover.
2. Place a calibrated digital temperature gauge on the stencil near to the squeegees.
3. Turn the digital temperature gauge on.
4. Close the front cover.
NOTE
The digital temperature gauge needs to be in place for at least 2 minutes to acclimatize and
give a reliable reading.
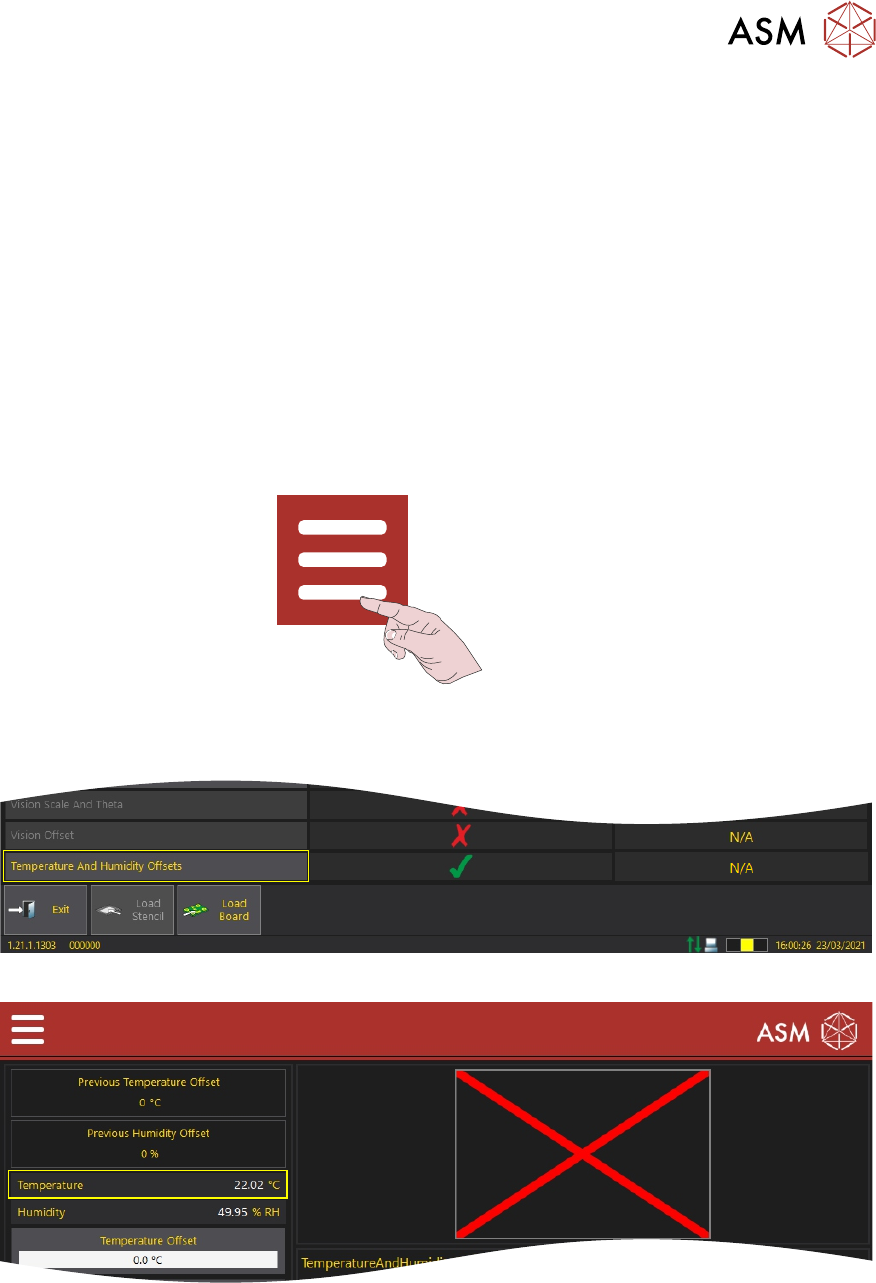
5. Press the System button.
6. Select Menu.
7. Select Service/Calibration.
8. Select Temperature And Humidity Offsets.
9. Note the temperature reading on the on-screen temperature display.
10. Ensuring 2 minutes have passed, open the front cover.
11. Remove the digital temperature gauge and note the temperature reading.
12. Close the front cover.
13. Press the System button.
7 PRINT CARRIAGE MODULE
7.3 CALIBRATIONS
122 TECHNICAL REFERENCE MANUAL DEK TQ 04/2021
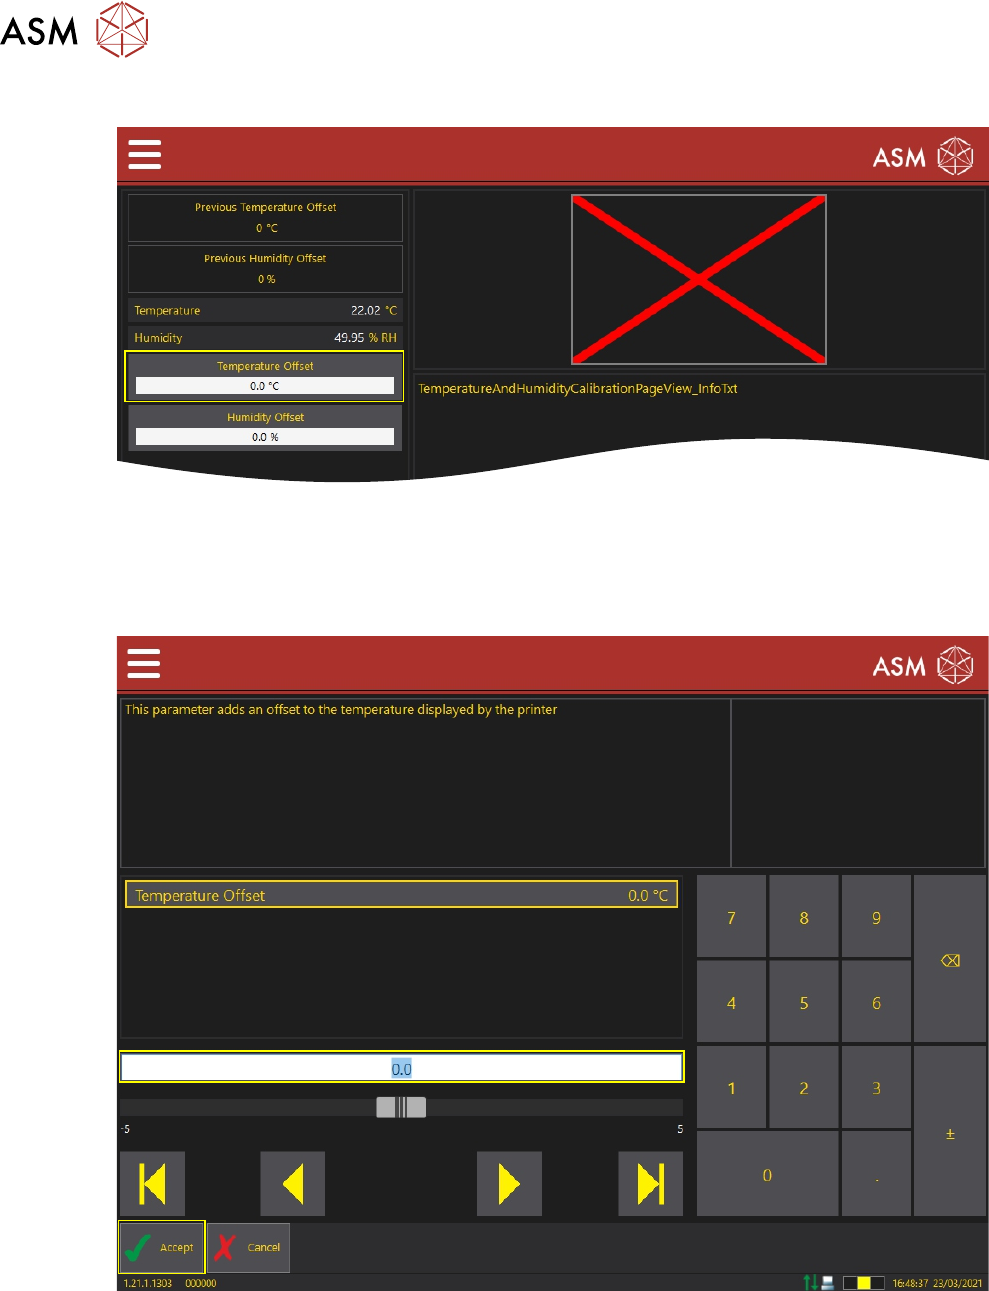
14. Select Temperature Offset.
15. Calculate the difference between the temperature gauge and the machine display.
NOTE
If the digital temperature gauge reading is 21
o
C and the machine temperature reading is
22.1
o
C then the offset needs to be +1.1
o
C.
16. Set the temperature offset required.
17. Select Accept.
18. Select Save And Exit.
19. Select Confirm.
20. Select Exit.
8 SQUEEGEE MODULE
8.1 OVERVIEW
TECHNICAL REFERENCE MANUAL DEK TQ 04/2021 123
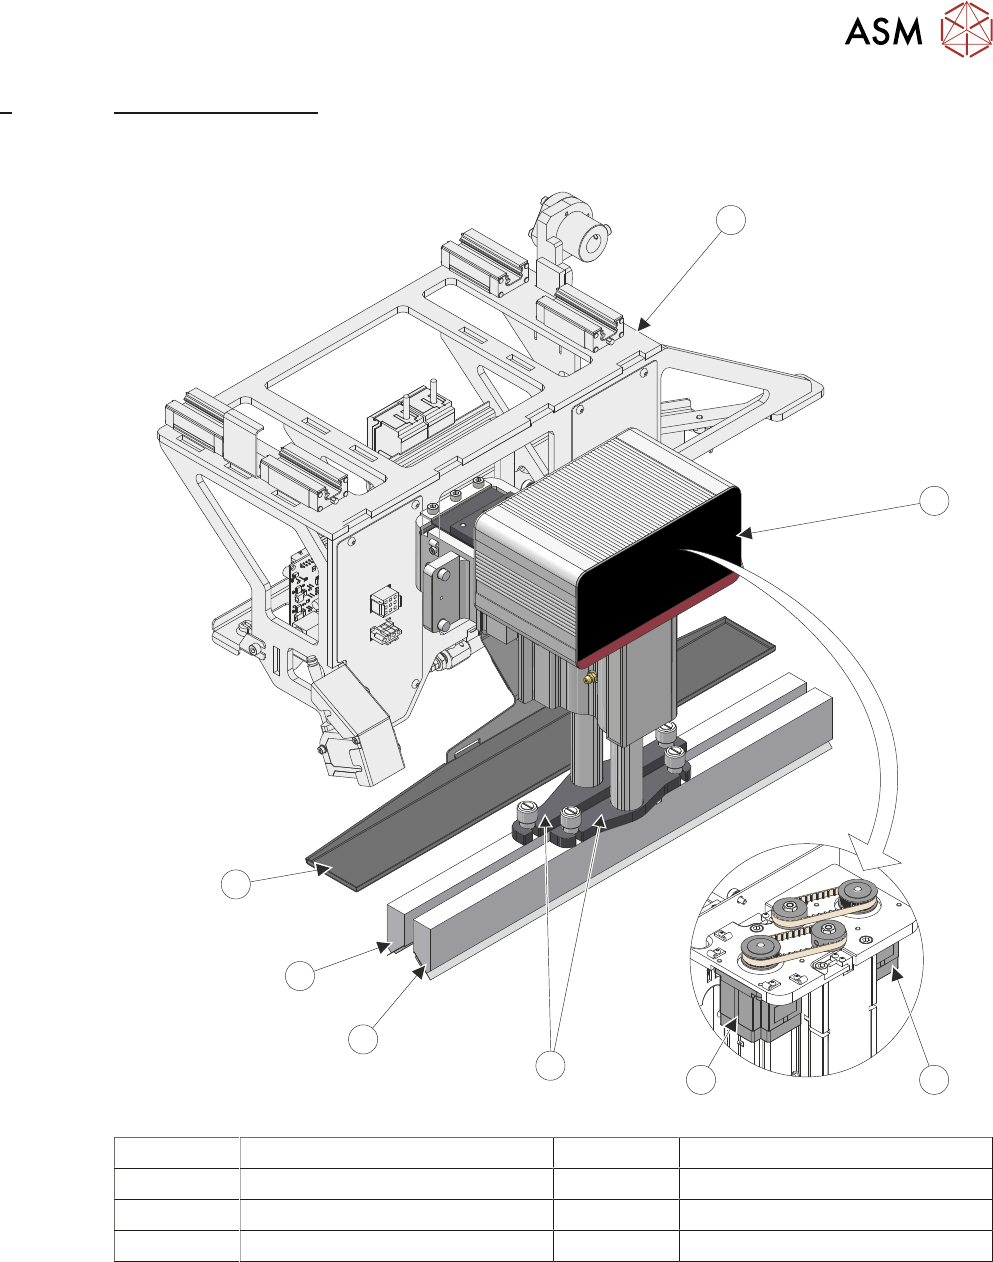
8 SQUEEGEE MODULE
8.1 OVERVIEW
2
1
34
6
5
7
8
1 Print Carriage 5 Squeegee Mounting Feet
2 Squeegee Mechanism 6 Front Squeegee
3 Rear Squeegee Stepper Motor 7 Rear Squeegee
4 Front Squeegee Stepper Motor 8 Squeegee Drip Tray
The squeegee mechanism is driven backwards and forwards across the stencil by the print car-
riage.
The squeegee mechanism incorporates two stepper motors to drive the two squeegees independ-
ently down onto the stencil when a print stroke is required. During the rearward stroke, the front
squeegee is in contact with the stencil performing a rear print stroke. During the forward stroke, the
rear squeegee is in contact with the stencil performing a forward print stroke.