88242361-04-01 Vol 1 DEK TQ TECHNICAL REFERENCE (1).pdfPDFA.pdf - 第157页
9 PASTE DISPENSER SYSTEM 9.4 REPLACEMENT PROCEDURES TECHNICAL REFERENCE MANUAL DEK TQ 04/2021 157 14. Remove and clean the paste drip tray (1). 1 15. Ensure that any spilled paste is removed from the surfaces on and arou…
9 PASTE DISPENSER SYSTEM
9.4 REPLACEMENT PROCEDURES
156 TECHNICAL REFERENCE MANUAL DEK TQ 04/2021
35. Place clean paste drip tray (1) in position beneath paste dispenser home position.
1
36. Fit paste jar and plunger into paste dispenser.
9.4.1.2 Jar to Cartridge
1. Select the Changeover tab.
2. Select Start Changeover.
3. Select Continue.
4. Select Carriage To Rear.
5. Select Menu.
6. Select Shut Down.
7. Open the front cover.
8. Ensure that the stencil has been removed.
9. Switch the mains isolator to OFF.
10. Remove the front panel.
11. Turn the pneumatic isolator to EXH.
12. Remove the upper left hand side panel.
13. Remove the paste jar from the paste dispenser.
9 PASTE DISPENSER SYSTEM
9.4 REPLACEMENT PROCEDURES
TECHNICAL REFERENCE MANUAL DEK TQ 04/2021 157
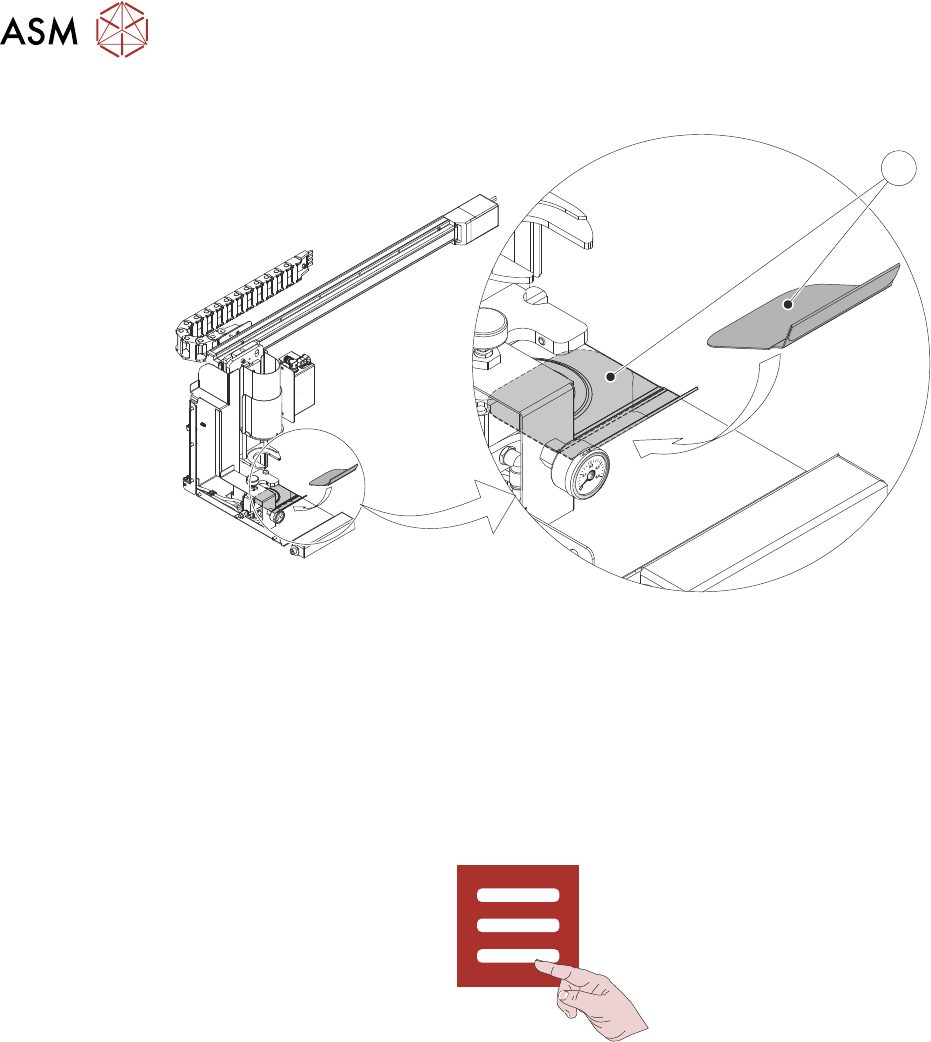
14. Remove and clean the paste drip tray (1).
1
15. Ensure that any spilled paste is removed from the surfaces on and around the paste dis-
penser.
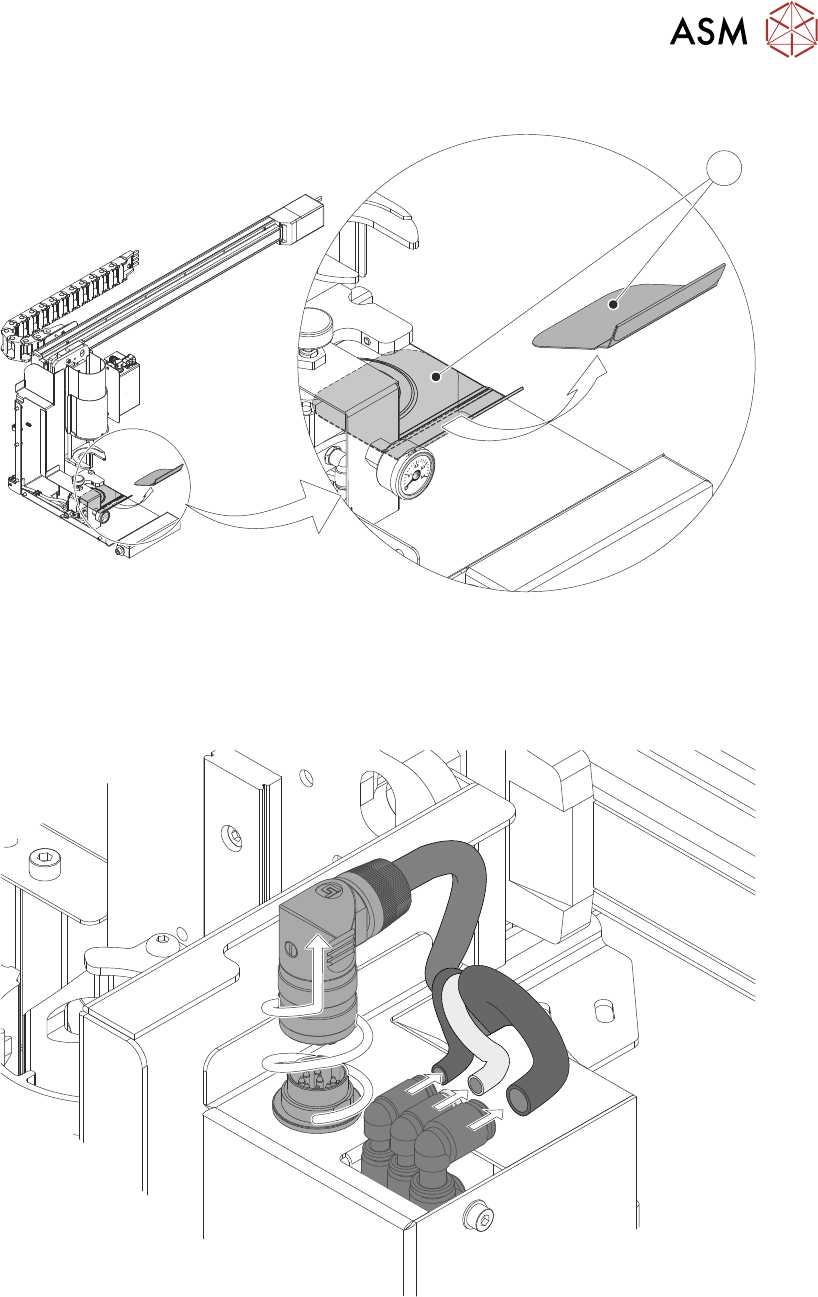
16. Disconnect the three pneumatic connectors and unscrew and pull-up the electrical connector
plug.
9 PASTE DISPENSER SYSTEM
9.4 REPLACEMENT PROCEDURES
158 TECHNICAL REFERENCE MANUAL DEK TQ 04/2021
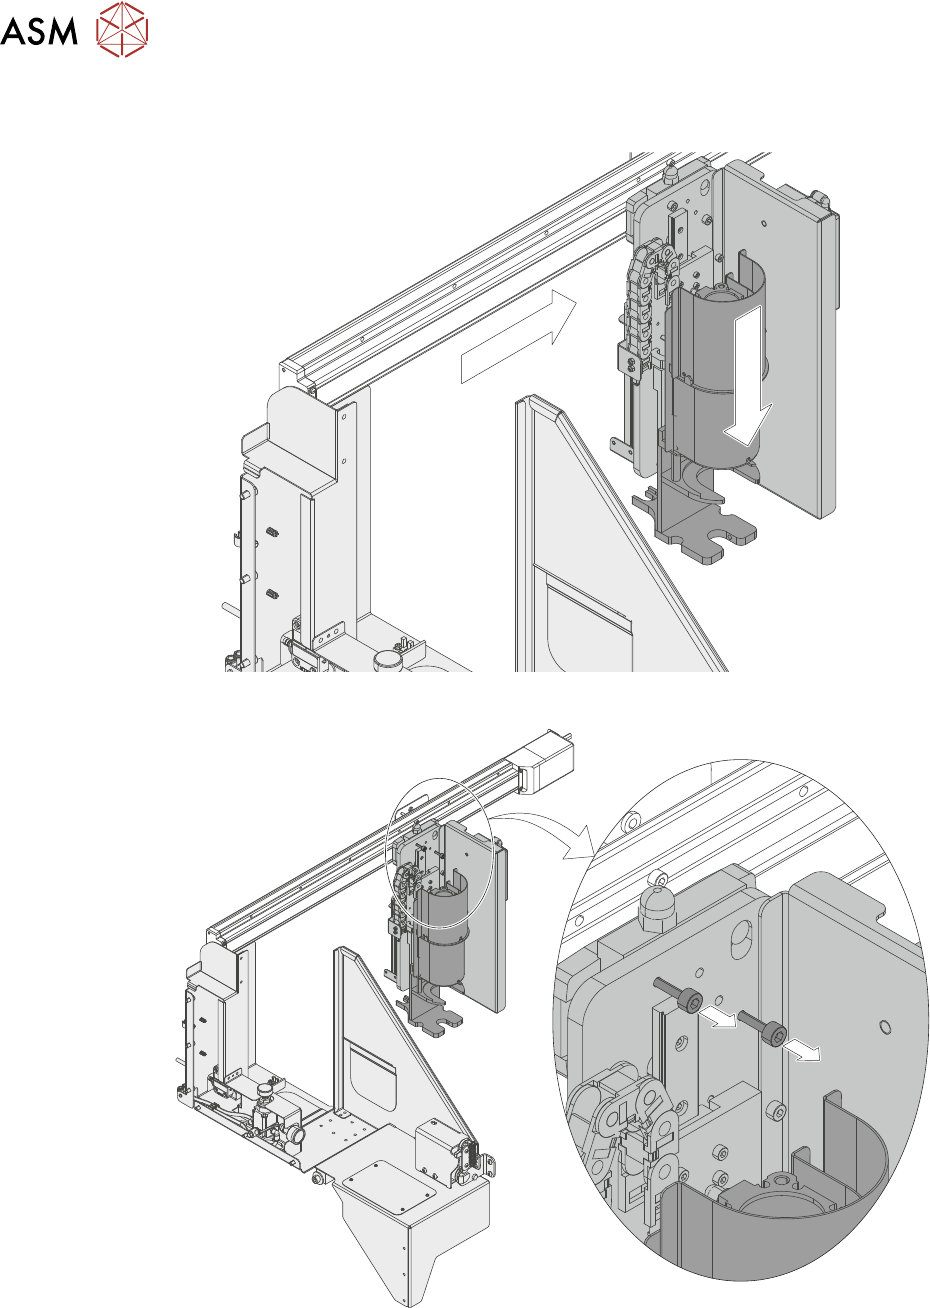
17. Manually move the jar dispenser into the centre of the printer, and lower the paste dispenser
to expose two M5 socket cap-head retaining screws.
18. Using a 4mm Allen key loosen the two M5 captive retaining screws.