80S-2080F480F5.pdf - 第702页
11 Station Extensions/Options SIPLACE 80S-20/F4/F5 User Manual 11.12 Nozzle Changer for the 6x Revolver Head 05/99 Issue from Software Version SR.405.xx 11 - 86 l Re turning a nozzle - The locking p late op ens. - The z-…

SIPLACE 80S-20/F4/F5 User Manual 11 Station Extensions/Options
05/99 Issue from Software Version SR.405.xx 11.12 Nozzle Changer for the 6x Revolver Head
11 - 85
11.12.3 Mode of Operation
Each magazine of the nozzle changer has a fiducial for position recognition.
The individual slots of the magazine are marked on the nozzle changer, numbered from 1 to 5. The individual
nozzle garages are numbered from 1 to 6 in each magazine.
(see Fig. 11.12.2).
PLEASE NOTE
Special magazines are available upon request from Siemens PL EA 1 E. These are marked separately.
The nozzles are fixed in position in the garages via a locking plate that can travel 12 mm along one axis. The
nozzles are either clamped or released according to the position of the plate.
The plate is moved via one pneumatic cylinder for all magazines or nozzles at the same time. All the nozzles
are released or held in place at the same time.
If the nozzle has not been changed, the locking plate is always in the "closed" position.
l Picking up a nozzle
- The z-axis of the revolver head moves down.
- The locking plate opens.
- The z-axis moves up.
11 Station Extensions/Options SIPLACE 80S-20/F4/F5 User Manual
11.12 Nozzle Changer for the 6x Revolver Head 05/99 Issue from Software Version SR.405.xx
11 - 86
l Returning a nozzle
- The locking plate opens.
- The z-axis moves down.
- The locking plate closes.
- The z-axis moves down.
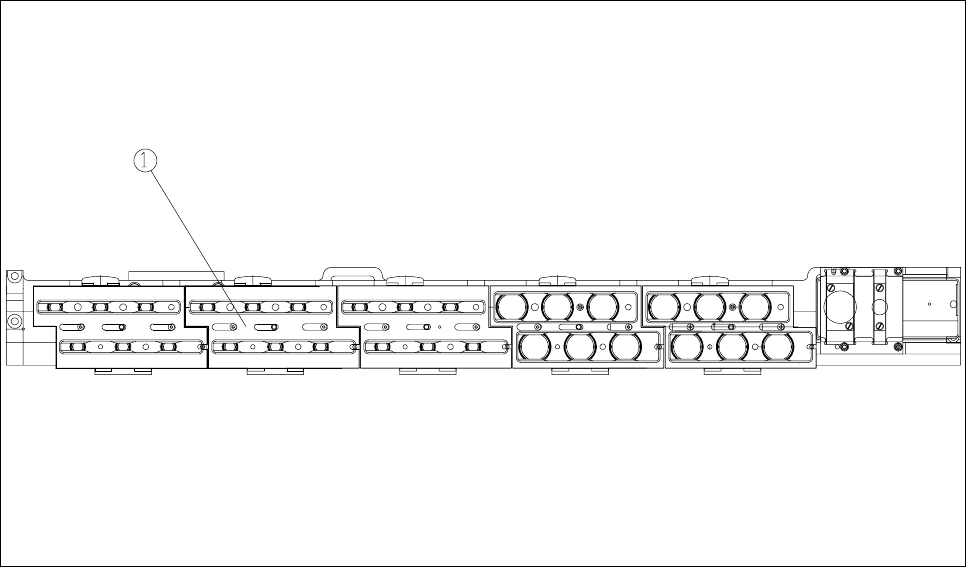
Fig. 11.12.3 Position of the locking plate
- Key to Fig. 11.12.3
1 Locking plate
l Rejection of defective nozzles
- The z-axis travels a distance of 14 mm at the reject position.
- The z-axis moves up and the nozzle is removed from the sleeve by spring wires.

SIPLACE 80S-20/F4/F5 User Manual 11 Station Extensions/Options
05/99 Issue from Software Version SR.405.xx 11.12 Nozzle Changer for the 6x Revolver Head
11 - 87
11.12.4 Notes on Operation
Before filling a magazine with a specific nozzle type, attach an adhesive label with the designation of the
nozzle type to the magazine.
PLEASE NOTE
Although various nozzle types from the same family (7.xx or 8.xx) can be used and configured for each mag-
azine, this should be avoided in order to prevent the machine being set up incorrectly.
Fill the magazines off the machine and only ever replace complete magazines.
Open the locking plate and insert the nozzles in the nozzle garages.
Close the locking plate so that the nozzles cannot fall out of the magazines.
Magazines must only be filled if all the nozzles on the revolver head have been returned to the magazine.
If you want to use different functions of the nozzle changer, see section 4.2.6 and section 4.2.7 of this User
Manual.
See the User Manual for the UNIX line computer for programming the nozzle changer on the line com-
puter.
PLEASE NOTE
Do not allow components to fall onto the magazines. This can cause the locking plate to
jam
. Do not allow
components to fall onto free locations since this will prevent magazines being set down
precisely
on these
locations. Remove all components from the magazines and free locations
on a regular basis
.