Portal-Operation-Manual-REV-I.pdf - 第26页
PVA Portal Manual Revision I / Janua ry 2022 Page 26 of 106 6.6 Vision For more informati on on visio n and fiducials, refer to the Visi on manual. 6.6.1 Vision Window Shown below is the standard Vision Wi ndow . To acce…
PVA Portal Manual
Revision I / January 2022
Page 25 of 106
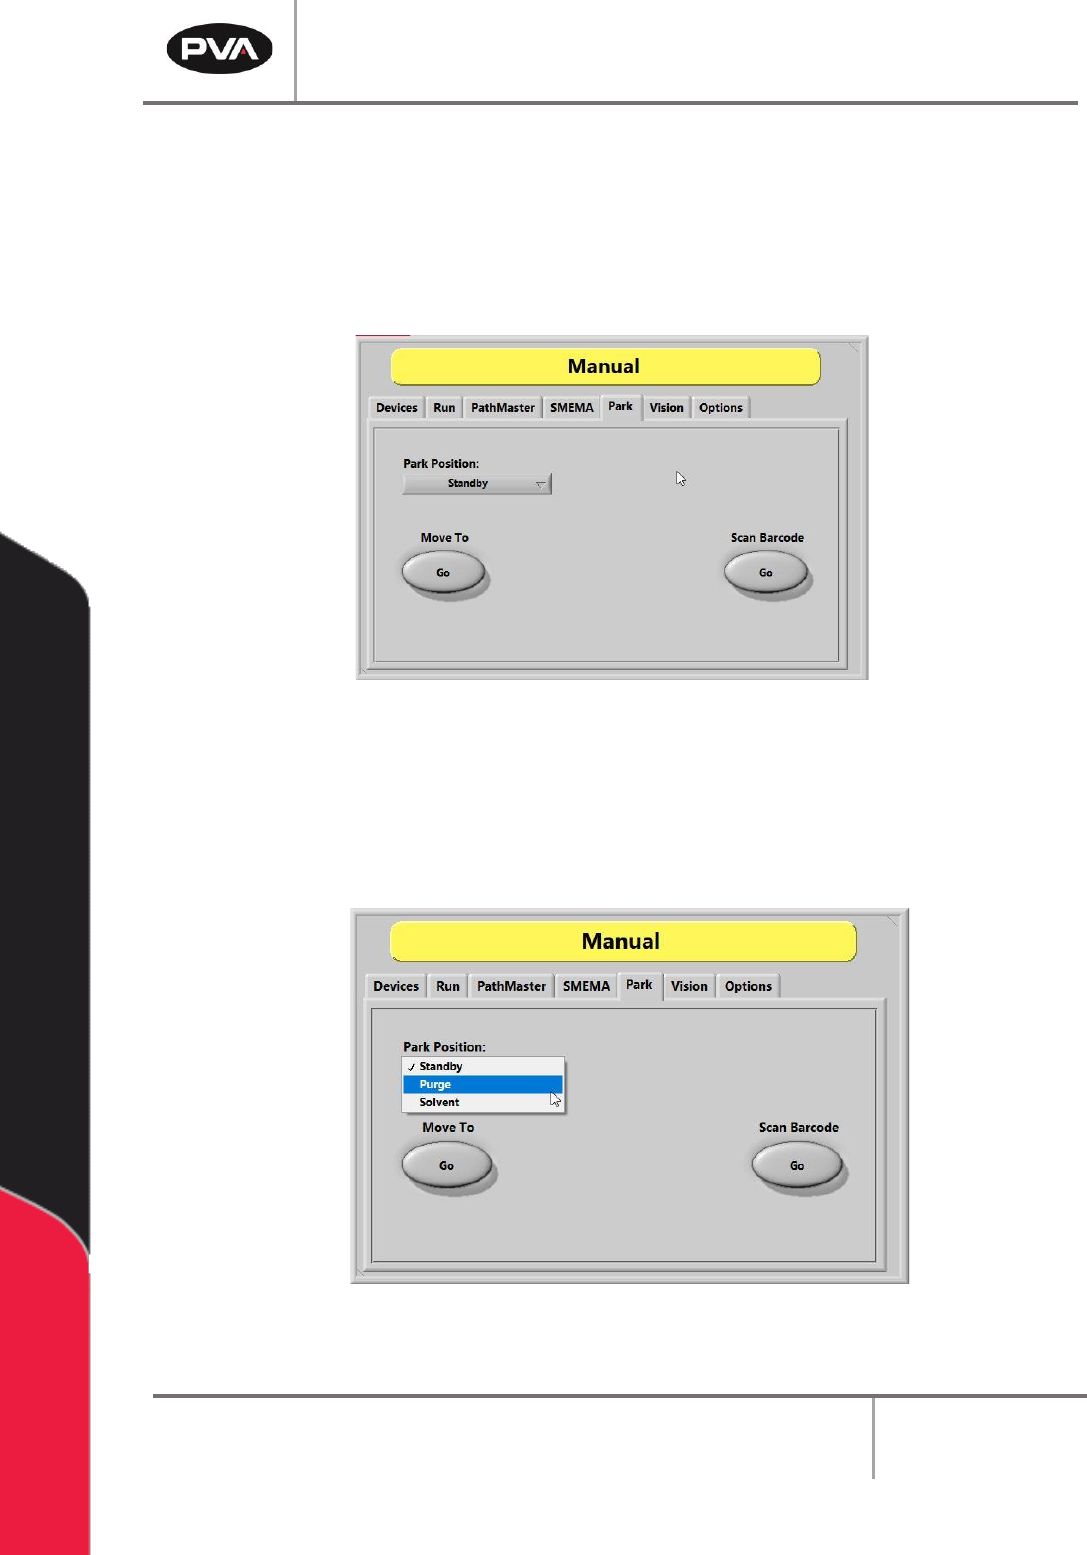
6.5 Park
The Manual mode Park tab allows the user to place the gantry/head/valve(s) into a
predefined Park Position. The positions are taught prior to shipment and can be retaught
in Setup Mode under the Positions tab, if needed. The most common Park Positions are
Standby, Purge, and Solvent.
Figure 13: Park Position Options
To place the head into a Park Position:
1. Navigate to the Park Position drop down list.
2. From the list, select the desired position – Standby, Purge, or Solvent.
Figure 14: Choosing a Park Position Option
3. Select/press the Move To – “Go” button.
PVA Portal Manual
Revision I / January 2022
Page 26 of 106
6.6 Vision
For more information on vision and fiducials, refer to the Vision manual.
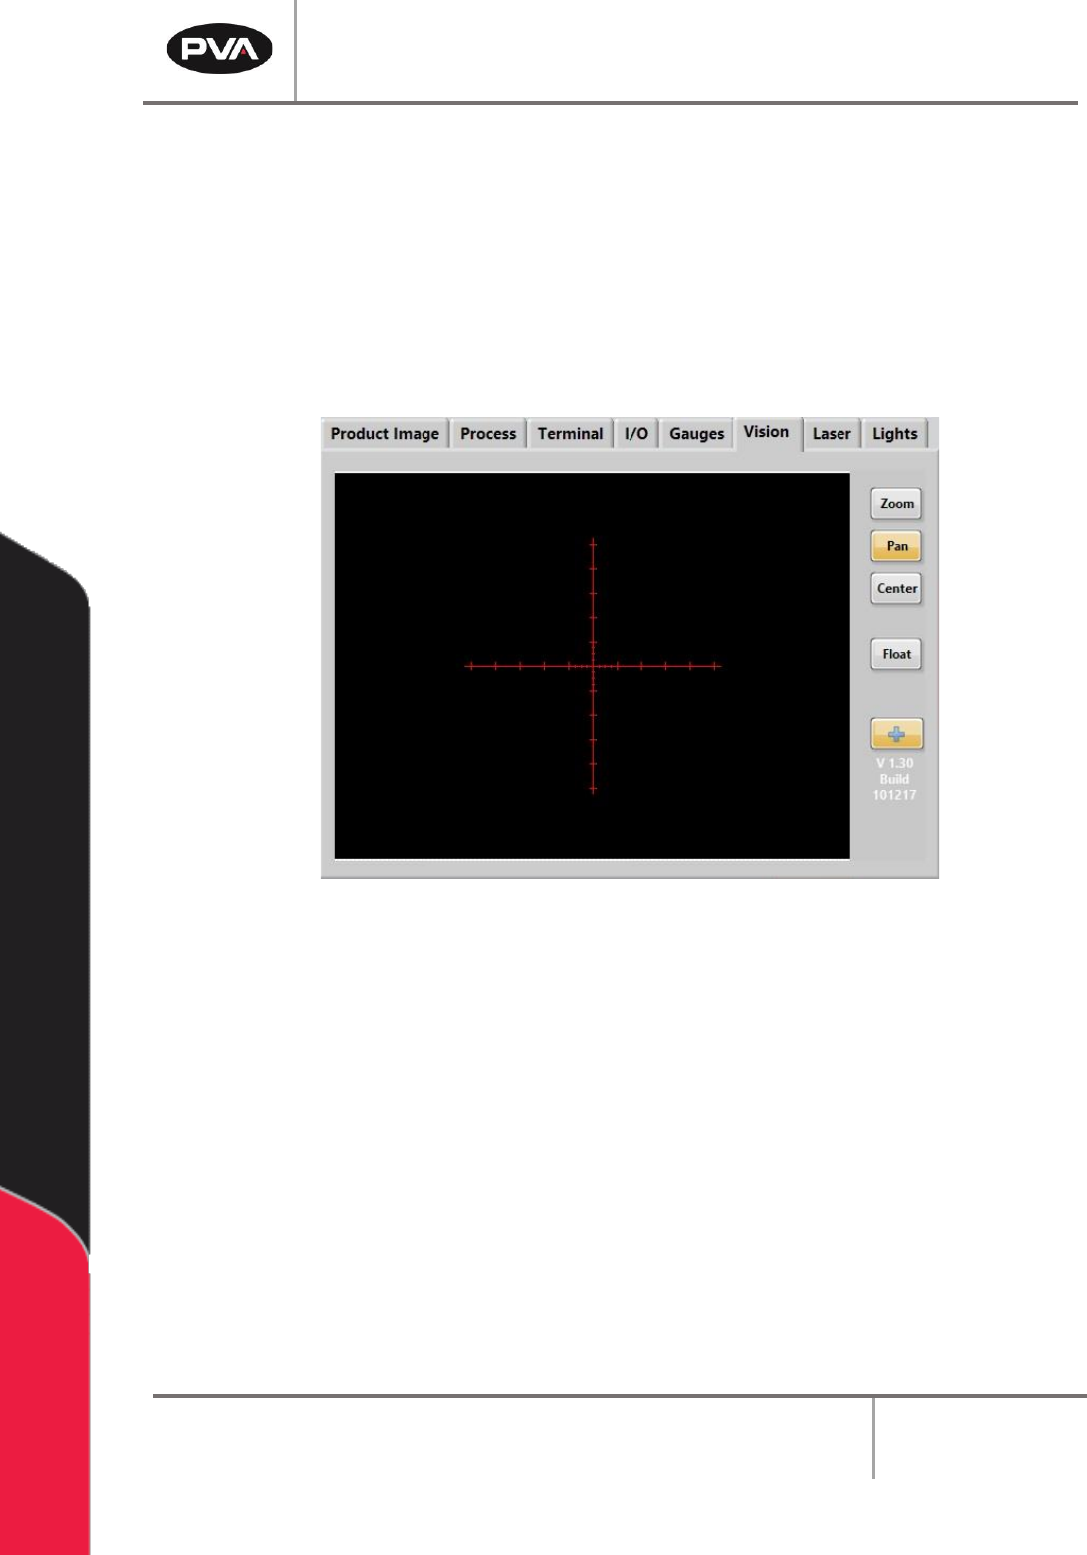
6.6.1 Vision Window
Shown below is the standard Vision Window. To access the Vision Window, select the
Vision tab from the System tab section of the screen.
Figure 15: Vision Window
• Select the “Zoom” button to zoom in or increase the size of the image on the
screen. This option is available for both static and live images.
• Select the “Pan” button to move across the zoomed image.
• Select the “Center” button to resize the image to its original size and align it with
the center of the screen.
• Select the “+” (Crosshair) button to toggle the crosshair overlay on and off. This
option is available for both static and live images.
• Select the “Float” button to open up a floating vision window that stays on top of
the Portal window.
PVA Portal Manual
Revision I / January 2022
Page 27 of 106
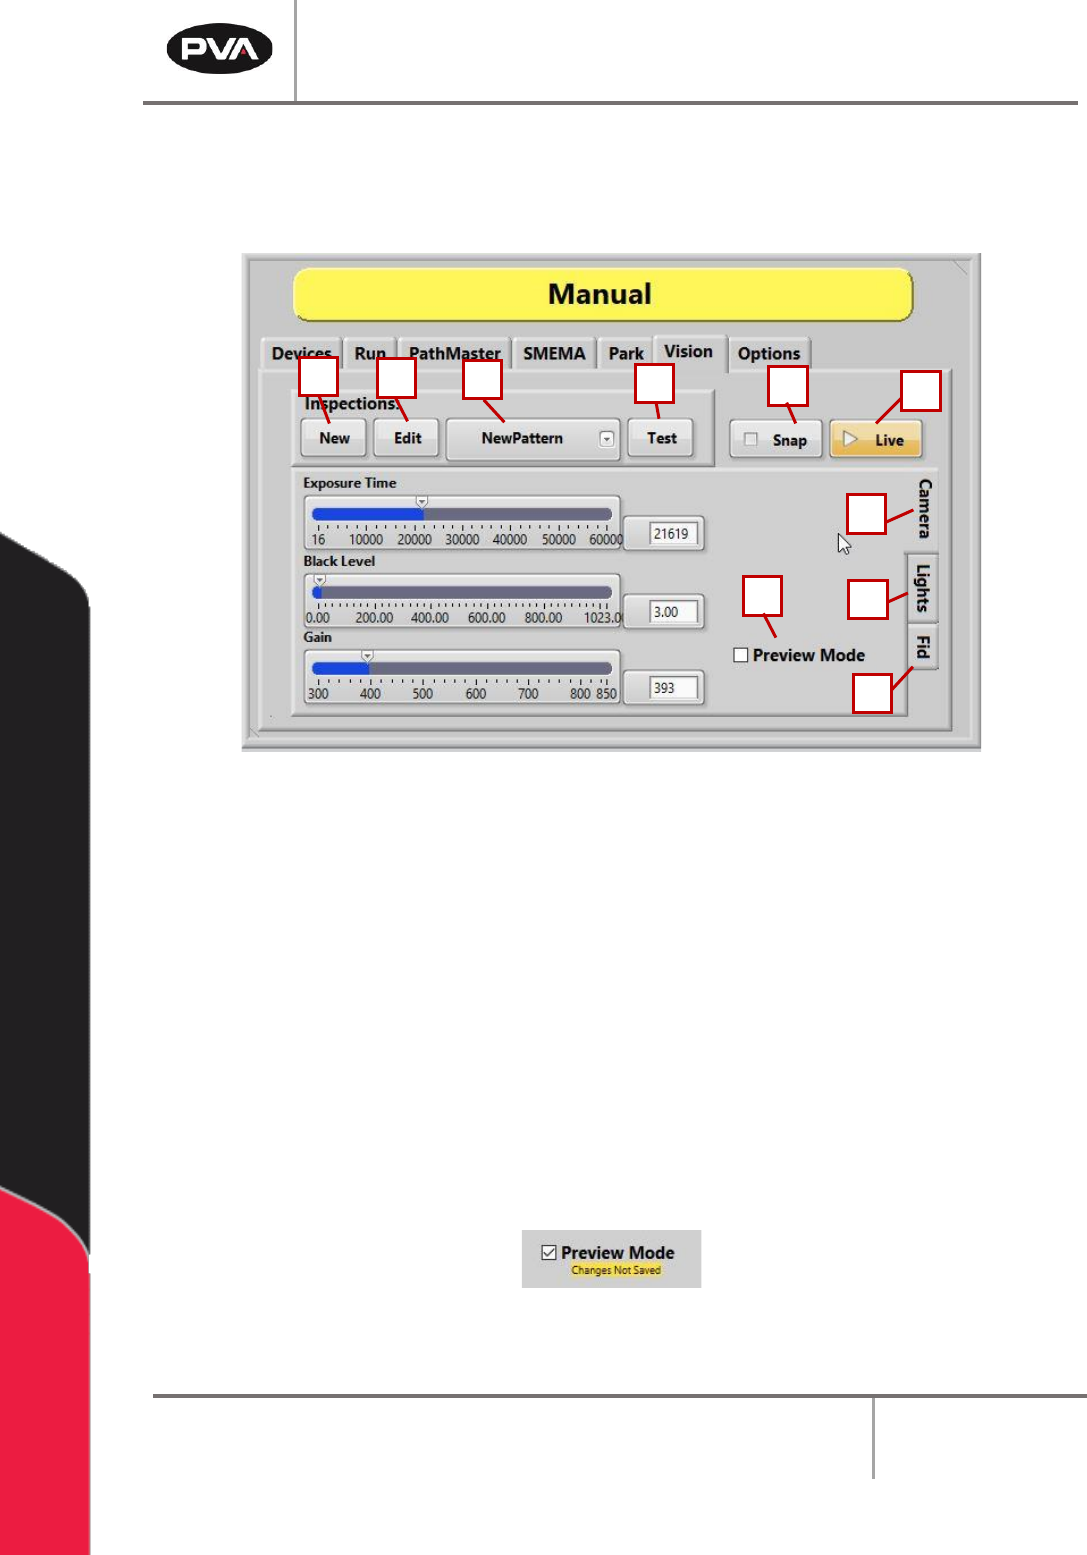
6.6.2 Manual Mode Vision Window
The Vision Window in Manual mode is used to set inspection attributes, create new
fiducials from a template, and edit and test inspections.
Figure 16: Vision Tab
1. Select the “New” button to create a new inspection from a list of templates.
2. Select the “Edit” button to take the current image and open NI Vision Builder to edit
the steps of the current inspection.
3. Select the New Pattern drop down menu to create a new pattern.
4. Select the “Test” button to take the current image and run the current inspection.
5. Select the “Snap” button to save the current live image.
6. Select the “Live” button to toggle the camera live mode on and off.
7. Select the “Preview Mode” checkbox to toggle the preview mode on and off.
Figure 17: Preview Mode Toggled On
1
2
3
4
6
6
8
9
5
7
10