Portal-Operation-Manual-REV-I.pdf - 第35页
PVA Portal Manual Revision I / Janua ry 2022 Page 35 of 106 6.8 FIS The PVA integra ted Factory Informa tion System ( F IS ) is an optio nal add-on. It is configurable a nd will interface with the majorit y of factor y i…
PVA Portal Manual
Revision I / January 2022
Page 34 of 106
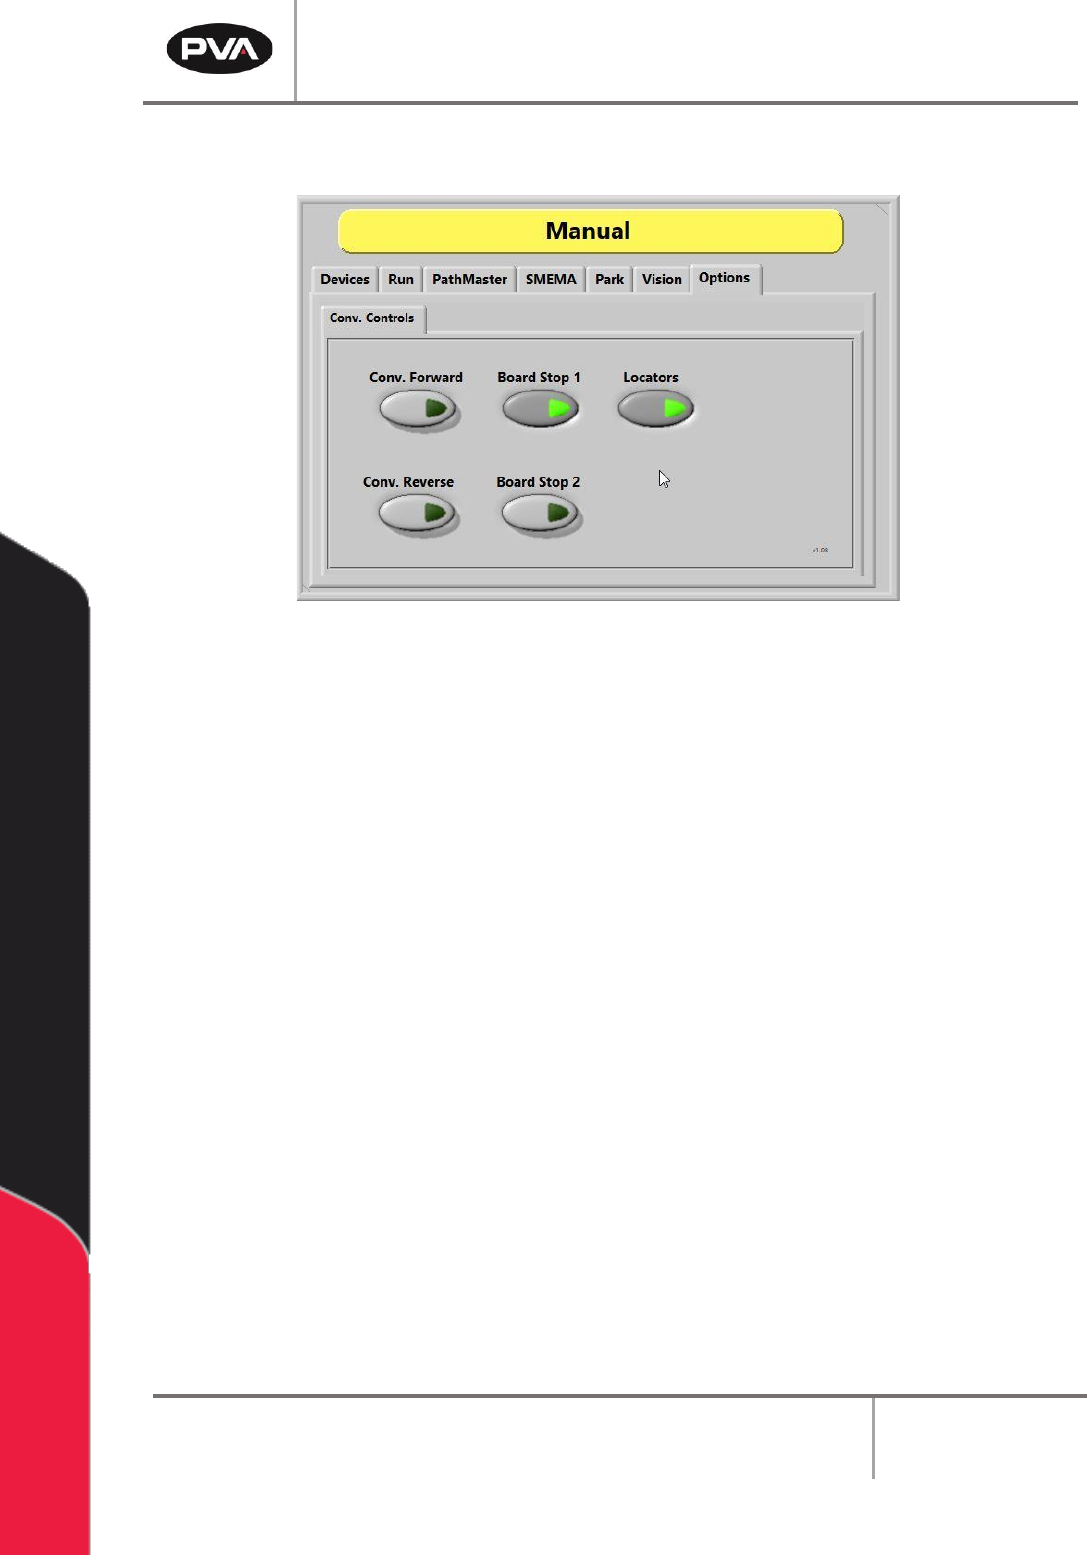
6.7 Conveyor Controls
Figure 28: Conveyor Controls
The conveyor and the board stops are controlled in the “Conv. Controls” tab found under
the ”Options” tab. These options allow the operator to adjust the position of the boards in
the workcell.
Note: Only workcells with conveyors will have this option.
1. Select the “Options” tab and then the “Conv. Controls” tab.
2. Select the “Conv. Forward” button to move the conveyor forward.
3. Select the “Conv. Reverse” button to reverse the conveyor direction.
Note: This option is only available on bi-directional systems.
4. Select the “Board Stop 1” button to turn the board stops on or off.
5. Select the “Board Stop 2” button to turn the board stops on or off. Board Stop 2
operates the upstream board stops for bi-directional systems. This feature can also
be for any additional stops like a buffer, queue zone, or conveyor.
6. Select the “Locators” button to move the locators to the up or down position.
Note: This is an optional feature for workcells with pneumatic-powered board
locators. Only workcells with board locators will have this option. If this feature is
present, the operator can move the board locators to the up and down positions.

PVA Portal Manual
Revision I / January 2022
Page 35 of 106
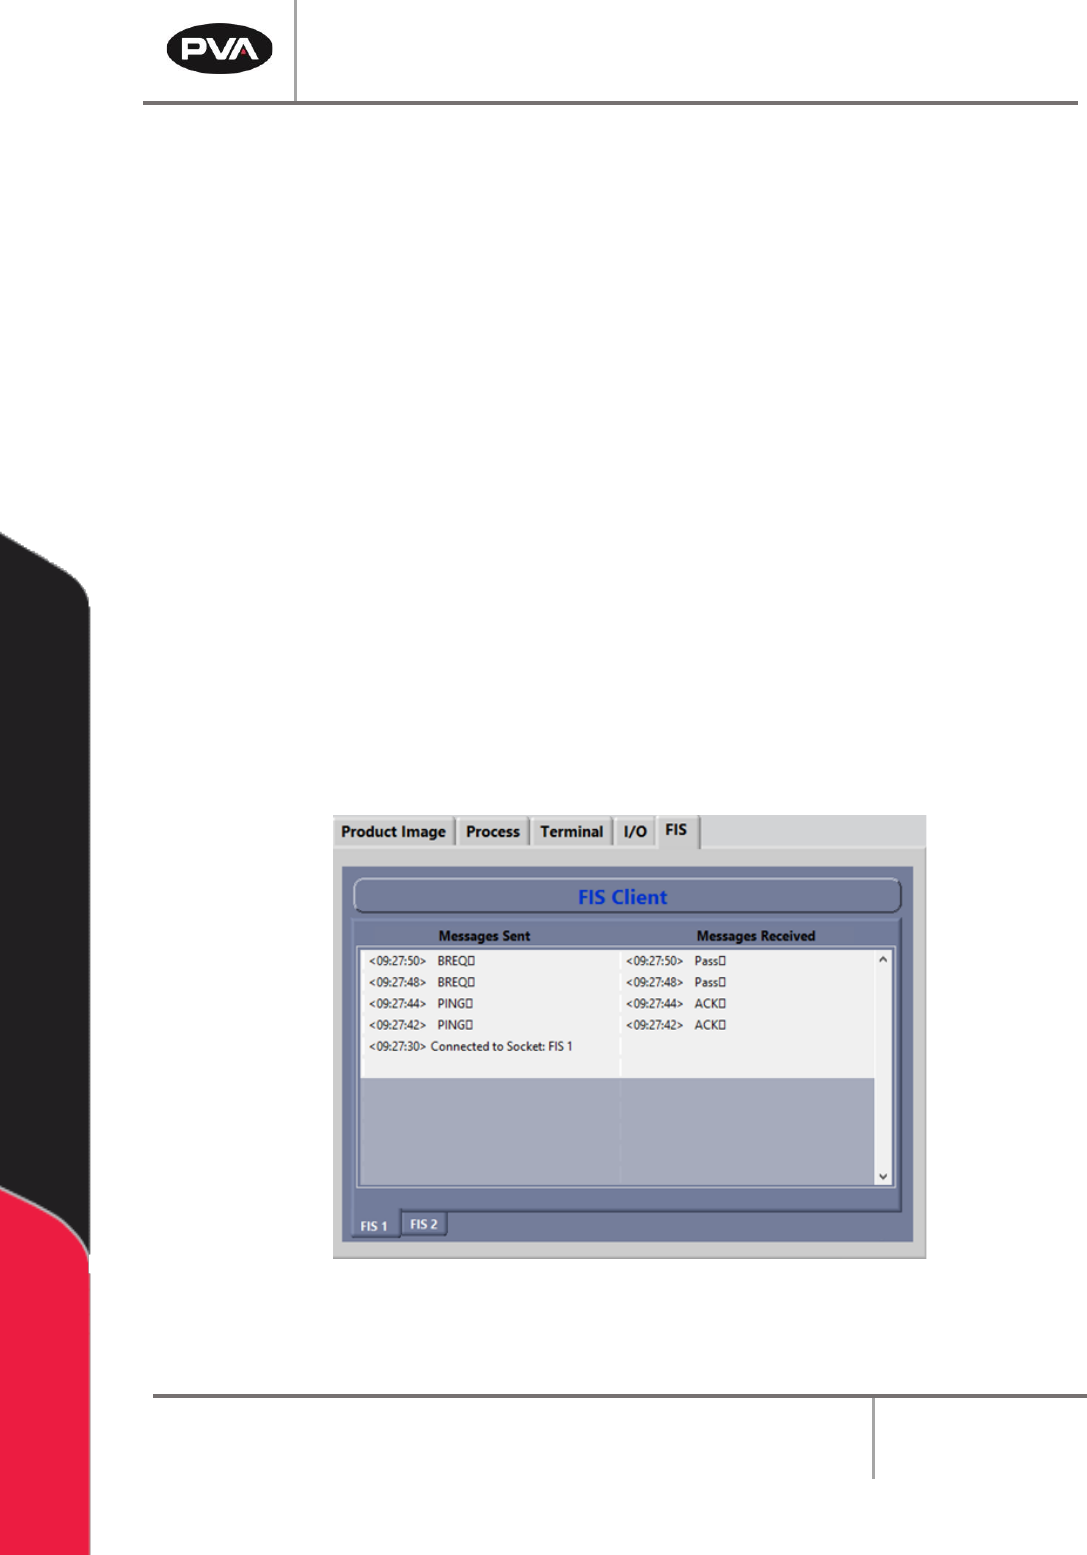
6.8 FIS
The PVA integrated Factory Information System (FIS) is an optional add-on. It is
configurable and will interface with the majority of factory information systems. If
necessary, its messages can be customized.
Figure 29: FIS Client Mode and Message Screens
6.8.1 FIS Client Mode Screen
1. The FIS Client mode screen can be seen in Manual mode when the FIS tab is
selected.
2. To change the display format, select an option from the Display drop down menu
(Normal, ‘\’ Code, Hex Code).
Figure 30: FIS Client Mode Screen
PVA Portal Manual
Revision I / January 2022
Page 36 of 106
3. Select the Server drop down menu to select the server for which to send a
message. The server list is specific to each workcell.
4. Select the message to send from the Message drop down menu. The message will
be shown in the message box.
5. If the Custom Message option is selected from the Message menu, the message
window can be edited. To edit the message window, use the keyboard and type the
message exactly as it should be received by the server.
6. Select the “Clear” button to clear the custom message. The “Clear” button is only
available for custom messages.
7. After selecting or typing the message, select the “Send” button to send the
message.
8. Select the “Refresh” button to refresh any dynamic data in the message, such as a
Galil variable. The “Refresh” button is not shown for custom messages.
6.8.2 FIS Client Message Screen
1. To see the FIS Client message screen, select the FIS tab from the Systems tab.
Figure 31: Message Terminal