MD600 Series Compact AC Drive Hardware Guide-EN-B06.PDF - 第62页
Installation ‑61‑ 3. Install the guide rail to the snap-fit joint on the drive, as shown in ④. 4. Press the guide rail latch down to the place to lock the guide rail, as shown in ⑤. Scenario 2: The guide rail is installe…
Installation
‑60‑
Procedure
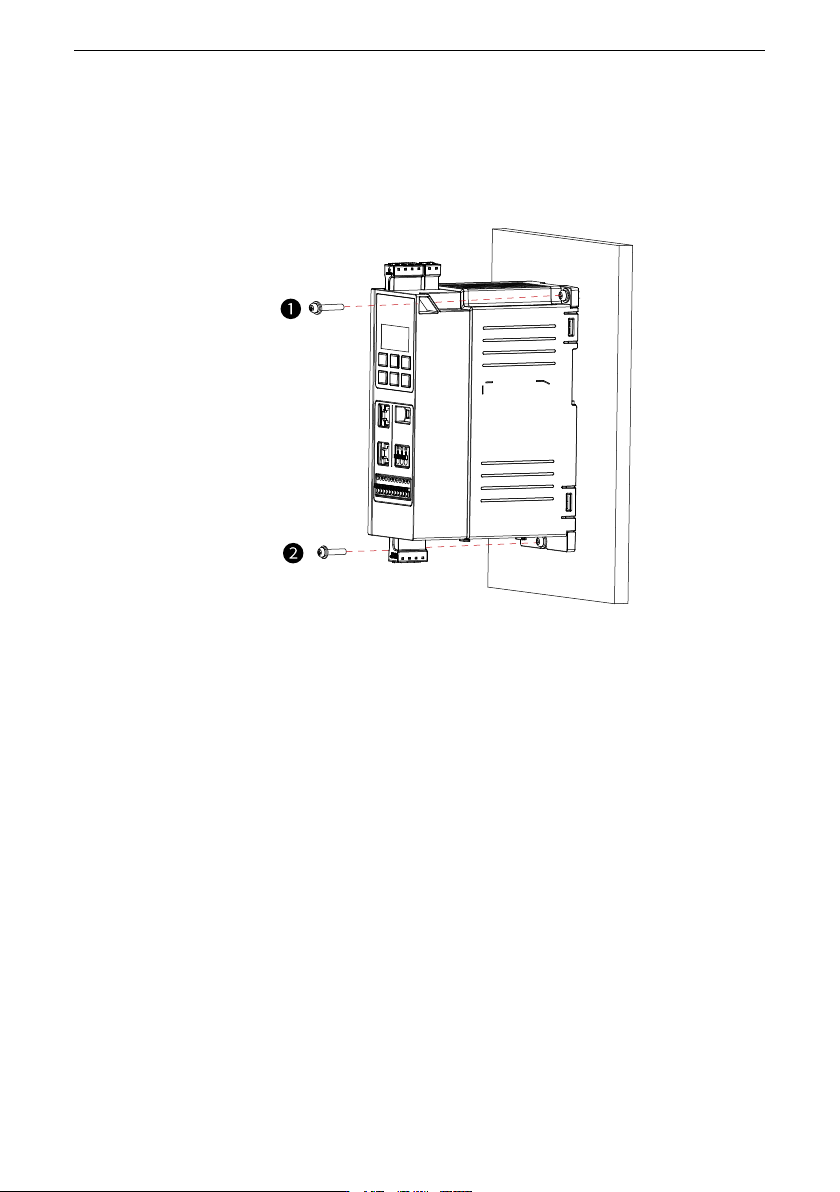
1. Use a Phillips screwdriver to secure the M4x12 cross recessed pan head SEMS
screw (with the flat washer and spring washer) on the upper right side of the
drive, as shown in ①.
2. Repeat the previous step to fix the screw below the drive, as shown in ②.
5.3.1.2 Guide Rail Mounting
Install the guide rail for T1 models (three-phase 380-480 V: 0.37-2.2 kW; single-phase
200-240 V: 0.37-1.5 kW). For T2 models (three-phase 380-480 V: 4-5.5 kW; single-phase
200-240 V: 2.2 kW), the guide rail is not required.
Prerequisites
● To install the AC drive with a guide rail, order the DIN guide rail (option). For details,
see
"12.1 List of Options
"
on page 102
.
● Before installation, check that the installation tools and environment have been
prepared. For details, see
" Pre-installation Preparation
"
on page 56
. This section
describes quick guide rail installation steps.
Procedure
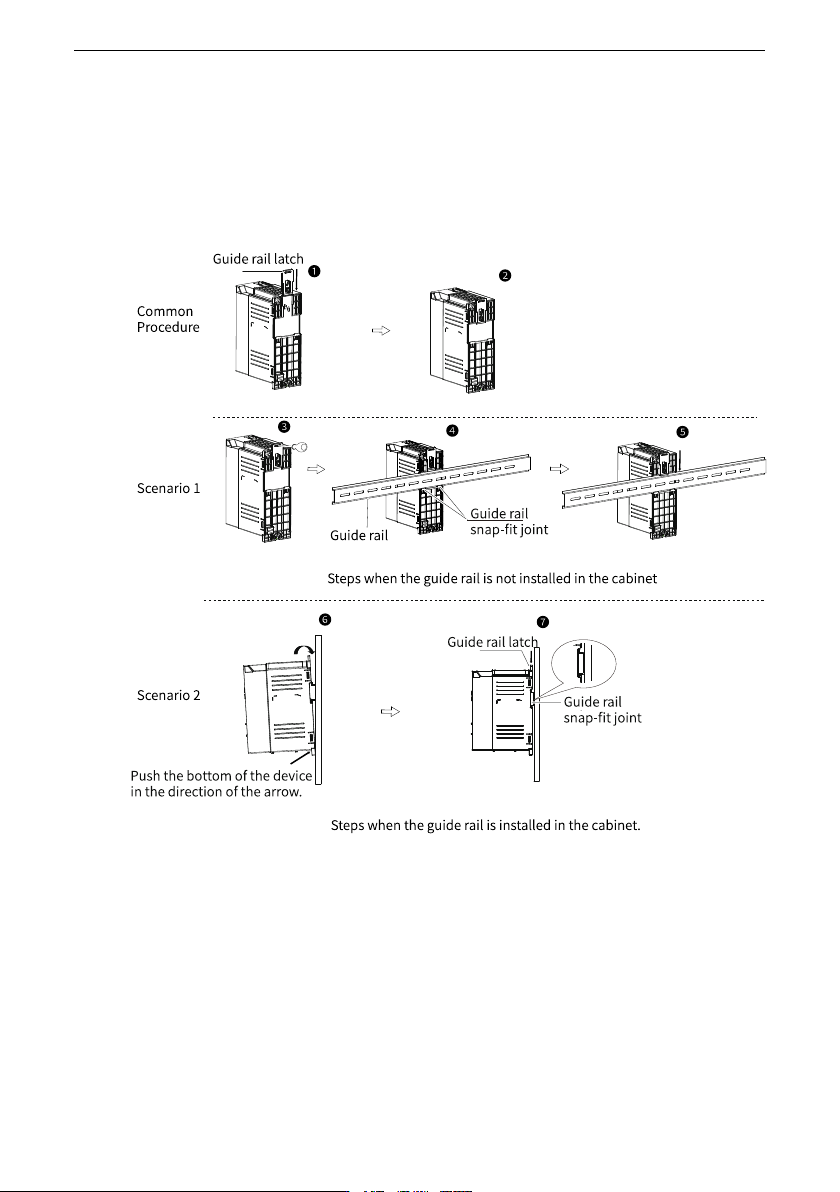
1. Insert the guide rail latch into the slot at the bottom of the drive until it clicks into place,
as shown in ①.
Figure ② shows that the guide rail is installed in place.
Scenario 1: The guide rail is not installed in the cabinet.
2. Use the straight screwdriver to pull the guide rail latch up slightly, as shown in ③.
Installation
‑61‑
3. Install the guide rail to the snap-fit joint on the drive, as shown in ④.
4. Press the guide rail latch down to the place to lock the guide rail, as shown in ⑤.
Scenario 2: The guide rail is installed in the cabinet.
5. Hold the drive at the fixing position, push the bottom of the drive in the direction of the
arrow to the place to lock it to the snap-fit joint, as shown in ⑥.
6. Press the guide rail latch down to the place to lock the guide rail, as shown in ⑦.
Figure 5‑2 Guide rail installation
5.4 Post-Installation Inspection
After installation is done, check the following items.

Installation
‑62‑
Table 5–6 Post-installation checklist
No. Item
Tick
1
The ceiling height meets the minimum requirements for smooth
ventilation. The air inlet and air outlet are free of obstruction and
have sufficient space. Sufficient space is reserved for safe passing
when the cabinet door is opened.
□
2
All contact protection devices (such as the guard plate) inside and
outside the cabinet are installed.
□