MD600 Series Compact AC Drive Hardware Guide-EN-B06.PDF - 第63页
Installation ‑ 62 ‑ Table 5–6 Post-installation checklist No. Item Tick 1 The ceiling height meets the minimum requirements for smooth ventilation. The air inlet and air outlet are free of obstruction and have sufficient…
Installation
‑61‑
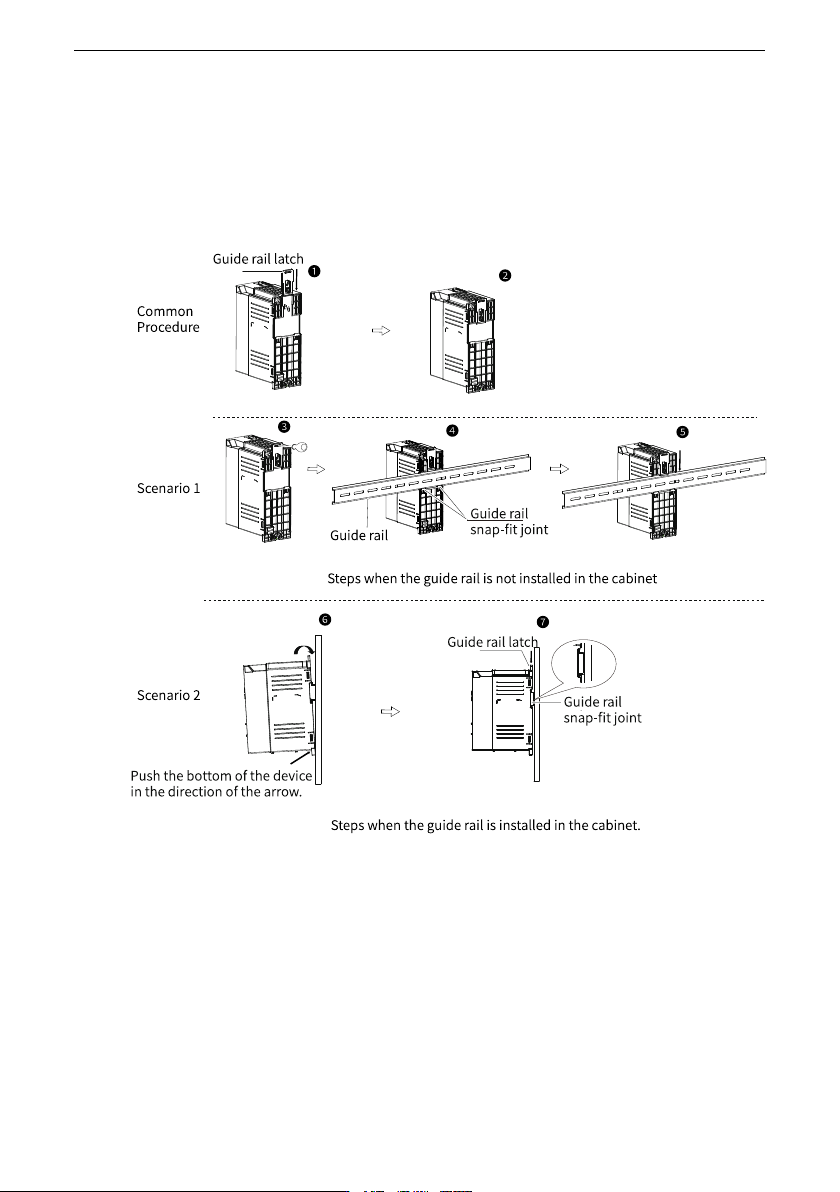
3. Install the guide rail to the snap-fit joint on the drive, as shown in ④.
4. Press the guide rail latch down to the place to lock the guide rail, as shown in ⑤.
Scenario 2: The guide rail is installed in the cabinet.
5. Hold the drive at the fixing position, push the bottom of the drive in the direction of the
arrow to the place to lock it to the snap-fit joint, as shown in ⑥.
6. Press the guide rail latch down to the place to lock the guide rail, as shown in ⑦.
Figure 5‑2 Guide rail installation
5.4 Post-Installation Inspection
After installation is done, check the following items.

Installation
‑62‑
Table 5–6 Post-installation checklist
No. Item
Tick
1
The ceiling height meets the minimum requirements for smooth
ventilation. The air inlet and air outlet are free of obstruction and
have sufficient space. Sufficient space is reserved for safe passing
when the cabinet door is opened.
□
2
All contact protection devices (such as the guard plate) inside and
outside the cabinet are installed.
□
Wiring
‑63‑
6 Wiring
6.1 Pre-wiring inspection
Check the following items before wiring.
Table 6–1 Pre-wiring checklist
No. Item
Tick
1
Cables used during wiring comply with the requirements on the
cross-sectional area and the shield.
□
2
The equipment and the drive are grounded properly.
□
3
Take proper electrostatic discharge (ESD) measures and wear an
antistatic wrist strap.
□
6.2 Main Circuit Connection
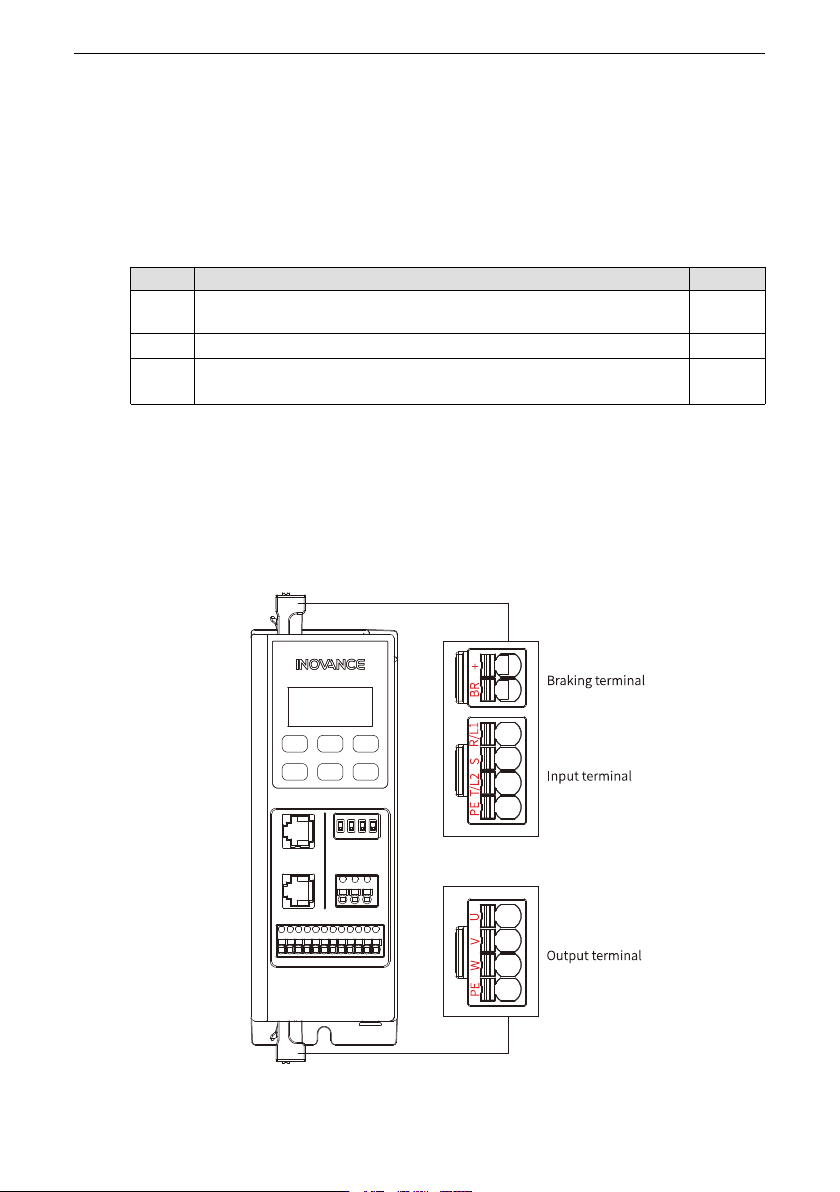
6.2.1 Descriptions of Main Circuit Terminals
Terminal Layout
Figure 6‑1 Arrangement of main circuit terminals of T1 to T2 models