MAN00000772_SI-G200BB_SVCPDFA.pdf - 第668页
Ch ange Procedu re fo r PWB Ca mera [Reassembl y] 3 Attach the PWB C amera (B ) Assy 1. Put PWB Camer a (B) Assy betwe en Came ra support. 2. T empor arily tighten the screws(2-C4x 18). 4 Attach the PWB Camer a cable. 1.…
Change Procedure for PWB Camera
Change Procedure for PWB Camera
[Disassembly]
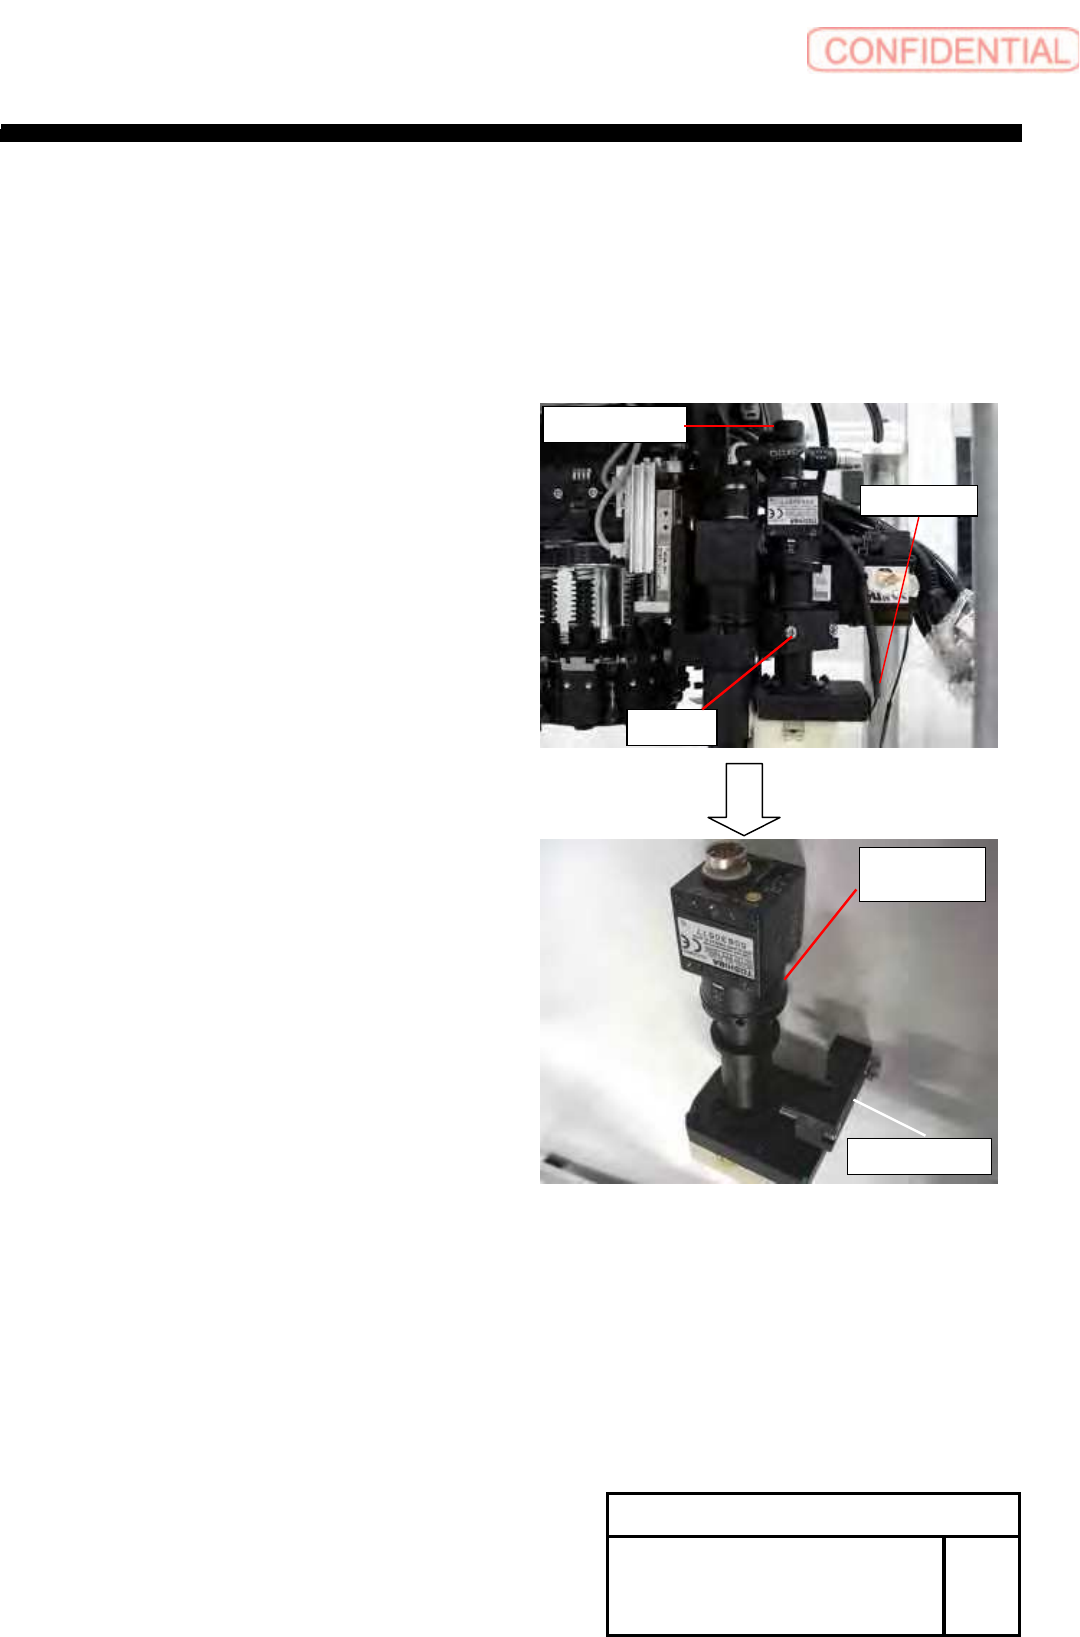
1 Remove the PWB Camera Cable.
1.Camera cable
2.LED cable
2 Remove the PWB Camera(B)Assy
1.Remove the screws(2-C4x18)
2. Camera support and PWB Camera(B)Assy
Change Procedure for Board
Camera
RPGB-10401-1
SEET
1/2
Camera cable
C4x18
Camera Support
PWB
Camera (B )
Assy
LED cable
Change Procedure for PWB Camera
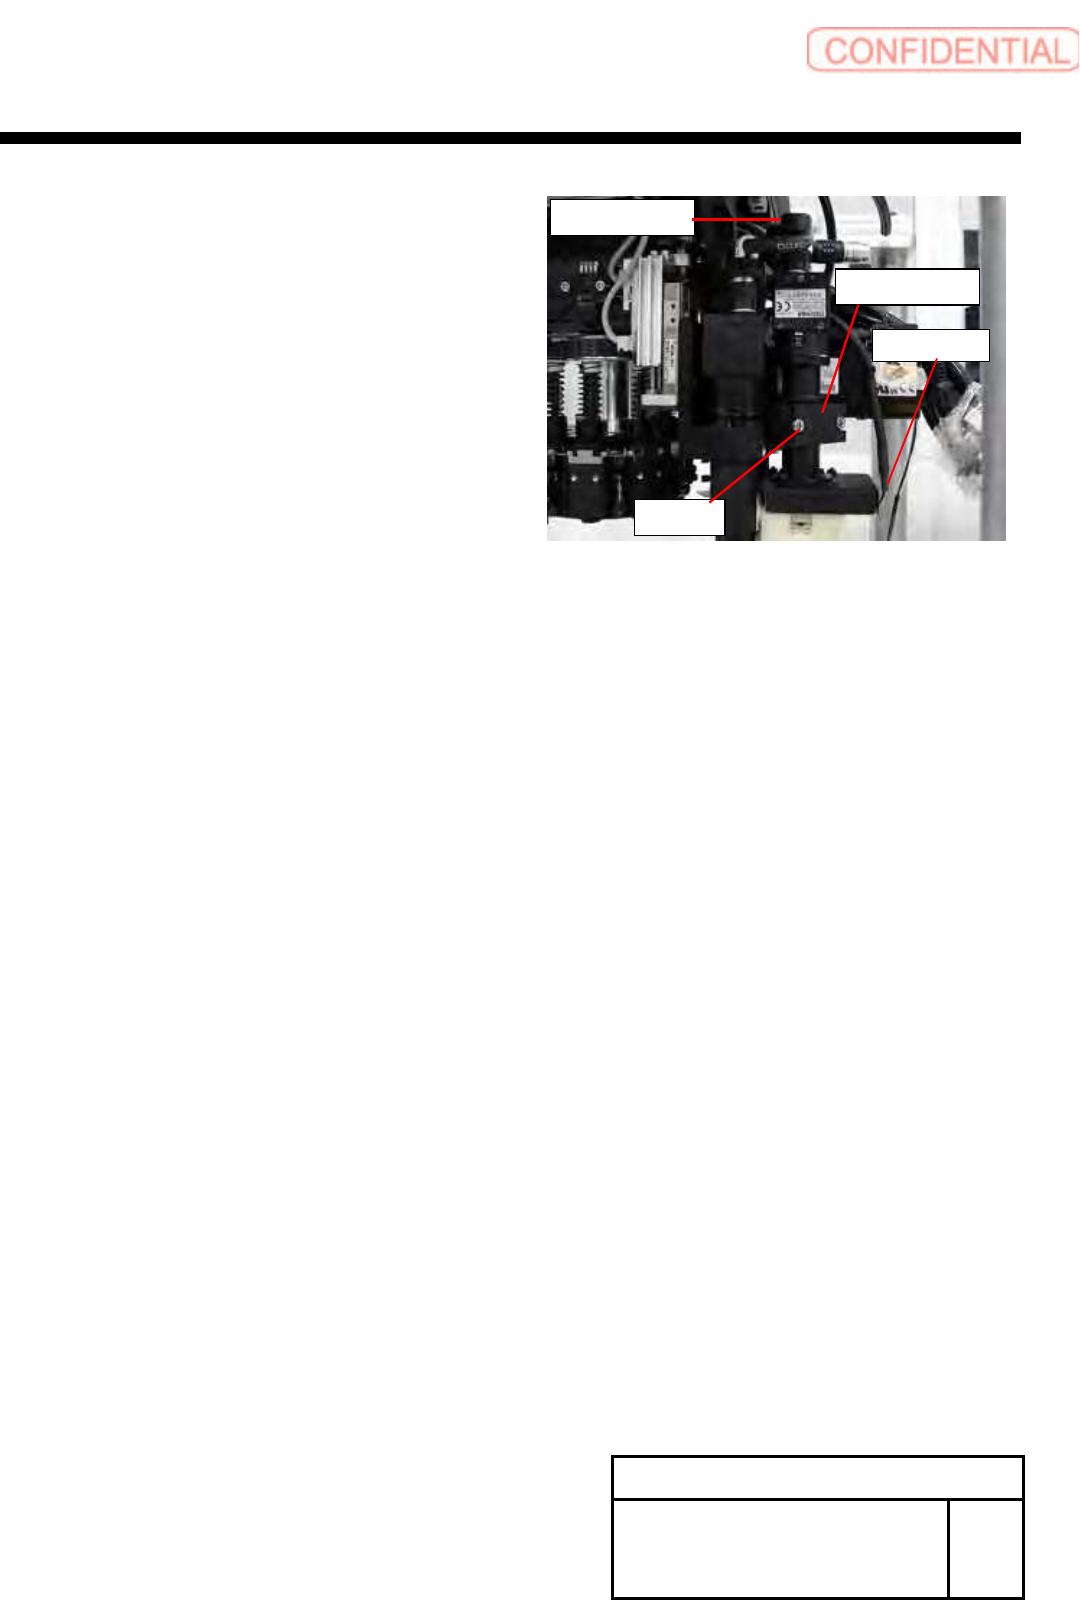
[Reassembly]
3 Attach the PWB Camera (B) Assy
1. Put PWB Camera (B) Assy between Camera support.
2. Temporarily tighten the screws(2-C4x18).
4 Attach the PWB Camera cable.
1.Camera cable
2.LED cable
[Adjustment]
5 Calibration
1.HLGB-10204-01 PWB Camera Setup
2.HLBG-10205-01 Fiducial Mark Setup
3.HLBG-10101-01 Preparation for Calibration
4.HLBG-10301-01 Calibration
Change Procedure for Board
Camera
RPGB-10401-1
SEET
2/2
Camera cable
C4x18
Camera support
LED cable
Change Procedure for RN Axis Motor Unit
Change Procedure for RN Axis Motor Unit
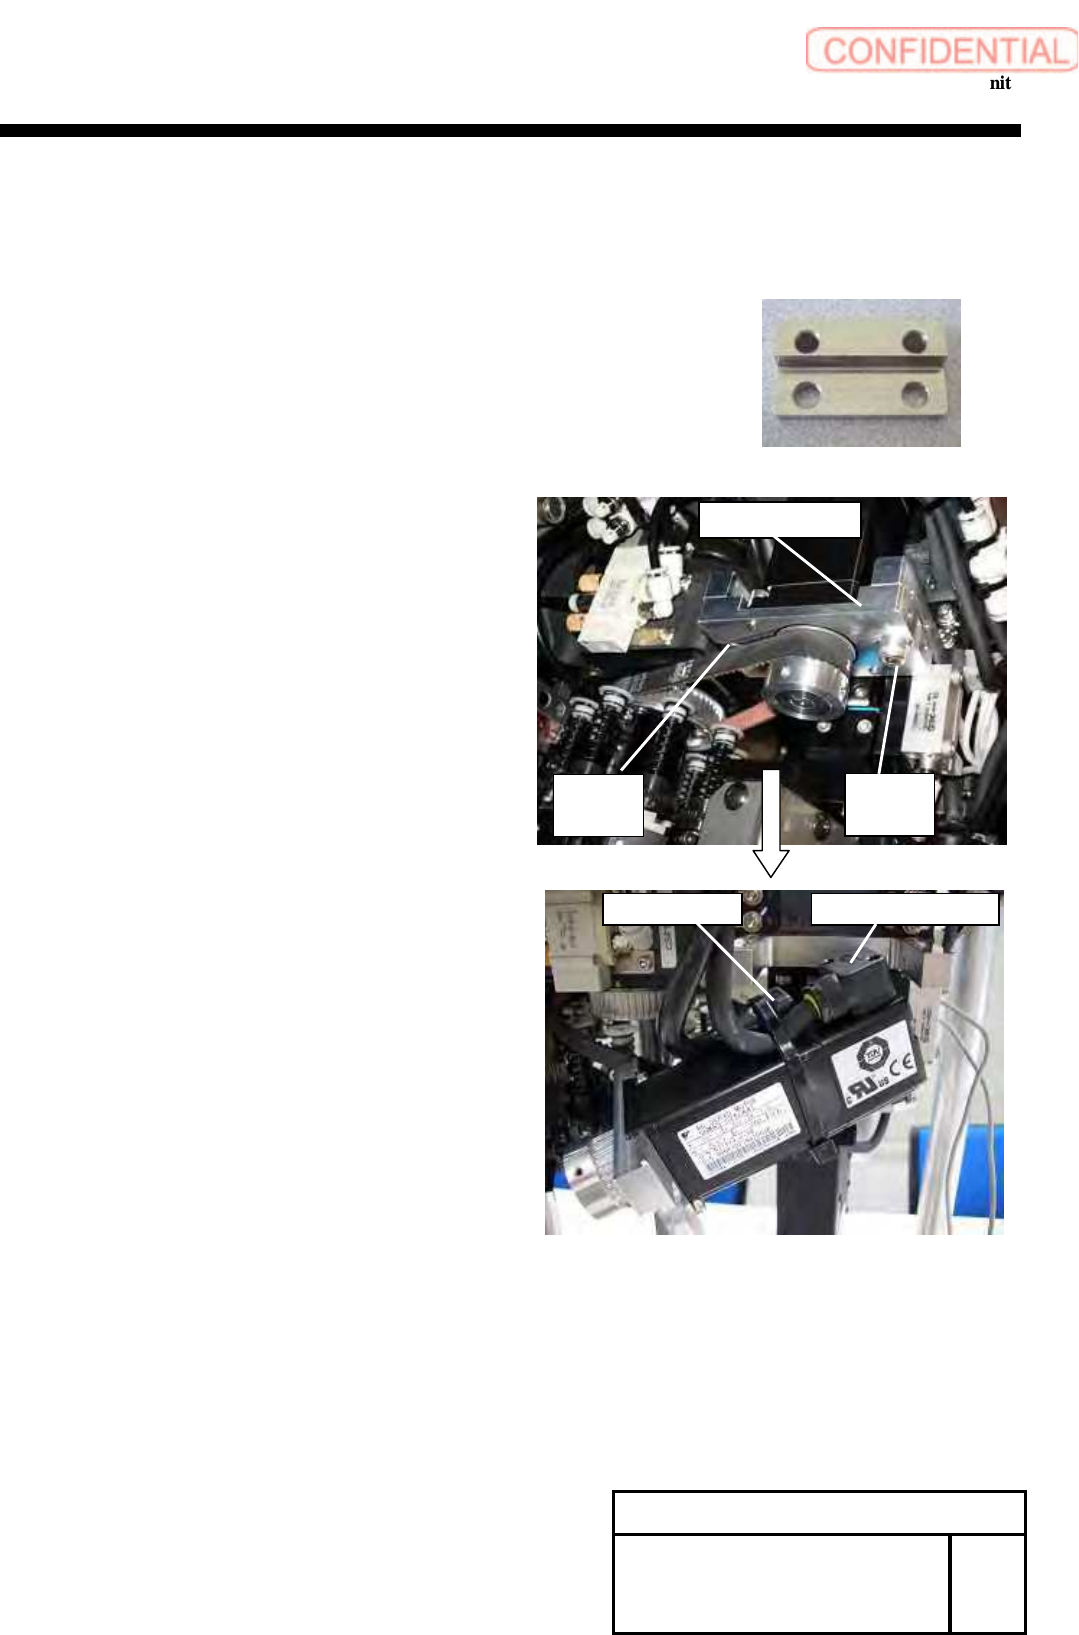
[Necessary Jigs]
Tension Meter (UNITTA U-507)
Belt Tension Jig (For B)
[Disassembly]
1 Open the front and rear slide doors of the main body.
2
Push the head base to the center.
3 Remove the screws (C5x20,C5x15,2-W5) and
Detach the RN Bracket (B).
4 Cut the cable tie locking the wiring of motor.
5 Remove the power cable and the encoder cable
of the motor.
Change Procedure for RN-axis
Motor Unit
RPGB-10501-1
SEET
1/3
RN bracket (B)
C5x15
W5
C5x20
W5
Encoder cable Power cable