4OM-1345-009_w.pdf - 第116页
1-60 AKHEMT -ID (22) T o check the results of the teaching operation, press the [T each Result] button. The results are displayed, enabling you to check the offset data. Fig. 4A58 "LINEAR MEASURE CLEANING" Wind…
1-59
AKHEMT-ID
(13) Open the cover.
CAUTION
CAUTION
The load power to the motors, etc., is turned OFF but the
maintenance operation must be performed carefully, protecting
your hands from any injury.
(14) Move the placement head manually to an easy-to-access position for
cleaning.
(15) Wipe the light emitter and receiver of the linear measure sensor (located
at the bottom of the head) softly with a cotton swab (cotton loosened
and soaked in absolute ethanol).
Notice
Be sure not to rub the surface of the linear measure sensor strong.
Otherwise, the sensor may be damaged.
(16) Close the cover.
(17) Press the [READY] switch. The LED illuminates.
The cover is locked.
(18) Press the [Garbage Chk Start] button.
"OK" or "NG" appears in the "Garbage Chk" text box of the selected
head.
When "OK" is displayed, proceed to Step (19).
When "NG" is displayed, go back to Step (11).
When "OK" is not displayed even after the required steps are repeated
several times, the linear measure sensor must be replaced with a new
one.
(19) Set the bank feeder change cart back in place and move up the feeder
base.
Reference
Refer to "2.4.8 Feeder Bases and Bank Feeder Change Cart" in "Chapter
1" of the instruction manual (Vol. 1: Guide) for how to attach the bank
feeder change cart.
(20) Select the [Yes] or the [No] button in the "Noz level" and "Noz pos"
group boxes ("Teaching Mode" Group Box) to determine whether or
not a teaching operation should be performed.
(21) Press the [Nozzle Set / Teach Start] button to attach the vacuum nozzle
to the placement head.
When the [Yes] buttons are selected in the "Noz level" and "Noz pos"
group boxes in Step (20), both nozzle attachment and teaching operation
are executed.
0602-001
4.5 Cleaning of Linear Measure Sensor
1-60
AKHEMT-ID
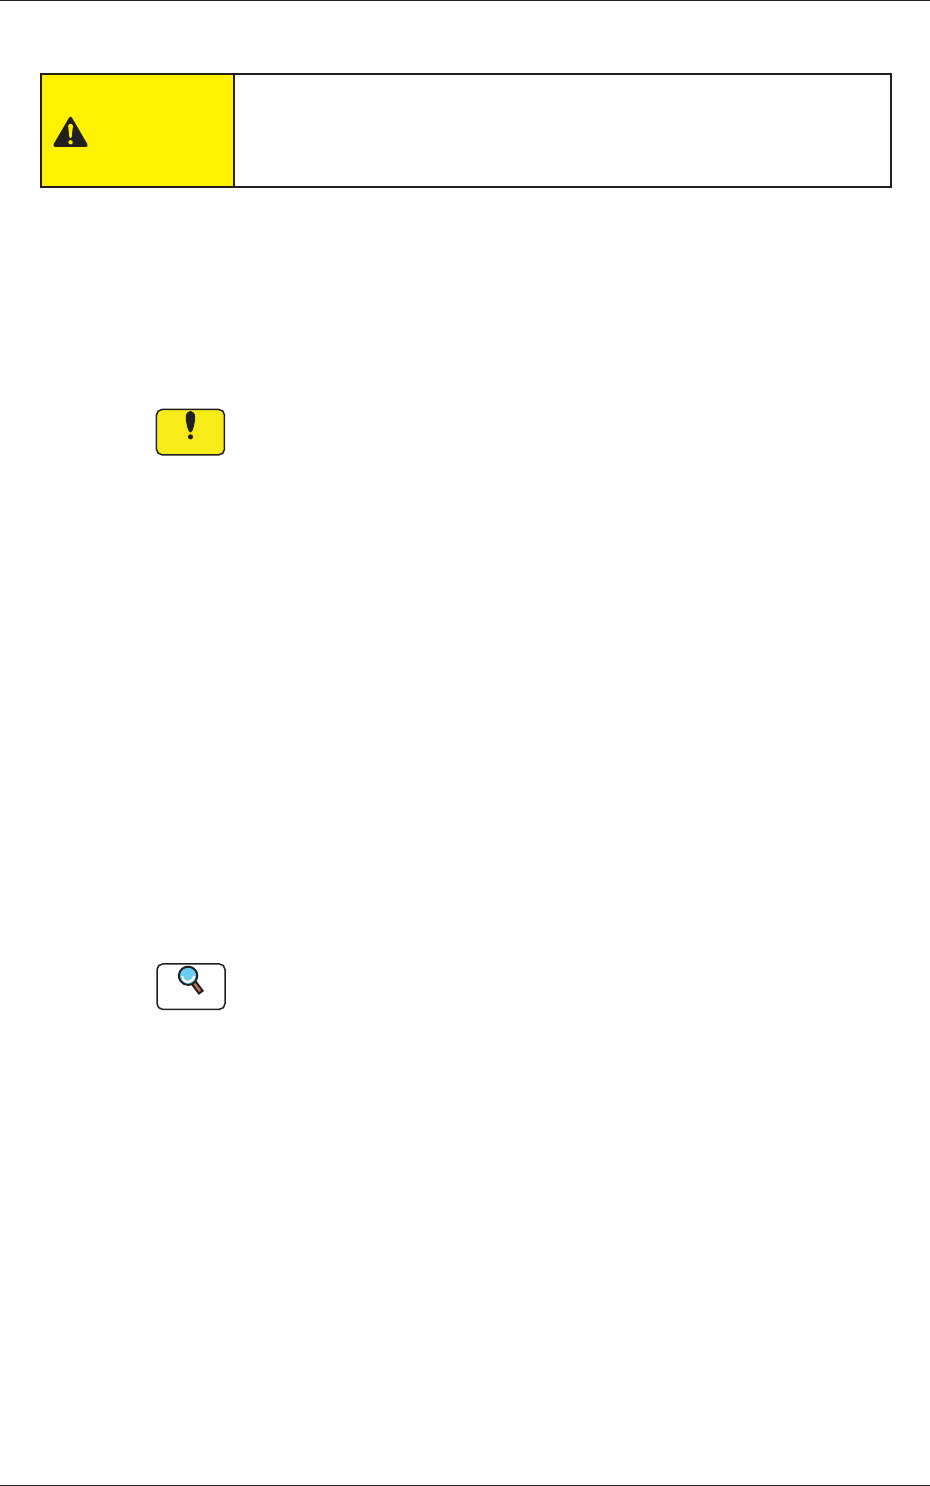
(22) To check the results of the teaching operation, press the [Teach Result]
button.
The results are displayed, enabling you to check the offset data.
Fig. 4A58 "LINEAR MEASURE CLEANING" Window
([Teach Result] Button Selected)
(23) Press the [End] button.
When the teaching operation is executed, a confi rmation dialog box
opens. Select either the [Yes] or the [No] button to determine whether
or not the data should be saved.
0605-002
4.5 Cleaning of Linear Measure Sensor
1-60-1
AKHEMT-ID
4.6 Replacement Procedure of Vacuum Filters
Time of Replacement
Replace the fi lters with new ones every three months.
Vacuum
Filters
Vacuum
Filters
Fig. 4A59 Filter Holder
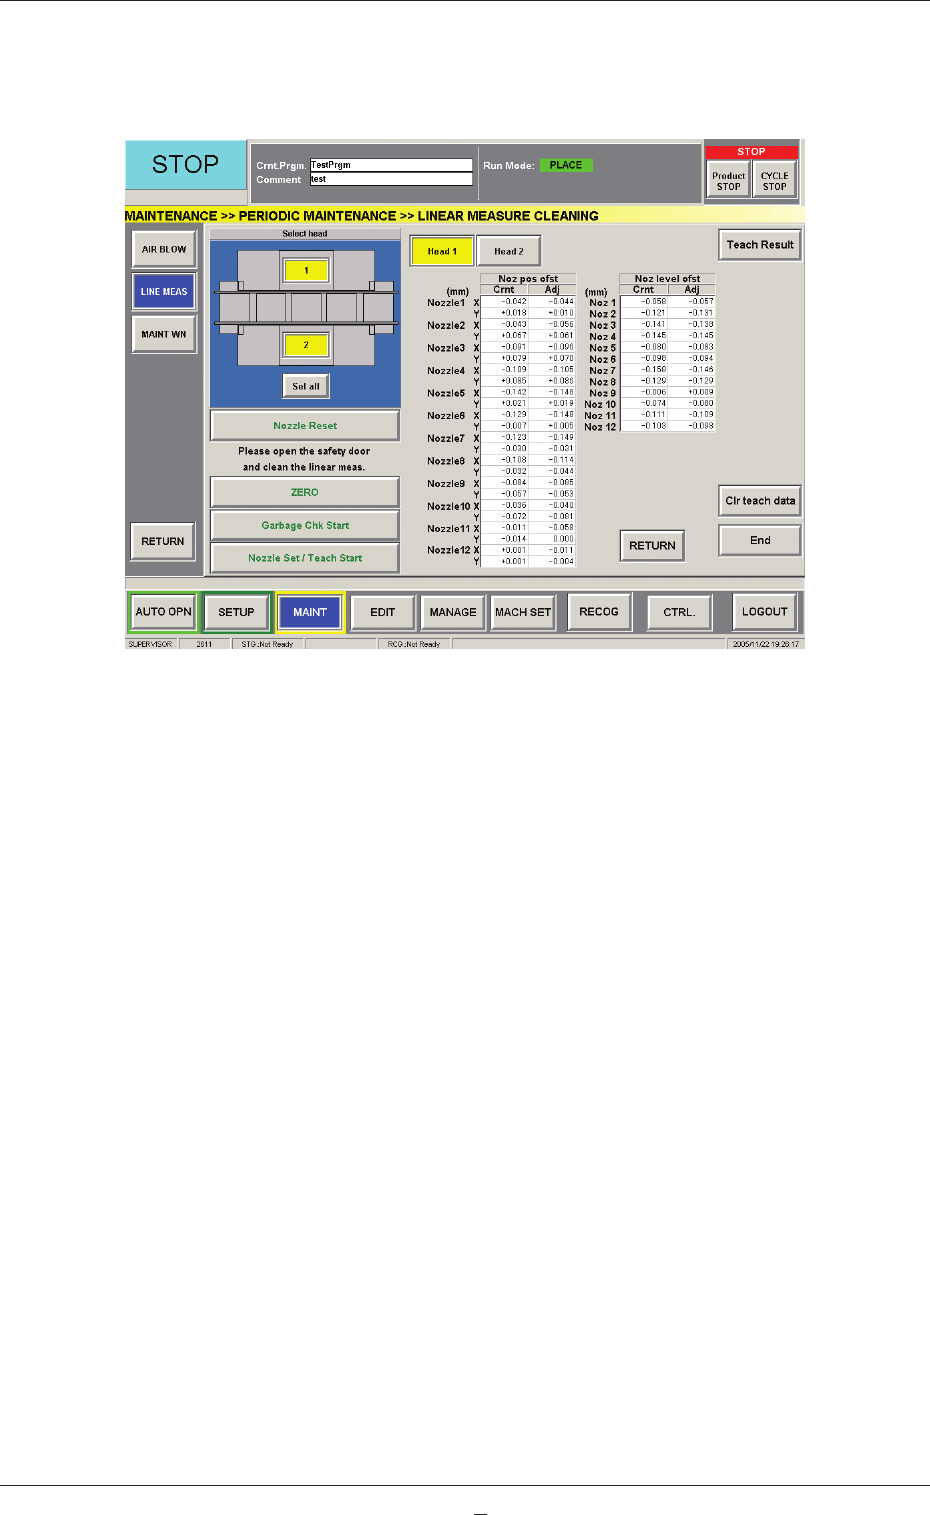
Required Item
Filter Replacement Jig
Fig. 4A60 Filter Replacement Jig
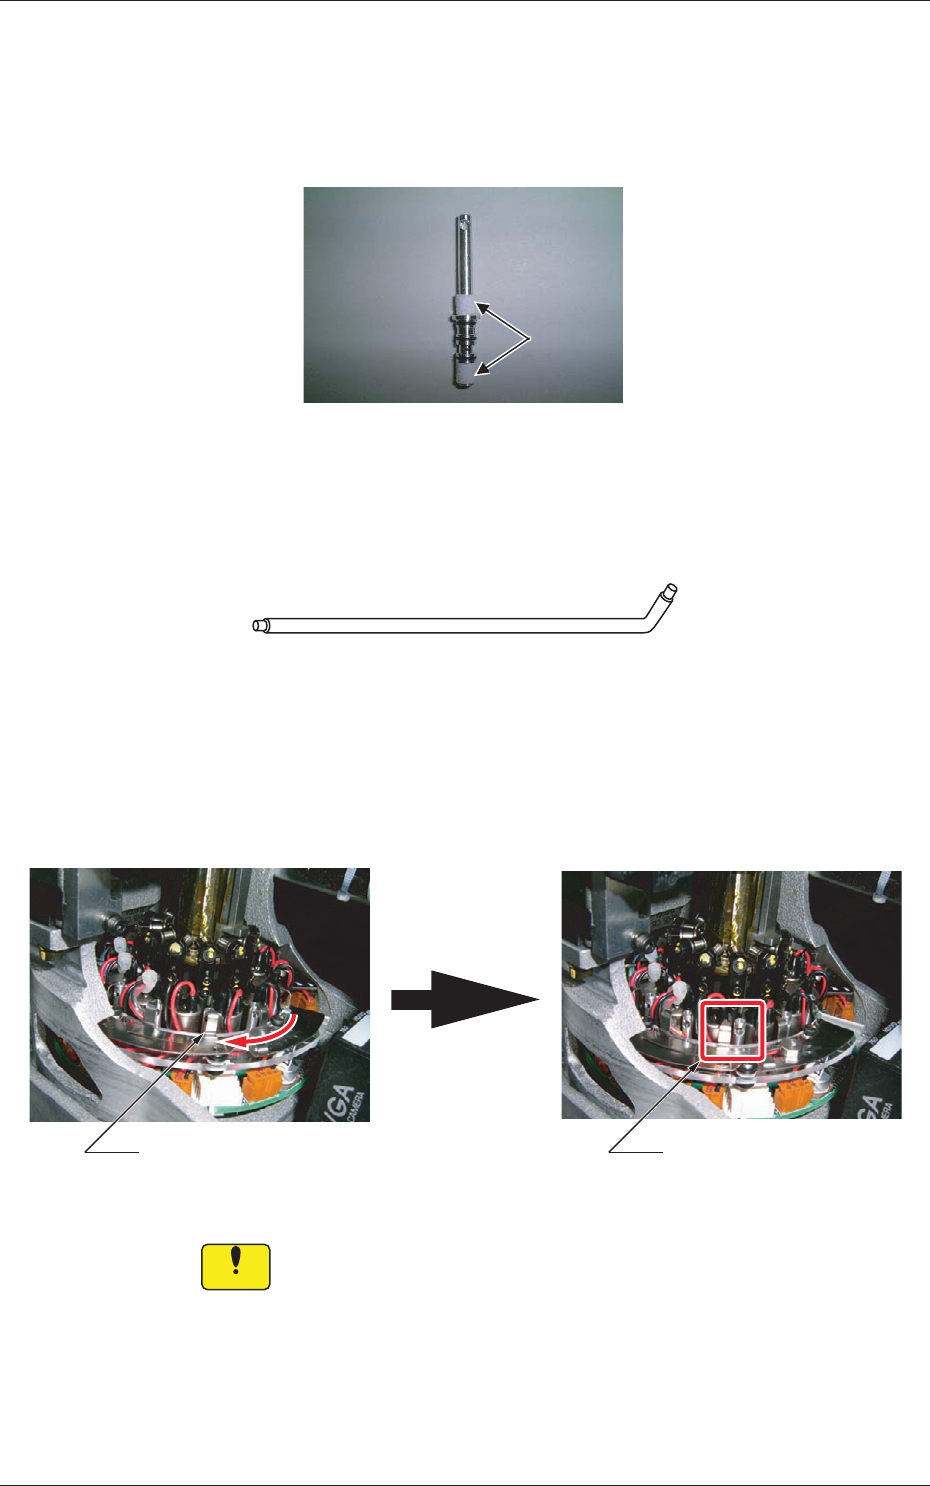
Replacement Procedure
(1) Slide the fi lter fastener to the left and release the lock of the fi lter
holder.
Filter UnlockedFilter Locked
Fig. 4A61
Notice
Be sure to slide the fi lter fastener so that it does not interfere with the
wiring, etc.
0605-001
4.6 Replacement Procedure of Vacuum Filters