4OM-1345-009_w.pdf - 第76页
1-21 AKHEMT -ID 3.3.2 V acuum System V acuum Pressure (1 Place) Every Day Inspection Required T ime: 1 minute Check the vacuum pressure visually . V acuum V alve Fully Closed: Min. -93 kPa (Min. 70 cmHg) or more Running:…
1-20
AKHEMT-ID
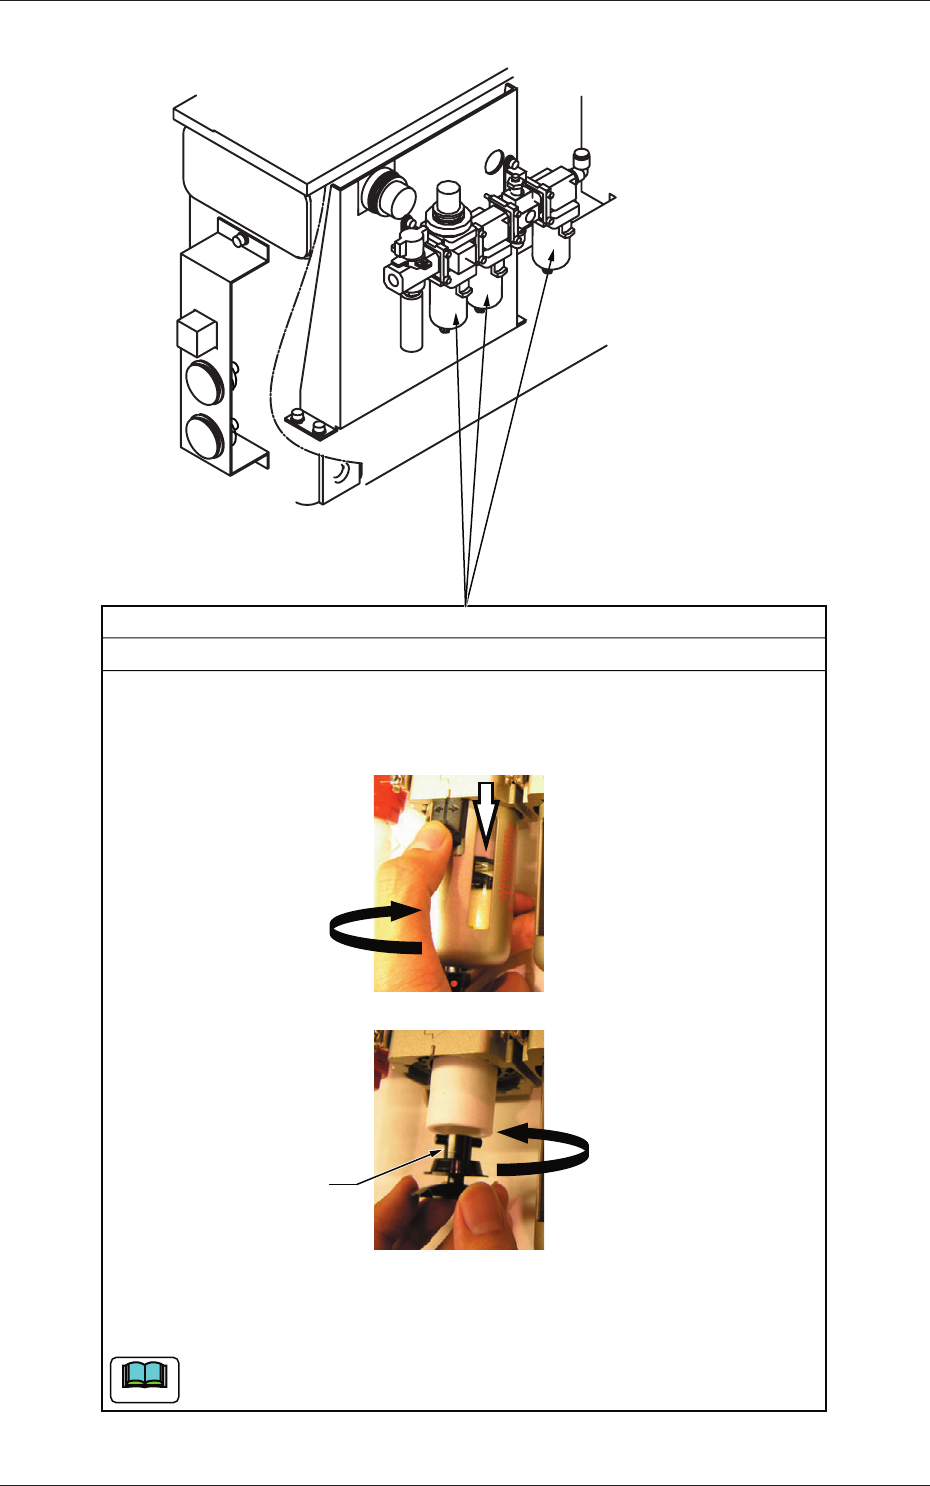
Filter
Every 3 Months Cleaning
(1) Detach the air filter.
While keeping the black part of the cover being slid down, rotate it
one-fourth.
(2) While rotating the filter holder counterclockwise, pull it out.
(3) Pull out the filter and blow air to it for cleaning.
(4) Insert the filter back in place and turn the filter holder clockwise to attach.
(5) Attach the filter cover.
When the filter has become defective, replace it with a new one.
Filter Holder
Required Time: 5 minutes
Note
Fig. 4A11
0602-001
3.3 Inspection, Cleaning, and Lubrication Spots
1-21
AKHEMT-ID
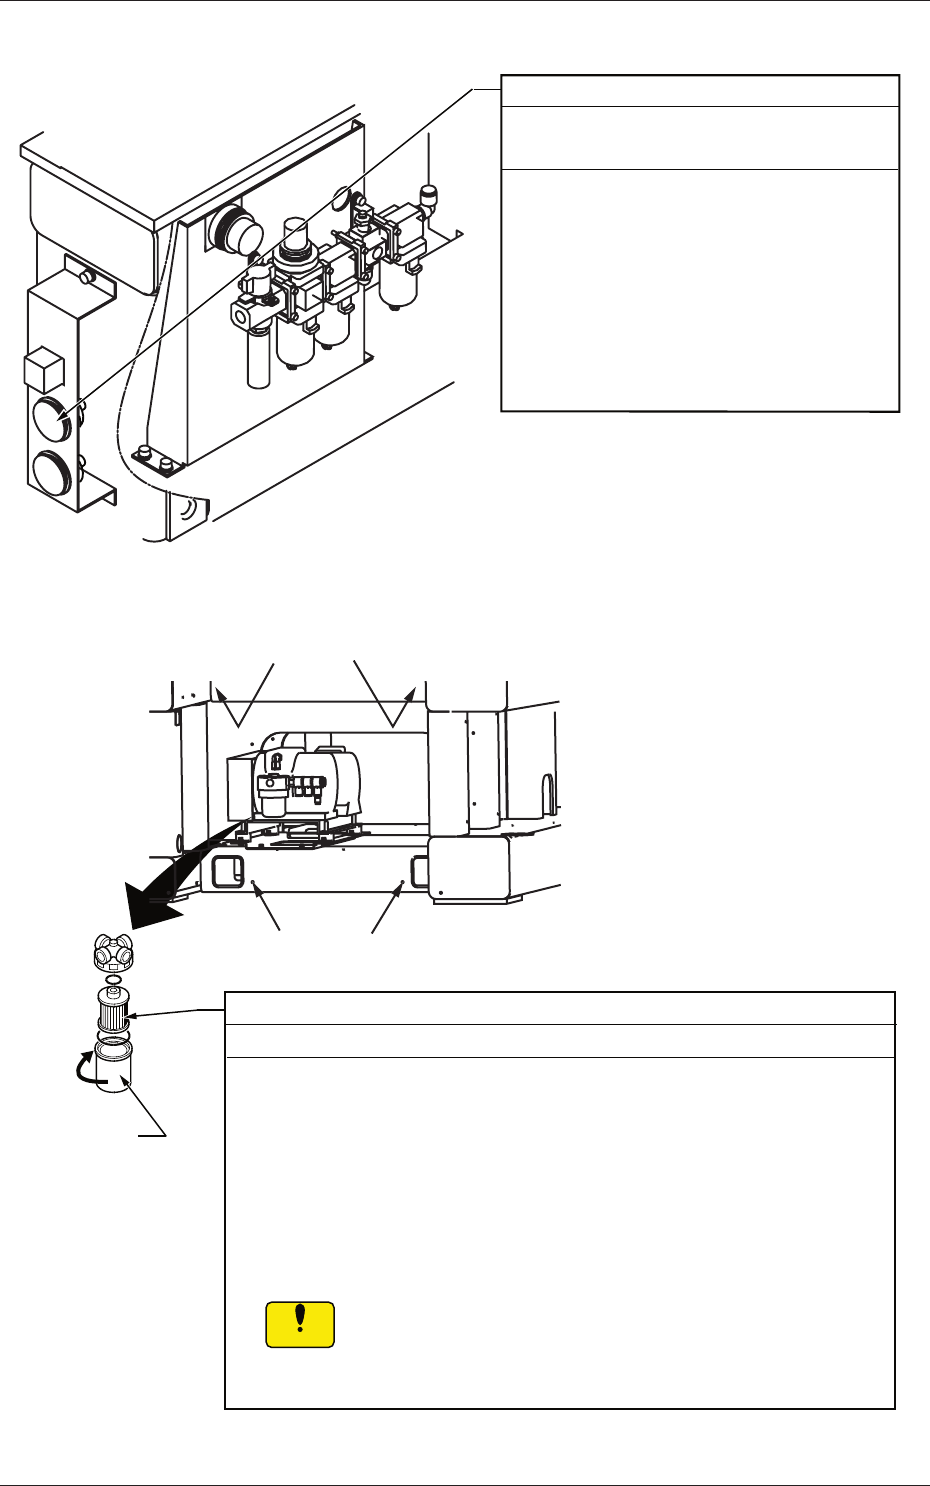
3.3.2 Vacuum System
Vacuum Pressure (1 Place)
Every Day Inspection
Required Time: 1 minute
Check the vacuum pressure visually.
Vacuum Valve Fully Closed:
Min. -93 kPa (Min. 70 cmHg) or more
Running:
Min. -60 kPa (Min. 45 cmHg) or more
When the vacuum pressure is insufficient,
air may be leaking from the vacuum line or
the vacuum pump may have broken down.
Fig. 4A12
C
Setscrews
Filter
Every 3 Months Cleaning
(1) Remove four setscrews fastening the cover located at the lower area
of the front side of the machine and detach the cover.
(2) Rotate the filter case in Arrow Direction C to detach and then take out
the filter.
(3) Blow air to the filter for cleaning.
When the vacuum pressure has dropped during the operation, replace
the filter with a new one.
(4) Attach the cover and tighten the setscrews.
If a clearance is left between the main machine and the
cover, the tape will pop out from the clearance during the
operaton, causing the machine to breakdown or generate
an error.
Filter Case
Setscrews
Notice
Required Time: 5 minutes
Fig. 4A13
0602-001
3.3 Inspection, Cleaning, and Lubrication Spots
1-22
AKHEMT-ID
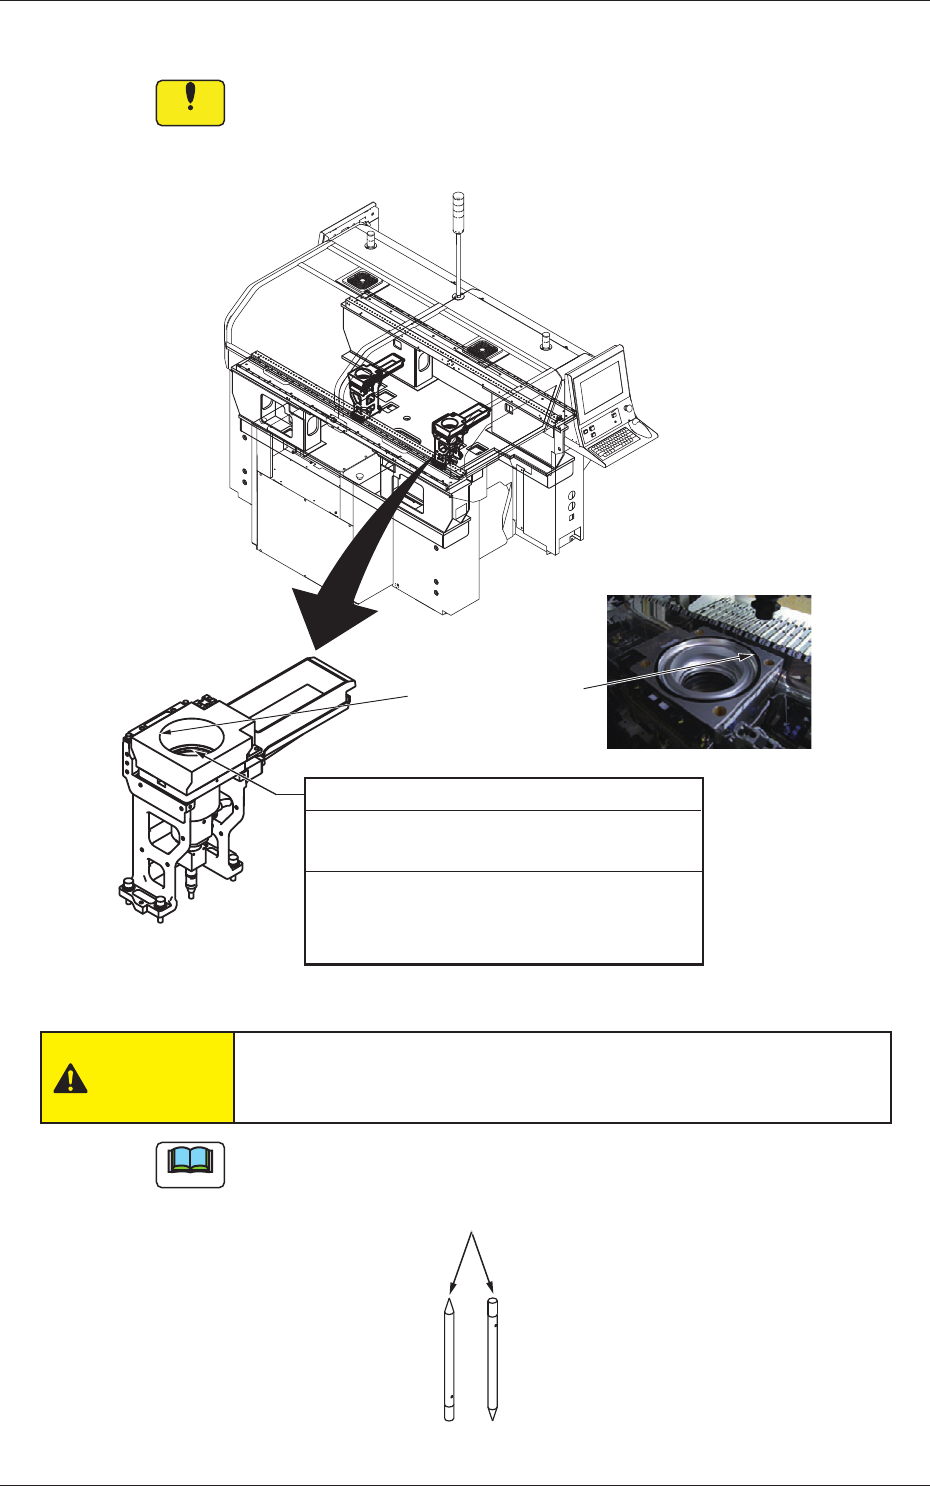
3.3.3 Component Recognition Camera Section
Notice
Be sure to use a suction force such as a vacuum cleaner for the
cleaning.
Do not blow air to any cleaning section with an air gun.
Hood
(for BGA components)
Component Recognition Camera
Every Day Cleaning
Required Time: 4 minutes
Remove the components that have fallen
with a pair of vacuum tweezers and wipe
off dust with a lens cleaning cloth.
Fig. 4A14
CAUTION
Be sure to wear gloves during cleaning. Otherwise, you may cut
your hands on the edges of the lighting hood.
Note
G-S047-01 Adhesive Cleaner (Part No: 630 133 0679) is also available
as an option.
Adhesive Cleaner
Fig. 4A14-1
0712-003
3.3 Inspection, Cleaning, and Lubrication Spots