4H4CEOM2.pdf - 第24页
Page 7-18 Call by SEQ Call by Comment Skip 4H4C-E-OMA07-A01-03 7-9 Mount Data The mount data is checked and modified. 1. Press Mount data . • The mount data screen appears. 2 . Select the head No. to be checked. 3. Modif…
Page 7-17
DATA MODIFICATION
7
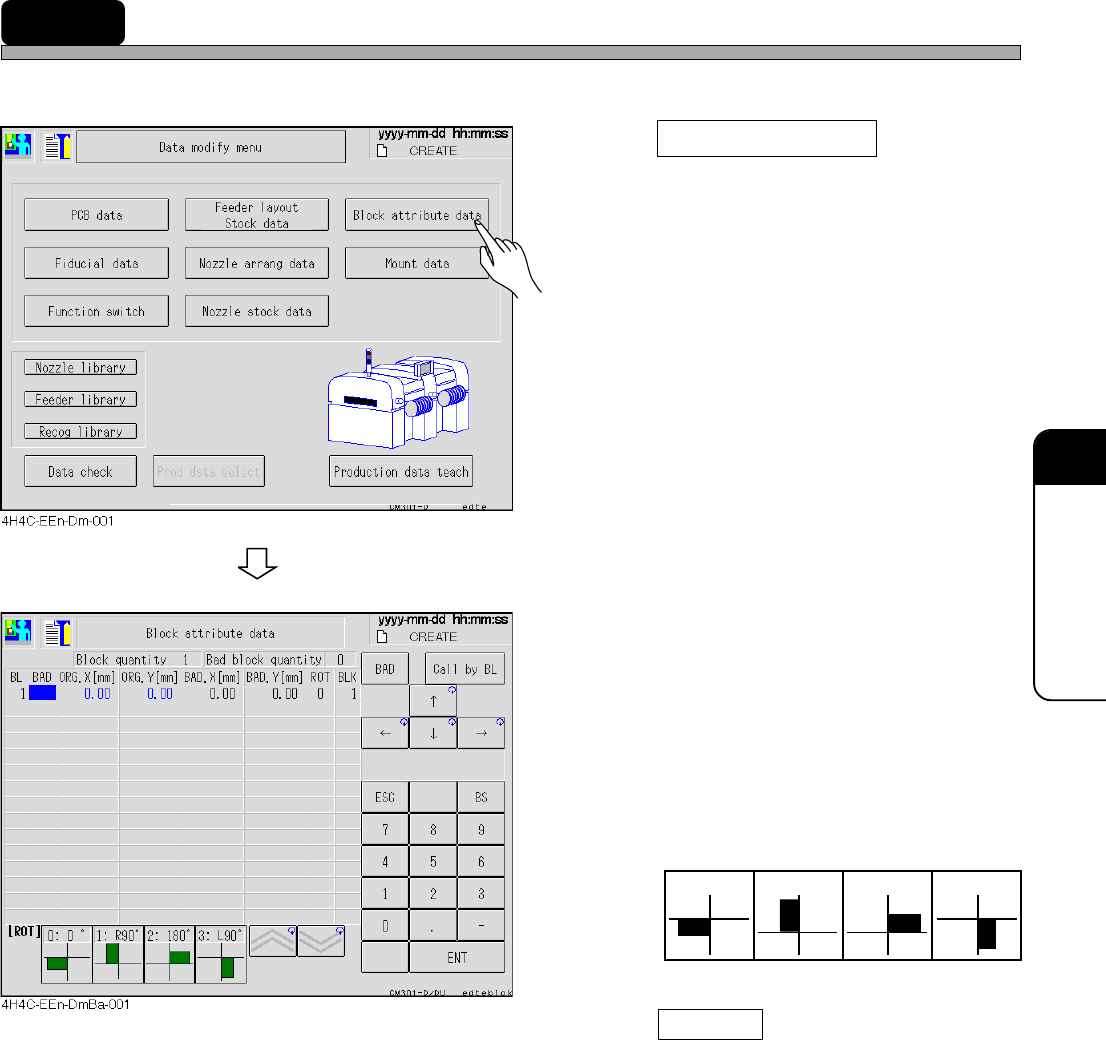
7-8 Block Attribute Data
The block attribute data is checked and modified.
1. Press Block attribute data .
• The block attribute data screen appears.
2. Modify the bad block mark coordinate
(BAD. X, BAD. Y), if necessary.
[Items]
• BL : Block No.
• BAD : Bad block
• ORG. X, Y : Block origin coordinate
• BAD. X, Y : Bad block mark coordinate
• ROT : Block extension angle number
• Press Call by BL , and enter the block No. to
move the cursor to the specified block No.
1 :
R 90°
2 : 180°
3 :
L 90°
0 : 0°
4H4C-E-OMA07-A01-05

Page 7-18
Call by SEQ
Call by
Comment
Skip
4H4C-E-OMA07-A01-03
7-9 Mount Data
The mount data is checked and modified.
1. Press Mount data .
• The mount data screen appears.
2. Select the head No. to be checked.
3. Modify the X and Y coordinates and
the mount angle if necessary.
• Mount points : All points including the
skipped ones
• Skip points : Points to skip mounting
• Skip (This cannot be changed while operation
is in progress.)
BAD : Bad block
USKP : Feeder layout skip
BSKP : Block data skip
MSKP : Mount data skip
∗ When skip is set by some data, priority is given
to the order above.
• ------------------ Skip (MSKP) is set.
∗ When the mount data screen is displayed from the automatic
operation stop screen, the skip button is not available.
• ------------------ moves the cursor to the specified SEQ No.
• ------------------ moves the cursor to SEQ of specified X and Y coordinates at the
lower position than the cursor.
• ------------------ moves the cursor to SEQ including the specified comment at the
lower position than the cursor.
Call by
Coordinate
Page 7-19
DATA MODIFICATION
7
4H4C-E-OMA07-A01-04
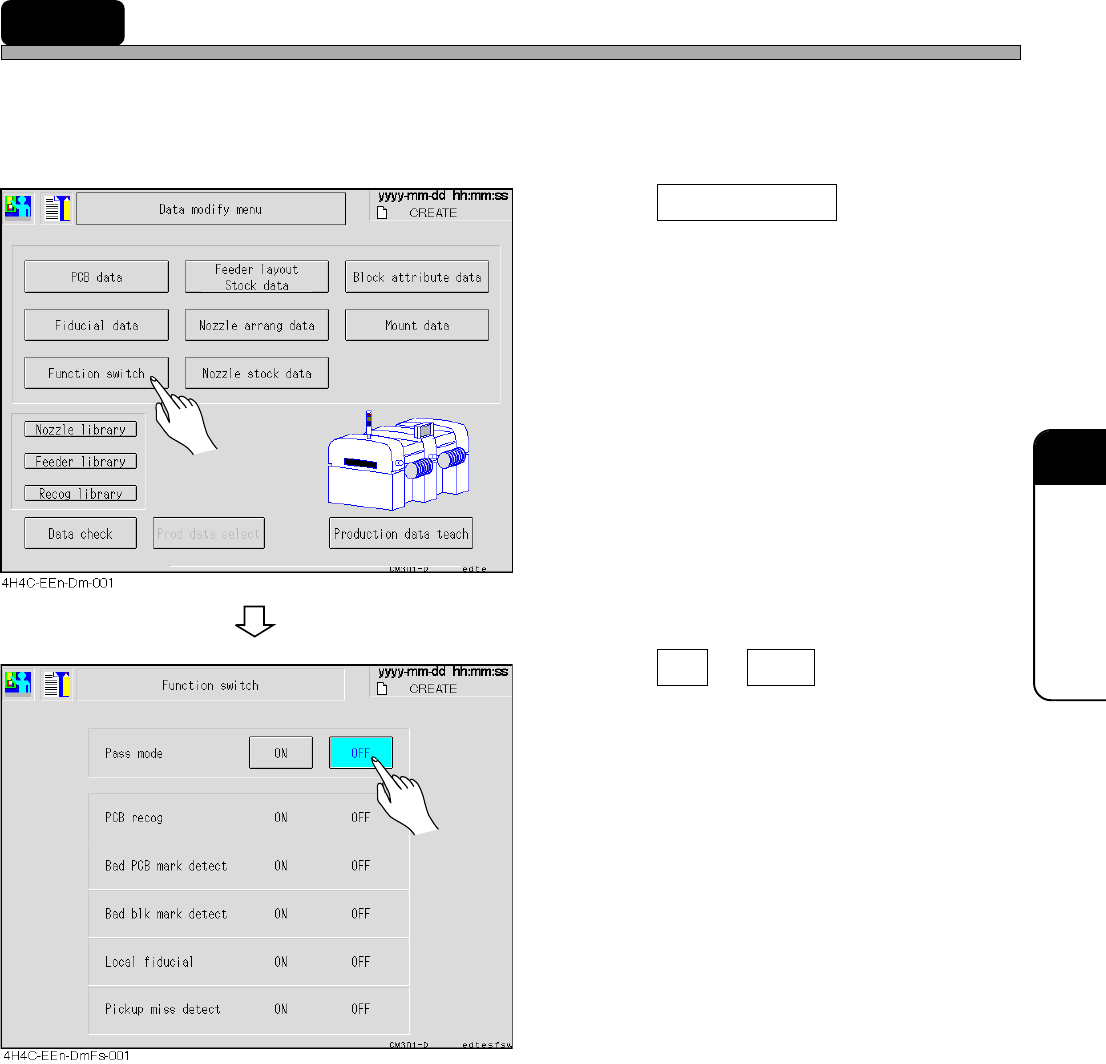
7-10 Function Switch
Setting of the function switch to set the operating condition is checked.
∗ Only the pass mode can be changed to ON and OFF on this screen.
As for other condition, change it on PT.
1. Press Function switch .
• The function switch screen appears.
• As for the function switches, refer to the
Programming Manual of PT.
2. Press ON or OFF of the pass
mode.
• The set switch is displayed in blue.