4H4CEOM2.pdf - 第54页
Page 8-26 4H4C-E-OMA08-A02-02 Chip Recognition T eaching 12. Set the point to be recognized by BL 1. • Move with . Set so that the chip (looks black) in the point obtains about 70 % of the whole. 13. Press Complete . ∗ F…
Page 8-25
TEACHING
8
4H4C-E-OMA08-A02-02
Chip Recognition Teaching
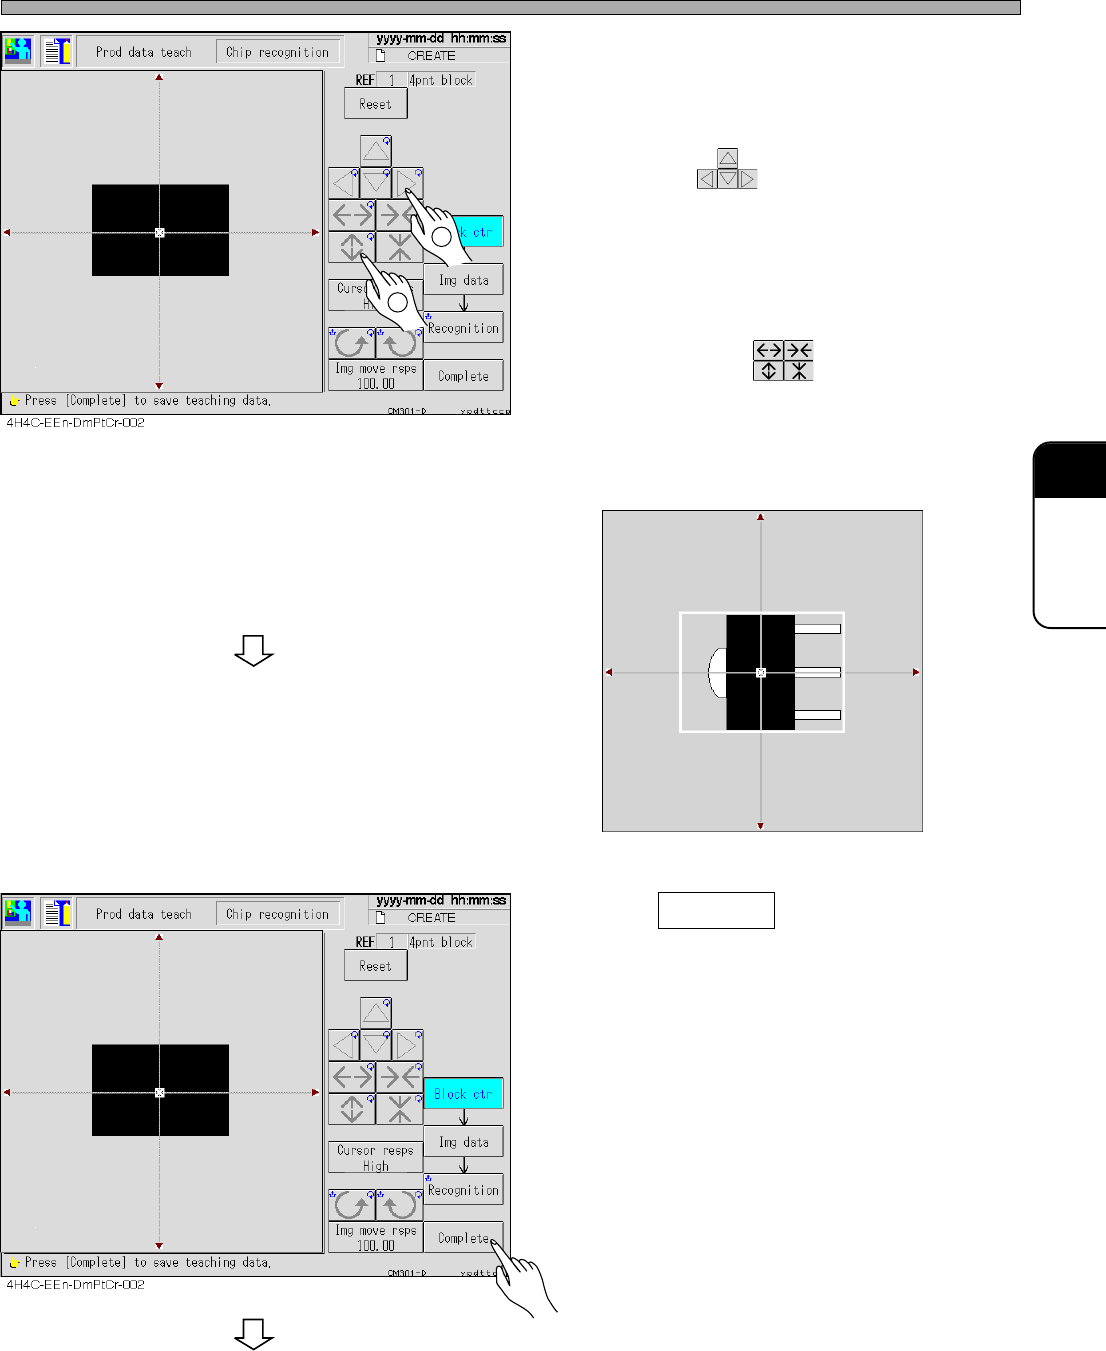
9. Correct the angle of the chip which is
picked up, and move the chip to the
center of the recognition screen.
• Move with .
10. Put the outline of the chip in the
frame of the block.
• Set the size with .
∗ For the chip with a pin, set so that the outline
including the center (pickup) position and the
pins is within the frame. (e.g. See the figure
below)
11. Press Complete .
• Teaching for each block starts.
To the next page
1
2
3Y3C-014P
Page 8-26
4H4C-E-OMA08-A02-02
Chip Recognition Teaching
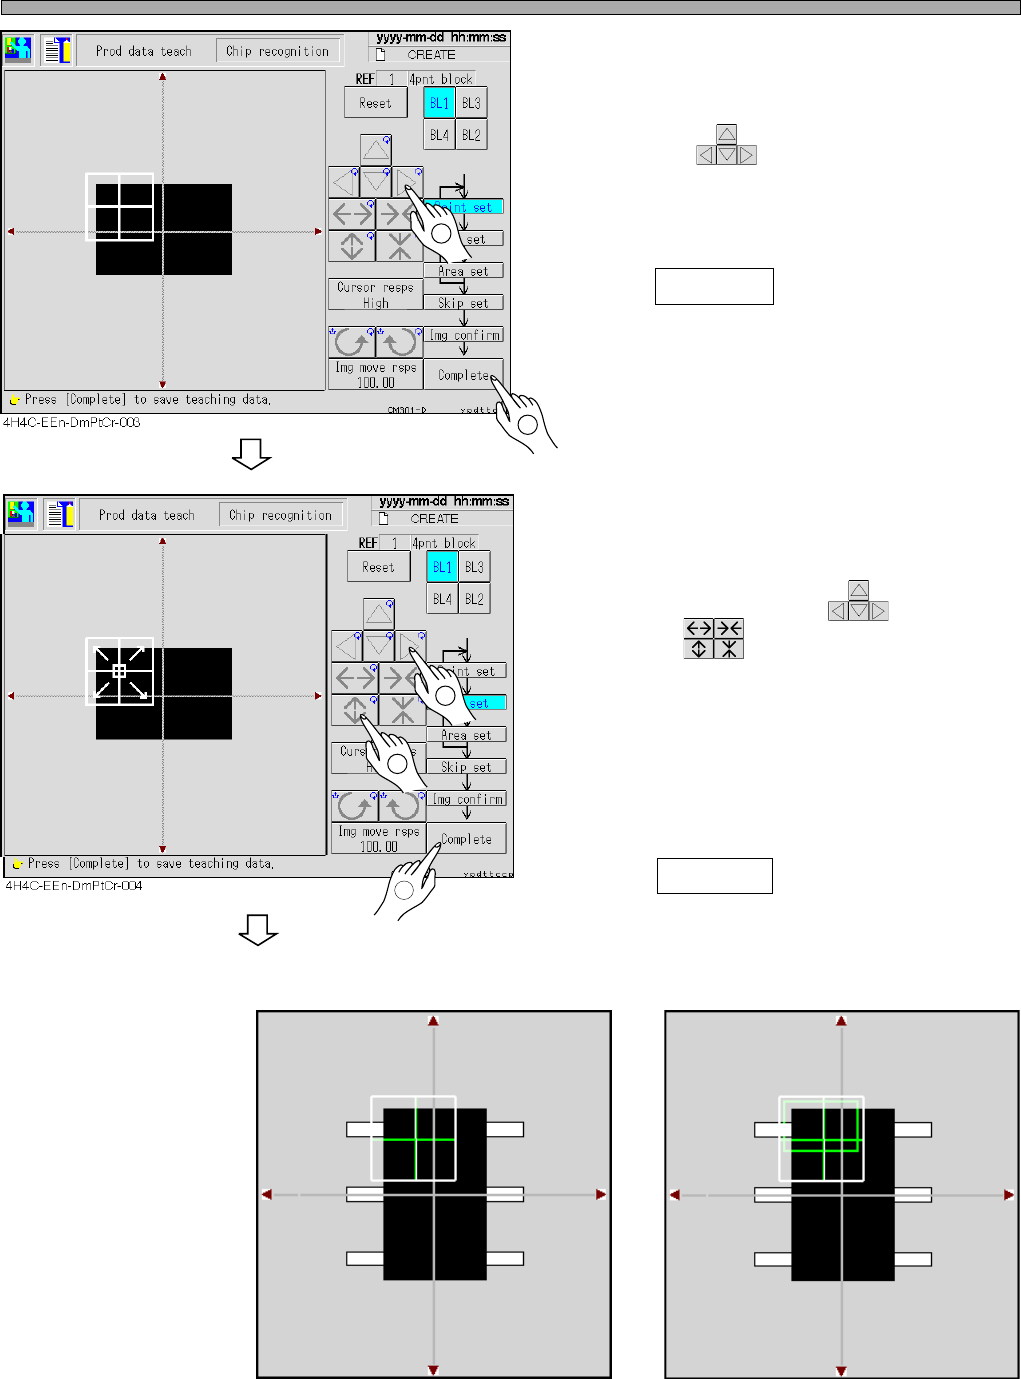
12. Set the point to be recognized by BL
1.
• Move with .
Set so that the chip (looks black) in the point
obtains about 70 % of the whole.
13. Press Complete .
∗ For the chip with the pins, also set so that the
chip which looks black obtains about 70% of
the whole. (e.g.: Recognition screen 1)
14. Set the range of the image to be rec-
ognized by BL 1.
• Move the inner frame appeared at the center of
the recognition point with , and set the
size with .
∗ Usually, set the recognition point at full size.
∗ For the chips with the pins or ones having
variations, set the range of the image to
recognize particular or stable points. (e.g.:
Recognition screen 2)
15. Press Complete .
Recognition screen 1 Recognition screen 2
3Y3C-015P
To the next page
1
2
1
2
3
Point
Chip
3Y3C-016P
Page 8-27
TEACHING
8
4H4C-E-OMA08-A02-02
Chip Recognition Teaching
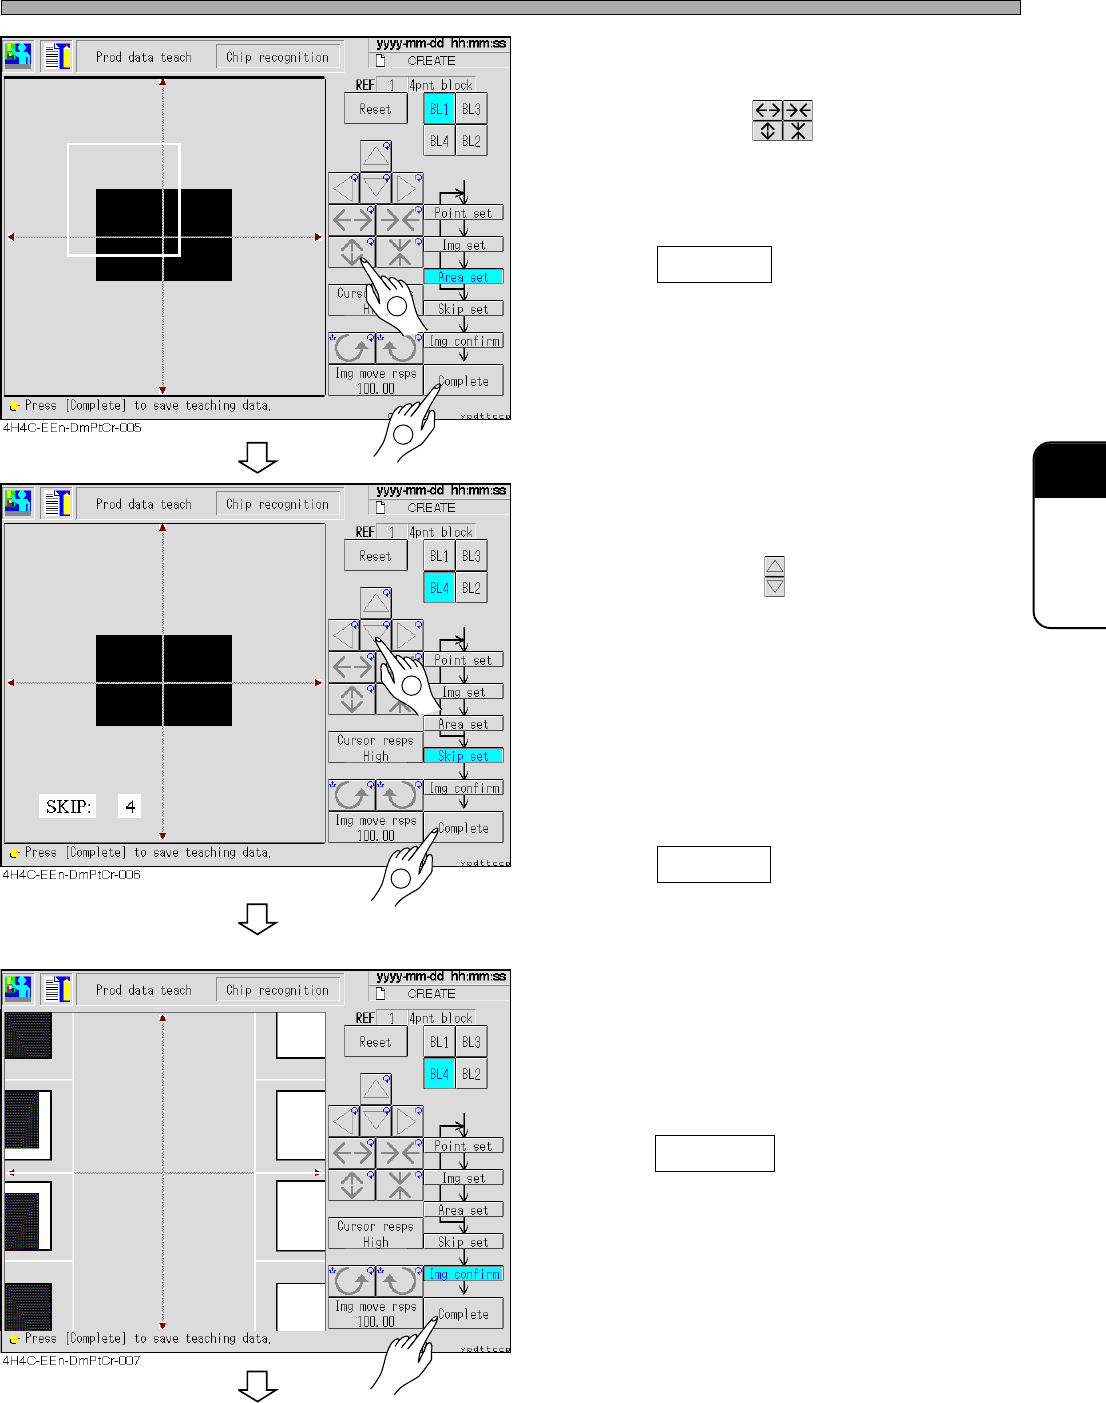
16. Set the area to be recognized by BL 1.
• Set the size with .
Set so that the recognition point (set at step
12) is in the area.
17. Press Complete .
• Data are automatically saved.
18. Repeat steps 12 to 17, and set to BL4.
19. Set the skip value.
• Set the value with .
Search the image to be recognized in detail at
1 and roughly at 10 (usually : 4)
The recognition image detection is finally
recognized at SKIP 1.
In recognition, the image is searched at the set
skip value at first, and the position is detected
at SKIP value 1 finally.
20. Press Complete .
• The teaching image for each block appears.
21. Check the taught image.
• Left : Position to be recognized (point setting)
Right : Image area to be recognized (image
setting)
22. Press Complete .
• Teaching for each block is over.
To the next page
1
2
1
2