4H4CEOM2.pdf - 第30页
Page 8-2 4H4C-E-OMA08-A01-04 4-point block a b c d b b a b a b aa c a b d b a a b a b a 8-1 Before T eaching 8-1-1 Recognition This machine has the function to recognize by the number registered to the recognition device…
Page 8-1
Data modify
Prod data teach
Chapter 8
TEACHING
Teaching
This machine corrects the mount data by the recognition device (PRU), based on
the data (machine data) created on PT.
Teaching consists of 4 types of PCB recognition, bad mark recognition, chip recog-
nition, and mount position recognition teachings.
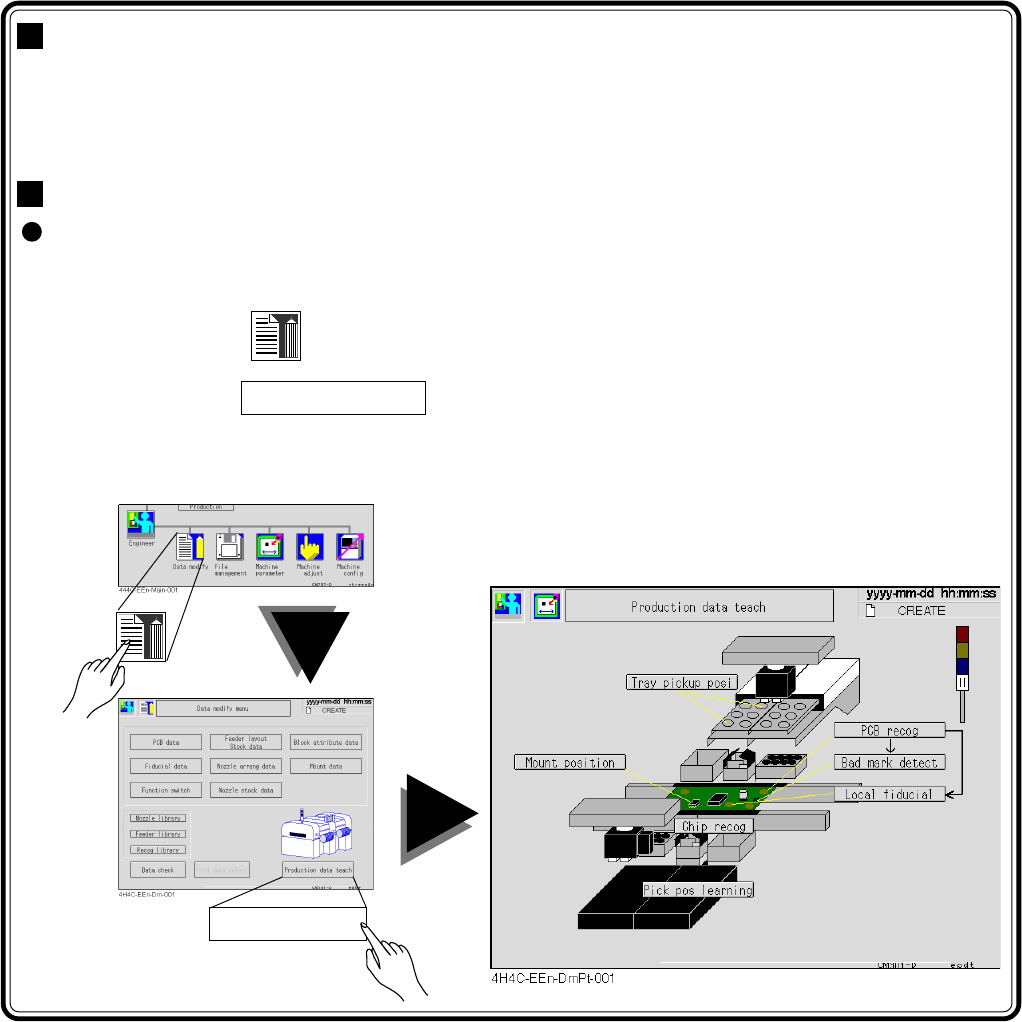
Entering the Production Data Teaching
The screen operation to start the production data teaching menu starts with the
main menu.
Start the first operation of each item with this.
1. Press
Data modify
in the main menu.
2. Press Prod data teach .
The “Production Data Teaching” screen appears. Start the next operation according to each item.
4H4C-E-OMA08-A01-02
Page 8-2
4H4C-E-OMA08-A01-04
4-point block
a
b
c
d
b
b
a
b
a
b
aa
c
a
bd
b
a
a
b
a
b a
8-1 Before Teaching
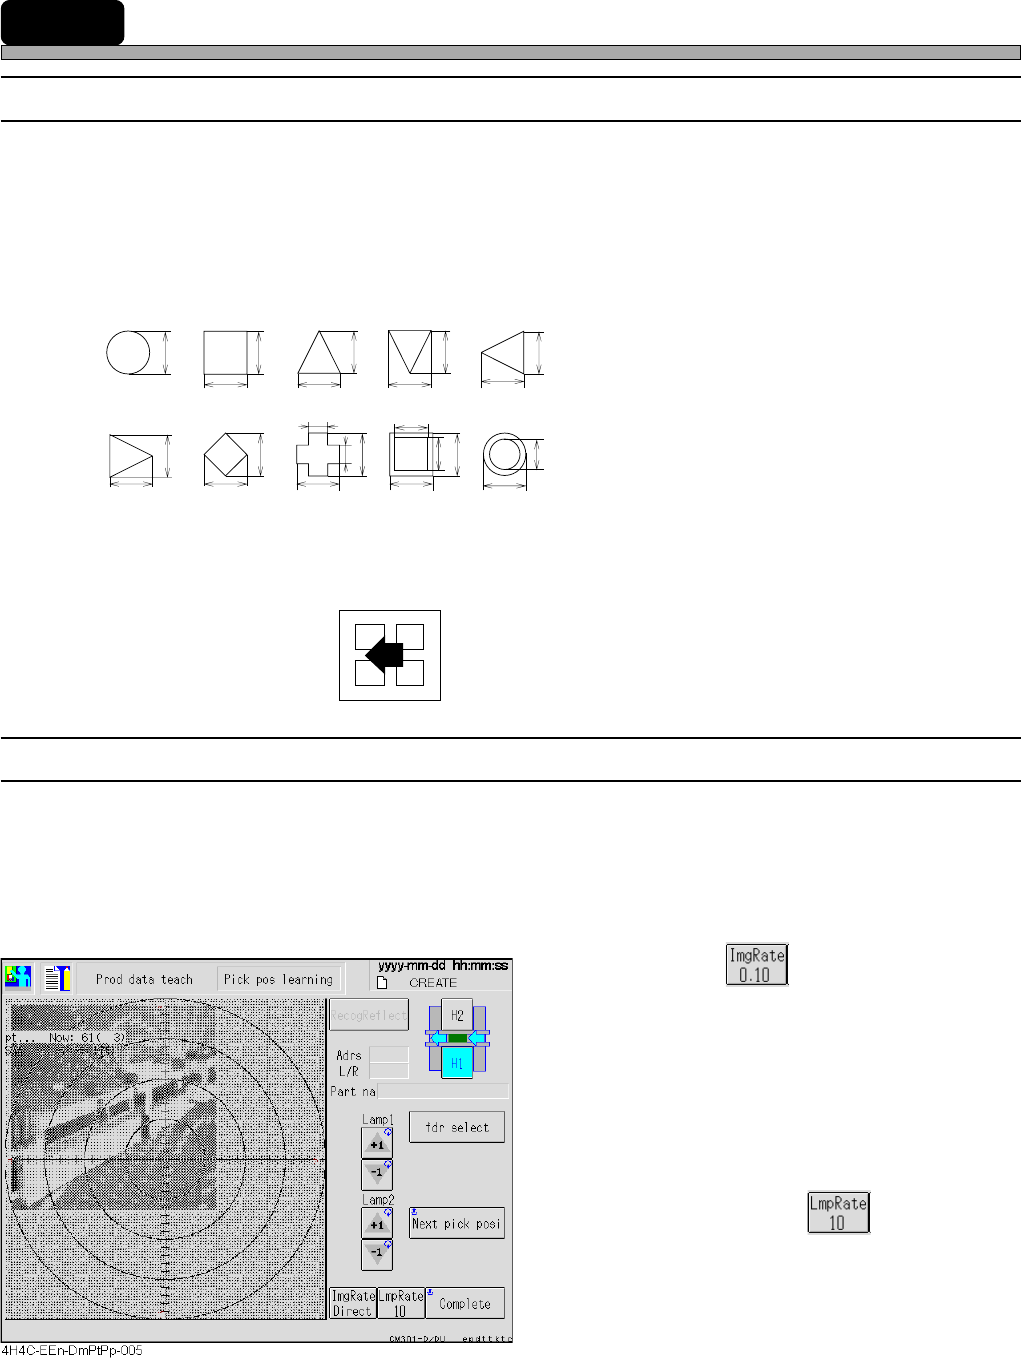
8-1-1 Recognition
This machine has the function to recognize by the number registered to the recognition device as a
reference number. The shape data recognition and the block match recognition are available for
the recognition, depending on the shapes to be recognized.
1. Shape data recognition (board recognition)
When the object to be recognized has following shapes and each size is known, use this.
• Reference No.125 : Lamp value is automatically set.
• Reference No.126 : Lamp value is manually set.
∗ When the color contrast of the mark and the
background of it is not so clear as the paper
phenol board, it is used. (When the contrast is
not clear and the lamp cannot be automatically
decided, use this.)
2. Block match recognition (chip recognition)
For the recognition mark with a complex shape and an unclear outline, or when it is too large to be
in the recognition screen, use this.
• 4-point block
Reference Nos. 1 to 30 (chip recognition)
8-1-2 Lamp Value Adjustment Setting
To set the key rate, press the lamp value adjustment button. Each time the button is pressed, the
key rate is changed by +1 or -1. It is also possible to change the key rate by +10 or -10 each time
the button is pressed.
The teaching targets : PCB recognition, Bad Mark detect, Mount position and Vacuum
position learning.
a. Image inching
• Inching keys :
These inch an image by the inching rate
indicated on the button.
When the button indicates Direct, the center
moves to the point you pressed on the
image.
• Image inching rate button:
This changes the inching rate.
b. Lamp value adjustment
• Lamp value buttons:
These change the lamp value by the key
rate indicated on the button.
• Key rate button :
This changes the key rate.
<Recognition screen>
Page 8-3
TEACHING
8
8-2 Board Recognition Teaching
8-2-1 Board Recognition
This machine has the function to correct the deviation between the board and the print pattern
before mounting. This function obtains that position by recognizing the mark set on the print pattern
and is carried out by comparing it with original position.
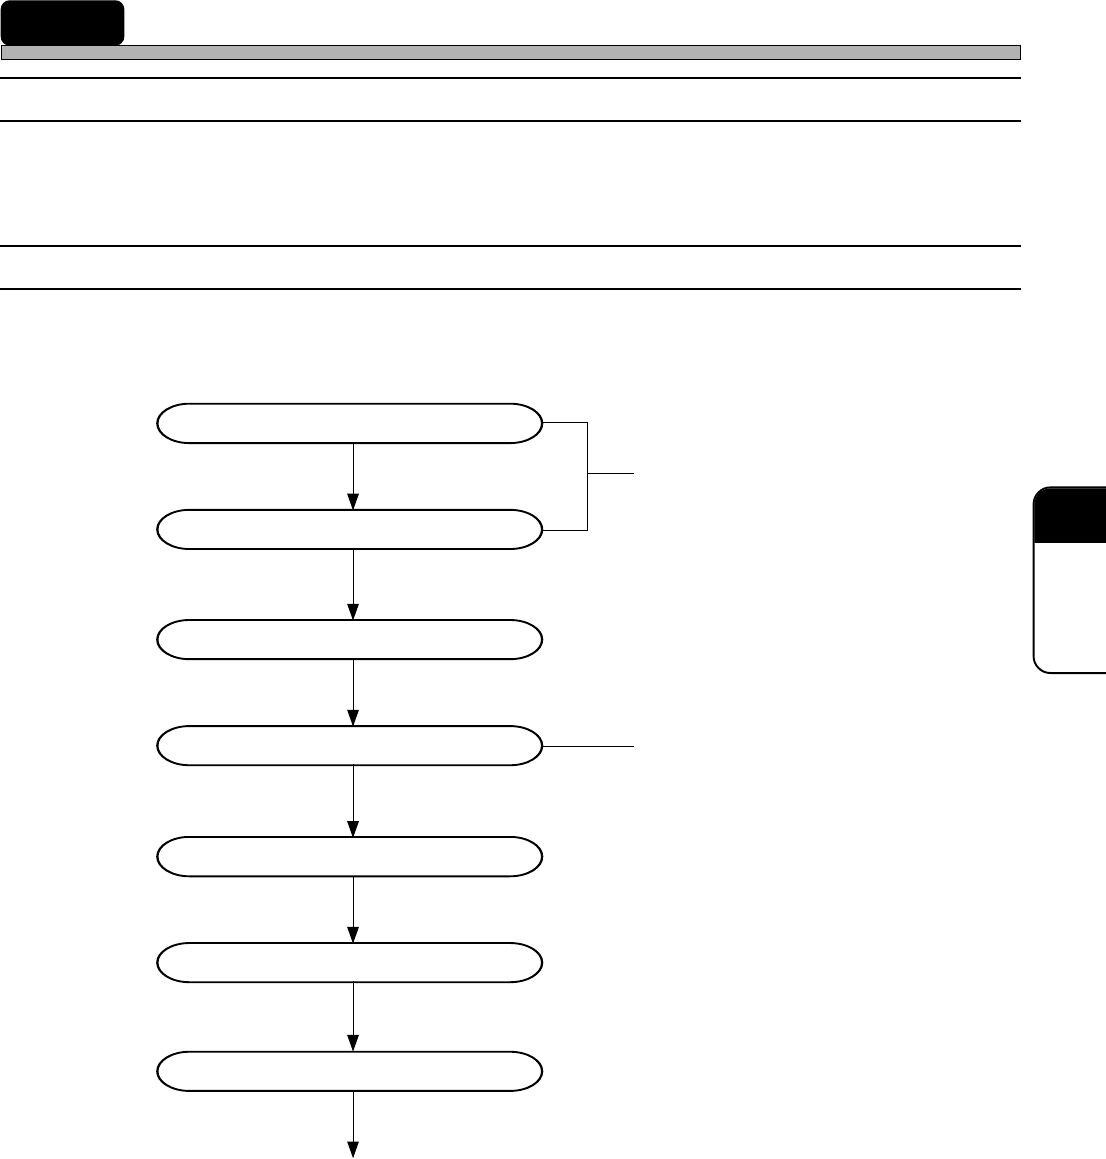
8-2-2 Flowchart of Board Recognition Teaching
Board recognition teaching checks the mark positions and performs the recognition test.
If the mark position runs off extremely, look the coordinates data over again.
Entering the PCB data
Entering the fiducial data
Starting to teach
Setting the lamp value
Recognition
Saving data
Recognition test
End of teaching
Created in PT
Unnecessary in selecting the automatic
lamp setting
4H4C-E-OMA08-A01-02