4H4CEOM2.pdf - 第76页
Page 9-6 9-3 Setting the Support Pin NOTICE Before starting this operation, remove all feeders for the feeder table on the front side (AF). The board support block with them installed cannot be exchanged. When the board …
Page 9-5
CHANGING THE
PRODUCTION BOARDS
9
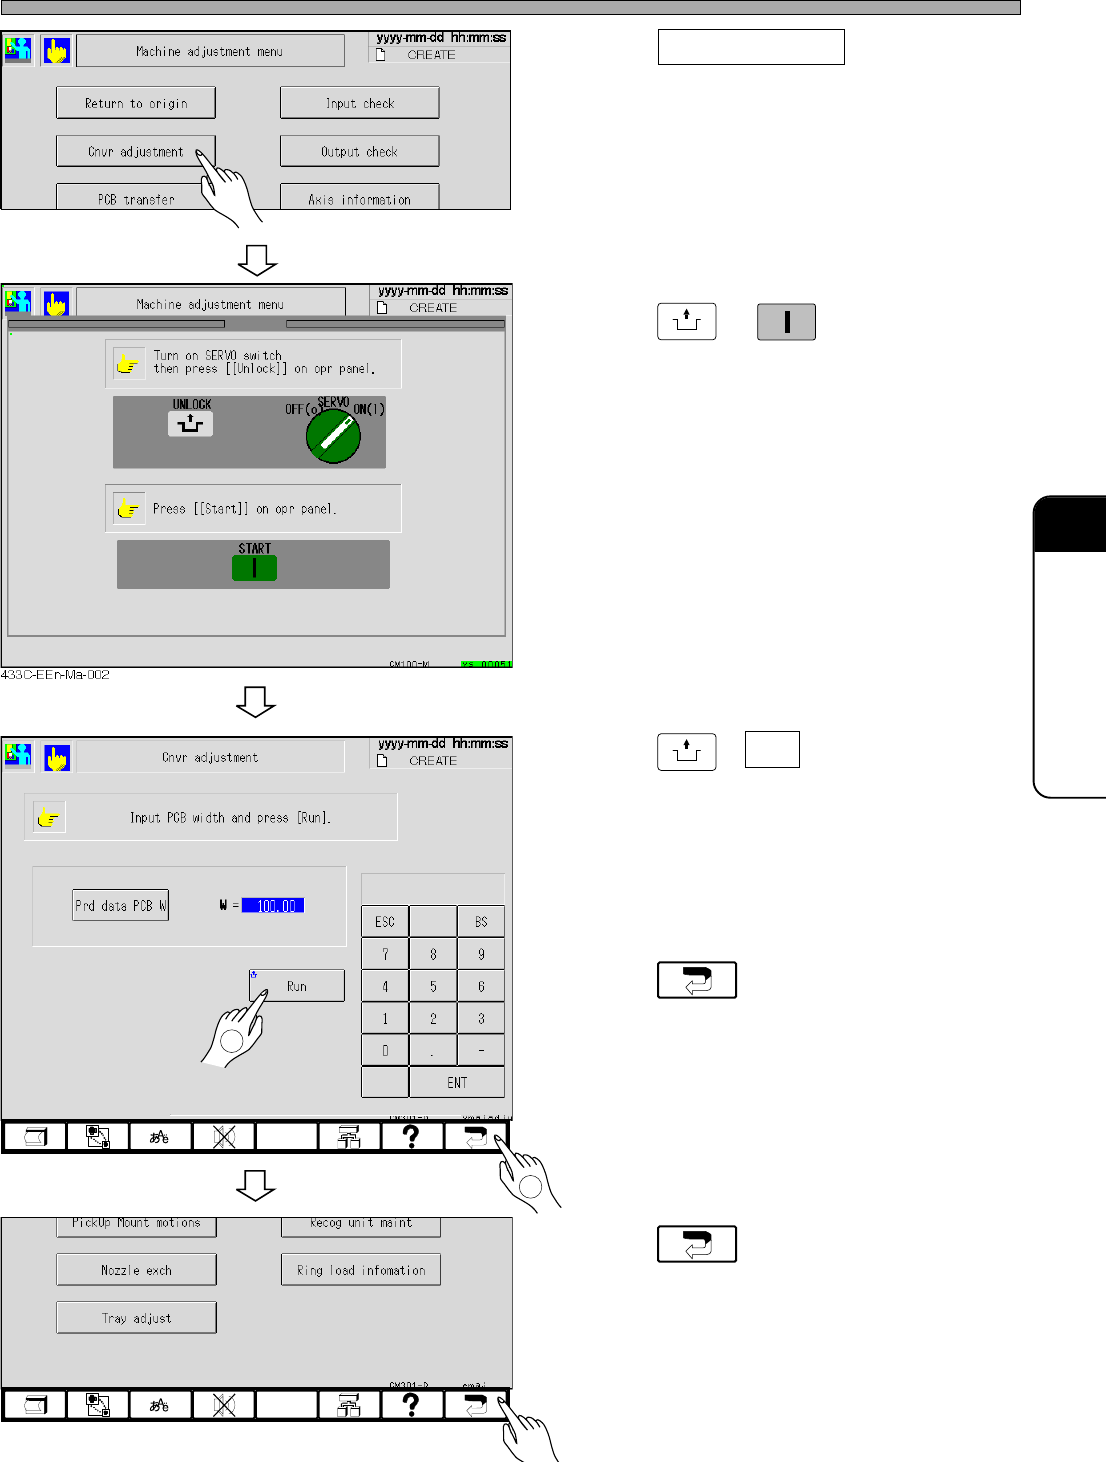
Adjusting the Transfer Rail Width
2. Press Cnvr adjustment .
• The conveyor width adjustment screen ap-
pears.
3. Press
UNLOCK
→
START
.
4. Press
UNLOCK
+ Run .
•“Conveyor width adjust preparing ...”
↓
The message “Conveyor width adjusting ...”
appears and the transfer rail is automatically
adjusted.
5. Press .
• The machine adjustment menu reappears.
6. Press .
• The main menu reappears.
4H4C-EEn-MaCa-001
4H4C-EEn-Ma-001
4H4C-EEn-Ma-001
1
2
4H4C-E-OMA09-A01-01
Page 9-6
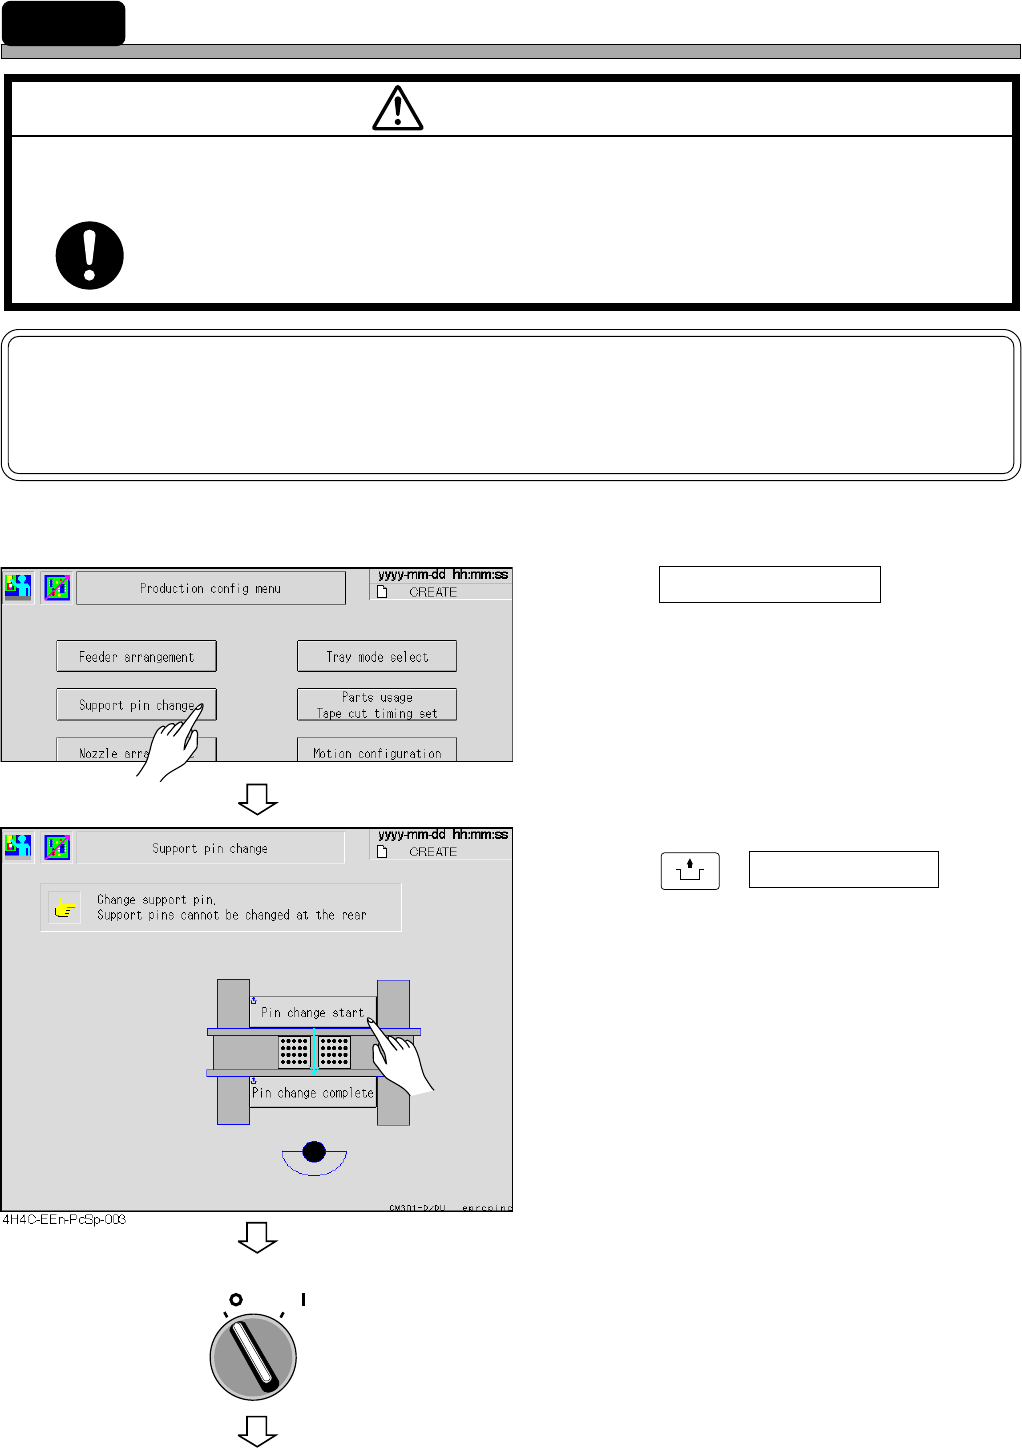
9-3 Setting the Support Pin
NOTICE
Before starting this operation, remove all feeders for the feeder table on the front side
(AF). The board support block with them installed cannot be exchanged.
When the board size and thickness are changed or when the parts are mounted on the back side
of the board, adjust the support pin.
1. Press Support pin change at the pro-
duction configuration menu.
• The support pin exchange screen appears.
2. Press
UNLOCK
+ Pin change start .
• The board support block moves up to be
drawn.
3. Turn off the servo switch.
M97E
TURN OFF THE POWER AND THE SERVO SWITCH BEFORE WORKING INSIDE
ACTIVE PART OF THE MACHINE FOR MACHINE SET-UP.
You will have serious injury if the machine is actuated.
WARNING
OFF ( )
ON ( )
SERVO
4H4C-EEn-Pc-002
To the next page
4H4C-E-OMA09-A01-03
Page 9-7
CHANGING THE
PRODUCTION BOARDS
9
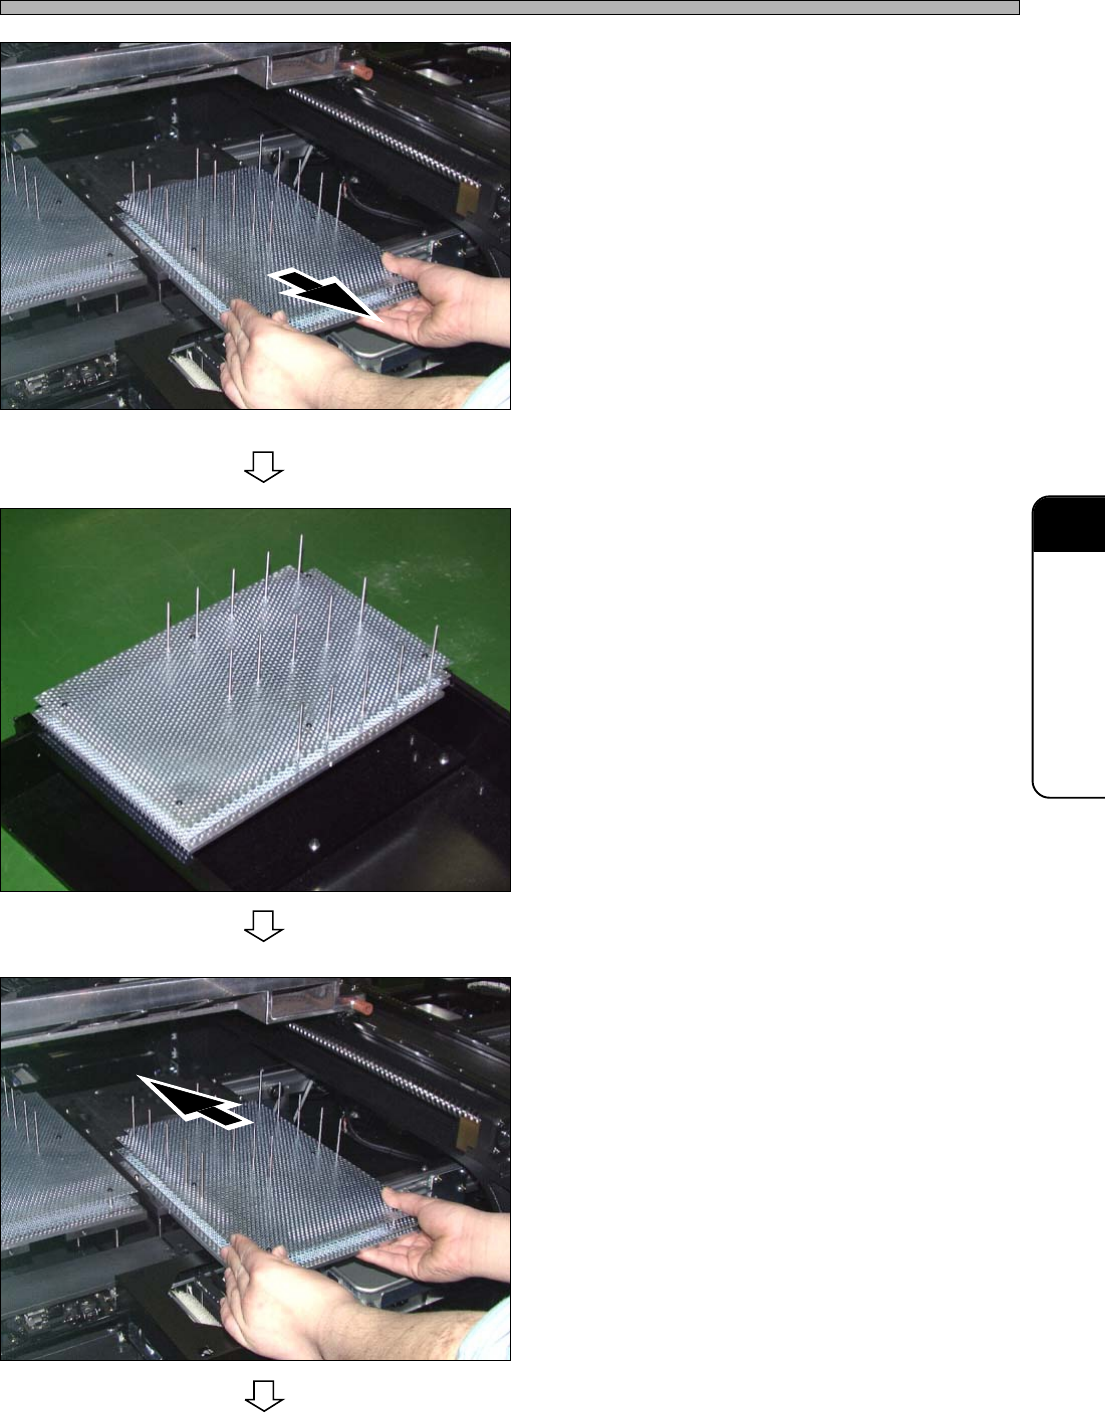
Setting the Support Pin
4. Pull out the board support block.
• Pull it out slowly through the front side with
both hands.
∗ Be careful not to hit the line camera.
5. Move the support pin position de-
pending on the board size.
• To support whole board equally, set as many
support pins as possible.
∗ Be careful not to make contact with the parts
on the back side of the board.
∗ When you set the support pin to the new board
at the external setup, make use of the optional
support pin setting jig.
6. Set the board support block.
• Insert it slowly from the front side with both
hands.
444C-107P
To the next page
444C-108P
444C-107P
4H4C-E-OMA09-A01-00