4H4CEOM2.pdf - 第37页
Page 8-9 TEACHING 8 8-3 Bad Mark Recognition T eaching 8-3-1 Bad Mark Recognition This machine has the function not to mount only the bad block for a false point on the board. A bad block mark indicates that. The bad boa…
Page 8-8
Board Recognition Teaching
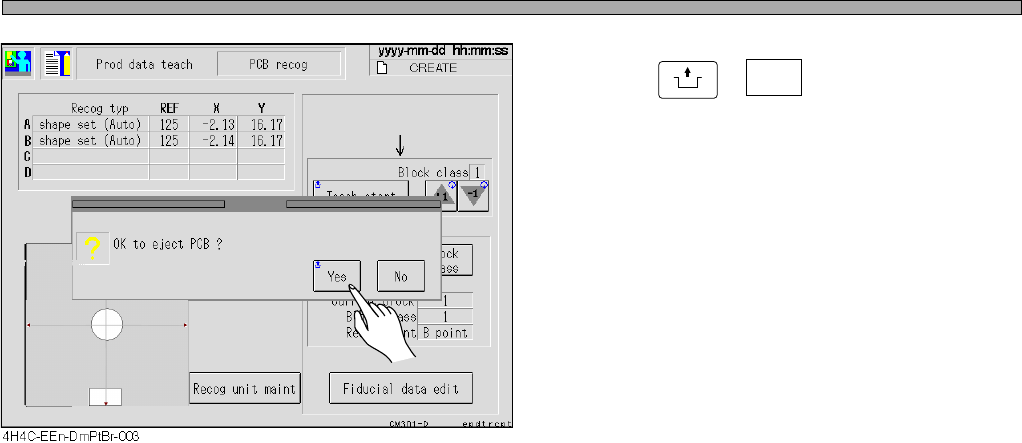
13. Press
UNLOCK
+ Yes .
• The board is discharged and teaching ends.
4H4C-E-OMA08-A01-02
Page 8-9
TEACHING
8
8-3 Bad Mark Recognition Teaching
8-3-1 Bad Mark Recognition
This machine has the function not to mount only the bad block for a false point on the board. A bad
block mark indicates that. The bad board mark also indicates the bad block mark on a board. Only
the board with the bad board mark is detected as the board with the bad block mark.
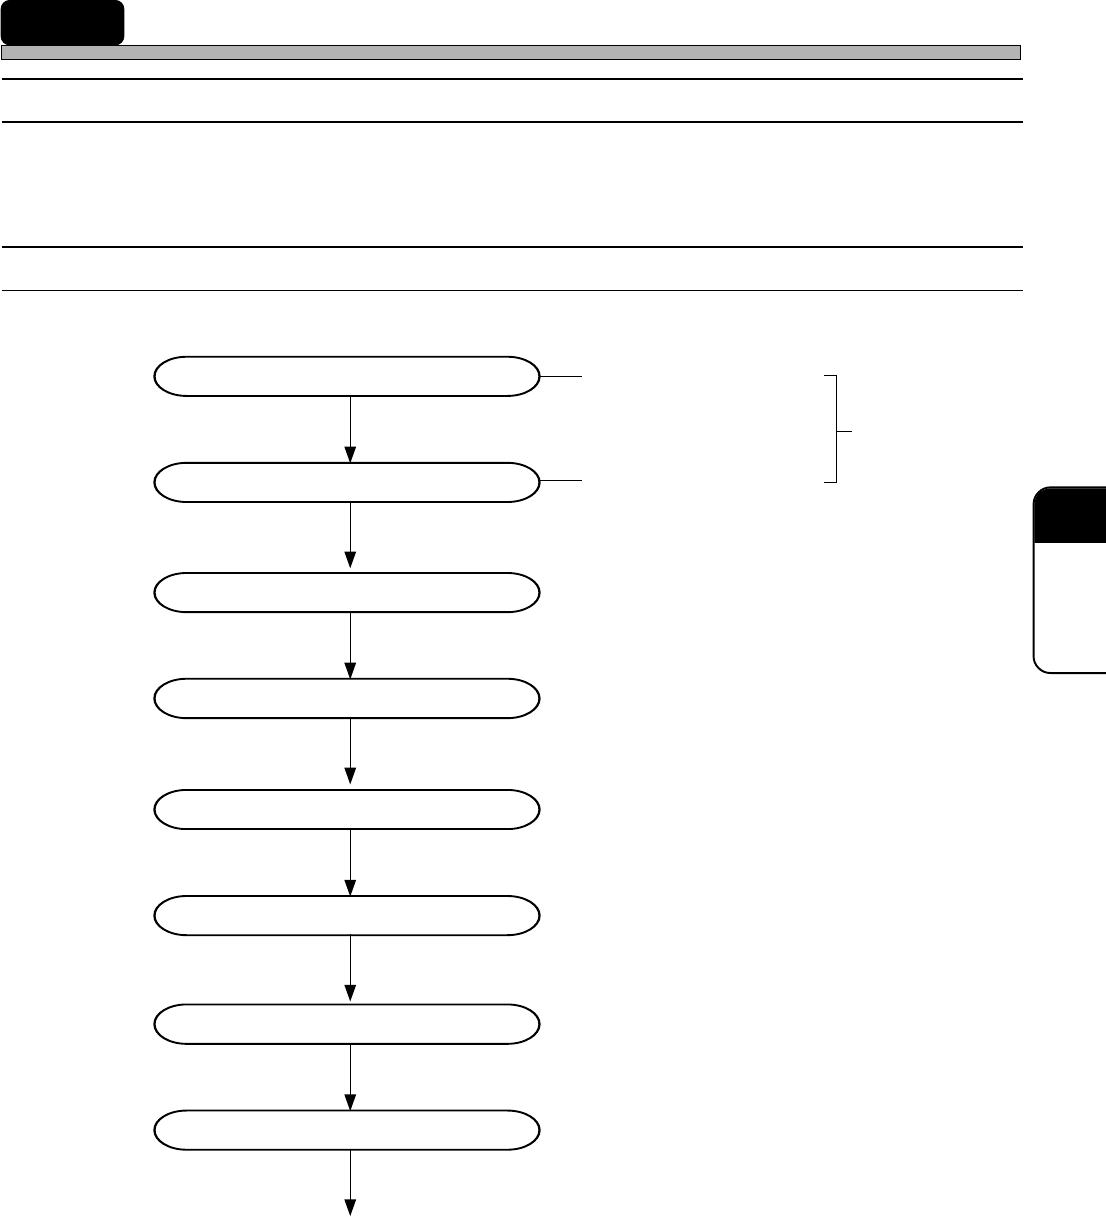
8-3-2 Flowchart of Bad Mark Recognition Teaching
Entering the board data
Entering the block attribute data
Starting to teach
Selecting a bad mark
Setting the lamp value
Recognition
Saving data
Recognition test
End of teaching
Entering a bad board mark
position(coordinates)
created on PT
Bad block mark position
4H4C-E-OMA08-A01-01
Page 8-10
Bad Mark Recognition Teaching
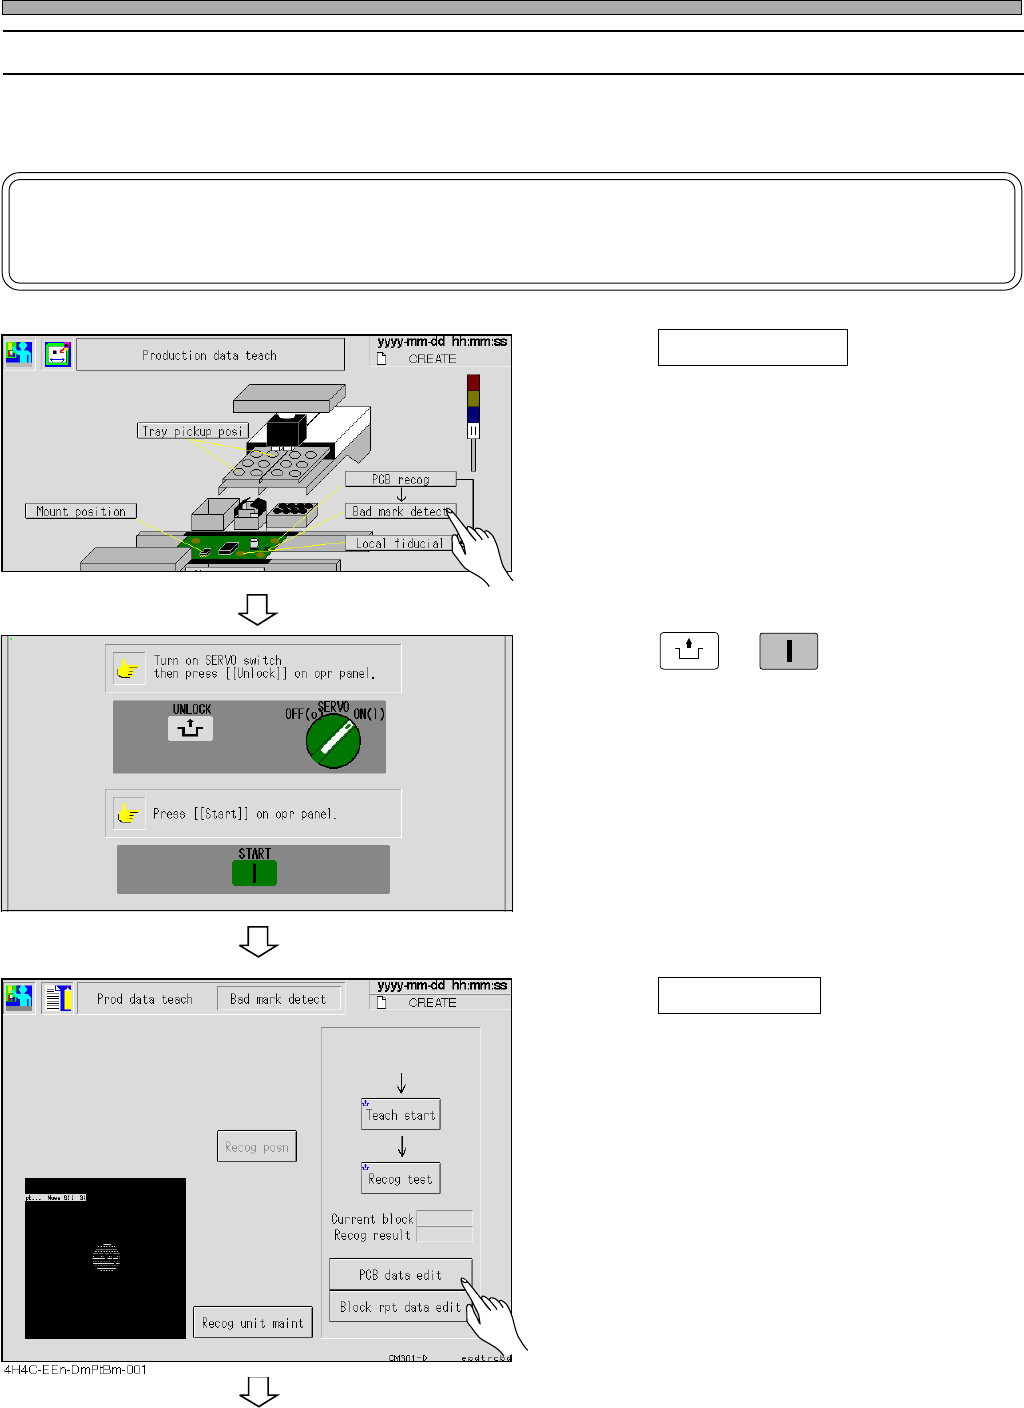
8-3-3 Teaching Procedures
When some bad blocks are detected on the production board, during the process, you can use the
function not to mount that block by marking that bad block mark.
NOTICE
When using the board recognition, carry out the board recognition teaching first.
1. Press Bad mark detect .
• The bad mark recognition screen appears.
2. Press
UNLOCK
→
START
.
3. Press PCB data edit .
4H4C-EEn-DmPt-001
To the next page
443C-EEn-DmPt-002
4H4C-E-OMA08-A01-01