4H4CEOM2.pdf - 第40页
Page 8-12 Bad Mark Recognition T eaching 8. Set the board to the front conveyor . 9. Press UNLOCK + T each start . • The board is transported to the mount stage and the recognition camera moves to the bad board mark posi…
Page 8-11
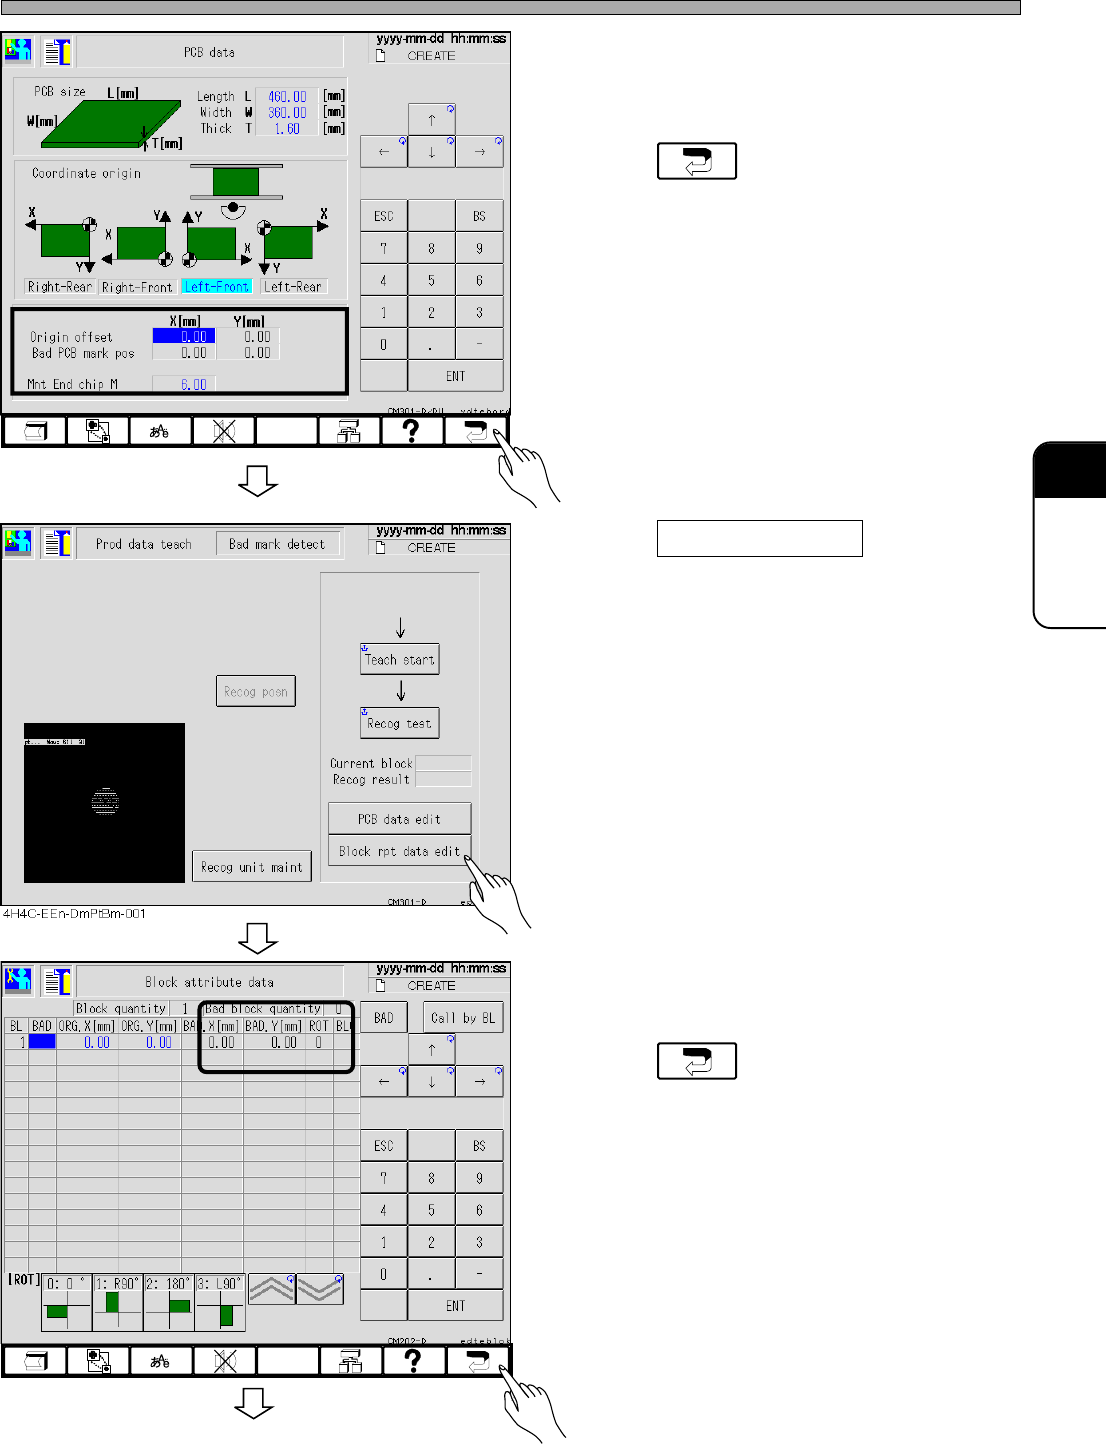
TEACHING
8
Bad Mark Recognition Teaching
4. Check and modify the value of coordi-
nates of the bad board mark position.
5. Press .
• The screen of step 3 reappears.
6. Press Block rpt data edit .
• The block attribute data screen appears.
∗ Check and modify the value of the coordiates
in the bad block quantity fields
7. Press .
• The screen of step 6 reappears.
444C-EEn-DmBa-002
To the next page
4H4C-EEn-DmPd-001
4H4C-E-OMA08-A01-02
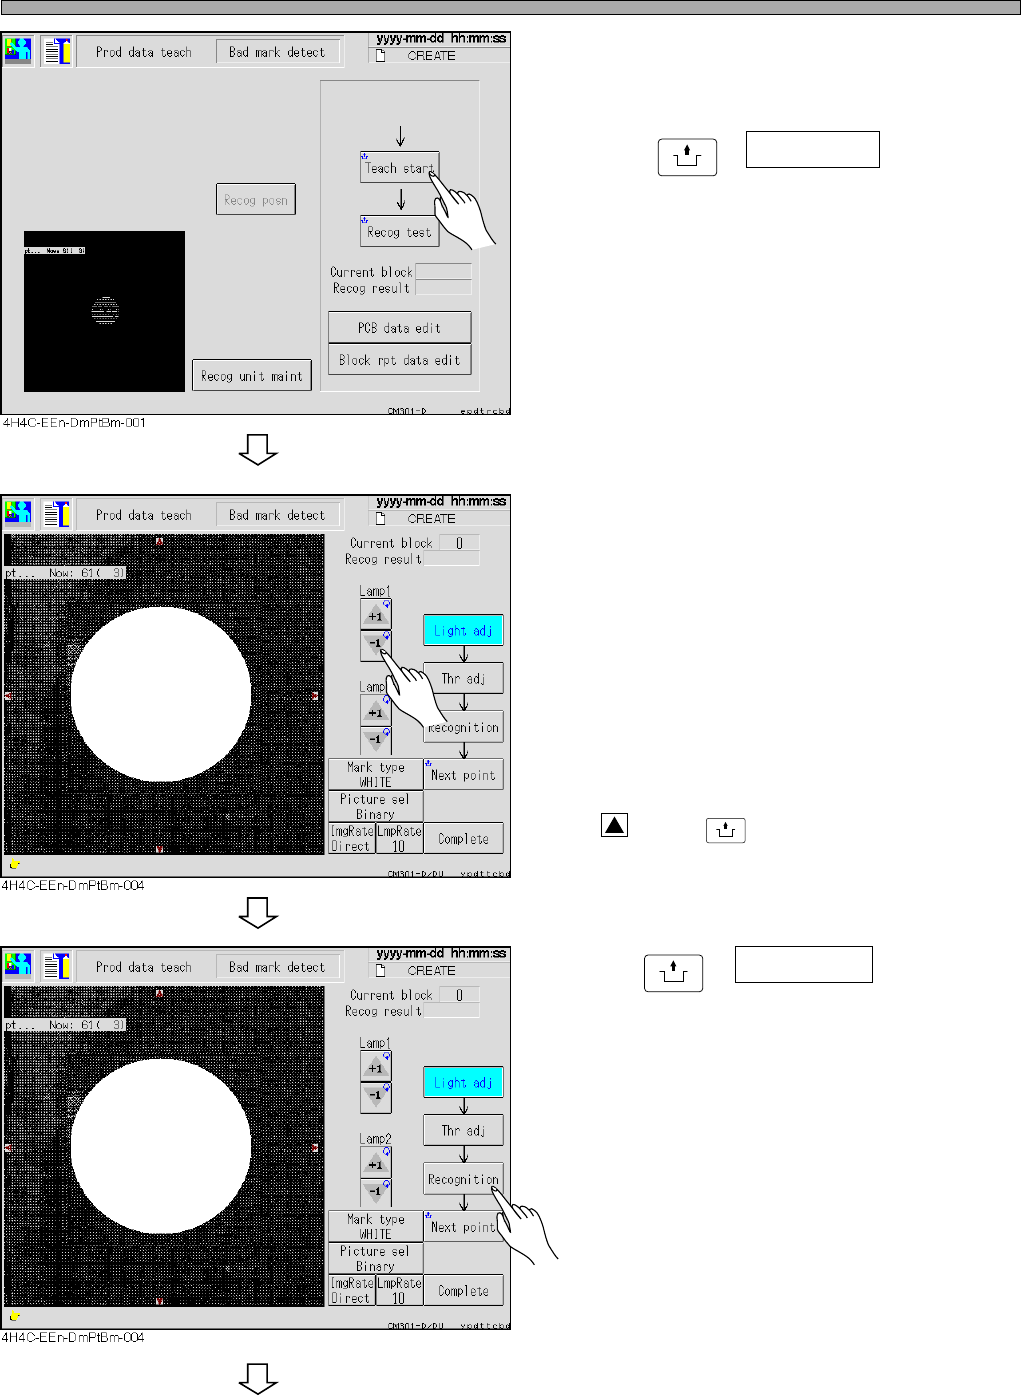
Page 8-12
Bad Mark Recognition Teaching
8. Set the board to the front conveyor.
9. Press
UNLOCK
+ Teach start .
• The board is transported to the mount stage
and the recognition camera moves to the bad
board mark position.
∗ When using the board recognition, the board
moves to the bad board mark position after it.
10. Increase and decrease the value of
lamps 1 and 2, and adjust the bright-
ness to obtain the bad mark.
• Lamp value 1 (around mark)
------Ring light (about 30 to 50)
• Lamp value 2 (center of mark)
------Spot light
∗ When the bad mark is not near the center of
the recognition screen, press the red triangle
holding
UNLOCK
, and move it to the center.
11.Press
UNLOCK
+ Recognition .
• The recognition starts.
∗ Check “OK block” at the blank for the recogni-
tion result.
To the next page
4H4C-E-OMA08-A01-02
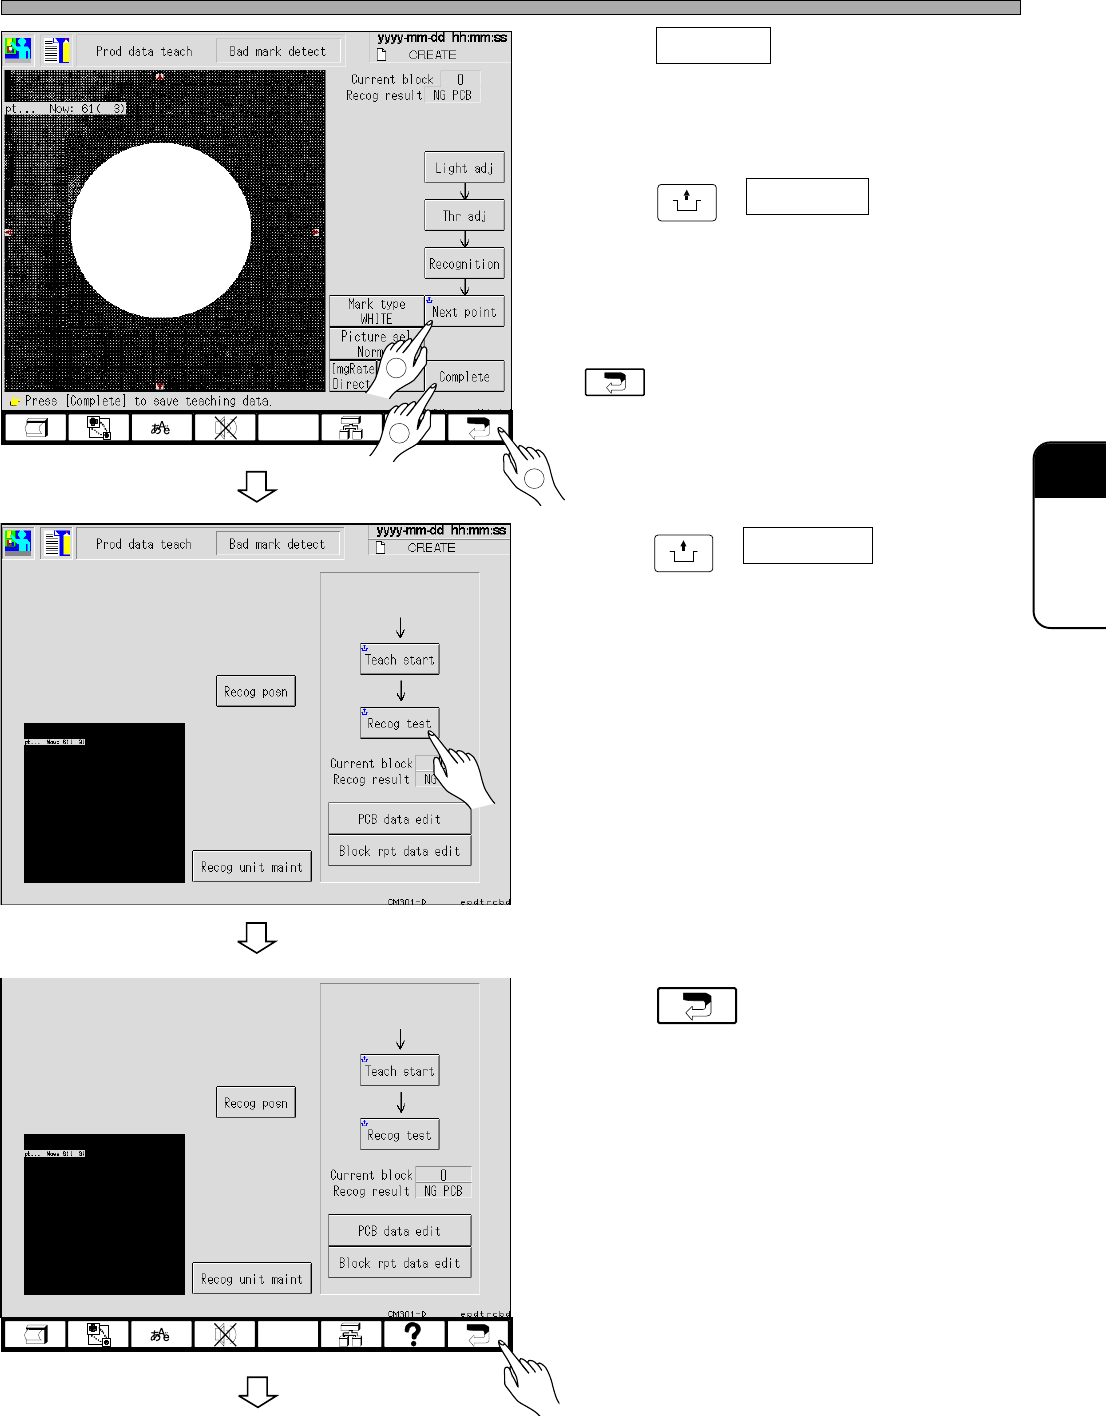
Page 8-13
TEACHING
8
Bad Mark Recognition Teaching
12. Press Complete .
• Data are automatically saved.
13. Press
UNLOCK
+ Next point .
• The next bad block mark appears.
14. Repeat the steps 10 to 12, and press
after teaching.
15. Press
UNLOCK
+ Recog test .
• Ensure that the recognition is carried out
properly.
16. Press .
3
4H4C-EEn-DmPtBm-005
4H4C-EEn-DmPtBm-002
1
2
To the next page
4H4C-E-OMA08-A01-02
4H4C-EEn-DmPtBm-002