4H4CEOM2.pdf - 第63页
Page 8-35 TEACHING 8 T o the next page 4H4C-015E 8-7 Pickup Position Learning T eaching T eaching for the original data of the pickup position learning in the production is carried out. NOTICE T eaching for three address…
Page 8-34
Teaching the Mount Position
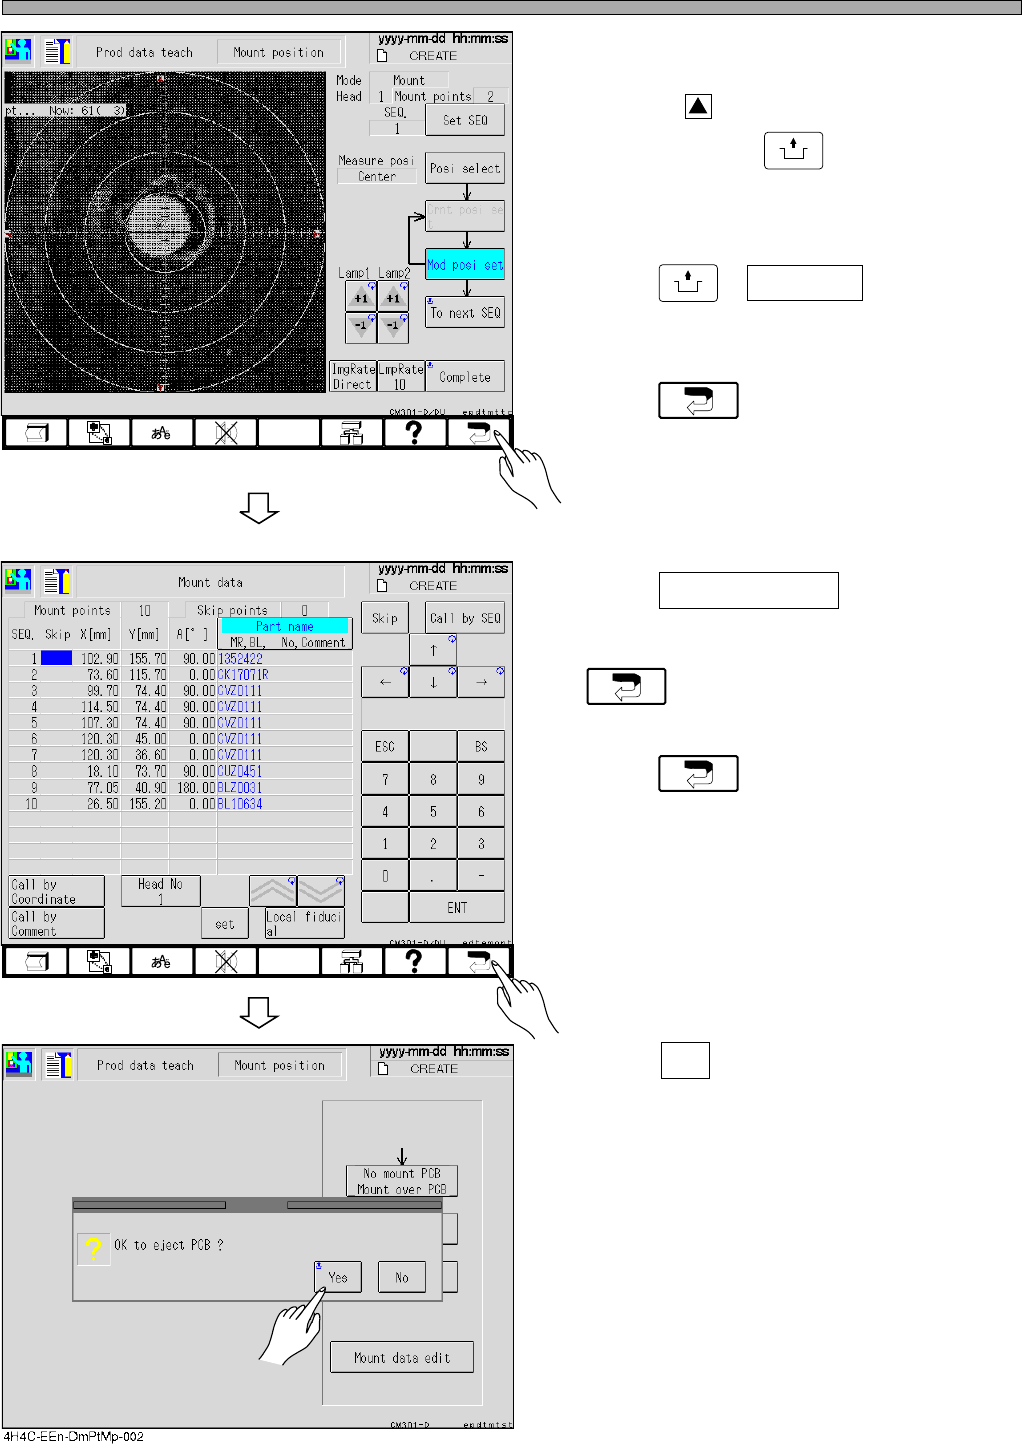
12. When the modification is needed,
after checking SEQ No., press the red
triangle, around the recognition
screen holding
UNLOCK
to move the
center of the pattern to the center of
the screen.
13. Press
UNLOCK
+ Complete .
• The mount coordinates are renewed.
14. Press and return to the screen
for step 6.
∗ If the data save mode is set to Pattern, this
operation is not necessary.
15. Press Mount data edit on the screen
for step 6 again, and ensure that the
coordinates are renewed, then press
.
16. Press again.
17. Press Yes .
• The board is carried out and teaching is fin-
ished.
• The production data teaching screen reap-
pears.
4H4C-EEn-DmPtMp-003
4H4C-EEn-DmMd-001
4H4C-E-OMA08-A03-04
Page 8-35
TEACHING
8
To the next page
4H4C-015E
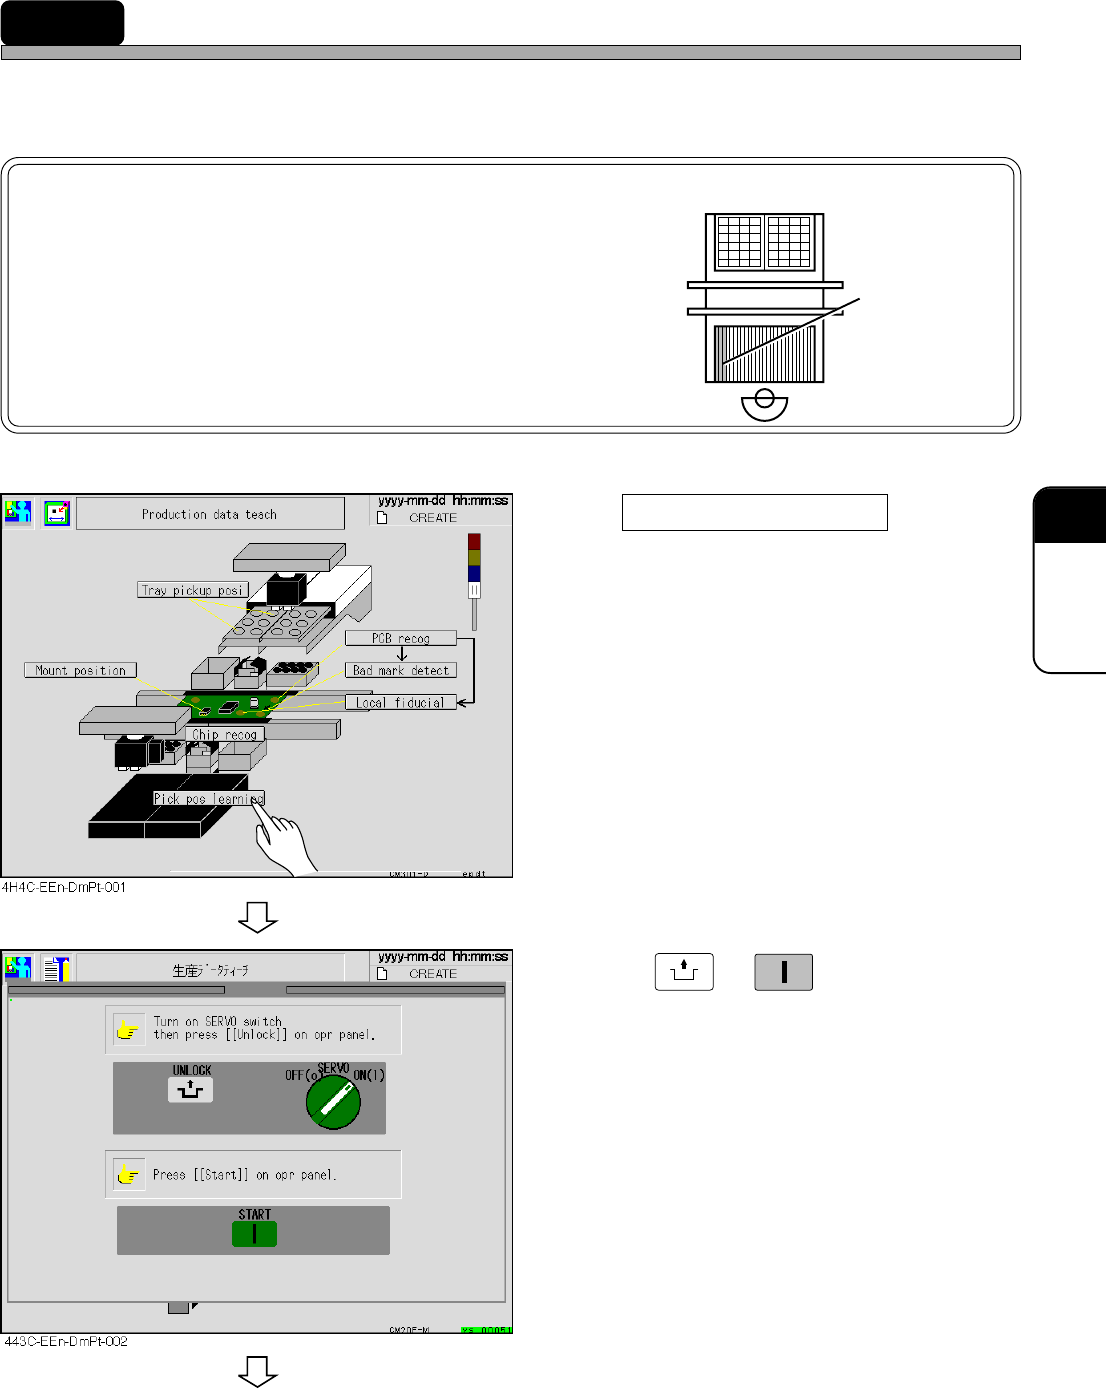
8-7 Pickup Position Learning Teaching
Teaching for the original data of the pickup position learning in the production is carried out.
NOTICE
Teaching for three addresses on the left side of
each feeder table is unavailable, because it is
unrecognizable. unavailable
For teaching, set the feeder to other address.
1.Press pickup position learning .
2. Press
UNLOCK
→
START
.
4H4C-E-OMA08-A03-03
Page 8-36
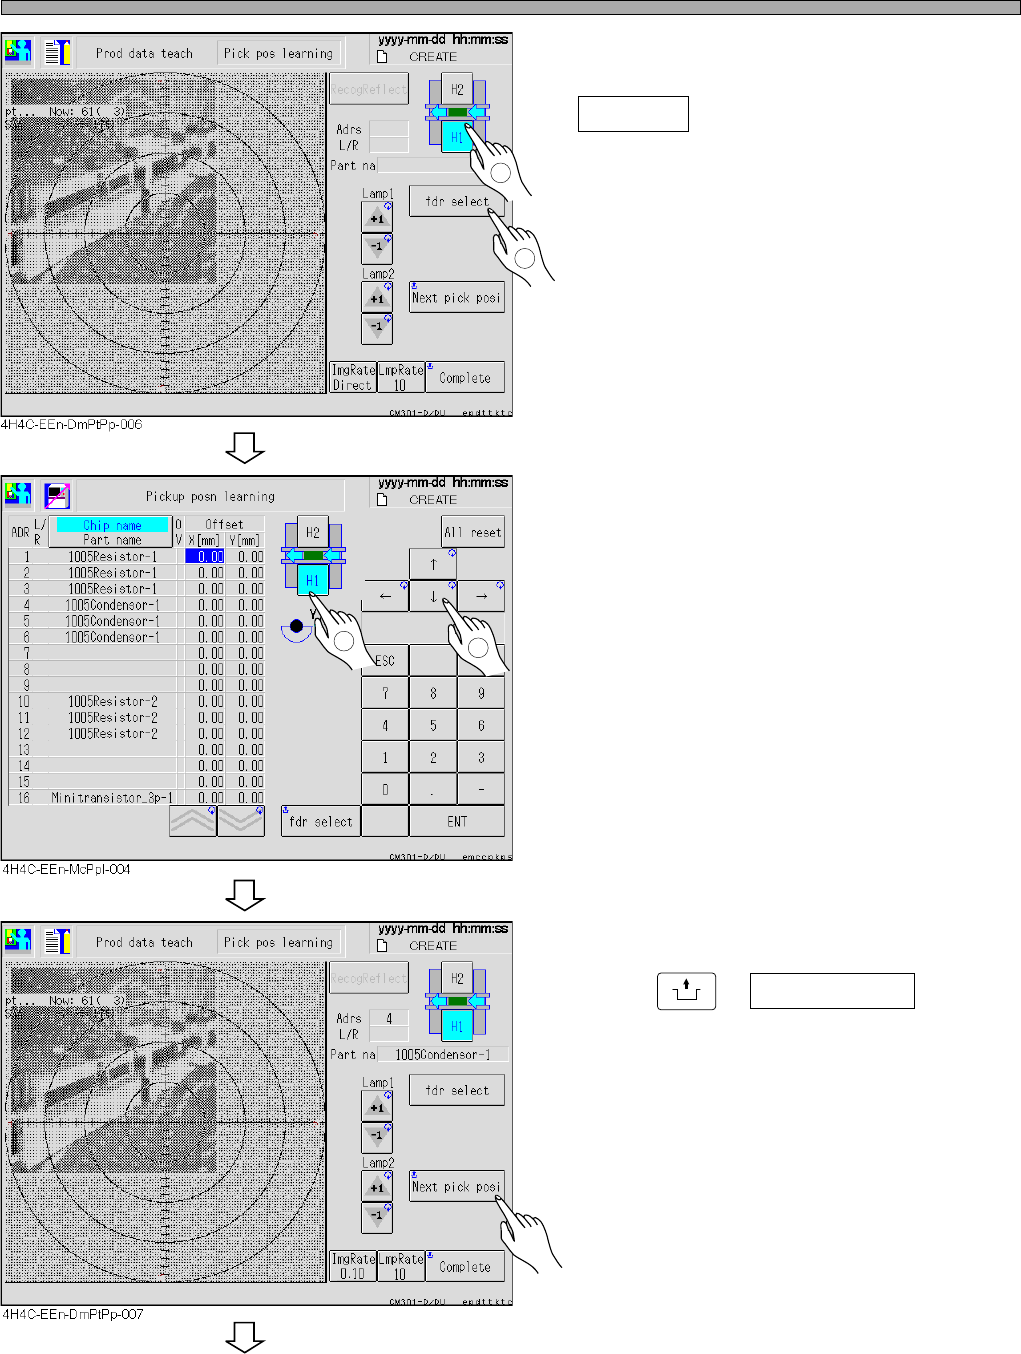
Pickup Position Learning Teaching
3. Select the satage and press
fdr select .
4. Select data for teaching.
5. Press
UNLOCK
+ Next pick posi .
• The head camera moves to the pickup position.
1
2
To the next page
1
2
4H4C-E-OMA08-A03-03