4H4CEOM2.pdf - 第85页
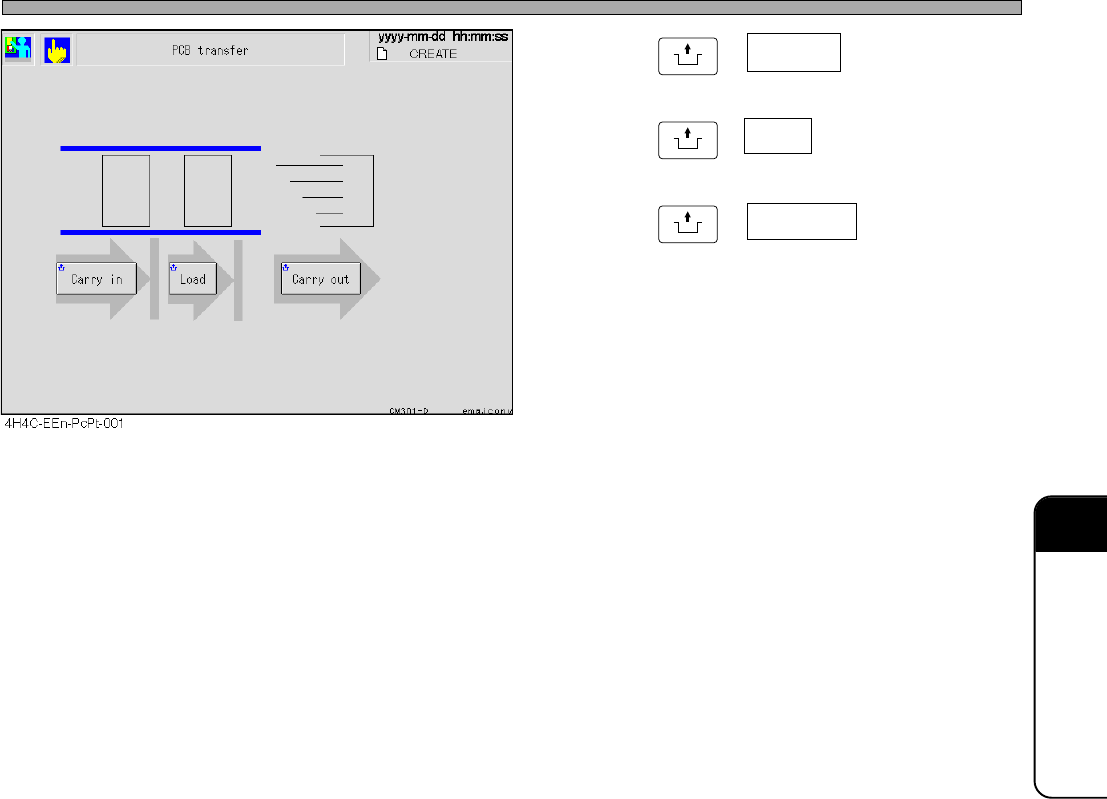
Page 9-15 CHANGING THE PRODUCTION BOARDS 9 Board T ransfer T est 4 . Press UNLOCK + Carry in . 5 . Press UNLOCK + Load . 6 . Press UNLOCK + Carry out . • The board at the transfer end position blinks as Carry in → Load →…
Page 9-14
9-6 Board Transfer Test
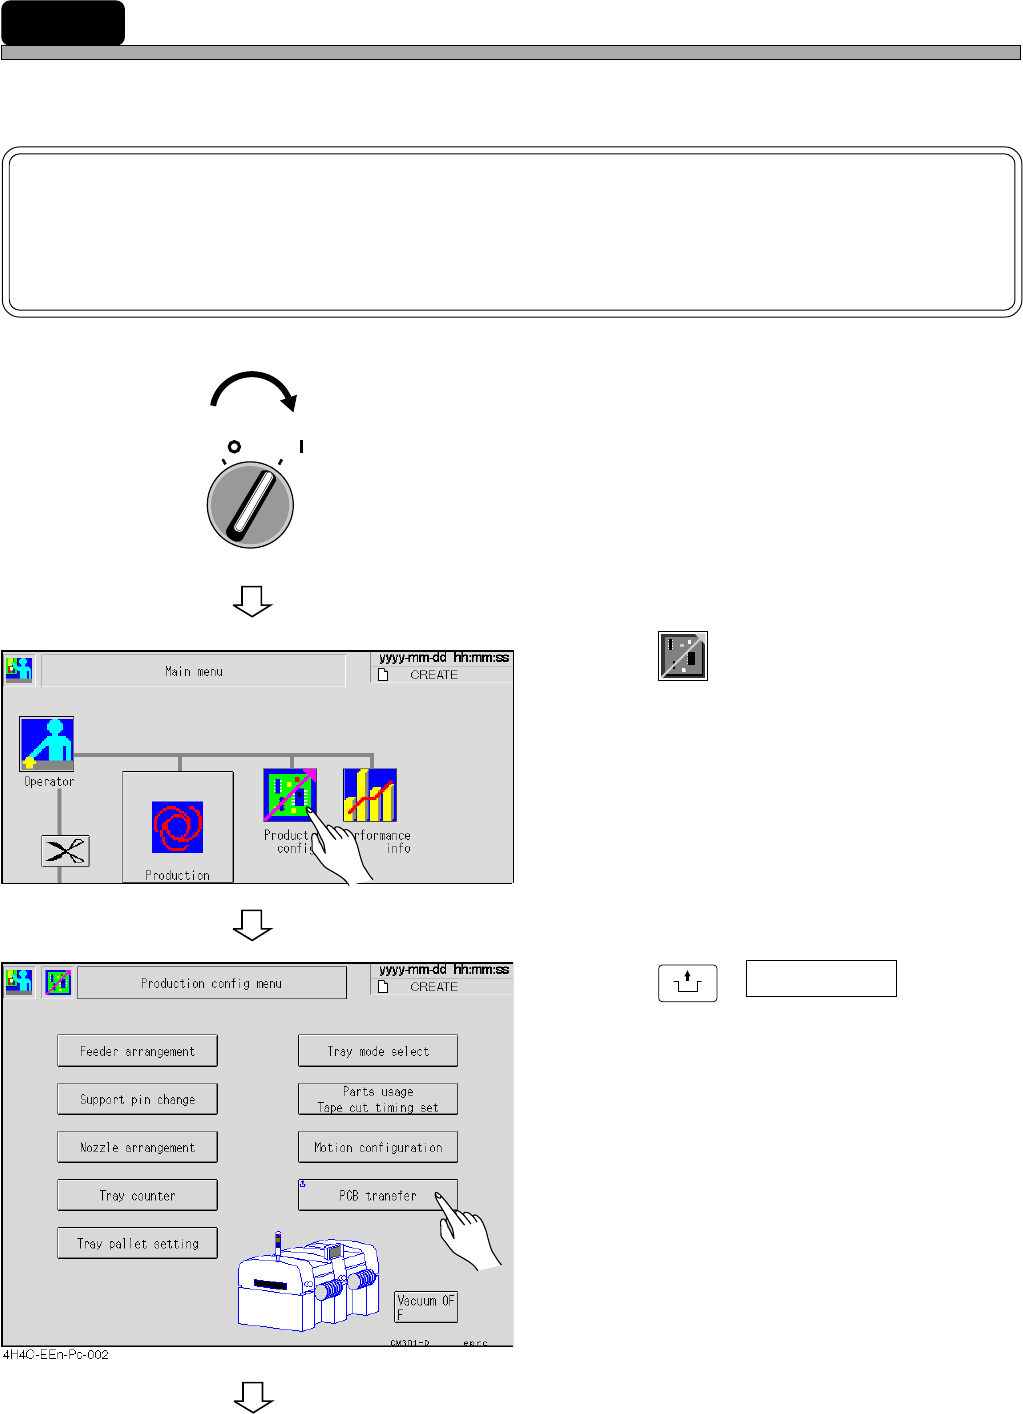
After adjusting the width of the transfer rail and the support pin, carry out the board transfer test,
and ensure that the board is transferred smoothly.
NOTICE
Actually, the transfer test is carried out for whole line. This section describes the
transfer test with the board on the rear conveyor of the pre-station, after the trans-
fer test for the pre-station.
1. Turn on the servo switch.
2. Press
Product
config
.
• The production setting screen appears.
3. Press
UNLOCK
+ PCB transfer .
• The board transfer screen appears.
To the next page
444C-EEn-Main-001
OFF ( )
ON ( )
SERVO
4H4C-E-OMA09-A01-02
Page 9-15
CHANGING THE
PRODUCTION BOARDS
9
Board Transfer Test
4. Press
UNLOCK
+ Carry in .
5. Press
UNLOCK
+ Load .
6. Press
UNLOCK
+ Carry out .
• The board at the transfer end position blinks as
Carry in → Load → Carry out during transport-
ing, and after transporting, the board at the
transfer start position goes out and is displayed
at the end position.
∗ Repeating the same operation makes a board
transfer error.
Press the emergency stop button and remove
the board.
4H4C-E-OMA09-A01-01
Page 9-16
9-7
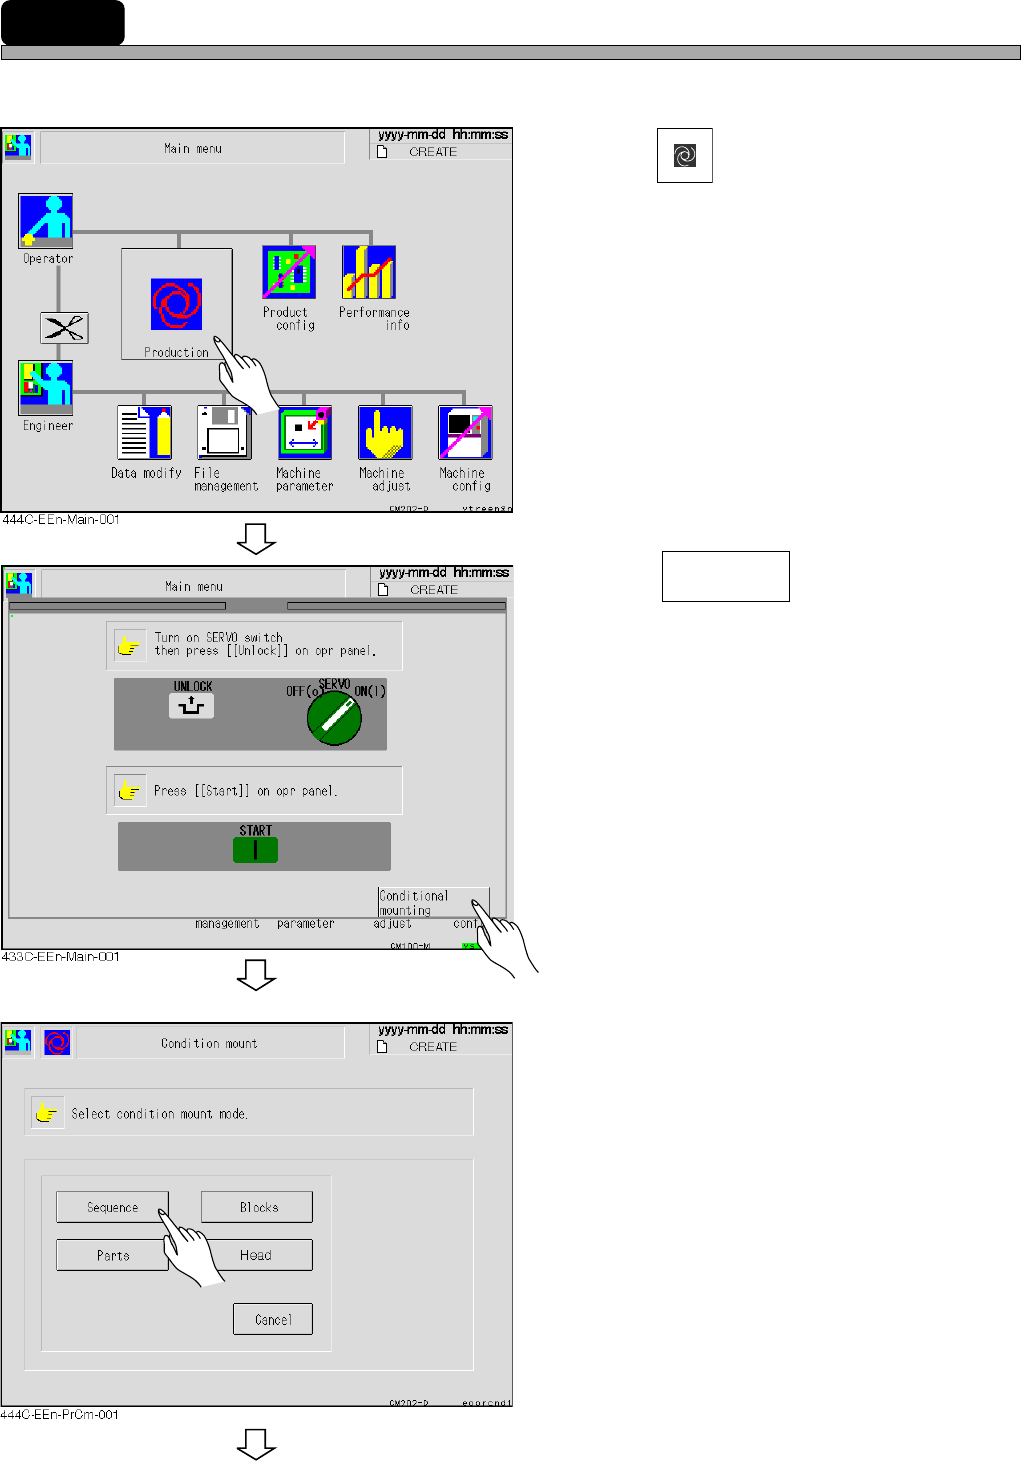
Checking the Mount State through the Conditional Mount
The mounting is checked by the conditional mounting before starting the production as following
procedure.
1. Press
Production
.
2. Press .
3. Select the condition.
To the next page
Conditional
mounting
4H4C-E-OMA09-A01-01