4H4CEOM2.pdf - 第60页
Page 8-32 T eaching the Mount Position 5 . Set the mounted board. (It is unnecessary when the board is on the stage.) 6 . When SEQ. No. with a deviated mount position is recognized, press Mount data edit . ∗ When SEQ. No…
Page 8-31
TEACHING
8
Teaching the Mount Position
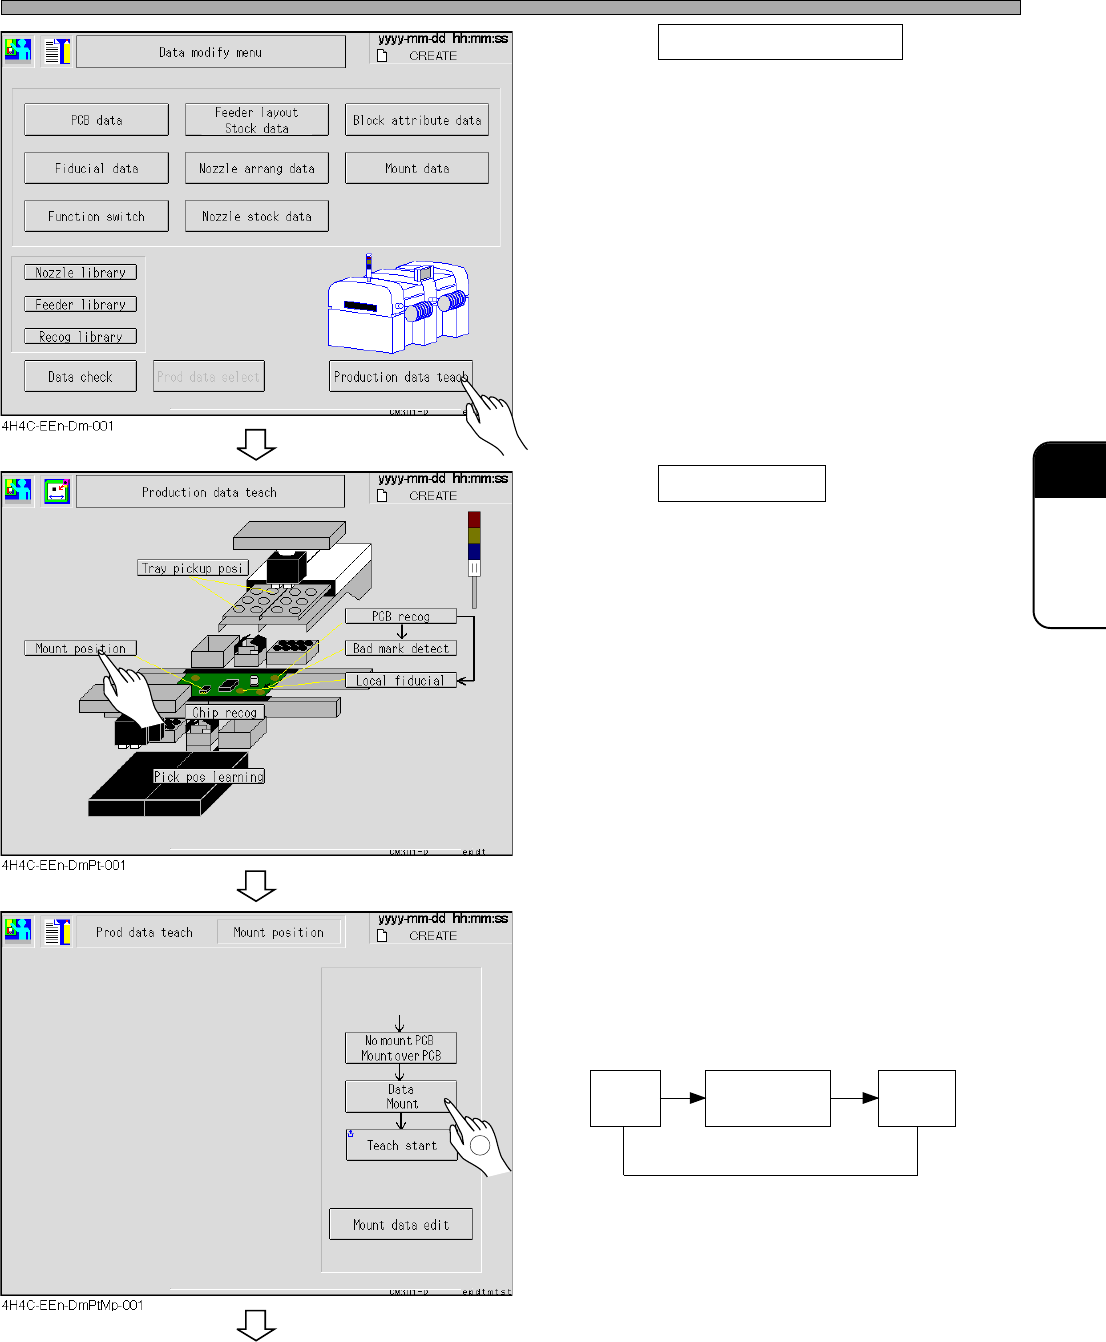
2. Press Production data teach .
• The production data teaching screen appears.
3. Press Mount position .
• The mount position screen appears.
4. Change the mode for necessary
teaching.
∗ Every pressing of the mode changes the
display as follows.
Data
Mount
Data
Mount/Block
Data
Pattern
To the next page
4H4C-E-OMA08-A03-02
1
Page 8-32
Teaching the Mount Position
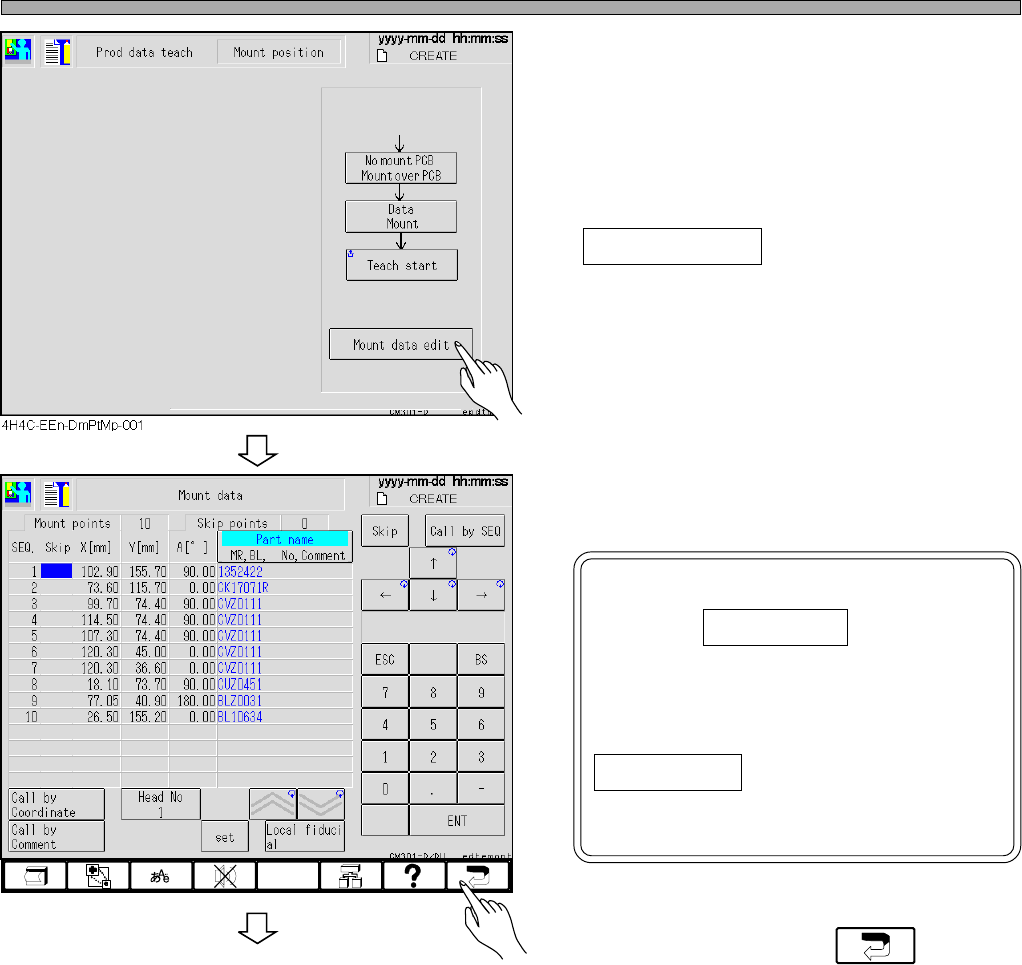
5. Set the mounted board.
(It is unnecessary when the board is on the
stage.)
6. When SEQ. No. with a deviated mount
position is recognized, press
Mount data edit .
∗ When SEQ. No. is not known, proceed to step
8.
7. Check the coordinates of the SEQ.
No. with a deviated mount position.
NOTICE
Pressing Call by SEQ changes
numerical keys and makes it
possible to enter numerals. When
the cursor is on the numerals of
the coordinate, pressing not
Call by SEQ but the numeralical
keys changes the numerals of
coordinates.
8. After checking, press .
To the next page
4H4C-EEn-DmMd-001
4H4C-E-OMA08-A03-03
Page 8-33
TEACHING
8
Teaching the Mount Position
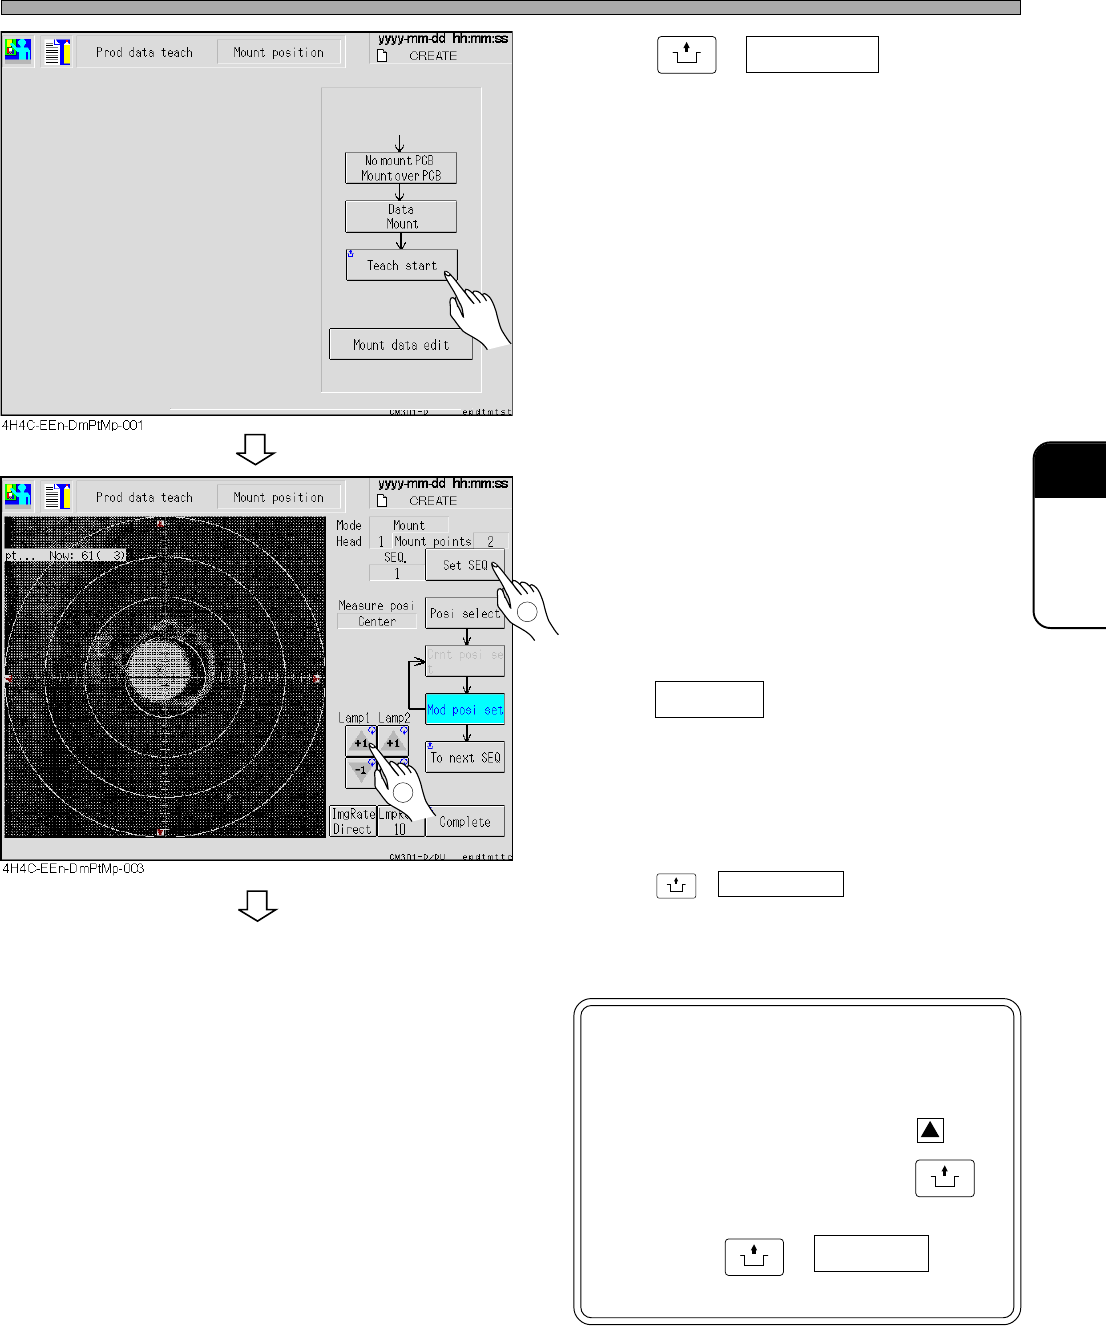
9. Press
UNLOCK
+ Teach start .
• The board is carried in to the stage, and moves
to the position to be mounted first.
10. Adjust the lamp value to what is
easier to see the screen.
11. When SEQ No. is known,
press Set SEQ to enter that numerals
( No. ).
• Move the board to the mounting position of
selected SEQ No.
∗ When SEQ No. is not known,
press
UNLOCK
+ To next SEQ to move the board
to the next coordinates which have the mount
position deviation.
NOTICE
Do not touch the recognition
screen here.
Pressing small red triangle, on
the recognition screen with
UNLOCK
held moves the coordinates, and
then press
UNLOCK
+ Complete to
renew the mount data.
To the next page
4H4C-E-OMA08-A03-04
1
2