4H4CEOM2.pdf - 第66页
Page 8-38 T o the next page 8-8 T ray Pickup Position T eaching Deciding the pickup position by viewing the chips through the camera, the tray block origin and pitch can be measured. 8-8-1 T eaching Procedure 1 . Press T…
Page 8-37
TEACHING
8
Pickup Position Learning Teaching
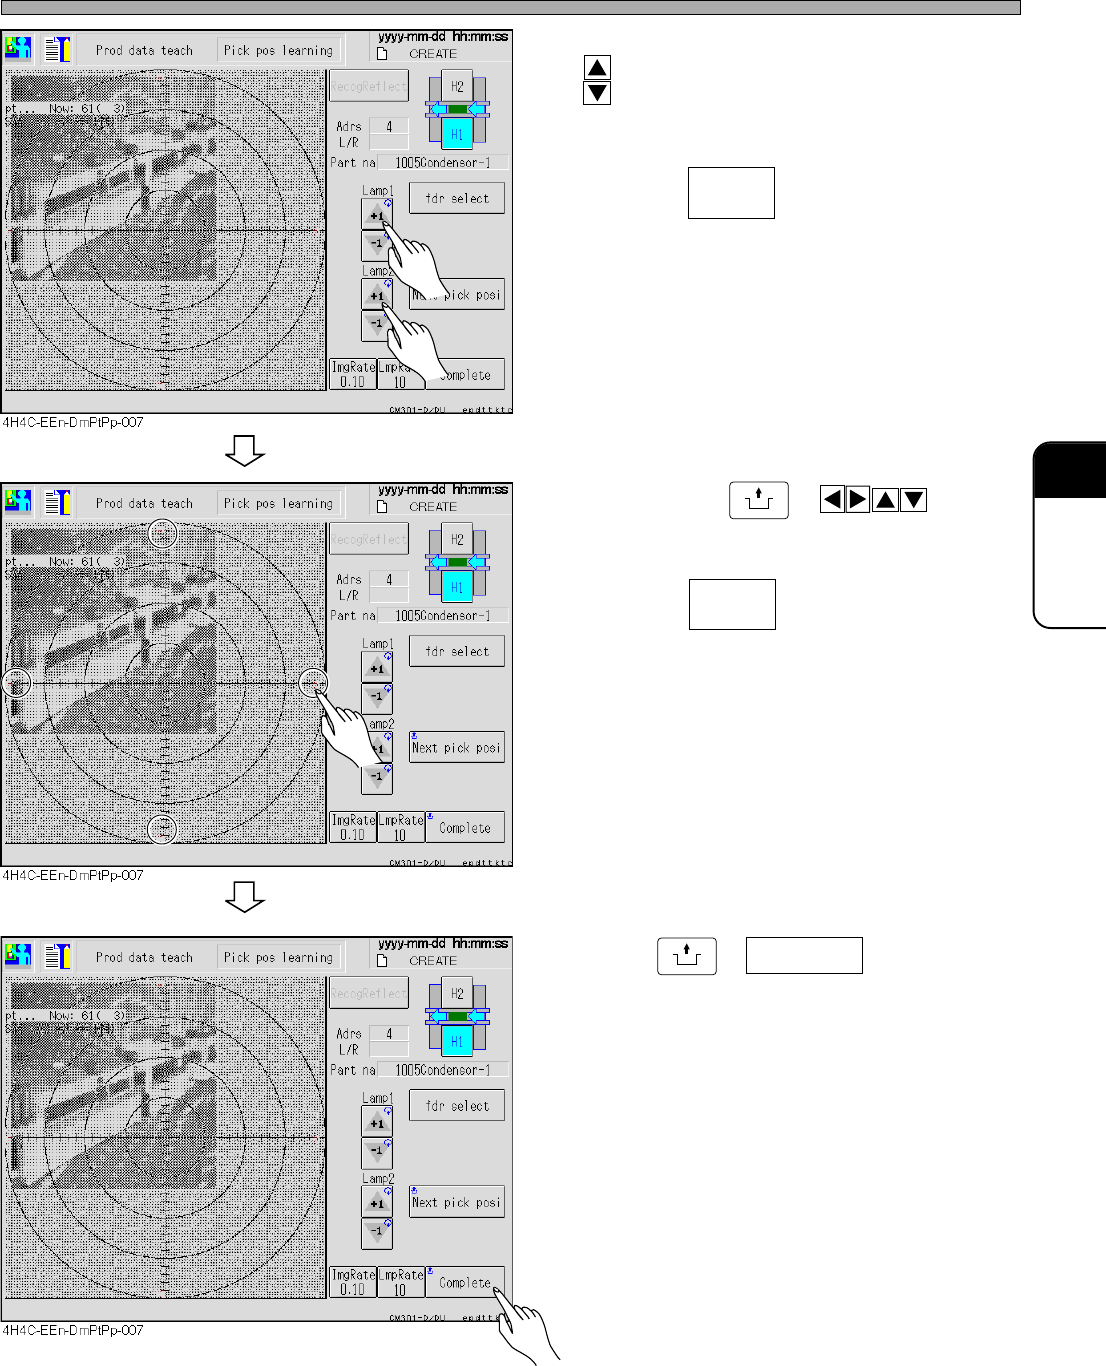
6. Adjust the brightness of the lamp with
.
• Adjust the brightness so that the chips can be
seen.
• Pressing changes the key rate of
lamp value adjustment .
7. By pressing
UNLOCK
+ , move
the image and put the pickup position
and the center of the camera together.
• Pressing changes the distance of
the head camera (image).
8. Press
UNLOCK
+ Complete .
4H4C-E-OMA08-A03-03
ImgRate
0.10
LmpRate
10
Page 8-38
To the next page
8-8 Tray Pickup Position Teaching
Deciding the pickup position by viewing the chips through the camera, the tray block origin and
pitch can be measured.
8-8-1 Teaching Procedure
1
. Press Tray pickup posi .
• The tray pickup position screen appears.
2. Press
UNLOCK
→→
→→
→
START
.
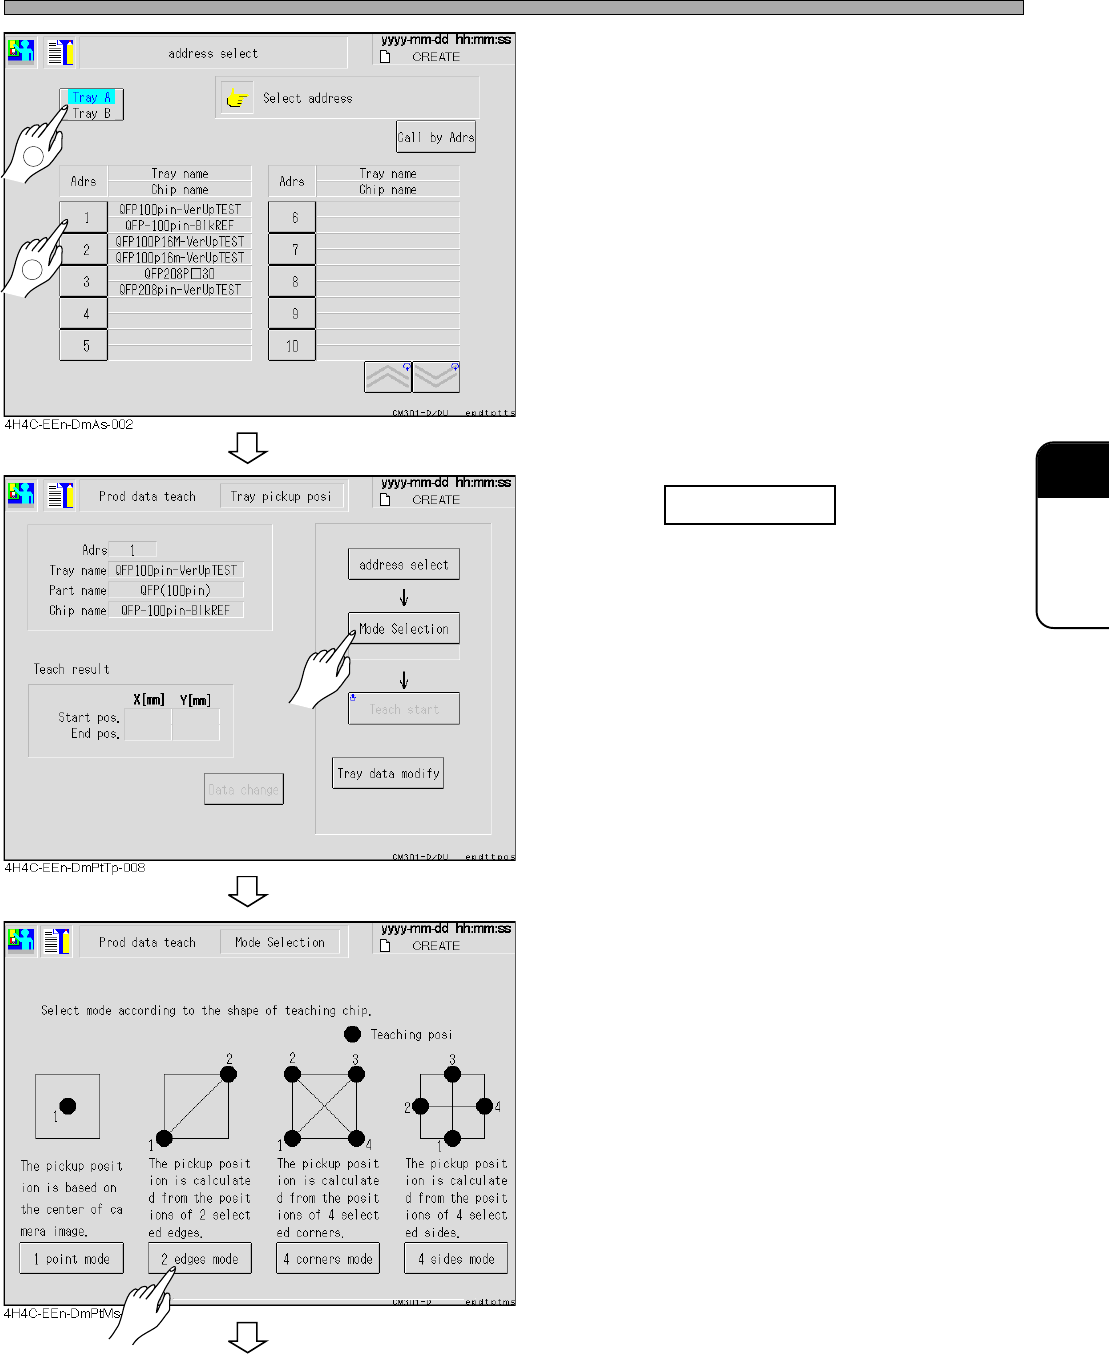
3. Press Address select .
4H4C-E-OMA08-A04-01
4H4C-EEn-DmPt-001
Page 8-39
TEACHING
8
Tray Pickup Position Teaching
• The address selection screen of the production
data is displayed.
• Teaching is performed on the tray pickup side.
4. Select data for teaching.
5. Press Mode selection .
6. Select the mode from the chip shape
to be taught.
• There are 4 of 1 point mode, across corner , all
corners mode, and all sides mode.
To the next page
4H4C-E-OMA08-A04-02
1
2