4H4CEOM2.pdf - 第39页
Page 8-11 TEACHING 8 Bad Mark Recognition T eaching 4. Check and modify the value of coordi- nates of the bad board mark position. 5. Press . • The screen of step 3 reappears. 6. Press Block rpt data edit . • The block a…
Page 8-10
Bad Mark Recognition Teaching
8-3-3 Teaching Procedures
When some bad blocks are detected on the production board, during the process, you can use the
function not to mount that block by marking that bad block mark.
NOTICE
When using the board recognition, carry out the board recognition teaching first.
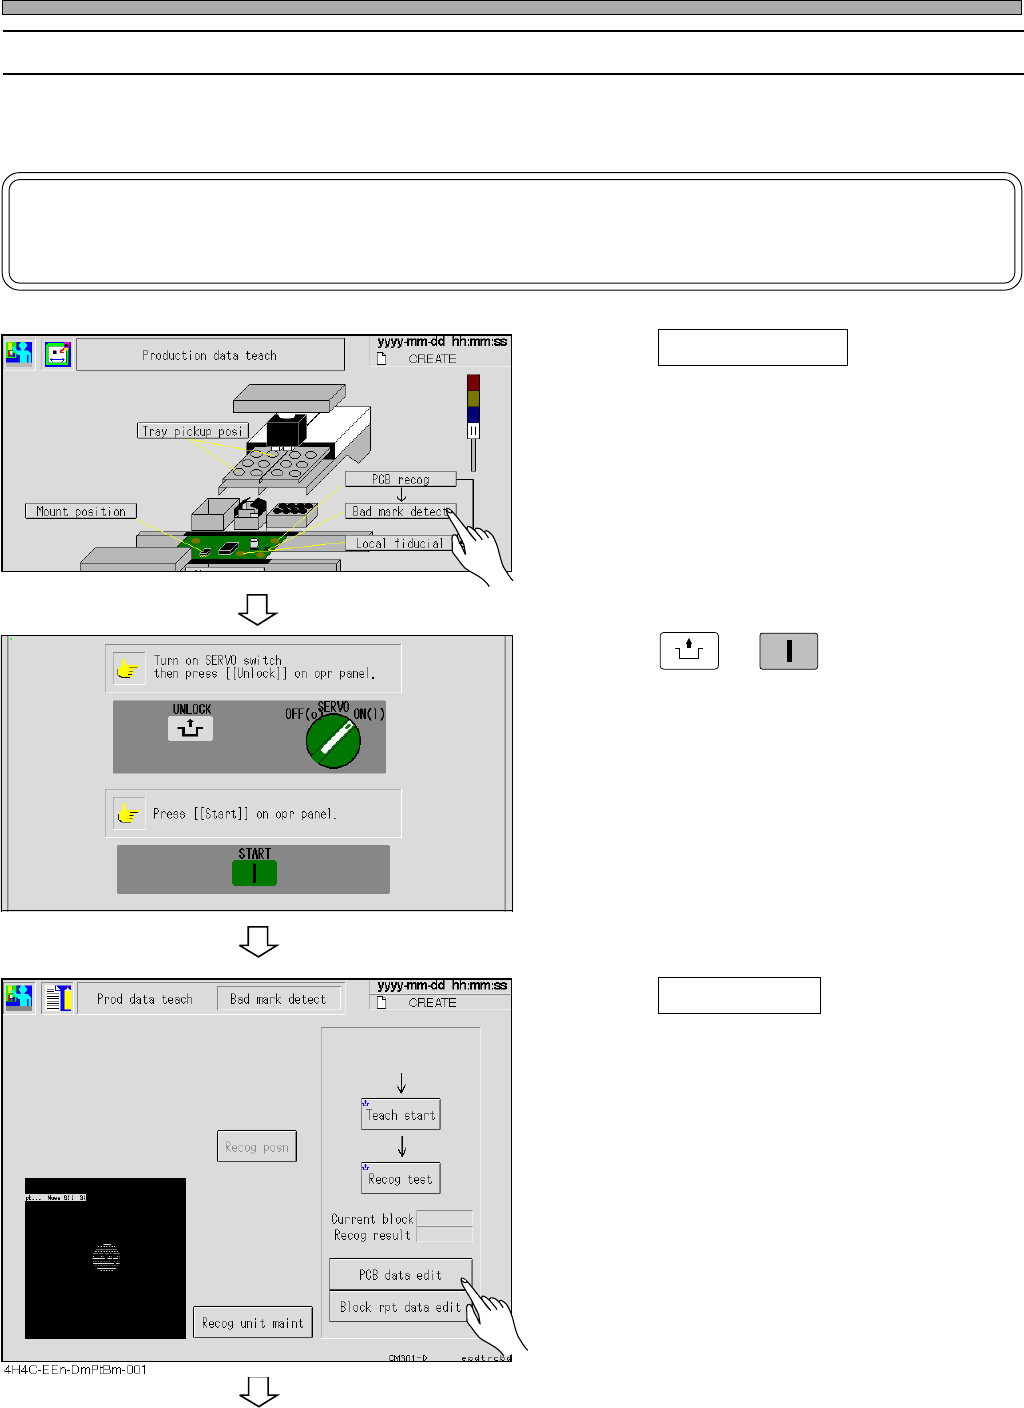
1. Press Bad mark detect .
• The bad mark recognition screen appears.
2. Press
UNLOCK
→
START
.
3. Press PCB data edit .
4H4C-EEn-DmPt-001
To the next page
443C-EEn-DmPt-002
4H4C-E-OMA08-A01-01
Page 8-11
TEACHING
8
Bad Mark Recognition Teaching
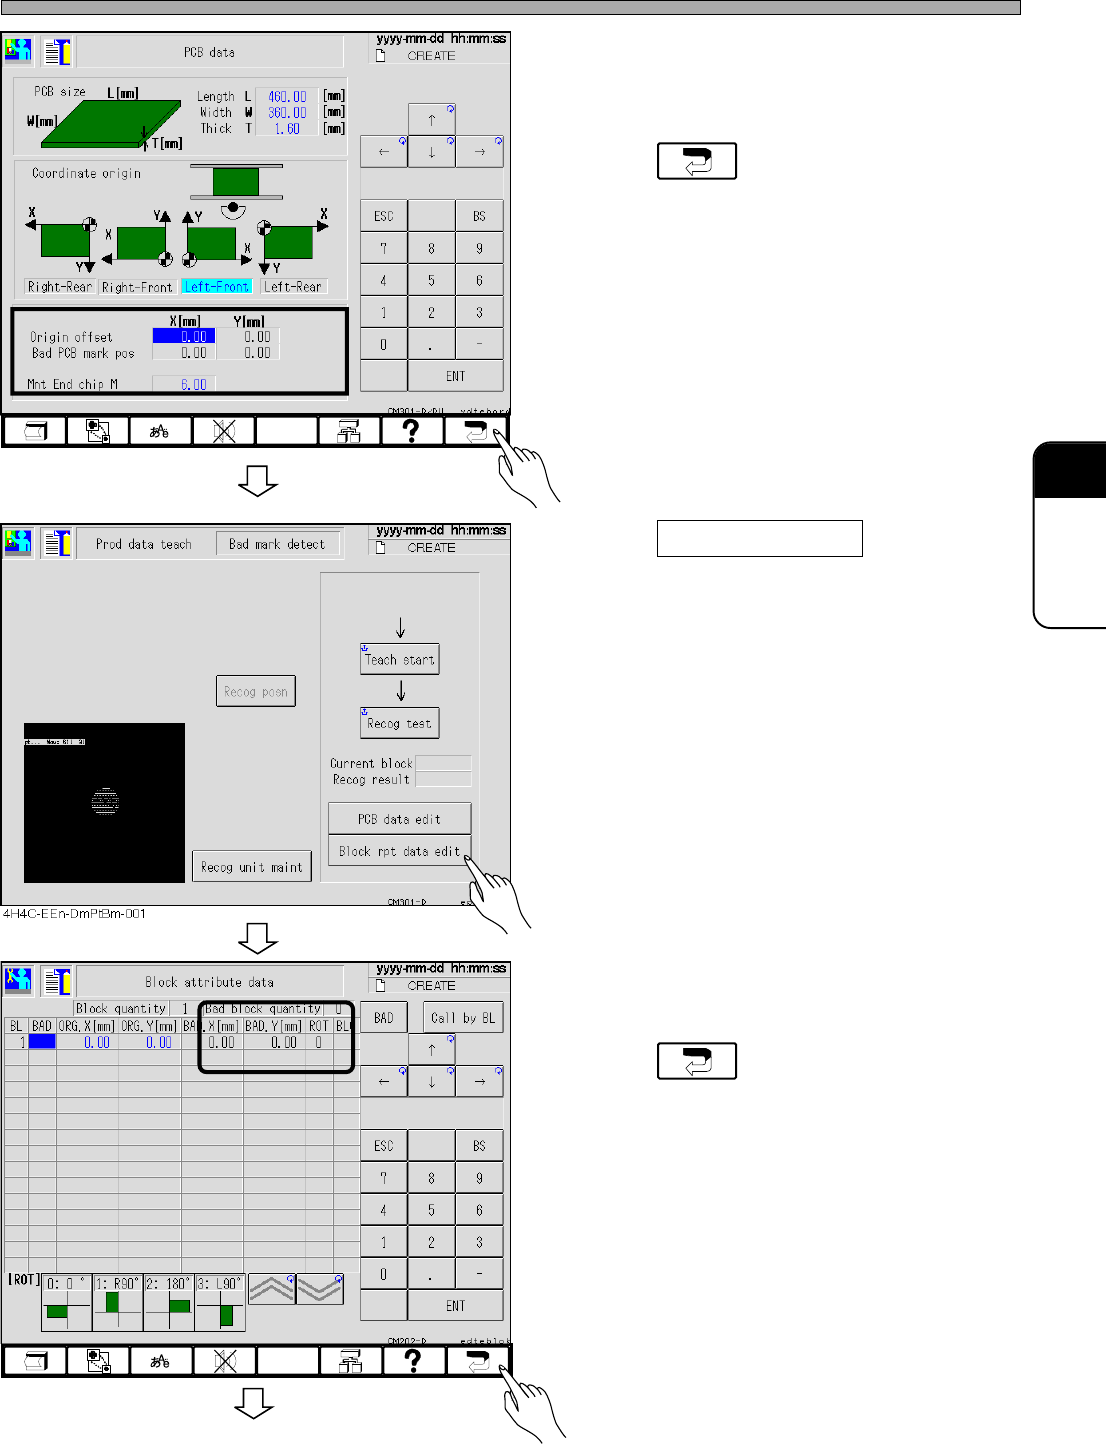
4. Check and modify the value of coordi-
nates of the bad board mark position.
5. Press .
• The screen of step 3 reappears.
6. Press Block rpt data edit .
• The block attribute data screen appears.
∗ Check and modify the value of the coordiates
in the bad block quantity fields
7. Press .
• The screen of step 6 reappears.
444C-EEn-DmBa-002
To the next page
4H4C-EEn-DmPd-001
4H4C-E-OMA08-A01-02
Page 8-12
Bad Mark Recognition Teaching
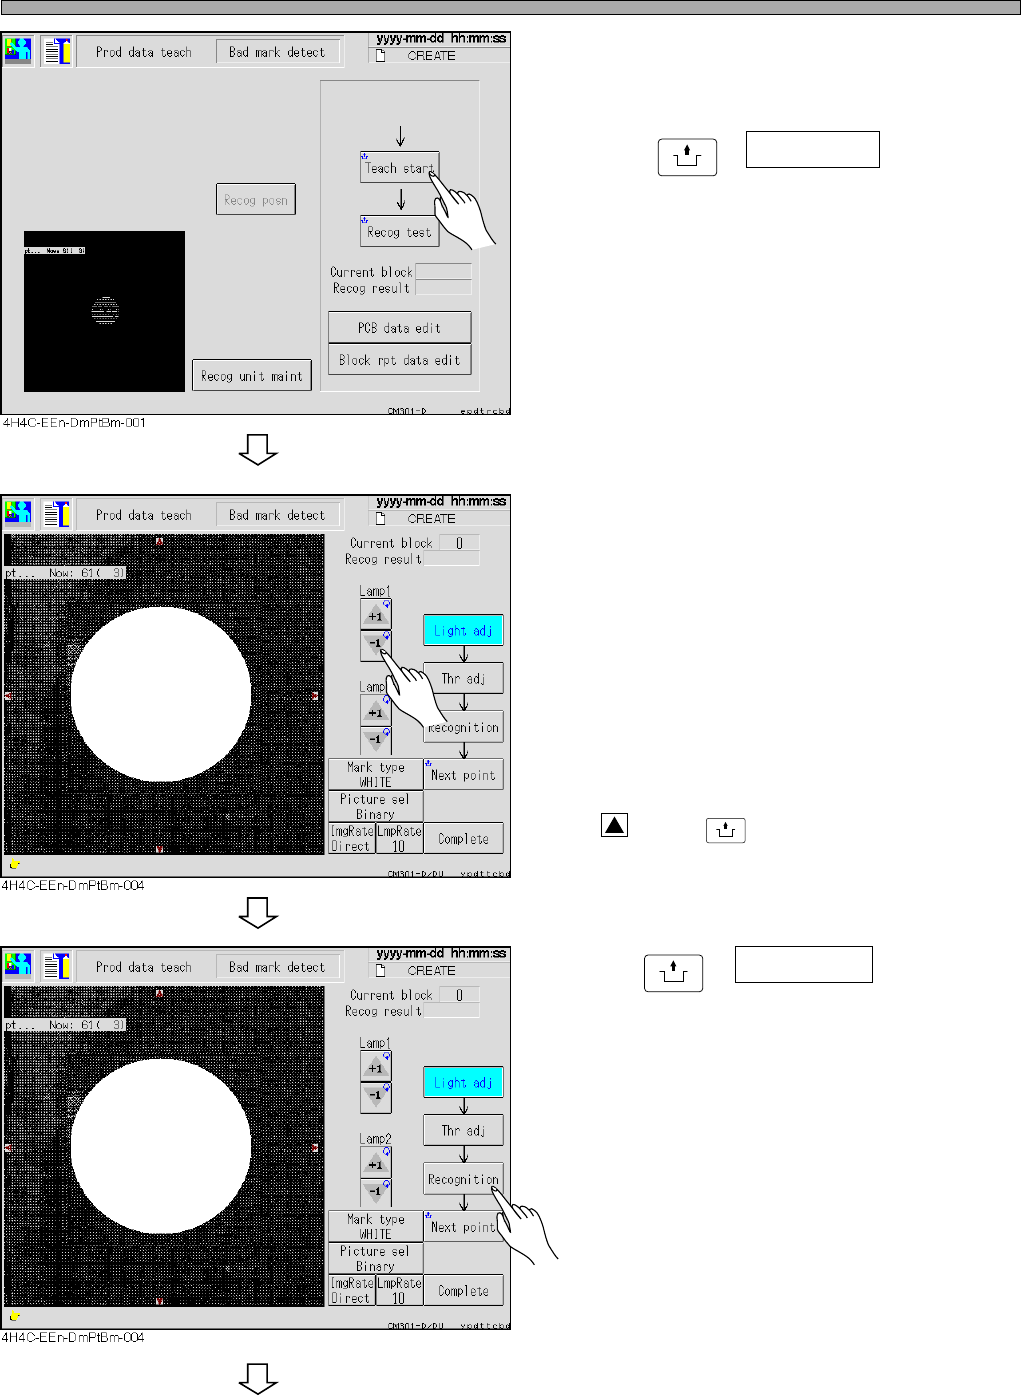
8. Set the board to the front conveyor.
9. Press
UNLOCK
+ Teach start .
• The board is transported to the mount stage
and the recognition camera moves to the bad
board mark position.
∗ When using the board recognition, the board
moves to the bad board mark position after it.
10. Increase and decrease the value of
lamps 1 and 2, and adjust the bright-
ness to obtain the bad mark.
• Lamp value 1 (around mark)
------Ring light (about 30 to 50)
• Lamp value 2 (center of mark)
------Spot light
∗ When the bad mark is not near the center of
the recognition screen, press the red triangle
holding
UNLOCK
, and move it to the center.
11.Press
UNLOCK
+ Recognition .
• The recognition starts.
∗ Check “OK block” at the blank for the recogni-
tion result.
To the next page
4H4C-E-OMA08-A01-02