4H4CEOM2.pdf - 第69页
Page 8-41 TEACHING 8 T ray Pickup Position T eaching 11 . After teaching the end position, press + Complete . 12 . Press Data change . • The message asking the data change appears. • T o change manually , press Tray data…
Page 8-40
Tray Pickup Position Teaching
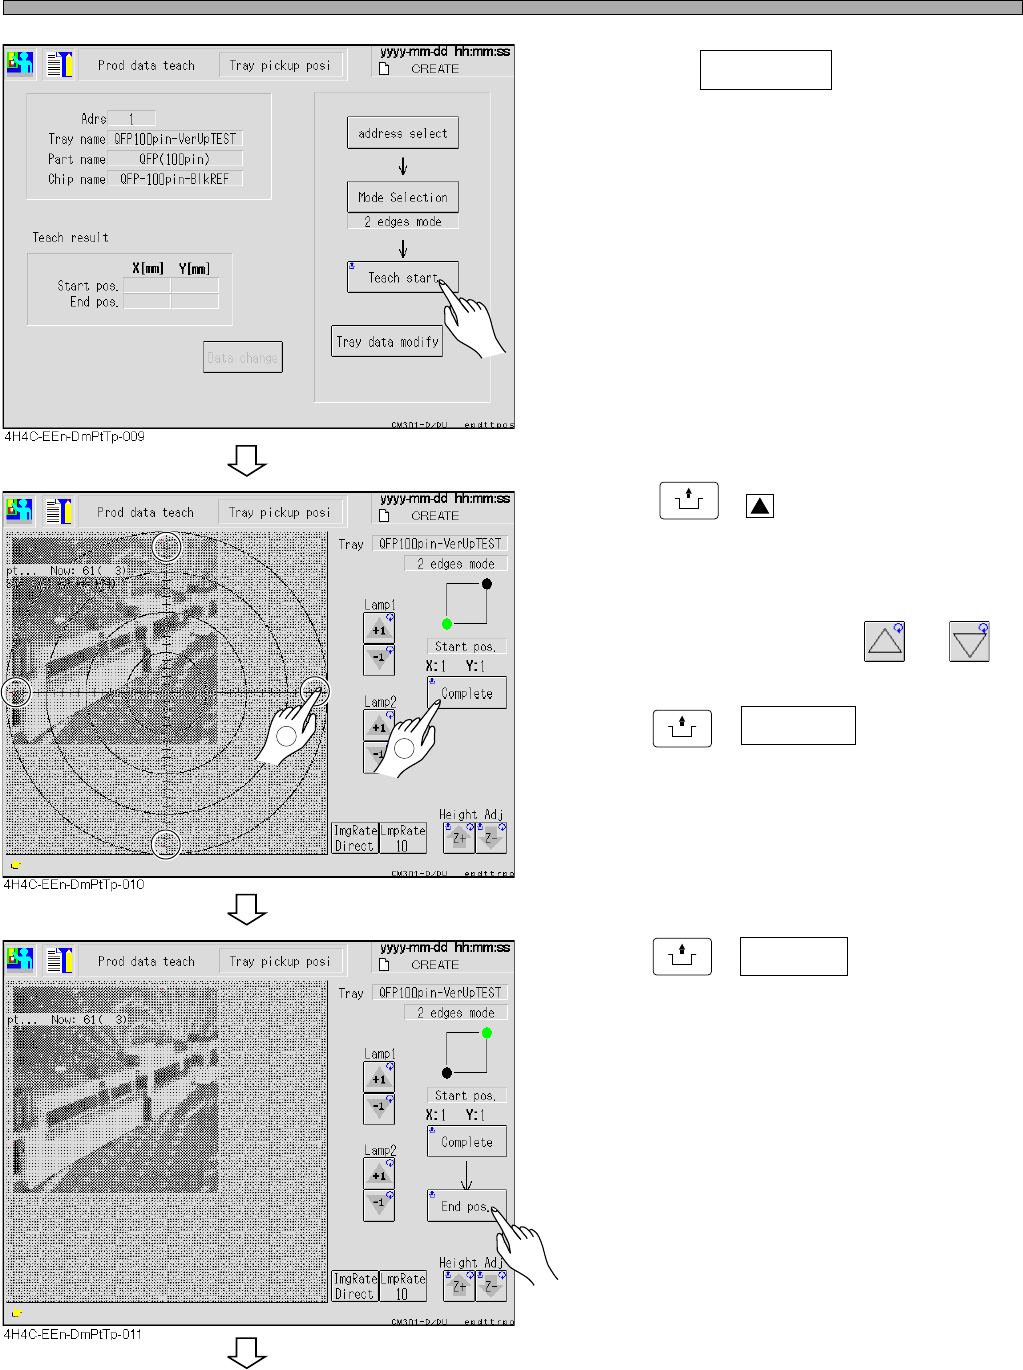
7. Press + Teach start .
• The head unit moves to the start position.
8. Press
UNLOCK
+ at the recognition
image display, and match the cross
line to the position to be taught.
• If the image is not clear, adjust the brightness
of lamps 1 and 2 by pressing and .
9. Press
UNLOCK
+ Complete , and decide
the position.
• If it is necessary to perform teaching many
time, repeat the same operation.
10. Press
UNLOCK
+ End pos. .
• The head unit moves to the end position.
• For the tray on the A side, if the end position
goes beyond the tray-setting reference by
about 170 mm in the direction of the X-axis,
teaching may be disabled owing to the travel
limit of the camera for recognition. In such a
case, it travels to the component that can be
taught by means of the software; therefore,
carry out teaching at that component. The
location of the component that could not be
taught will be found from the data of the one
that could be taught.
∗ Perform the same operation as for the start
position.
To the next page
2
1
4H4C-E-OMA08-A04-03
Page 8-41
TEACHING
8
Tray Pickup Position Teaching
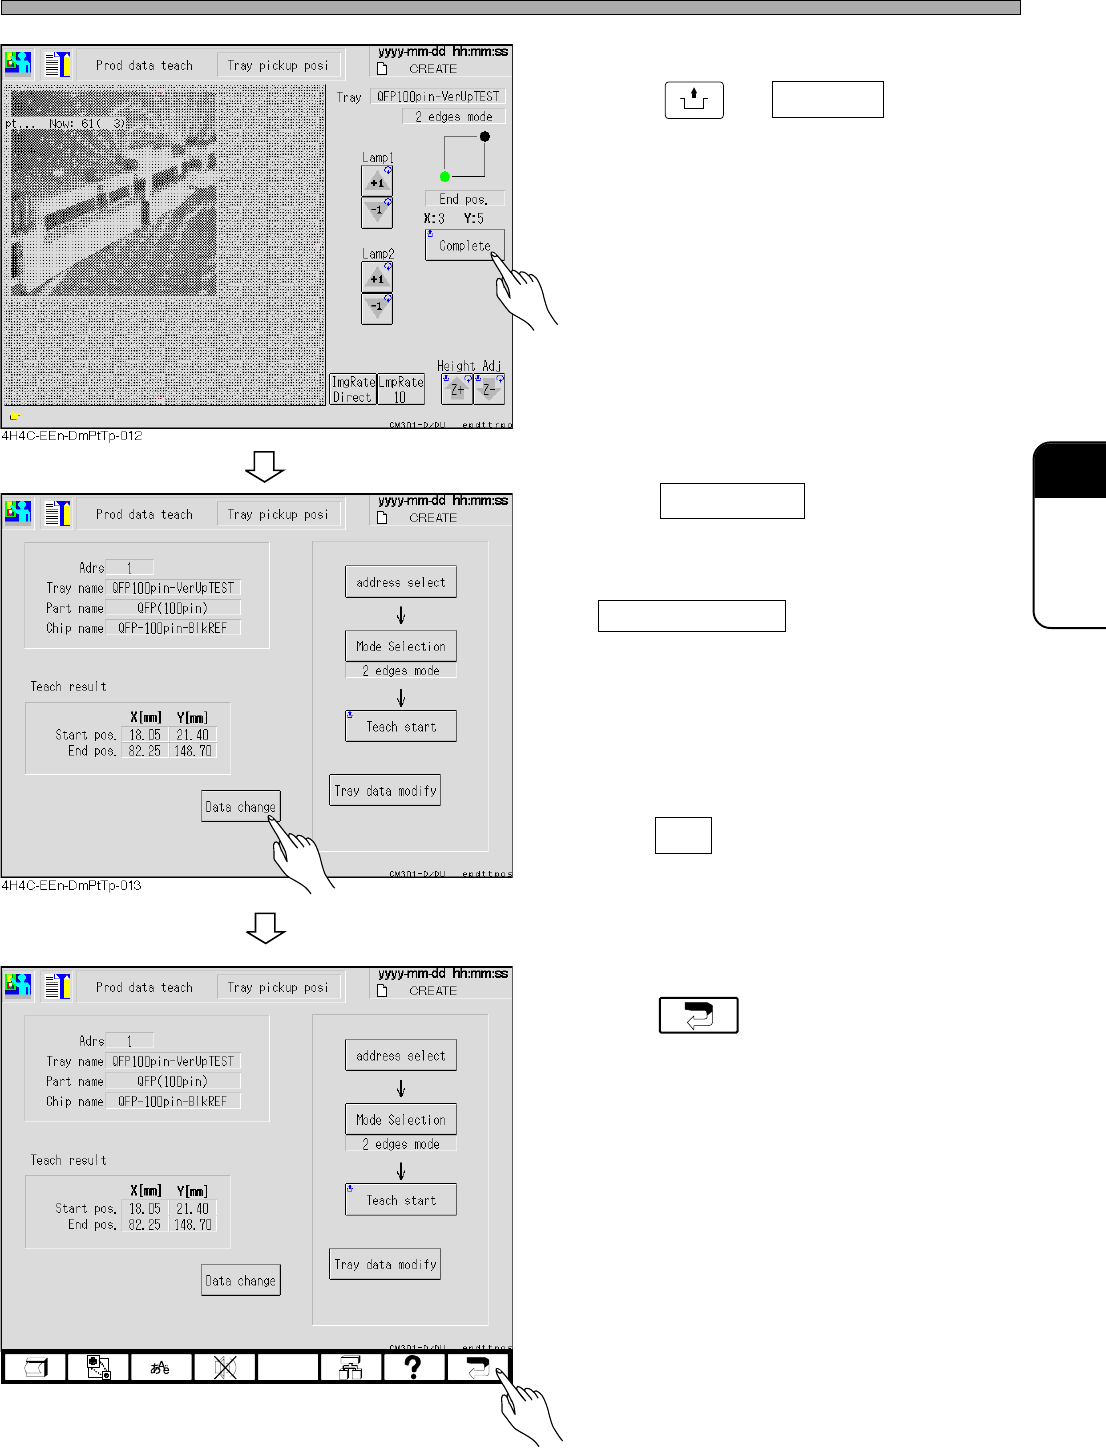
11. After teaching the end position,
press + Complete .
12. Press Data change .
• The message asking the data change appears.
• To change manually, press
Tray data modify .
13. Press Yes , and decide the position.
• The pickup start position and end position of
the tray data is changed to the taught result.
14. Press .
• The tray pickup position teaching ends.
UNLOCK
4H4C-E-OMA08-A04-02
4H4C-EEn-DmPtTp-013

Page 8-42
= MEMO =
4H4C-E-OMA08-A04-01