4H4CEOM2.pdf - 第88页
Page 9-18 Checking the Mount State through the Conditional Mount Blocks is pressed at step 3. • Select data for the conditionial mount from the mount data. (Some pieces of them can be selected.) Head is pressed at step 3…
Page 9-17
CHANGING THE
PRODUCTION BOARDS
9
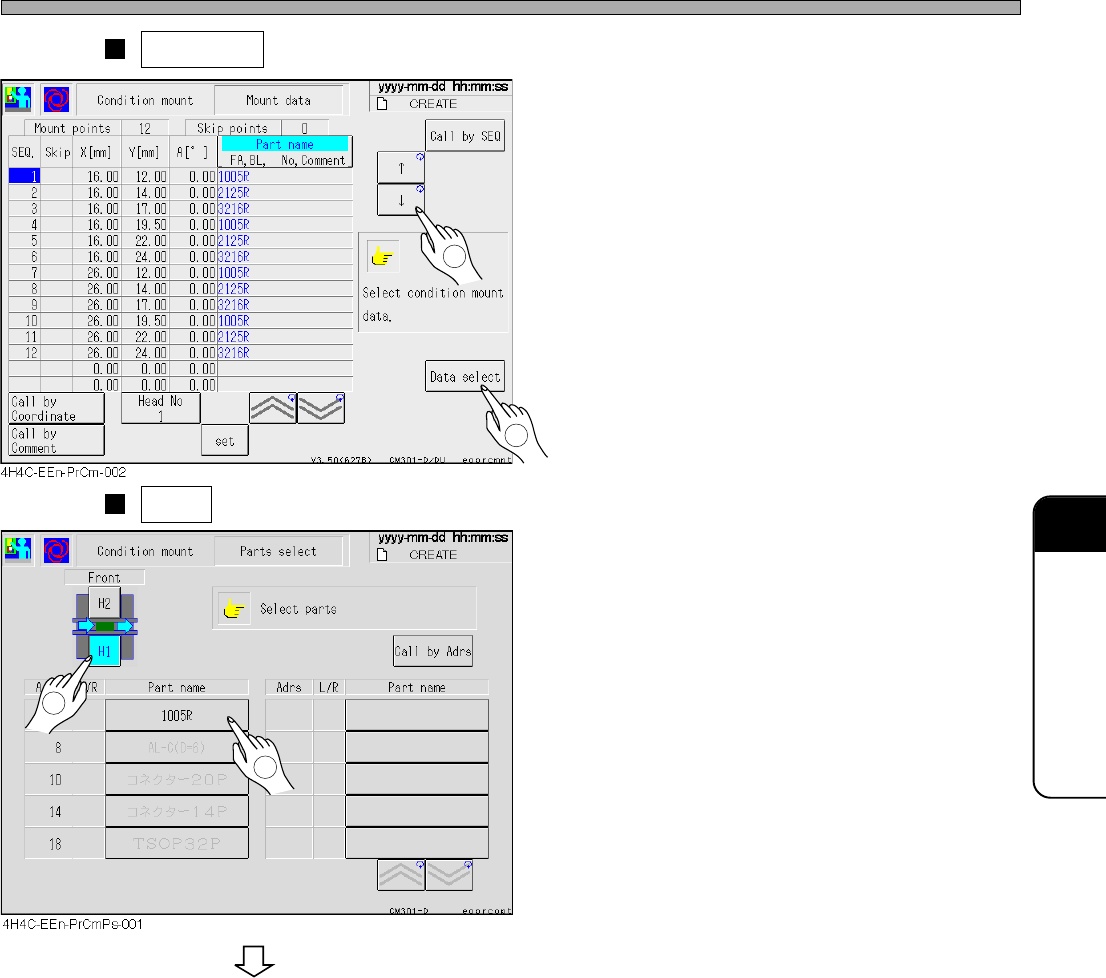
Sequence is pressed at step 3.
• Select data for the conditionial mount from the
mount data. (Some pieces of them can be
selected.)
Parts is pressed at step 3.
• Set the parts to be mounted.
Checking the Mount State through the Conditional Mount
2
To the next page
4H4C-E-OMA09-A01-02
1
2
1
Page 9-18
Checking the Mount State through the Conditional Mount
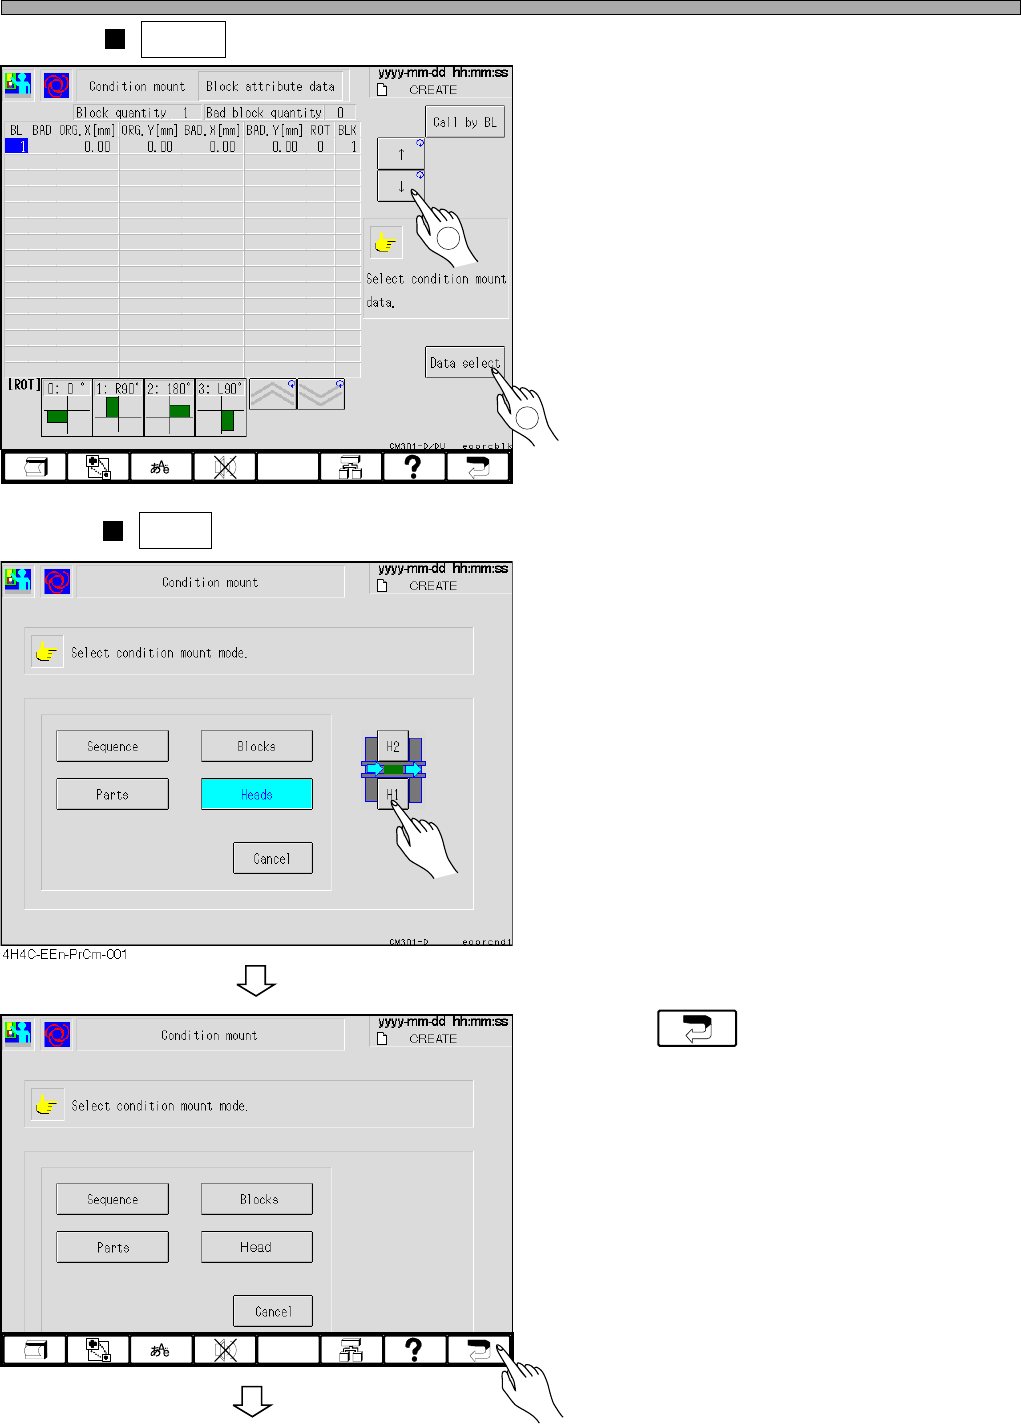
Blocks is pressed at step 3.
• Select data for the conditionial mount from the
mount data. (Some pieces of them can be
selected.)
Head is pressed at step 3.
• Select the head for the conditional mount.
4. Press .
• The main menu reappear.
4H4C-EEn-PrCm-002
444C-EEn-PrCm-001
1
2
4H4C-E-OMA09-A01-04
To the next page
Page 9-19
CHANGING THE
PRODUCTION BOARDS
9
Checking the Mount State through the Conditional Mount
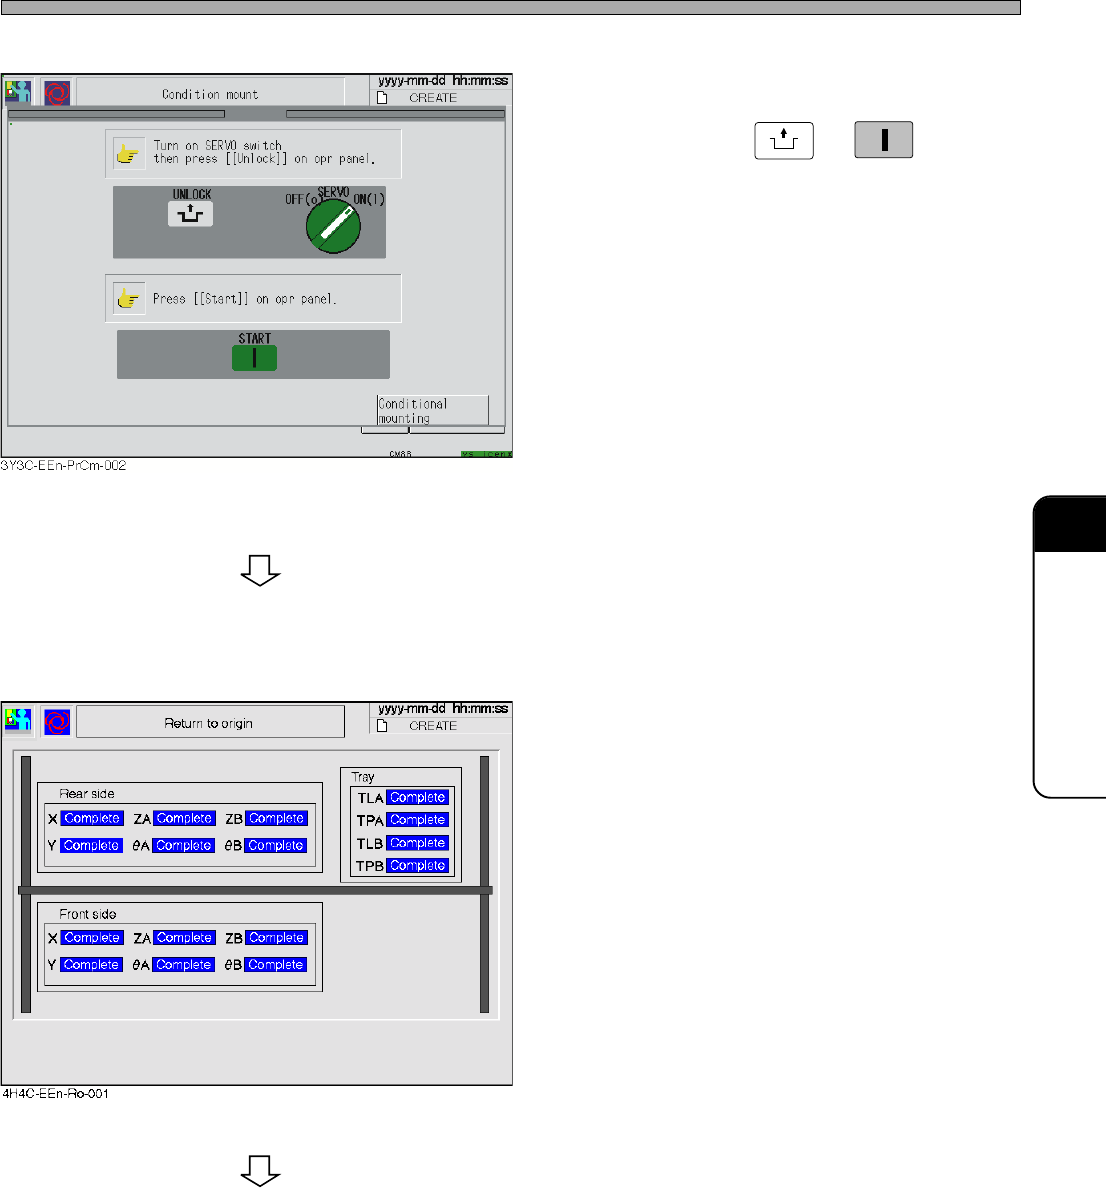
5. Ensure that the servo switch is turned
ON, and press
UNLOCK
→
START
.
• All axes return to their origin.
• The axis returned to its origin is displayed with
“Complete.”
4H4C-E-OMA09-A01-03
To the next page