4H4CEOM2.pdf - 第34页
Page 8-6 Board Recognition T eaching 8 . Press Complete . 9. Press UNLOCK + Next point . • The screen moves to the next board recogni- tion mark and the recognition automatically starts. 10. Press Complete . • Data are a…
Page 8-5
TEACHING
8
Board Recognition Teaching
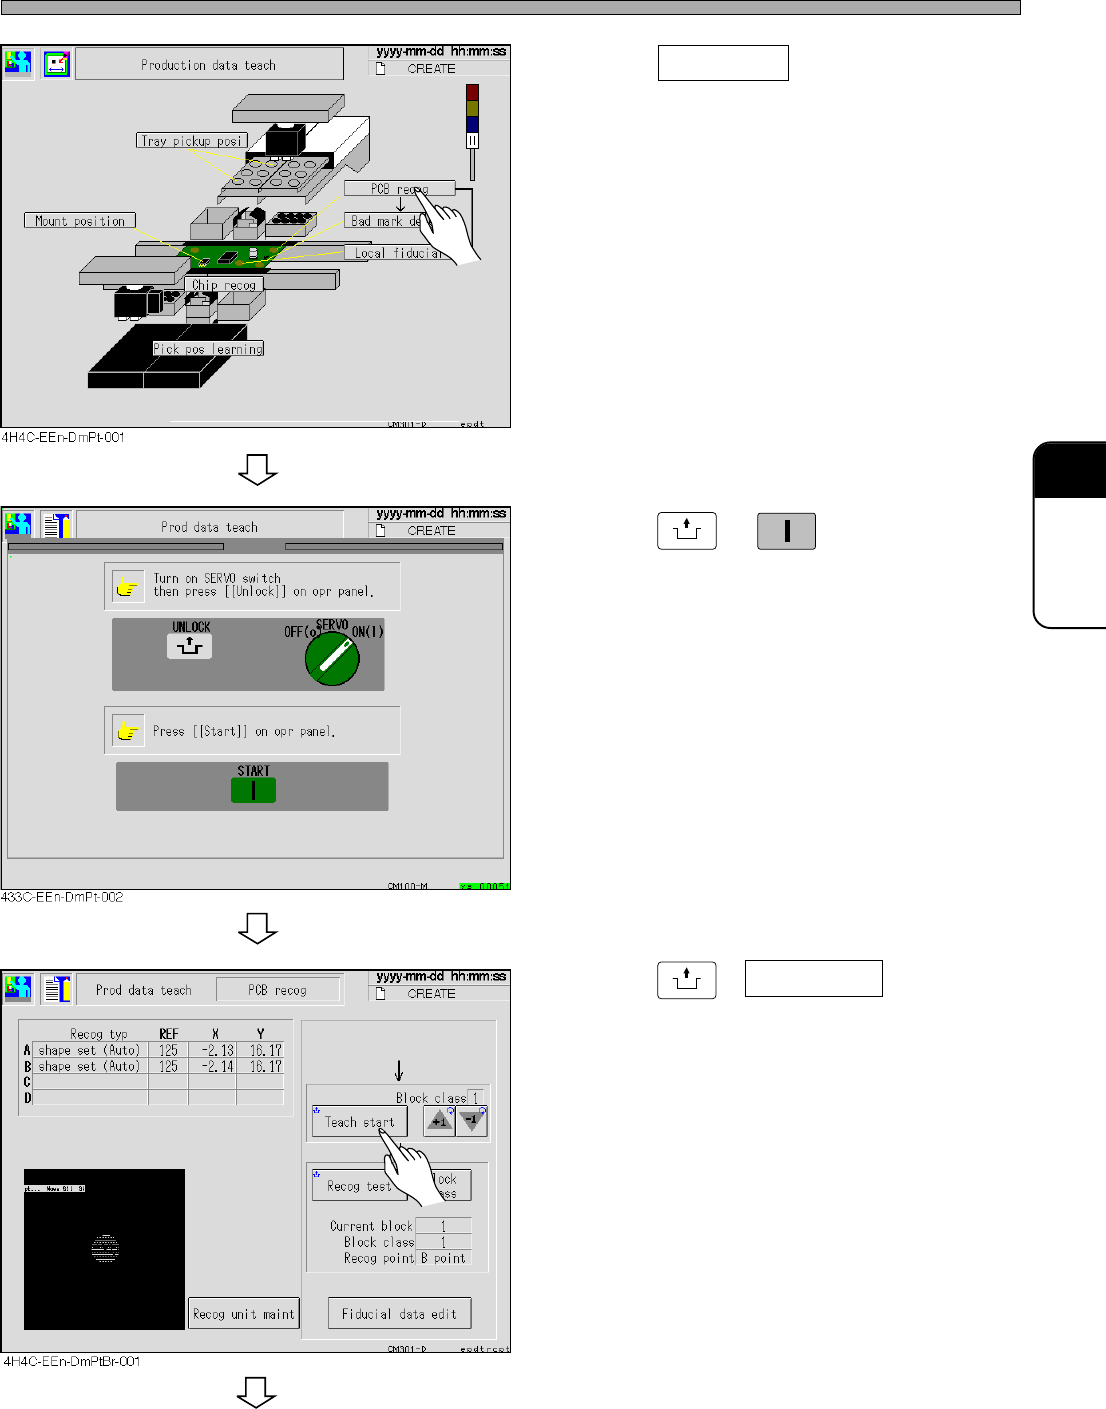
4. Press PCB recog .
• The board recognition screen appears.
5. Press
UNLOCK
→
START
.
6. Set the board to the front conveyor.
7. Press
UNLOCK
+ Teach start .
• The board is transported.
• The recognition is automatically operated.
To the next page
4H4C-E-OMA08-A01-02
Page 8-6
Board Recognition Teaching
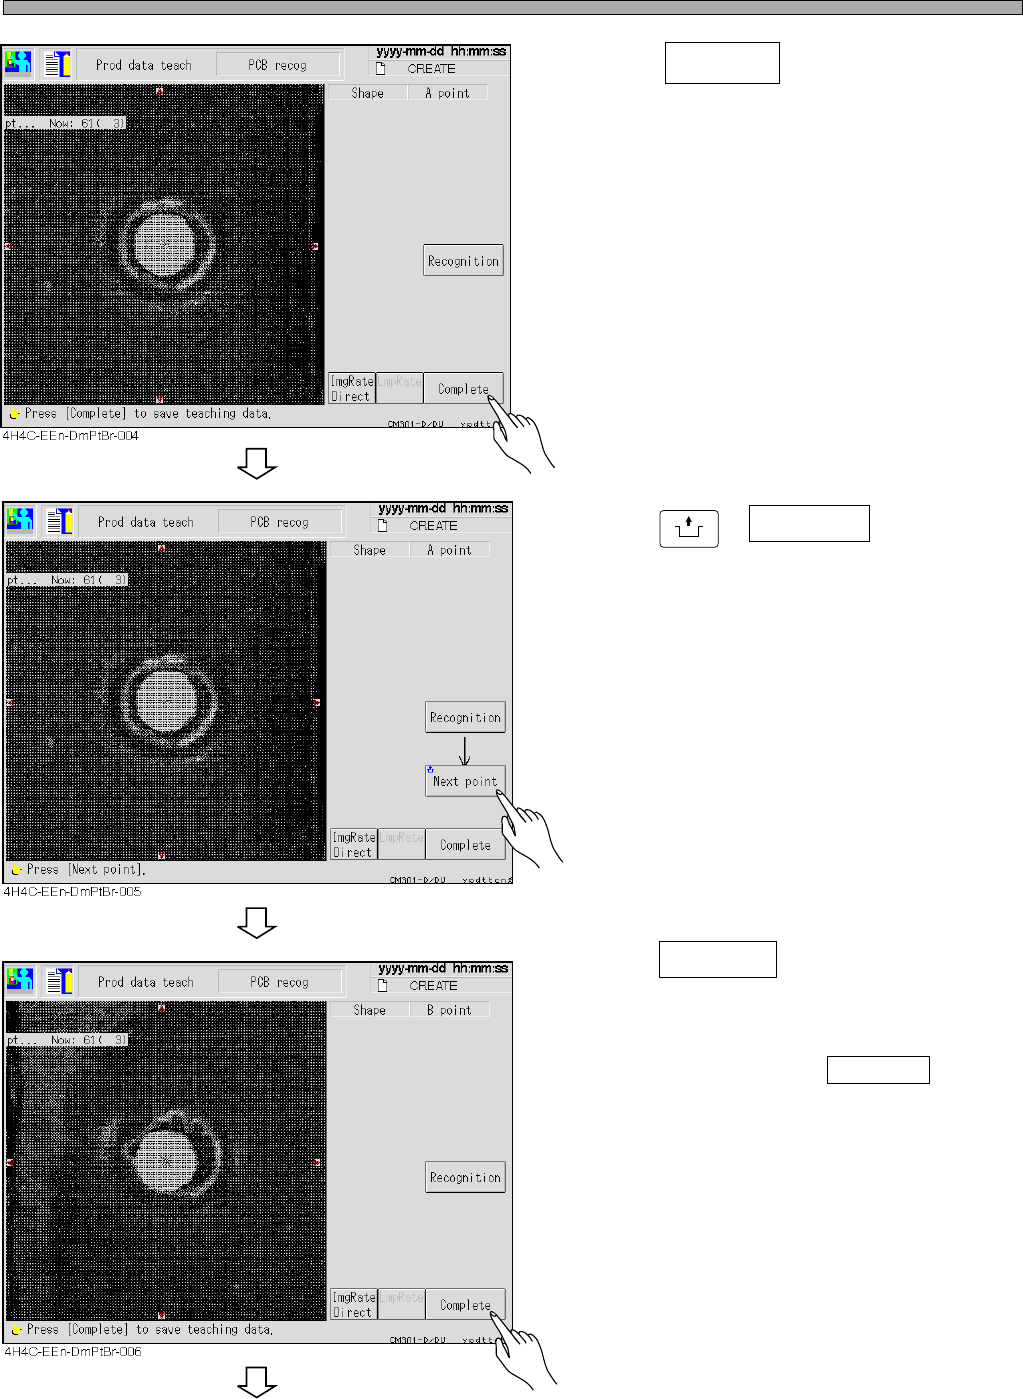
8. Press Complete .
9. Press
UNLOCK
+ Next point .
• The screen moves to the next board recogni-
tion mark and the recognition automatically
starts.
10. Press Complete .
• Data are automatically saved.
• When you have selected ABC point at the
board recognition, repeat steps 10 and 11 and
carry out teaching for C point.
To the next page
4H4C-E-OMA08-A01-03
Page 8-7
TEACHING
8
Board Recognition Teaching
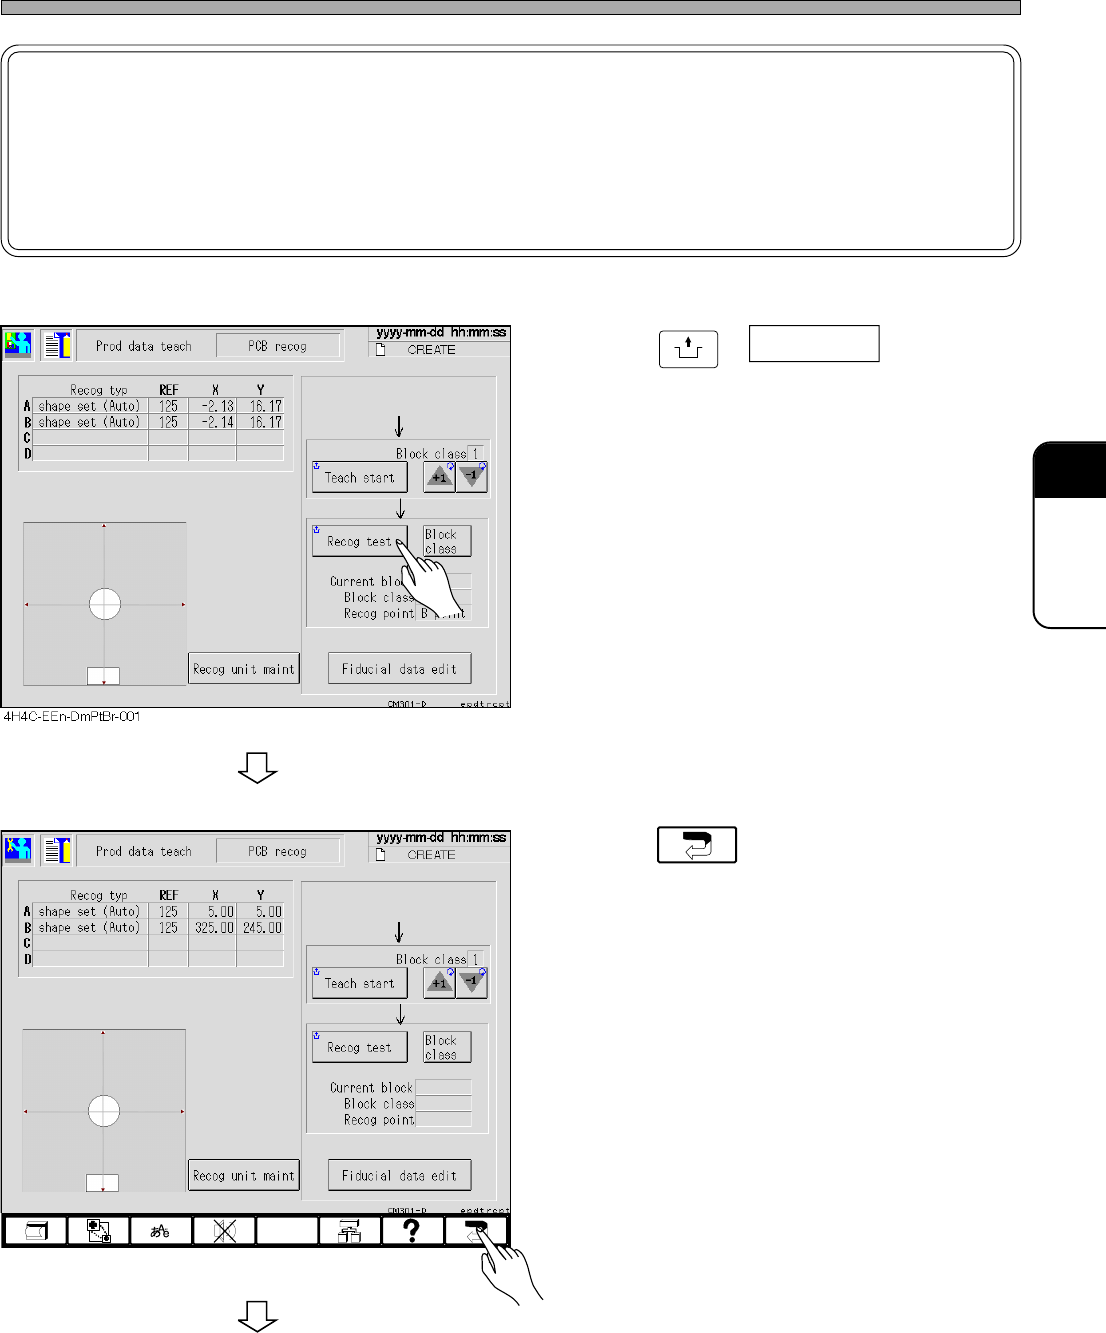
11. Press
UNLOCK
+ Recog test .
• Ensure that the recognition is performed
properly.
12. Press .
To the next page
4H4C-EEn-DmPtBr-002
4H4C-E-OMA08-A01-02
NOTICE
The displayed value of X and Y is the reference data.
Even if the board recognition data is modified by using this value, the mount
accuracy worsens as the correlation between the board recognition data and the
mount coordinate data is not guaranteed.