4H4CEOM2.pdf - 第44页
Page 8-16 4H4C-E-OMA08-A01-02 T o the next page Mount Point Recognition T eaching 4. Move the cursor to the mount point recognition mark number for teaching and press MR select . 5. Press . 6. Set the board to the front …
Page 8-15
TEACHING
8
8-4 Mount Point Recognition Teaching
8-4-1 Teaching Procedure
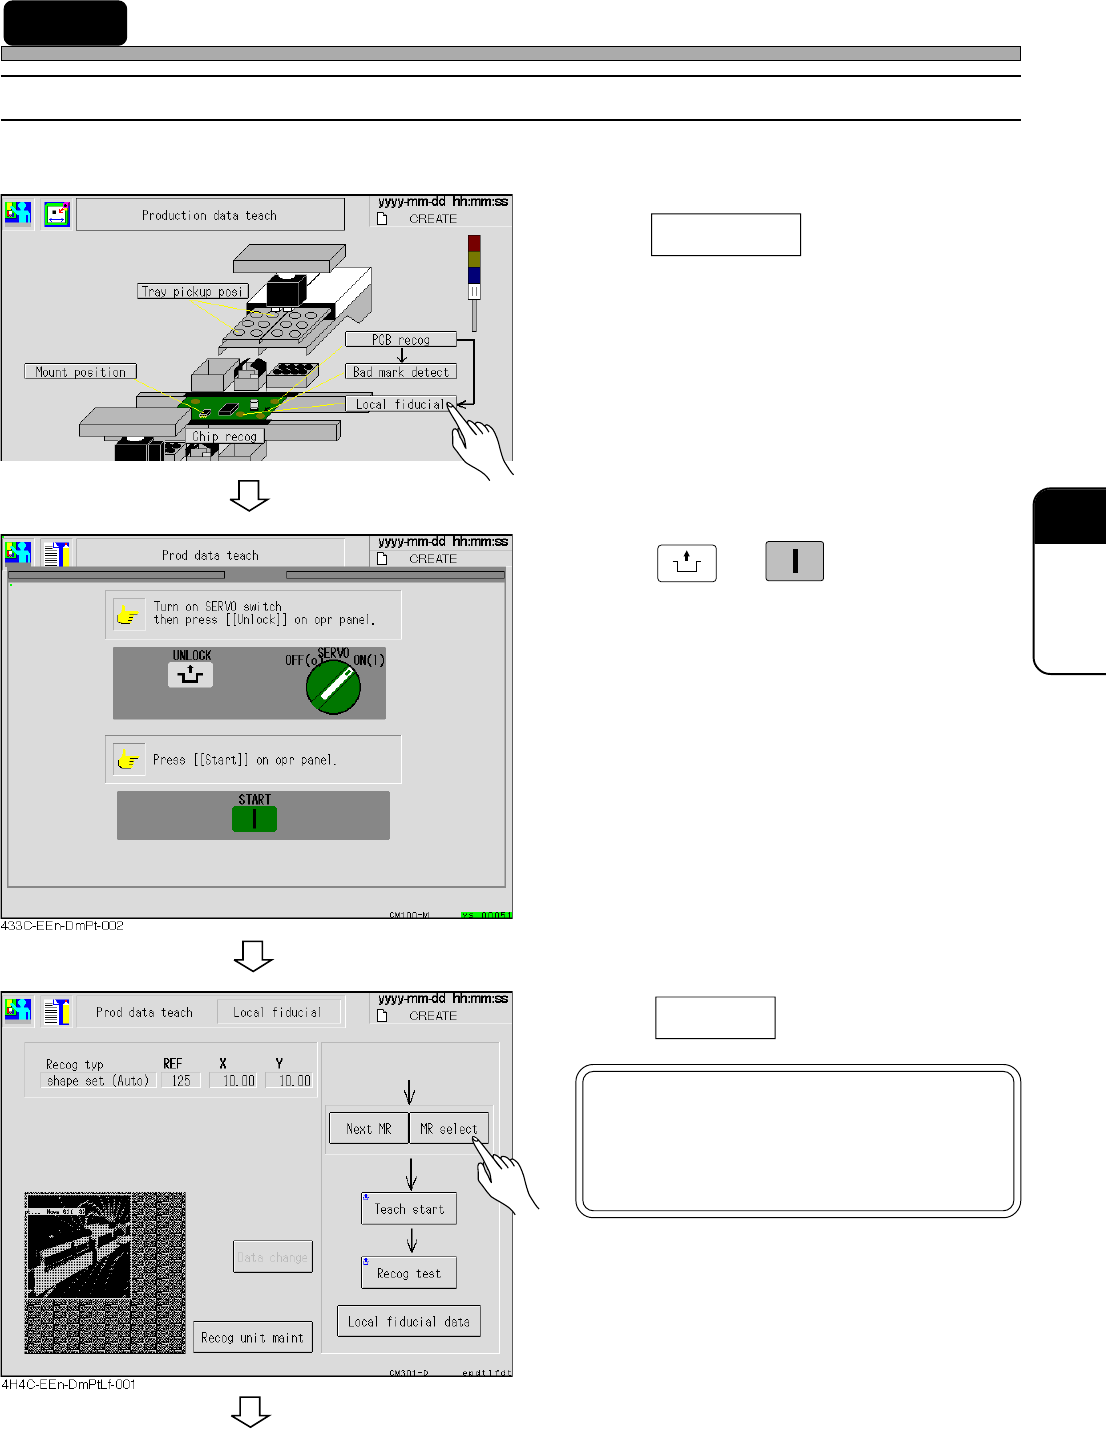
Before the mount point recognition teaching, check that the function switch, “Mount point
recognition” for the created data is set to ON.
1. Press Local fidusial .
• The mount point recognition screen appears.
2. Press
UNLOCK
→ .
3. Press
MR select
.
4H4C-E-OMA08-A01-02
8-
8
4H4C-JEn-DmPt-001
START
NOTICE
MR: Mount point recognition data No.
Refer to PT (Programming Manual)
for the details.
To the next page
Page 8-16
4H4C-E-OMA08-A01-02
To the next page
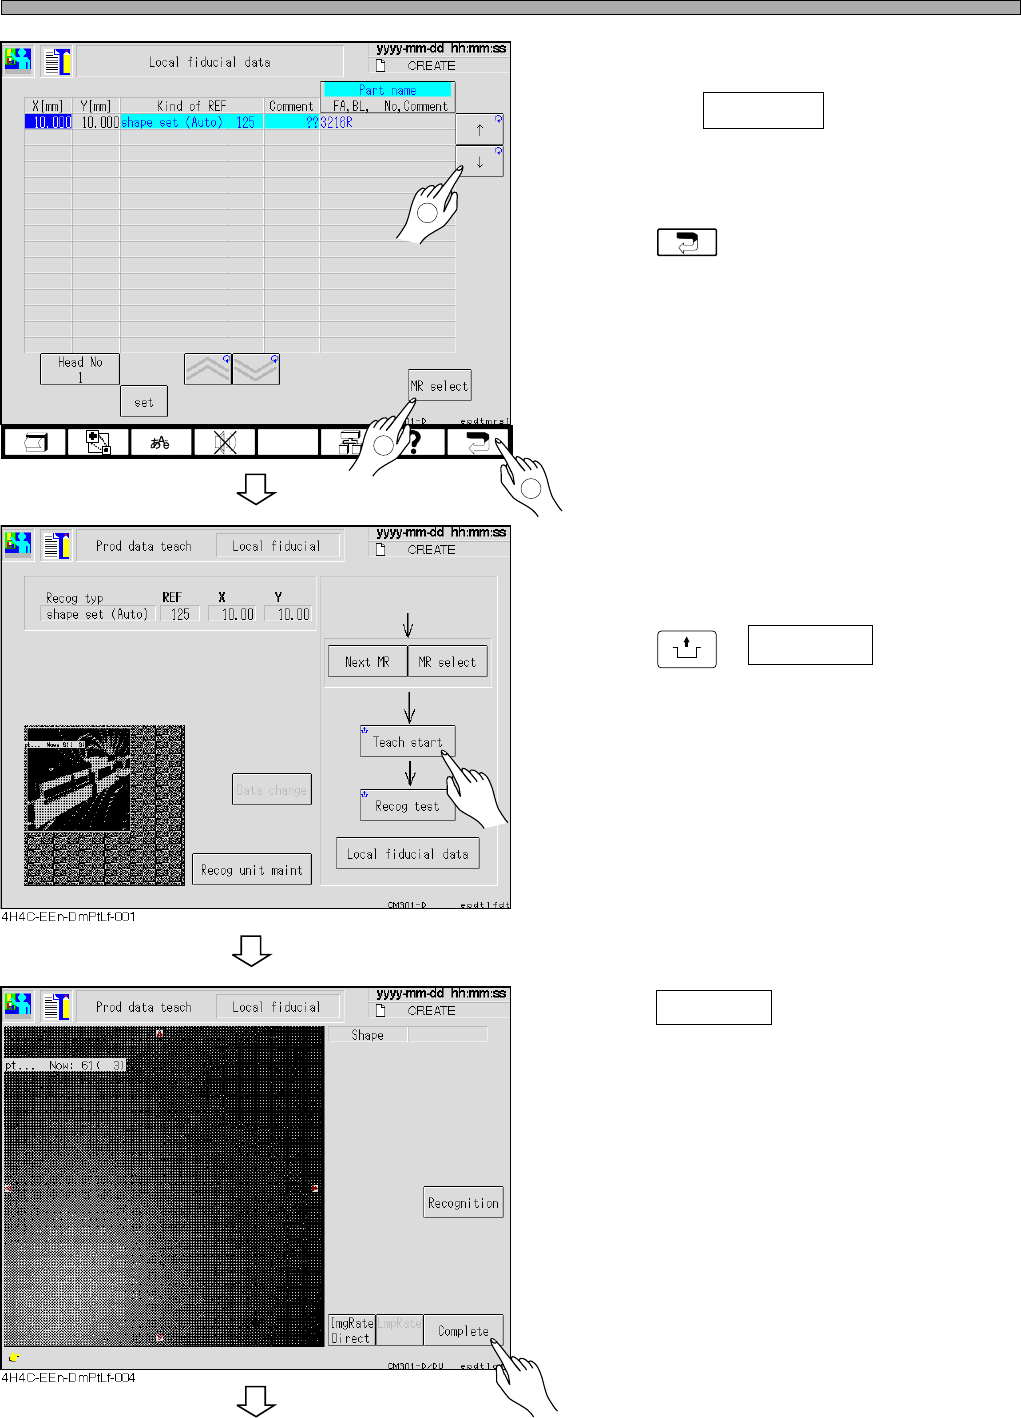
Mount Point Recognition Teaching
4. Move the cursor to the mount point
recognition mark number for teaching
and press MR select .
5. Press .
6. Set the board to the front conveyor.
7. Press
UNLOCK
+ Teach start .
• The board is carried in and loaded.
8. Press Complete .
• Data is saved.
1
2
3
4H4C-EEn-DmPtLf-002
Page 8-17
TEACHING
8
4H4C-E-OMA08-A01-01
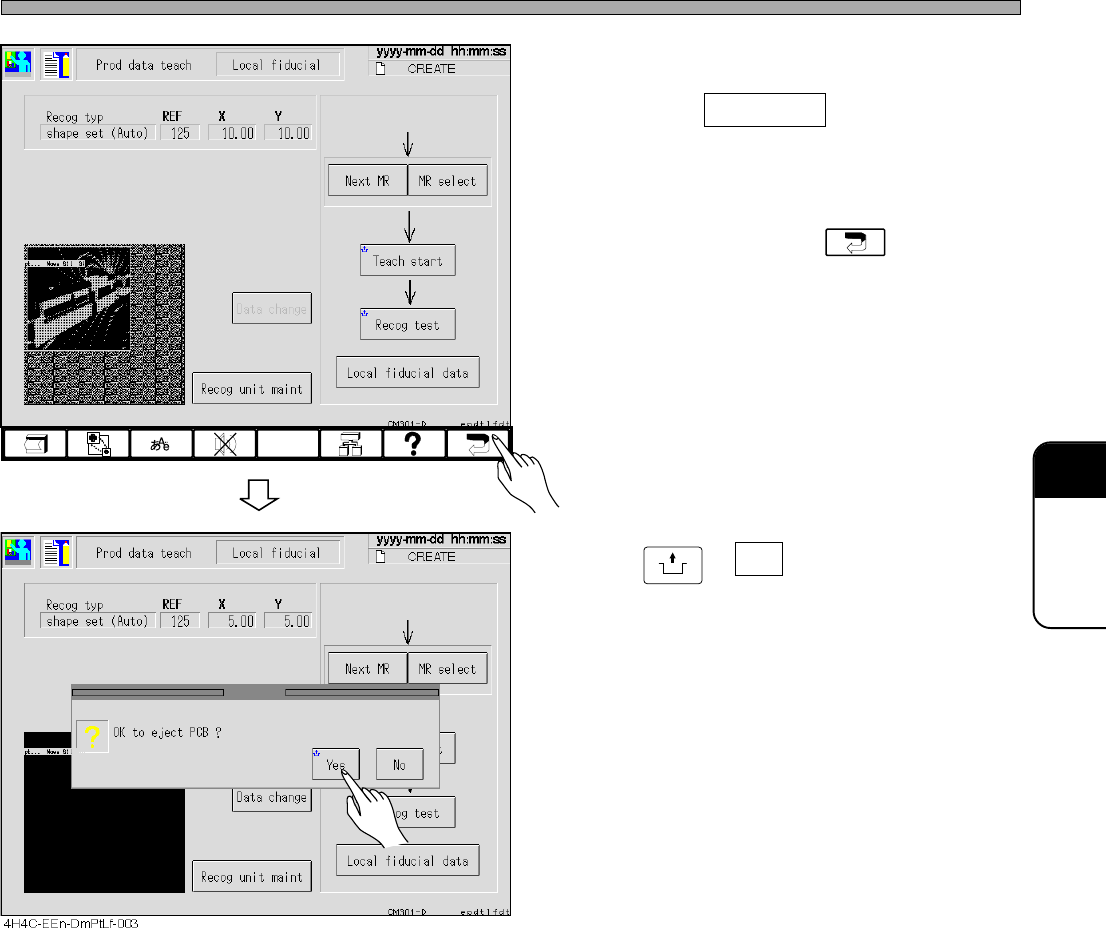
Mount Point Recognition Teaching
9. Move the cursor to the mount point
recognition mark number for teaching
and press MR select .
10. After teaching, Press .
11.Press
UNLOCK
+ Yes .
• The board is carried out, and teaching is over.
4H4C-EEn-DmPtLf-001