OM-1743-005w.pdf - 第81页
1209-001 6. Splicing The taping components can be supplied to the tape feeder without stopping automatic operation by splicing during operation. 6.1 Preparation of Splicing When the splicing operation is to be performed,…
GT-38080, GD-38080
GD-38083
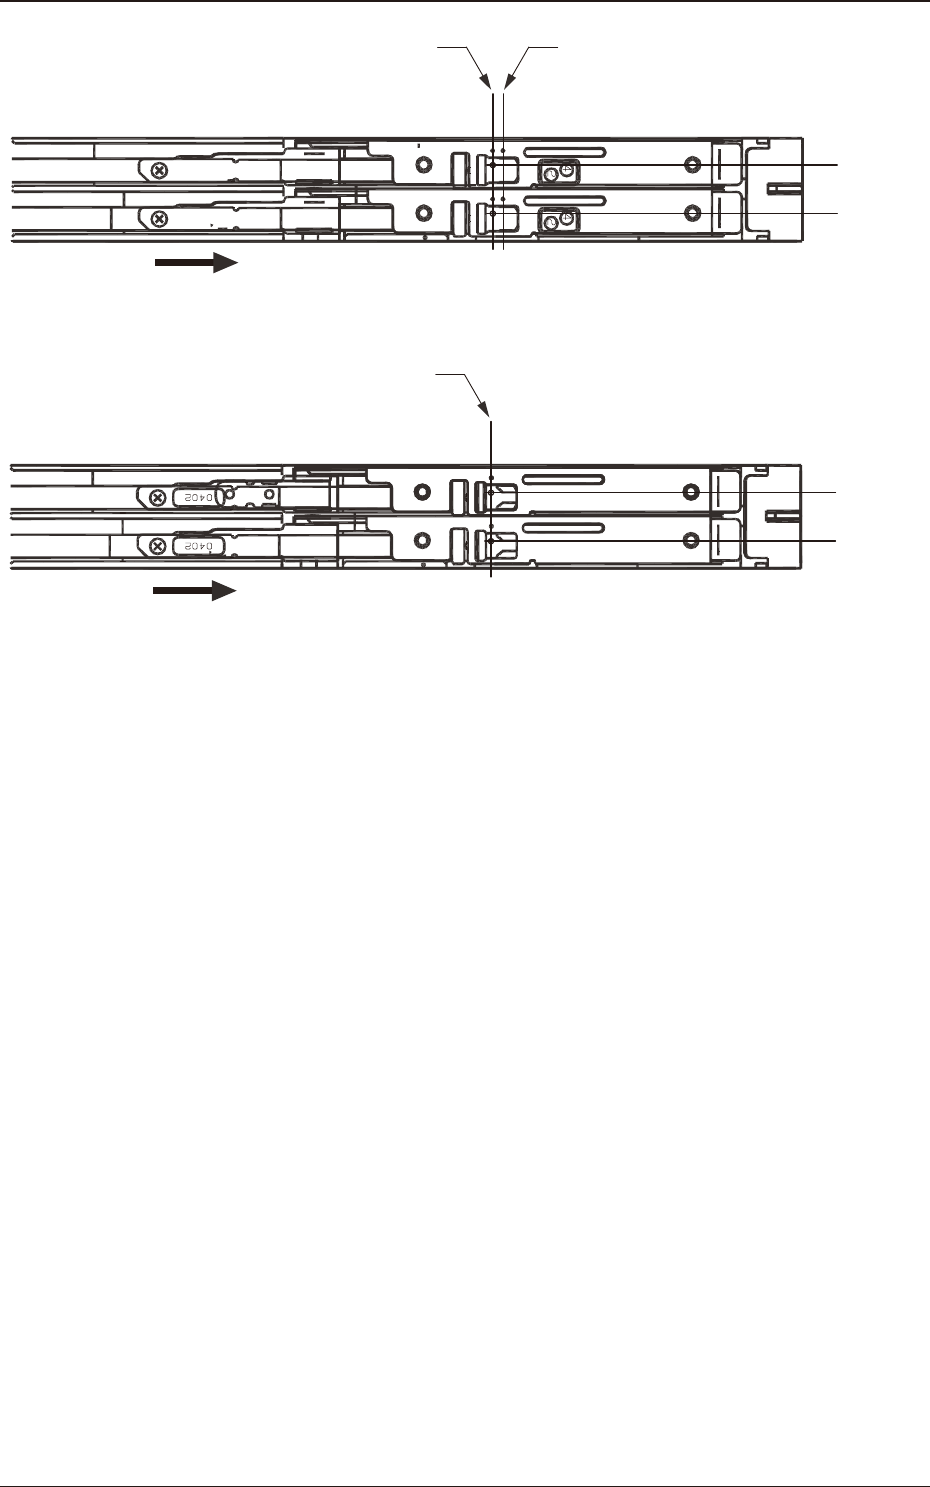
Pick-up Position at 4 mm pitchPick-up Position at 2 mm pitch
Direction of Feed
Pick-up
Position
Pick-up
Position
Direction of Feed
Pick-up
Position
Pick-up
Position
Pick-up Position at 1 mm pitch and 2mm pitch
Fig. E2
1209-001
5. Component Pick-up Position Alignment
OM-1743
5-2
1209-001
6. Splicing
The taping components can be supplied to the tape feeder without stopping
automatic operation by splicing during operation.
6.1 Preparation of Splicing
When the splicing operation is to be performed, the splicing setting in the machine
body is required before beginning the splicing operation.
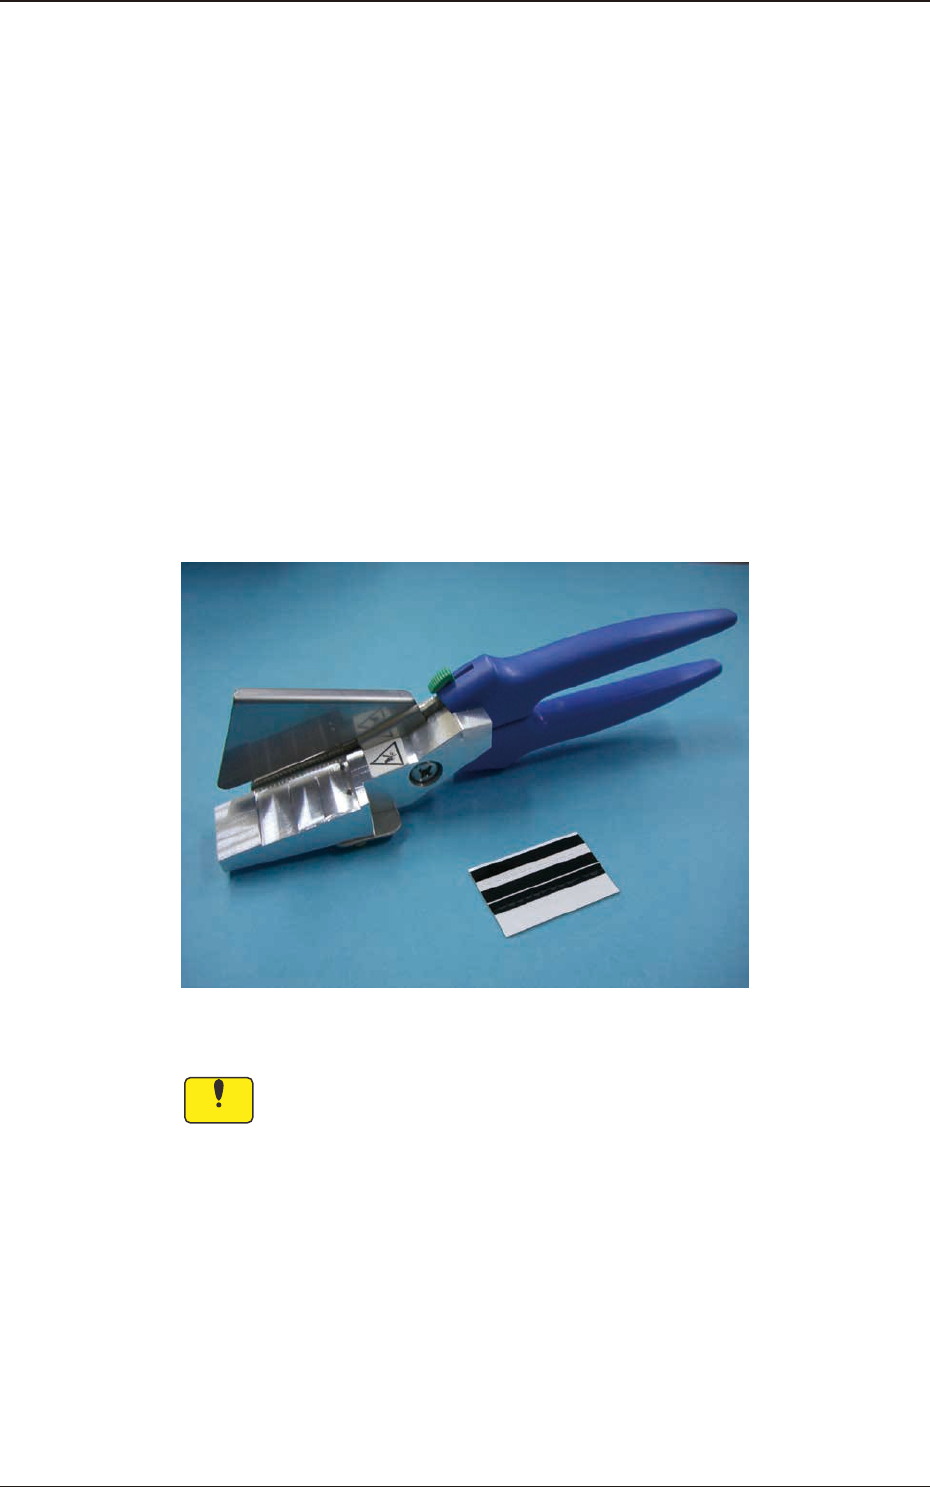
The tape cutting jig and splicing tape are required for the splicing operation,
The selection of the splicing tape depends on the tape width for the taping.
•
Tape Cutting Jig with a Mirror
KJ3-MY045-10 : For a tape of 8 to 32 mm width
•
Splicing Tape
KYK-M860E-00 : For a tape of 8 mm width
Fig. F1 Tape Cutting Jig and Splicing Tape
Notice
The warranty period of the splicing tape is one year from the time when
the tape is shipped from our company.
Store the splicing tape in the place where the temperature is 30 °C or
less and the sunlight does not hit directly.
When the splicing tape is stored in the place where the temperature is
more than 40 °C or the sunlight hits directly, the adhesive strength of the
splicing tape might be degraded even within the warranty period.
6. Splicing
OM-1743
6-1
1209-001
6.2. Setting in the Main Machine before Splicing Operation
Notice
When the splicing operation is to be performed, the splicing setting in the
machine body is required.
Reference
Refer to "4.2.8 Splicing" in Chapter 1, Volume 2 in the Instruction Manual for
the Main Machine, for the description of the "Splicing" window.
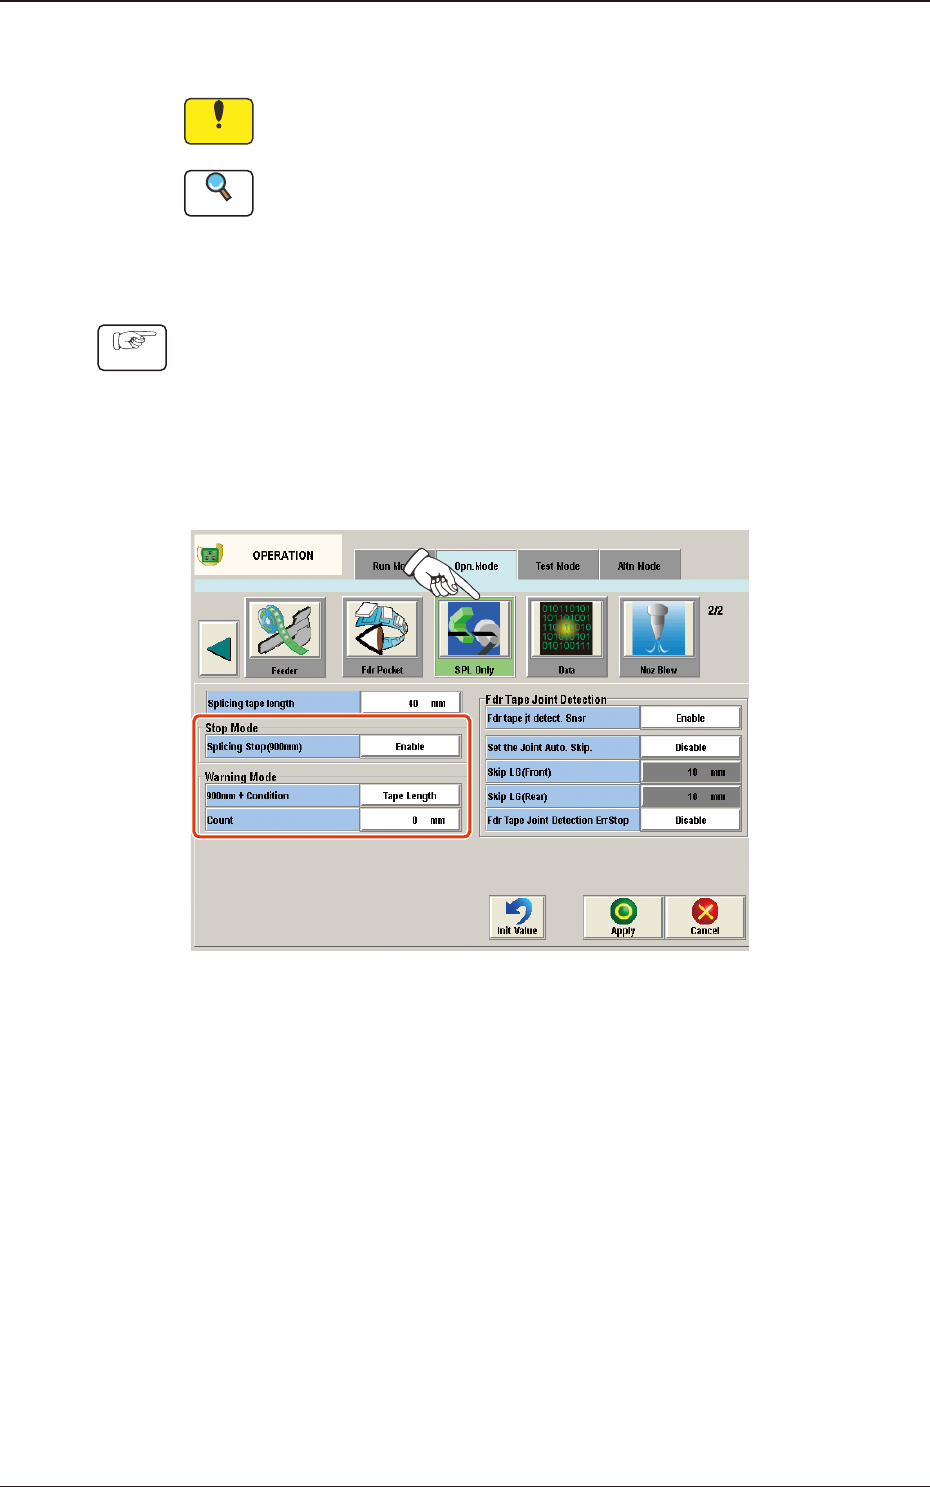
6.2.1 Setting in the Splicing Stop and Warning Mode
Procedure
(1) Press the [Opn. Mode] tab in the "AUTO OPN" window.
(The "Opn. Mode" tab sheet will appear.)
(2) Press the [Opn. Mode] tab and press the [SPL Only] button on the "Opn.
Mode" tab sheet.
(The "Splicing" window will appear.)
Fig. F2 "SPL Only" Window
(3) Select "Enable" in the "Splicing Stop (900 mm)" selection box in the "Stop
Mode" group box.
6.2. Setting in the Main Machine before Splicing Operation
OM-1743
6-2