AltaPail II Bulk Melters Product Manual.pdf - 第164页
Repair 10-2 Part 1121836_03 E 11/2014 Nordson Corporation Replacing Gear Pump WARNING: System and materi al pressurized. R elieve bulk me lter pressure before disconnecting p ressurized components (e .g. hoses, pressure …
Repair
10-1
Part 1121836_03
E 11/2014 Nordson Corporation
Section 10
Repair
WARNING! Allow only qualified personnel to perform the following tasks.
Follow the safety instructions in this document and all other related
documentation.
Observe Before Performing Repairs
WARNING! Risk of electrical shock. Failure to observe may result in
personal injury, death, or equipment damage.
WARNING: Disconnect equipment from line voltage before any repairs.
Risk of Burns
WARNING! Hot! Risk of burns. Wear appropriate protective
clothing/equipment.
Some components can be detached only when the bulk melter is heated up.
Relieving Pressure
WARNING: System and material pressurized. Relieve bulk melter pressure
before disconnecting pressurized components (e.g. hoses, pressure
sensors). Failure to observe can result in serious burns.
1. Switch off motor.
2. Set selector Raise/lower platen to 0/stop.
3. Place a container under the nozzle(s) of the applicator/assembly
handgun.
4. Applicator: Activate the solenoid valve(s) electrically or manually; or, pull
the trigger of the assembly handgun. Repeat this procedure until no more
material flows out.
5. Properly dispose of material according to local regulations.
Repair
10-2
Part 1121836_03
E 11/2014 Nordson Corporation
Replacing Gear Pump
WARNING: System and material pressurized. Relieve bulk melter pressure
before disconnecting pressurized components (e.g. hoses, pressure
sensors). Failure to observe can result in serious burns. Refer to page 10-1,
Relieving Pressure.
WARNING: Hot! Risk of burns. Wear heat-protective gloves.
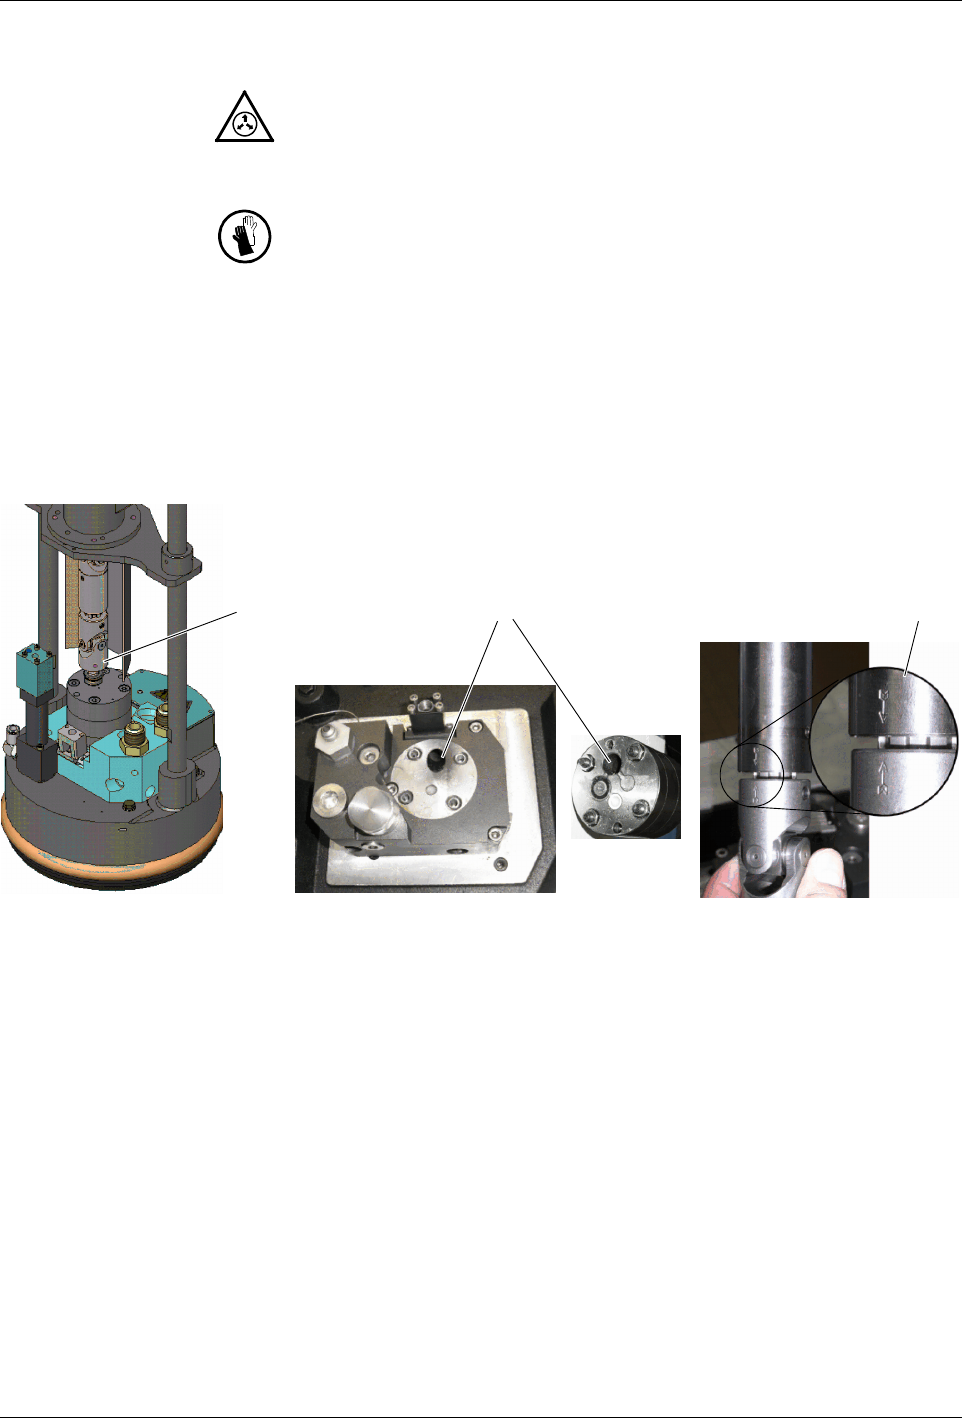
Detaching Gear Pump
NOTE: Detach the gear pump only when the material is soft (approx.
70 ° C/158 ° F, depending on material).
1. Remove the cover and detach the Cardan joint (1) from the pump shaft.
2. Detach pump.
3. Allow the bulk melter to cool to room temperature.
3
1 2
Attaching Gear Pump
1. Clean the sealing surfaces on the plate and pump. If necessary, heat
material residue with a hot air fan, then remove.
2. Put the pump in place. Ensure that the suction hole (2) is positioned
properly.
3. Screw the pump into place:
a. Apply high temperature grease (Refer to page 8-2, Processing
Materials) and tighten by hand, such that the pump and plate have
thermal contact
b. Wait until the pump and plate are at the same temperature
c. Tighten the fixing screws crosswise using a torque wrench. Torque:
25 Nm / 220 lbin.
4. Attach Cardan joint. Ensure that the marks (3) line up.
5. Put the cover into place.
Repair
10-3
Part 1121836_03
E 11/2014 Nordson Corporation
Replacing Motor
NOTE: Perform work only when the material is soft (approx. 70 ° C/158 ° F,
depending on material); otherwise the Cardan joint can not be turned.
Observe when replacing:
S
Verify that the electrical connection effects the desired direction of
rotation (see arrow).
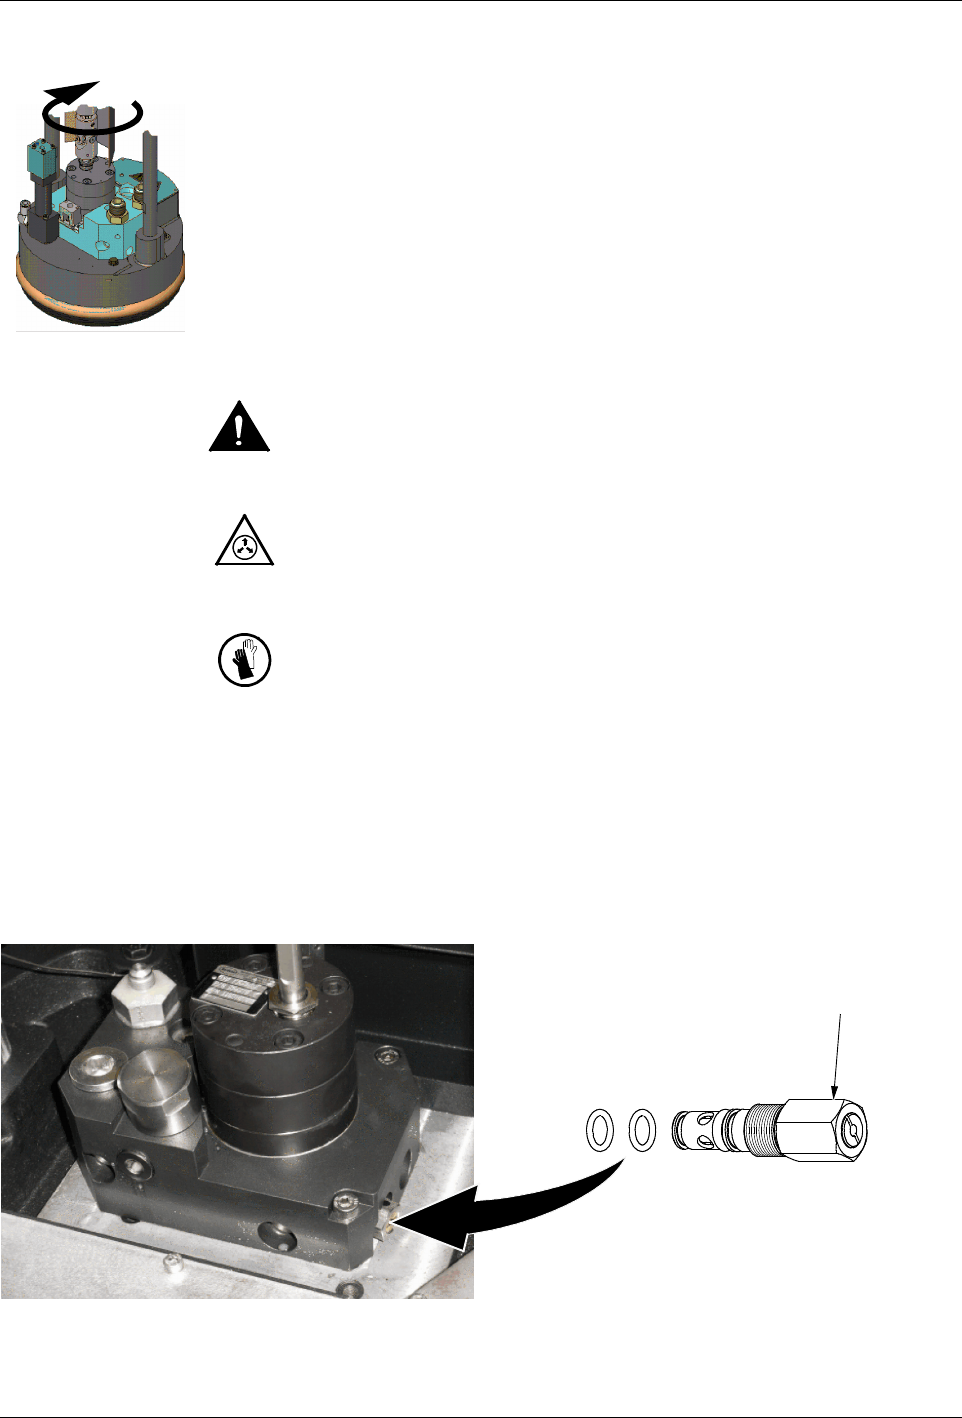
Replacing Safety Valve
WARNING! For safety reasons, the safety valve may not be disassembled.
The complete valve must be replaced every time.
WARNING: System and material pressurized. Relieve bulk melter pressure
before disconnecting pressurized components (e.g. hoses, pressure
sensors). Failure to observe can result in serious burns. Refer to page 10-1,
Relieving Pressure.
WARNING: Hot! Risk of burns. Wear heat-protective gloves.
Observe when replacing:
S
Replace the valve only when the bulk melter is heated. Otherwise the
sealing rings could be damaged by charred material
S
Apply high temperature grease to all threads and O-rings (Refer to
page 8-2, Processing Materials)
S
Tighten valve with a torque wrench. Torque: 15 Nm (133 lbin).
Size 19