AltaPail II Bulk Melters Product Manual.pdf - 第166页
Repair 10-4 Part 1121836_03 E 11/2014 Nordson Corporation Replacing O-rings WARNING: System and materi al pressurized. R elieve bulk me lter pressure before disconnecting p ressurized components (e .g. hoses, pressure se…
Repair
10-3
Part 1121836_03
E 11/2014 Nordson Corporation
Replacing Motor
NOTE: Perform work only when the material is soft (approx. 70 ° C/158 ° F,
depending on material); otherwise the Cardan joint can not be turned.
Observe when replacing:
S
Verify that the electrical connection effects the desired direction of
rotation (see arrow).
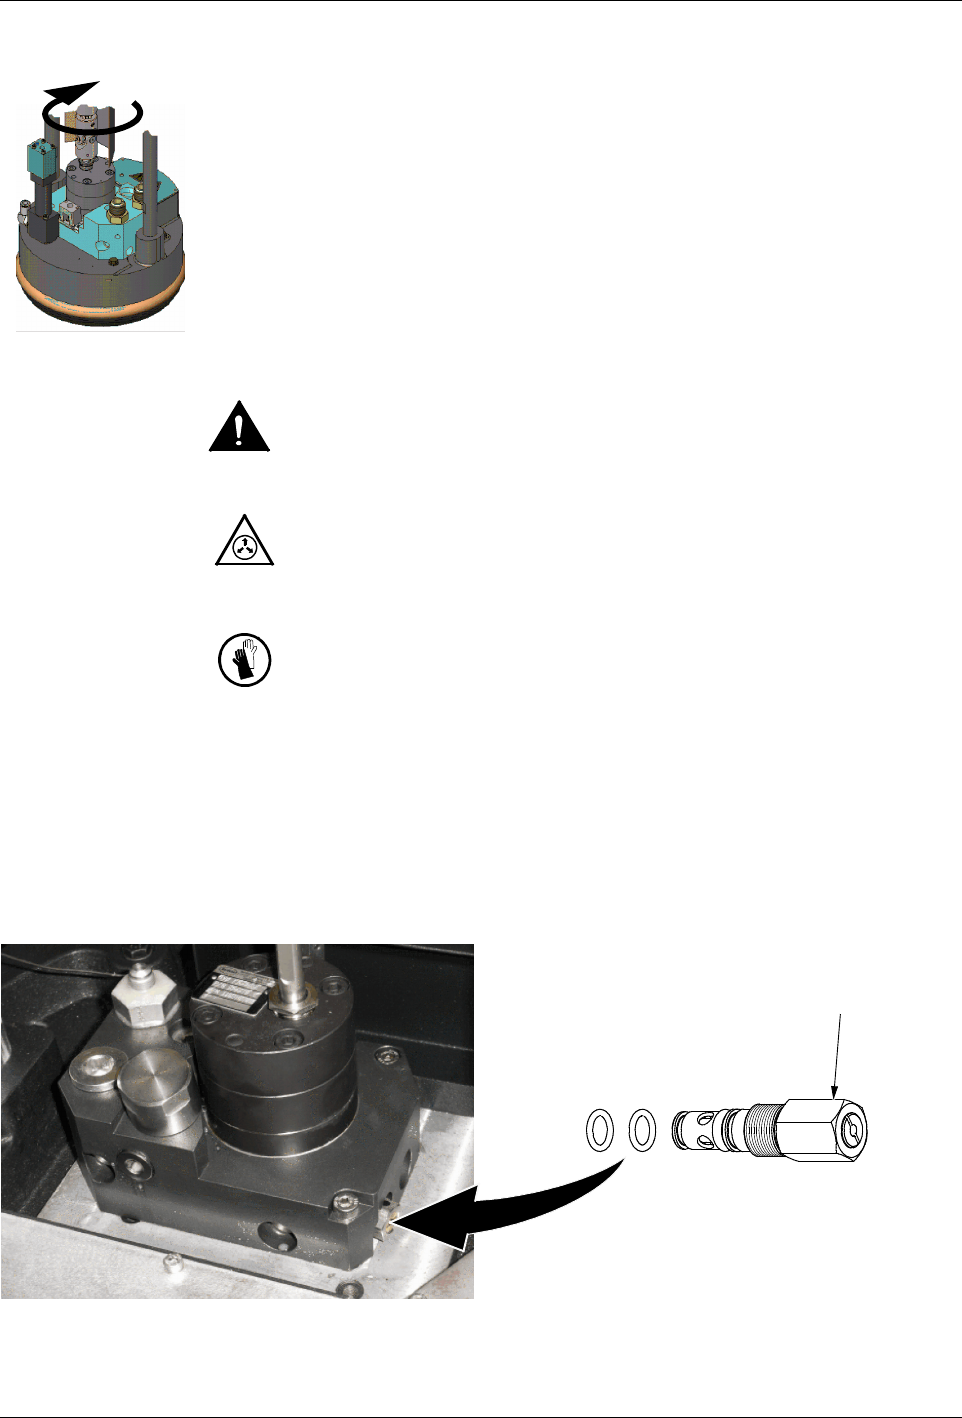
Replacing Safety Valve
WARNING! For safety reasons, the safety valve may not be disassembled.
The complete valve must be replaced every time.
WARNING: System and material pressurized. Relieve bulk melter pressure
before disconnecting pressurized components (e.g. hoses, pressure
sensors). Failure to observe can result in serious burns. Refer to page 10-1,
Relieving Pressure.
WARNING: Hot! Risk of burns. Wear heat-protective gloves.
Observe when replacing:
S
Replace the valve only when the bulk melter is heated. Otherwise the
sealing rings could be damaged by charred material
S
Apply high temperature grease to all threads and O-rings (Refer to
page 8-2, Processing Materials)
S
Tighten valve with a torque wrench. Torque: 15 Nm (133 lbin).
Size 19

Repair
10-4
Part 1121836_03
E 11/2014 Nordson Corporation
Replacing O-rings
WARNING: System and material pressurized. Relieve bulk melter pressure
before disconnecting pressurized components (e.g. hoses, pressure
sensors). Failure to observe can result in serious burns. Refer to page 10-1,
Relieving Pressure.
WARNING: Hot! Risk of burns. Wear heat-protective gloves.
When leakage occurs, e.g. at the hose connections, the O-rings must be
replaced. Observe the following:
S
Clean and lubricate O-ring groove. Nordson recommends special high
temperature grease; refer to page 8-2, Processing Materials.
S
Also lubricate O-ring
S
Do not use removed O-rings again.
S
Tighten hose connection and blind covers with a torque wrench to
9.5 Nm.
2
3
1
4
Repair
10-5
Part 1121836_03
E 11/2014 Nordson Corporation
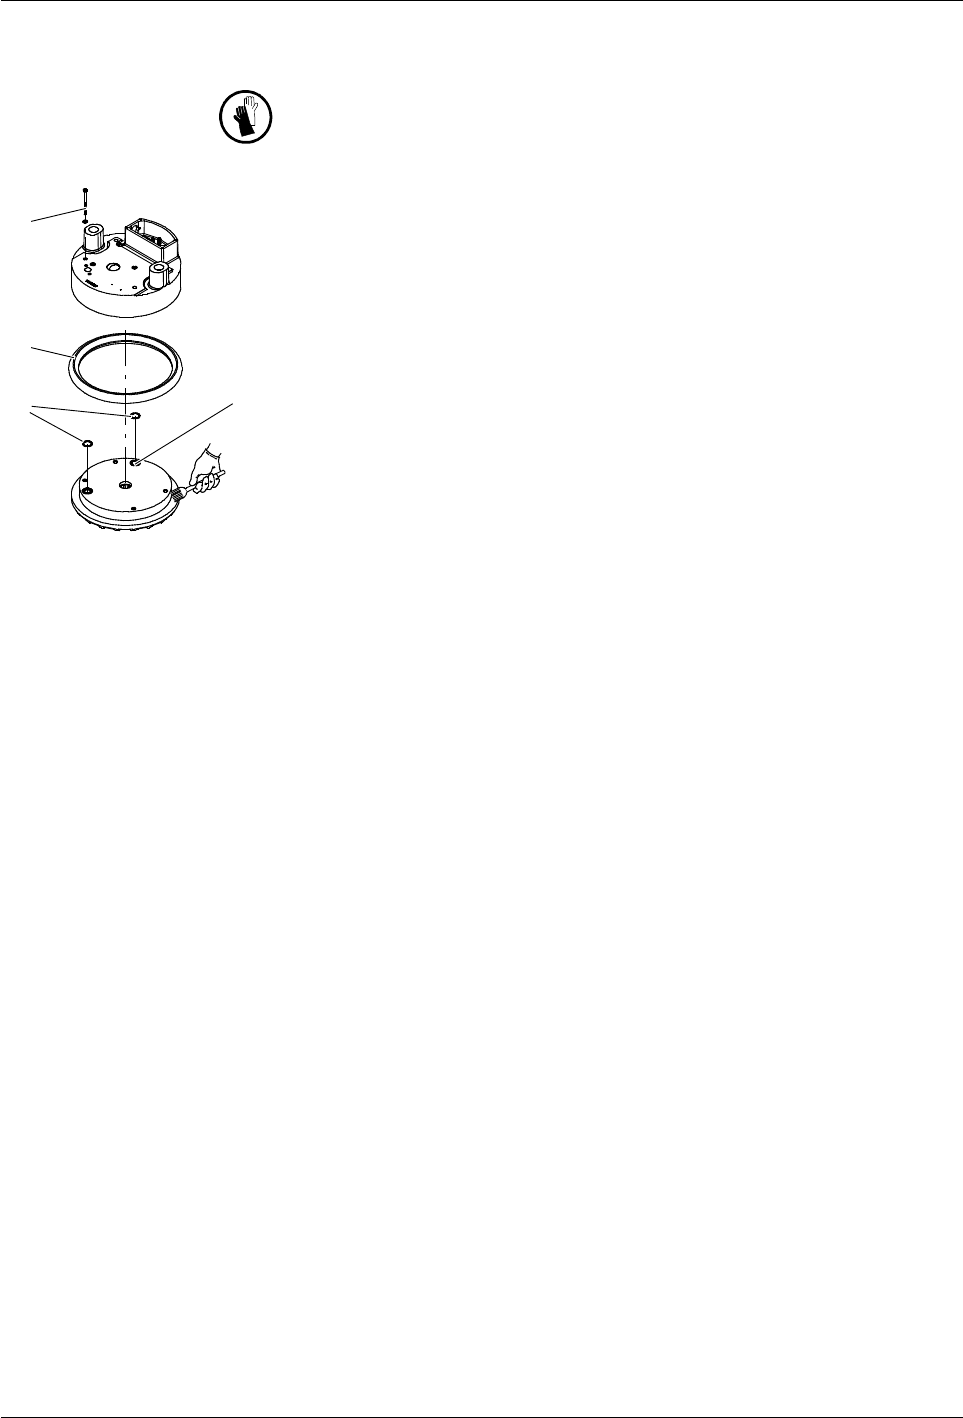
Replacing Melting Plate and/or Sealing Ring
WARNING: Hot! Risk of burns. Wear heat-protective gloves.
1. Heat the platen until the material softens (approx. 70 ° C / 158 ° F,
depending on the material).
2. Place a clean, hard, heat-resistant resting surface (e.g. metal plate) on
the container and lower the platen onto the surface.
3. Release all of the fixing screws (1).
4. Raise the platen approx. 10 cm. The melting plate remains on the resting
surface.
5. Shut down the bulk melter.
6. Carefully extract the temperature sensor from the bore (4).
7. Replace the O-rings (3). Clean and grease the grooves. Refer to page
8-2, Processing Materials for the type of grease to be used.
The sealing ring (2) can now be replaced. Refer to page 8-2, Processing
Materials for the type of grease to be used.
8. Apply heat transfer compound (Refer to page 8-2, Processing Materials)
to the temperature sensor and insert it into the bore (4).
9. Screw the melting plate into place:
a. Grease the fixing screws and screw in loosely such that the platen
and melting plate have thermal contact
b. Wait until the platen and melting plate are at the same temperature
c. Tighten the fixing screws with 10 Nm.
NOTE: The next time the platen is cold (e.g. weekend, factory vacation)
tighten the fixing screws again with the stated torque.