1.011.1_VPC使用手册.pdf - 第121页
120/144 8.6 VPCSetup VpcSetup makes it possible to automati cally transfer SPC configurations to VPC configurations, so the operator no longer has to carry out manual modifications. The following example ill ustrates the…

119/144
• Always overwrite files (last inspection is maintained).
• Never overwrite files (first inspection is maintained).
8.5.6 Step 6: Starting the import
Clicking the button "Start" starts the data import, which can be broken off with
the button "Cancel" if necessary.
8.5.7 Step 7: Progress of the file import
Here is where the actual status of the data import is read out. This includes:
• the current processed input/output file,
• the number of the completely read or written bytes,
• the ratio and finally,
• the number of processed and aborted files.
120/144
8.6 VPCSetup
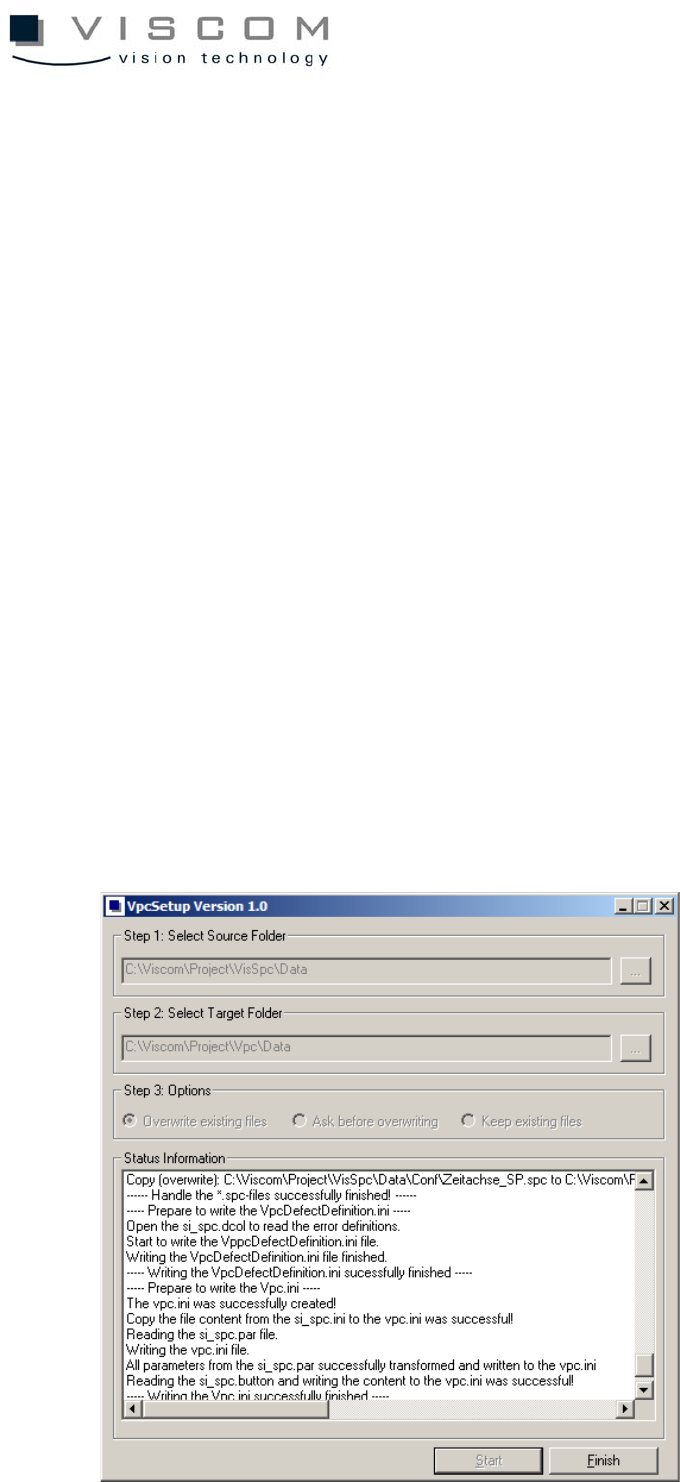
VpcSetup makes it possible to automatically transfer SPC configurations to
VPC configurations, so the operator no longer has to carry out manual
modifications. The following example illustrates the VpcSetup program after a
successful configuration transfer.
VpcSetup transfers the configuration files (with the file ending "spc") and the
configuration set files (with the data ending "sps") for the new software VPC. In
the process, the files from the "Conf" directory of the SPC software are copied
to the "Conf" directory of the VPC software, and named according to the
following convention:
• configuration set: old file ending: “sps“; new file ending “vps“
• configuration set: old file ending: “sps“; new file ending “vps“
At the end, a Vpc.ini file and a VpcDefectDefinition.ini file (see "Error definition
setup") are generated, in which all the settings for the VPC software are saved.

121/144
8.6.1 Program settings
The program VpcSetup can be operated through three simple steps. As pre-
selection, the directory where the configurations are actually to be found is
selected. If this does not apply, the path to the directory can be changed, by
activating the button (indicated by ...). Here please note that the "Data" directory
of the particular software has to be chosen, because this is where the
configurations which are to be transferred are held and so, where the directory
structure described under "Setup directory structure" is.
First, select the "Data" directory of the SPC software from the “Step 1: Select
Source Folder”. As the second step, select the "Data" directory of the VPC
software under "Step 2: Select Target Folder“. In the third step, "Step 3:
Options“, the user can set how the available files should be processed. In these
steps, the following options can be chosen from:
• Overwriting existing files: All available files are overwritten, without
additional action by the user.
• Ask before overwriting: Before an available file is overwritten, the user
must confirm it.
• Keep existing files: all available files remain and are not re-copied or
regenerated.
To start the transfer, the button "Start" must be confirmed.
8.6.2 Program process
After the button "Start" is confirmed, the transfer of the SPC configuration to
VPC configuration is started. In the end, the user can not make any more
changes to the settings (the buttons are grayed out). This executes successive
steps.