00197042-04_SM_X-Serie-S_Customer_EN.pdf - 第289页
7 Conveyor 7.8 Laser light barriers, fiber optic cable and PCB sensors Service Manual SIPLACE X-Serie S 06/2019 289 Fig.365: Teaching the sensors ► Click on the button Sensors . Fig.366: Teaching the sensors ► Select L…

7 Conveyor
7.8 Laser light barriers, fiber optic cable and PCB sensors
288 Service Manual SIPLACE X-Serie S 06/2019
7.8.9 Teaching the PCB sensors (SW70x)
Whenever you manually loosen the conveyor rails, you also need to reteach the light barrier
sensors. This is required because the light intensity depends on the conveyor width. Without teach-
ing, the conveyor will show boards which are not present, preventing the conveyor from being ref-
erenced.
Teaching is performed automatically during operation.
Procedure
Fig.363: Select operator level
► Select the
button, to open the
Configure, update and calibrate the
machine menu.
► Select the
button to open the
Check and set user settings menu.
► Switch over to the operator level Ma-
chine service.
ð The
button will be shown.
Fig.364: Checking sensors and functions
► Click the
button.
► Click the
button.
► Click on the Conveyor inputs/outputs
button.
7 Conveyor
7.8 Laser light barriers, fiber optic cable and PCB sensors
Service Manual SIPLACE X-Serie S 06/2019 289
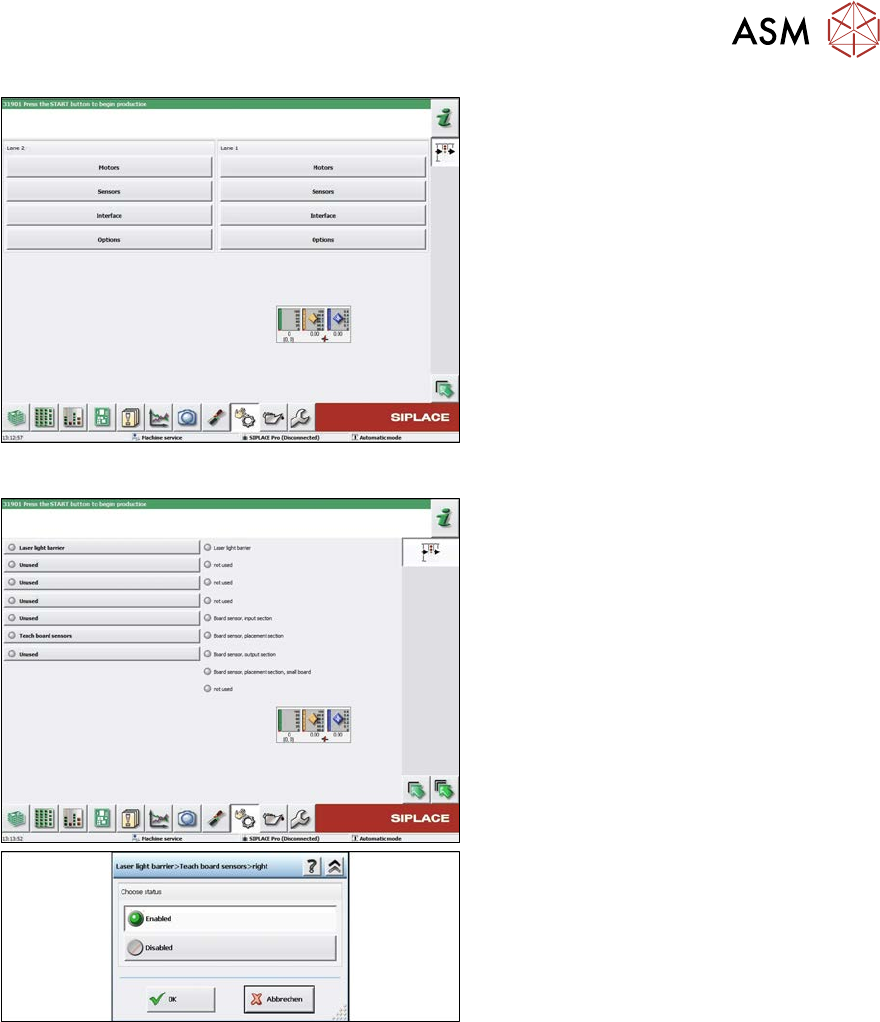
Fig.365: Teaching the sensors
► Click on the button Sensors.
Fig.366: Teaching the sensors
► Select Laser light barrier at conveyor
track 1, enable Teach board sensors
and press the Start button on the
machine.
Disable this function again afterwards.
► Repeat this step for all tracks.
7 Conveyor
7.9 Boards
290 Service Manual SIPLACE X-Serie S 06/2019
7.9 Boards
7.9.1 Replacing the conveyor control TSP420
Parts, equipment and tools
●
Conveyor control TSP420 assembly [03087642-xx]
Overview
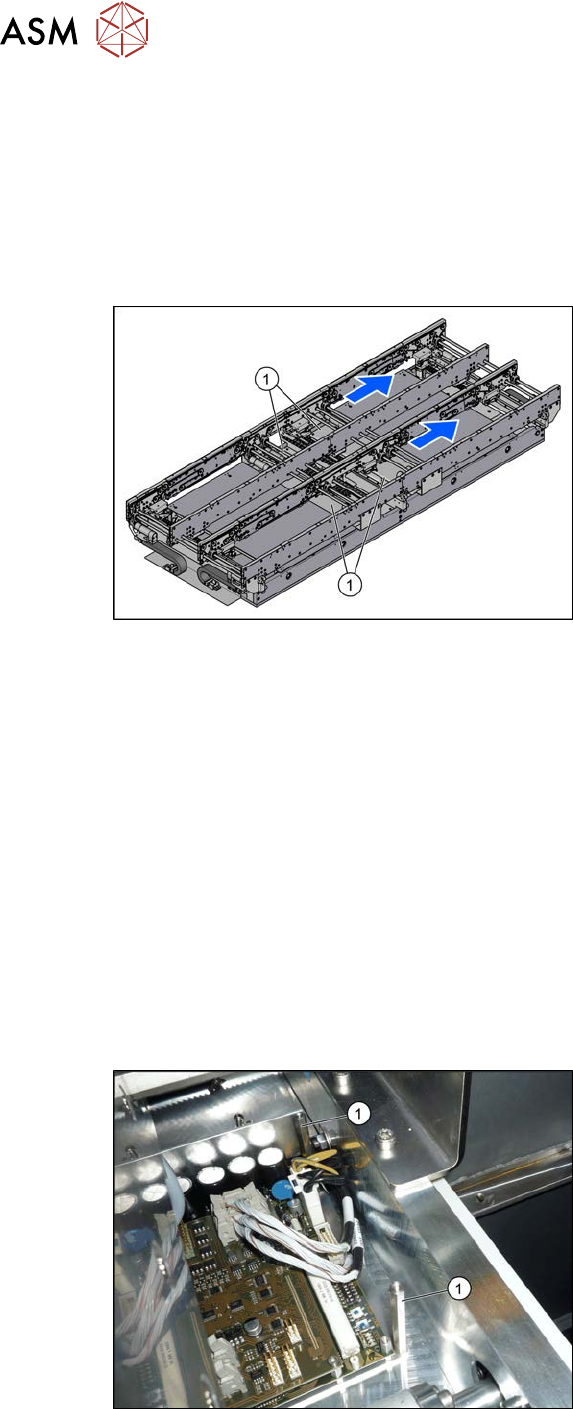
Fig.367: Overview of conveyor controls
The conveyor control units are located under
the covers (1) in the intermediate conveyor.
Two TSP420s are fitted on single convey-
ors; four are fitted on dual conveyors.
Removal
► Use the software to move the conveyor sides into a position which allows you best access. As
an alternative, you can loosen the clamps for the relevant sides in dual conveyors.
7.2 "Loosening the Conveyor Side Clamps" [}207]
► Switch off the machine, disconnect it from the power supply and secure it to prevent
unauthorized reactivation.
1.2 "Preparatory work..." [}16]
► Remove the screws fastening the lifting table plate and remove the lifting table plate.
7.3.1 "Replacing the lifting table plate" [}212]
► Remove the screws fastening the cover plate above the conveyor control and remove the
cover plate.
► Unplug all electrical connections to the conveyor control. Mark their positions, to make clear
assignment easier later on.
7.9.1.1 "Conveyor control TSP420" [}291]
Fig.368: Spacer bolts
► Remove the four spacer bolts(1).