00197042-04_SM_X-Serie-S_Customer_EN.pdf - 第368页
9 Component feeding 9.2 COT insert 368 Service Manual SIPLACE X-Serie S 06/2019 9.2.9 Replacing the control valve Parts, equipment and tools ● Valve assembly SX4 [03097252-xx] Overview 1 Fig.492: Control valve on the CO…

9 Component feeding
9.2 COT insert
Service Manual SIPLACE X-Serie S 06/2019 367
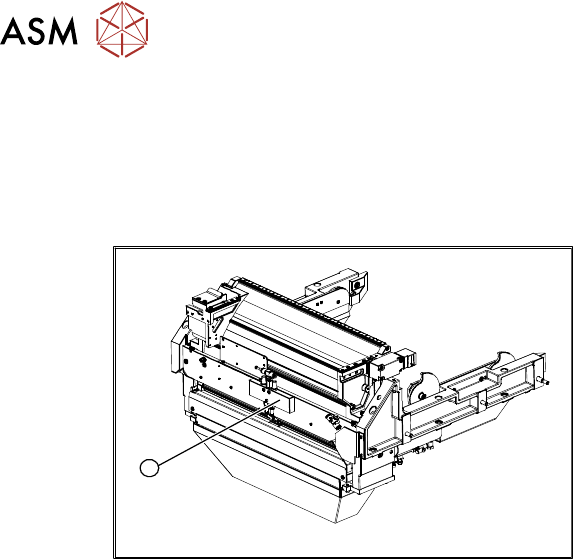
► Carefully lift the empty-tape duct (2) out of the COT insert (1).
NOTICE
Unplug the cable from the FCU
► You could also unplug the cable at the FCU. This gives you greater freedom of move-
ment. In this case, note the positions, to make clear assignment easier later on.
CAUTION
Risk of cutting
The cutter is located under the empty tape duct. There is a very sharp blade located there.
► Do not reach into the cutter and make sure that it is never left unmonitored or freely
accessible.
Installation
► Follow the removal instructions in reverse order for installation. Also observe the following
instructions:
●
Fit the sensors (reed contacts) for the reject container.
NOTICE
These sensors are installed in different positions, according to the configuration of
the machine.
► Refer to the appropriate assembly instructions.
●
Fit the empty-tape duct.
●
When fitting the nozzle changer, observe the applicable assembly instructions, as you need to
check the installation height.
9 Component feeding
9.2 COT insert
368 Service Manual SIPLACE X-Serie S 06/2019
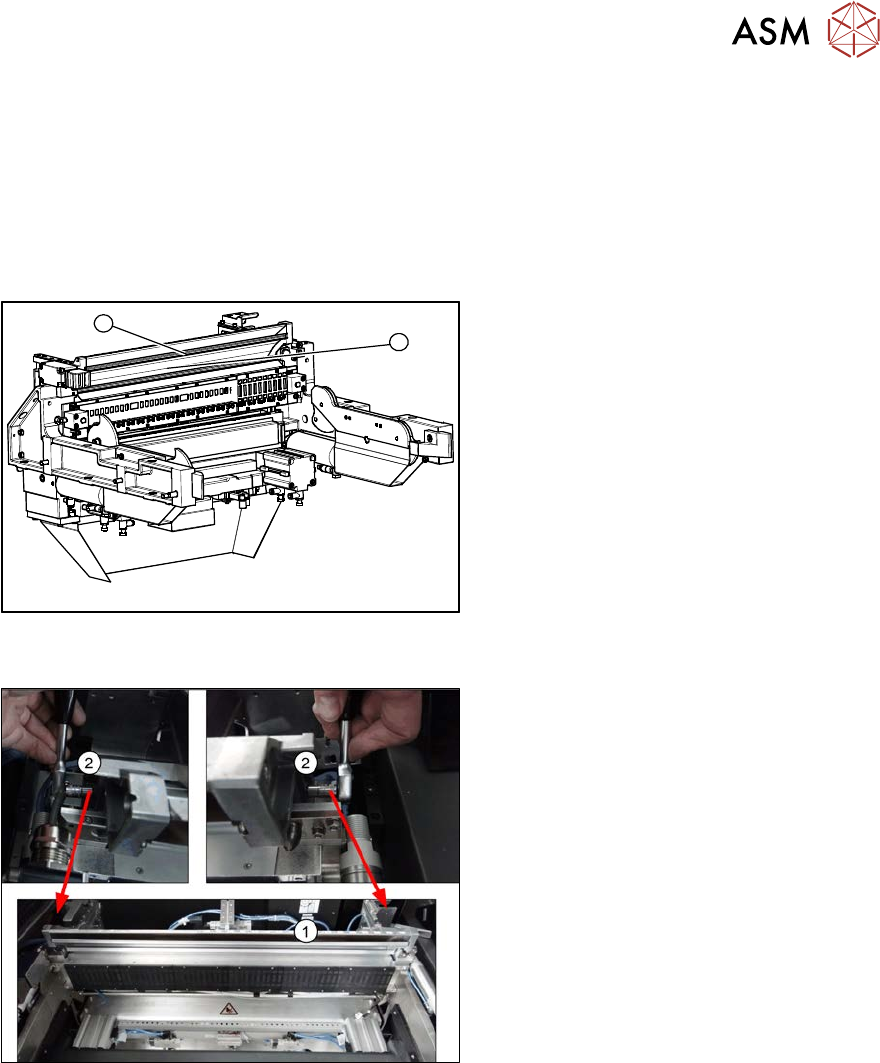
9.2.9 Replacing the control valve
Parts, equipment and tools
●
Valve assembly SX4 [03097252-xx]
Overview
1
Fig.492: Control valve on the COT insert
► Control valve
Removal
► Switch off the machine, disconnect it from the power supply and secure it to prevent
unauthorized reactivation.
1.2 "Preparatory work..." [}16]
► Switch off the compressed air supply
5.2 "Disabling the compressed air supply" [}134]
► You may have to move out the COTi out a little to improve the accessibility.
9.2.3 "Replacing the COT Insert Assembly" [}356]
► Dismantle the cover plate over the valve.
► Disconnect the electrical and pneumatic connections to the control valve(1). Mark their posi-
tions, to make clear assignment easier later on.
► Remove the fastening screws and remove the control valve.
Installation
► Installation is performed by following the above instructions in the reverse order.
9 Component feeding
9.2 COT insert
Service Manual SIPLACE X-Serie S 06/2019 369
9.2.10 Replacing the empty tape duct Einsatz
► Read the relevant section of the user manual for your machine.
Parts, equipment and tools
●
Empty tape duct Einsatz
(The number can be found in catalog of parts.)
Overview
1
2
Fig.493: Empty tape duct (example of SIPLACE X‑Series
shown)
1. Empty tape duct assembly
2. Empty tape duct Einsatz
Fig.494: Empty tape duct Einsatz (example of SIPLACE
SX4 shown)
1. Empty tape duct
2. Screws fastening the empty tape duct
Einsatz (left and right)