CYCLONE-User-Manual.pdf - 第11页
User Manual For Cyclone LC Programmers 11 2 QUICK ST ART GUIDE FOR SAP OPERA TION This guide will allow the user to set up and program a simple Stand-Alone Programming (SAP) image with the Cyclone by completing the follo…

User Manual For Cyclone LC Programmers 10
1. RSA/AES encryption of programming images
Users create unique ImageKeys which are used to encrypt their programming images.
SAP images encrypted in this way can only be loaded onto a Cyclone or programmed with
a Cyclone if that Cyclone has been provisioned with the identical ImageKey.
2. The ability to restrict image programming by programming count or date range.
Programming restrictions on images are easily configured during the image creation
process.
Together these security features help keep the user’s valuable IP safe. The user should refer to
CHAPTER 11 - SAP IMAGE ENCRYPTION for more information on encrypted programming
images. Image restrictions are described in Section 6.1.8.2 - Image Restrictions.
1.2.2 Cyclone Control Suite Advanced Features License
Cyclone LC programmers include a basic version of the Cyclone Control Suite. The Advanced
Cyclone Control Suite Update license enables additional features that allow the user to:
• Add/Remove/Update many images in the Cyclone (Console, SDK, GUI)
• Gang program: Simultaneously control multiple Cyclones via the USB, Serial, or Ethernet
connections
• Program (and read) Dynamic Data in addition to fixed image data
• Access a Remote Display for the Cyclone
• Read/write Cyclone properties
• Read Image and target Properties and Status
• Compare images against a SAP file
This gives the user much more control and flexibility during the production process. The user
should refer to Section 8.1 - Overview Of Cyclone Control Suite for more information.
1.2.3 SDHC Port Activation License
The SDHC Port Activation License activates the SDHC port of the Cyclone LC. This allows the
user expand the storage capacity of the Cyclone by loading images onto SDHC cards. SDHC
cards can hold more and larger images than a Cyclone LC programmer can normally
accommodate. The Cyclone display and management tools allow the user to easily distinguish
between “internal” and “external” images. Section 6.2 - Managing Multiple SAP Images displays
an example of how external images are differentiated.
User Manual For Cyclone LC Programmers 11
2 QUICK START GUIDE FOR SAP OPERATION
This guide will allow the user to set up and program a simple Stand-Alone Programming (SAP) image
with the Cyclone by completing the following steps.
• Installing the Cyclone software
• Setting up the Cyclone hardware
• Creating a stand-alone programming image
• Launching Cyclone programming
This guide is intended as a supplement to the Cyclone’s User Manual, which contains in-depth
information about the topics covered here and much more.
2.1 Installing The Cyclone Software
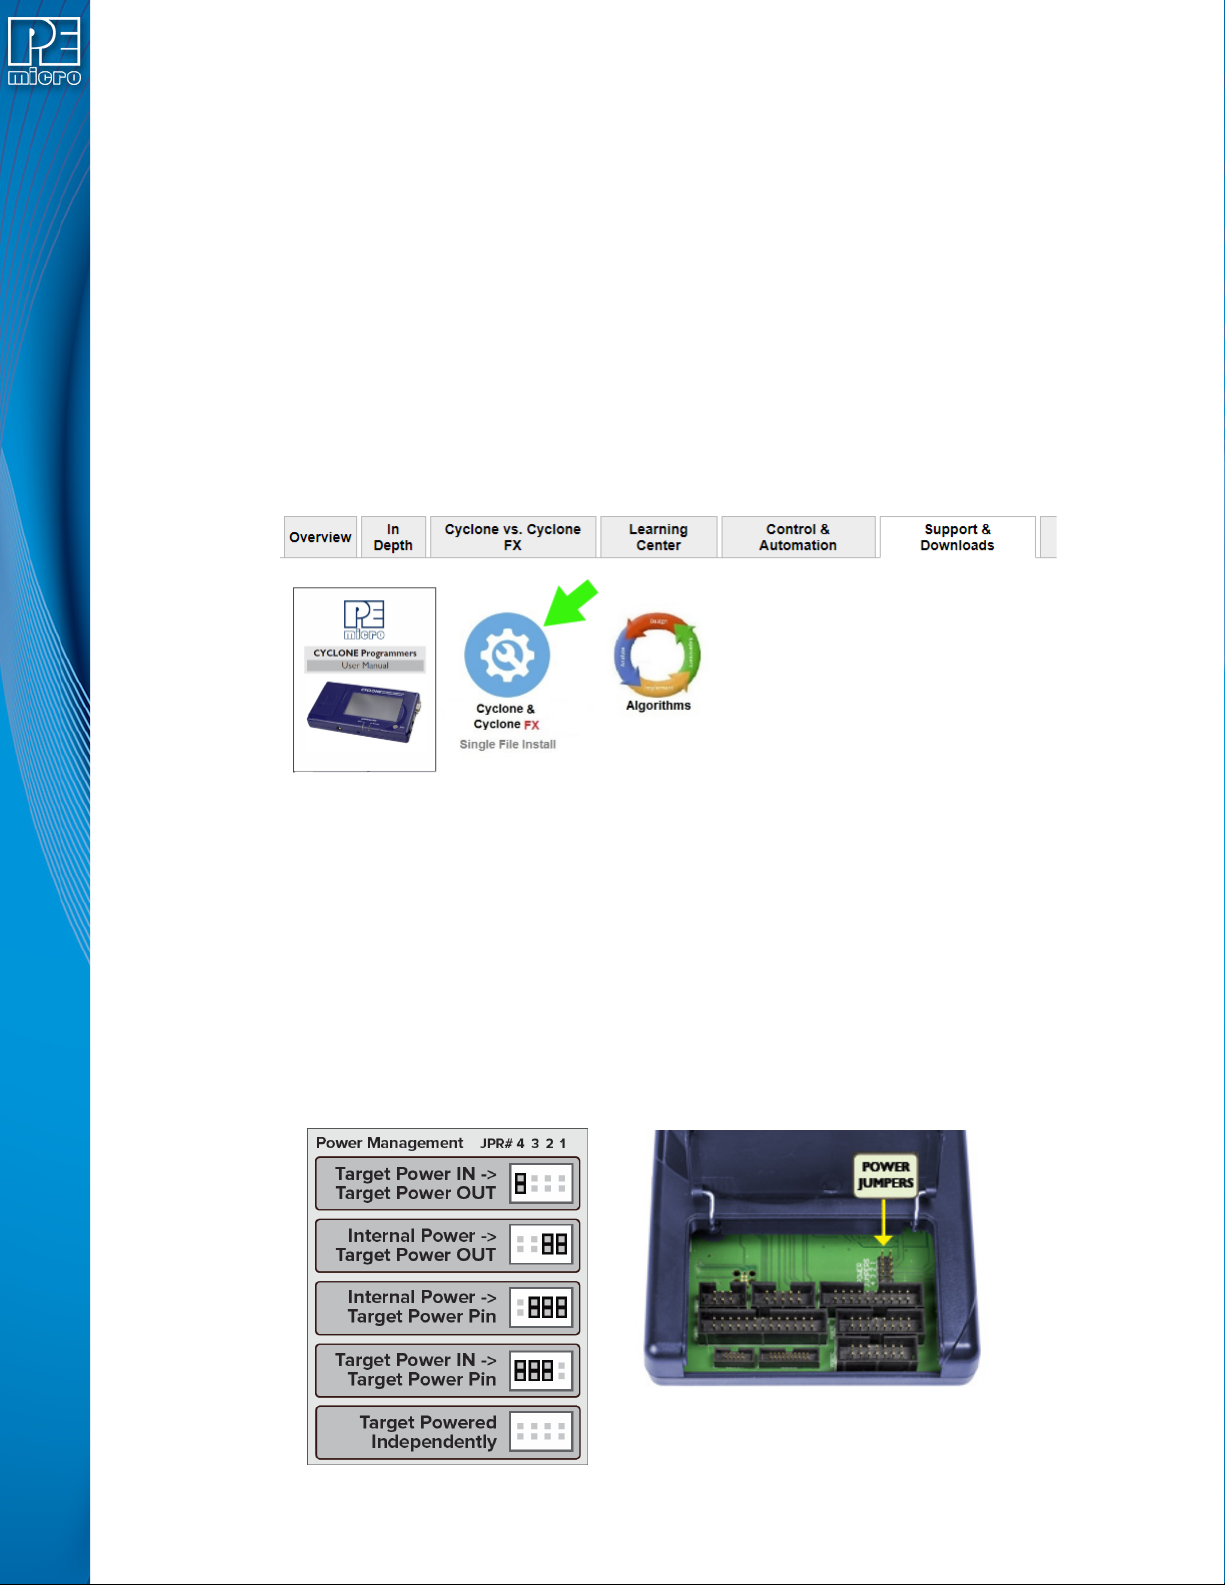
First, the Cyclone software should be installed on the user’s PC. It can be downloaded from the
Support & Downloads tab on the pemicro.com Cyclone product page, or directly from https://
www.pemicro.com/downloads/download_file.cfm?download_id=481.
Once the software is downloaded, the user should install it on their PC. If Cyclone software is already
installed on the PC, it is recommended that the old installation be removed before the user installs the
latest software.
2.2 Setting Up The Cyclone Hardware
Step 1. Configure Cyclone power settings
The Cyclone has several different power configurations. The label on the bottom of the Cyclone
indicates the appropriate Jumper settings for each. The user should install the Jumpers as indicated
for their desired power configuration.
The Jumpers are located underneath the Cyclone’s access panel. They are labeled “Power Jumpers.”
and numbered from 1-4. The Cyclone-LC-ARM is shown in the example below; the jumper location will
be similar for all Cyclone models.
User Manual For Cyclone LC Programmers 12
If power is provided via the Cyclone, the user may need to configure the programming image
accordingly. Image creation and configuration is discussed in Section 2.3 - Creating A Stand-Alone
Programming Image.
For more information on the various power configurations, the user should refer to their Cyclone’s User
Manual. There is a also a blog post that covers this topic at: http://www.pemicro.com/blog/
index.cfm?post_id=121
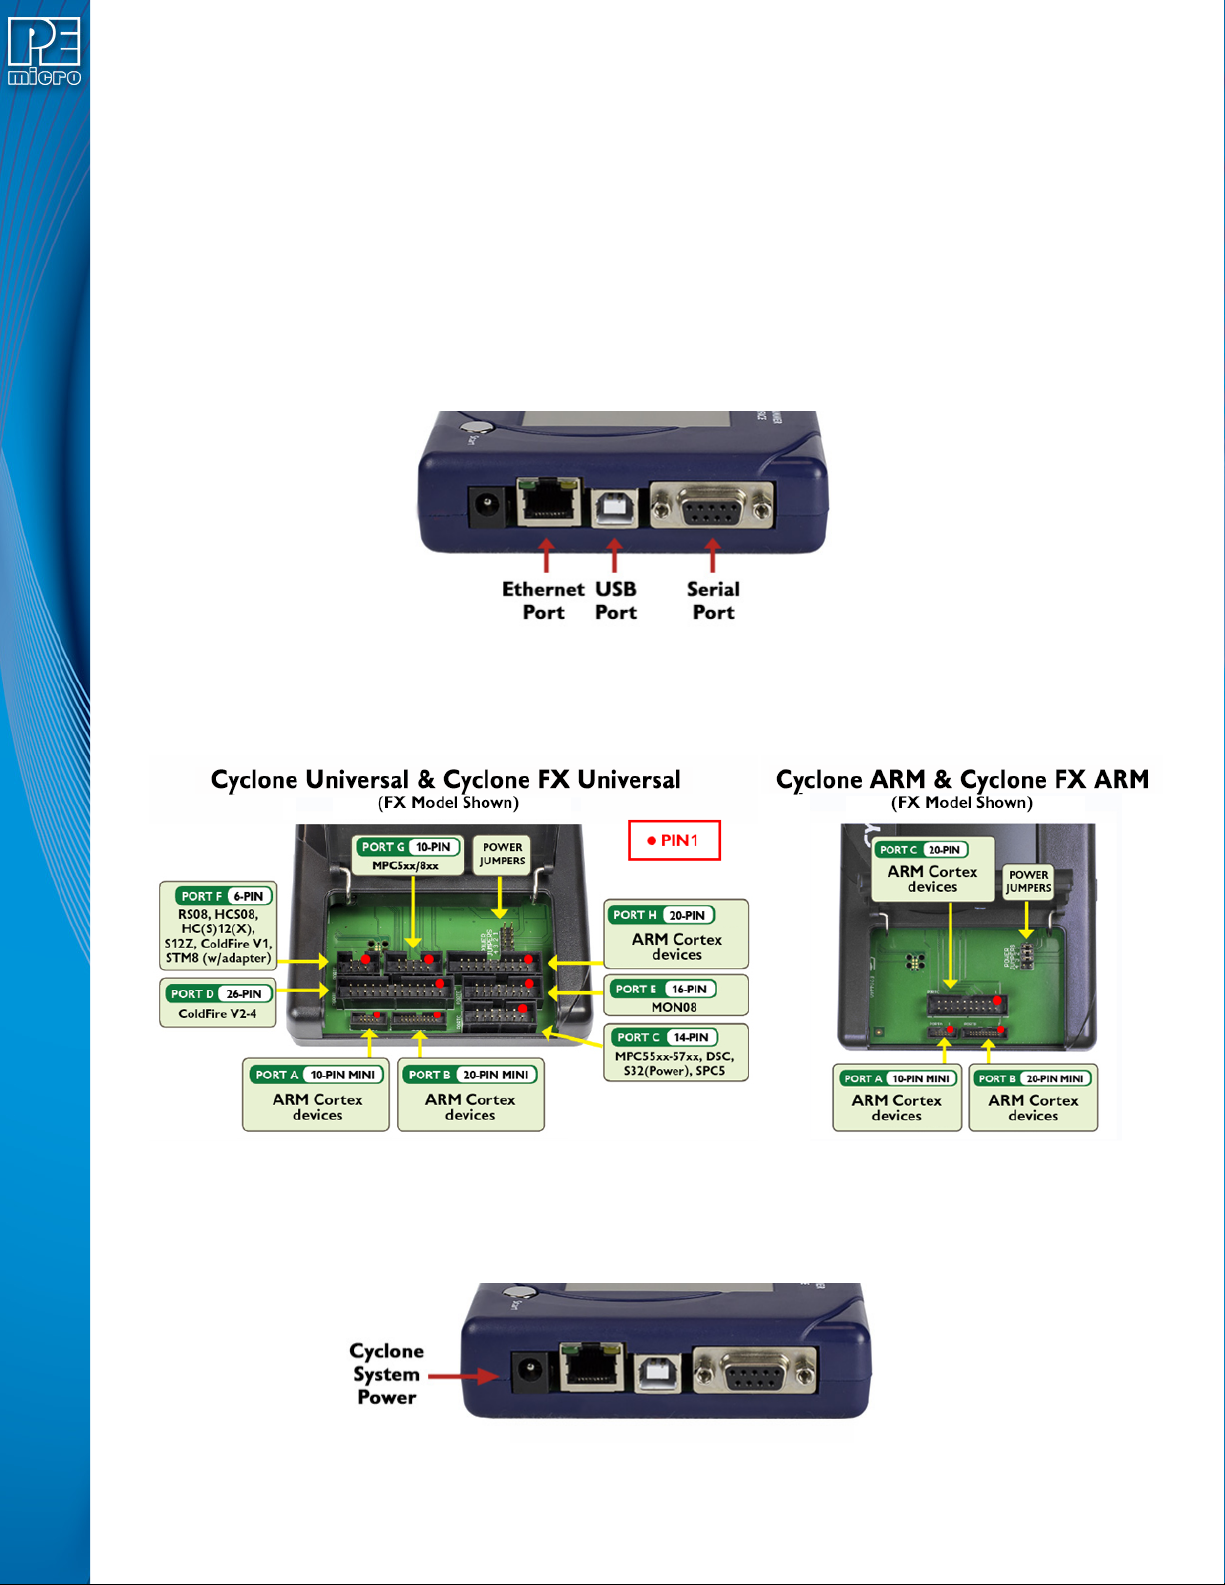
Step 2. Connect Cyclone to a PC (for programming image setup)
The Cyclone programmer should be connected to the PC via USB, Serial, or Ethernet. Cables for each
of these options are included with the Cyclone.
Note: An Ethernet connection requires IP setup on the Cyclone unit; please refer to the Cyclone’s User
Manual for more information.
Step 3. Connect Cyclone to target
A ribbon cable should be connected from the appropriate Cyclone header (located under the Cyclone’s
access panel) to the header for your target device. Ribbon cables are provided with the Cyclone.
Step 4. Plug in power to the Cyclone
The provided power supply should be plugged into the System Power jack of the Cyclone programmer.
Other power connections should be made according to the power configuration selected in Step 1.
On power-up the user may need to agree to a firmware update on the Cyclone unit.