CYCLONE-User-Manual.pdf - 第93页
User Manual For Cyclone LC Programmers 93 Figure 8-5: Changing Storage Area - Right Click or Drop-Down Selections Note: An image displayed in blue is not yet committed, so disconnecting from the Cyclone before the “Apply…
User Manual For Cyclone LC Programmers 92
8.4.2 The Control Tabs
The control tabs allow access to the Cyclone. Through these tabs you can view, add, and erase
Cyclone images, you can view and modify properties, you can modify licenses, see the Cyclone
screen remotely and view/manage Serial Files and Encryption Keys.
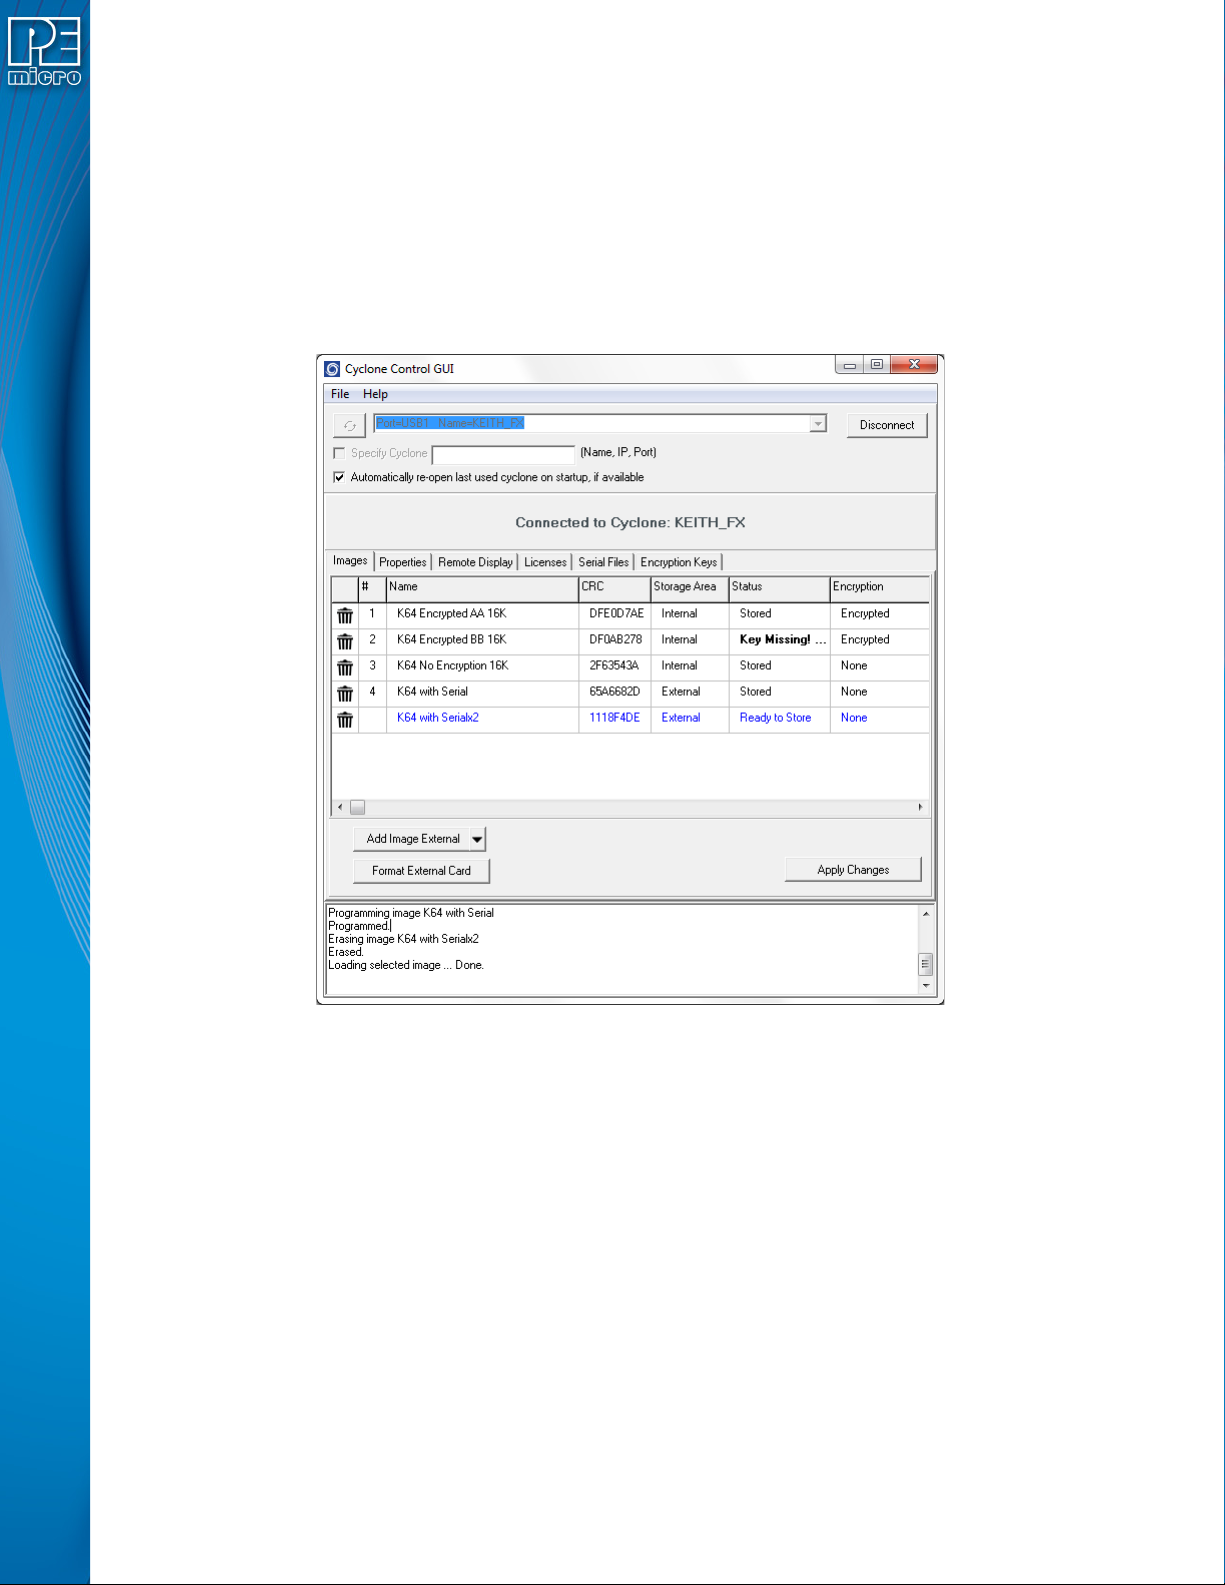
8.4.2.1 Images Tab
The Images tab allows the user to view and modify the Cyclone images both in internal Cyclone
memory and on external memory cards. To add a new image to the Cyclone, click on the “Add
Image Internal” button and selected the image you want to add. For the changes to take effect, the
“Apply Changes” button needs to be clicked, this will place the image in the Cyclone memory.
Figure 8-4: Images Tab - Image Ready to Store
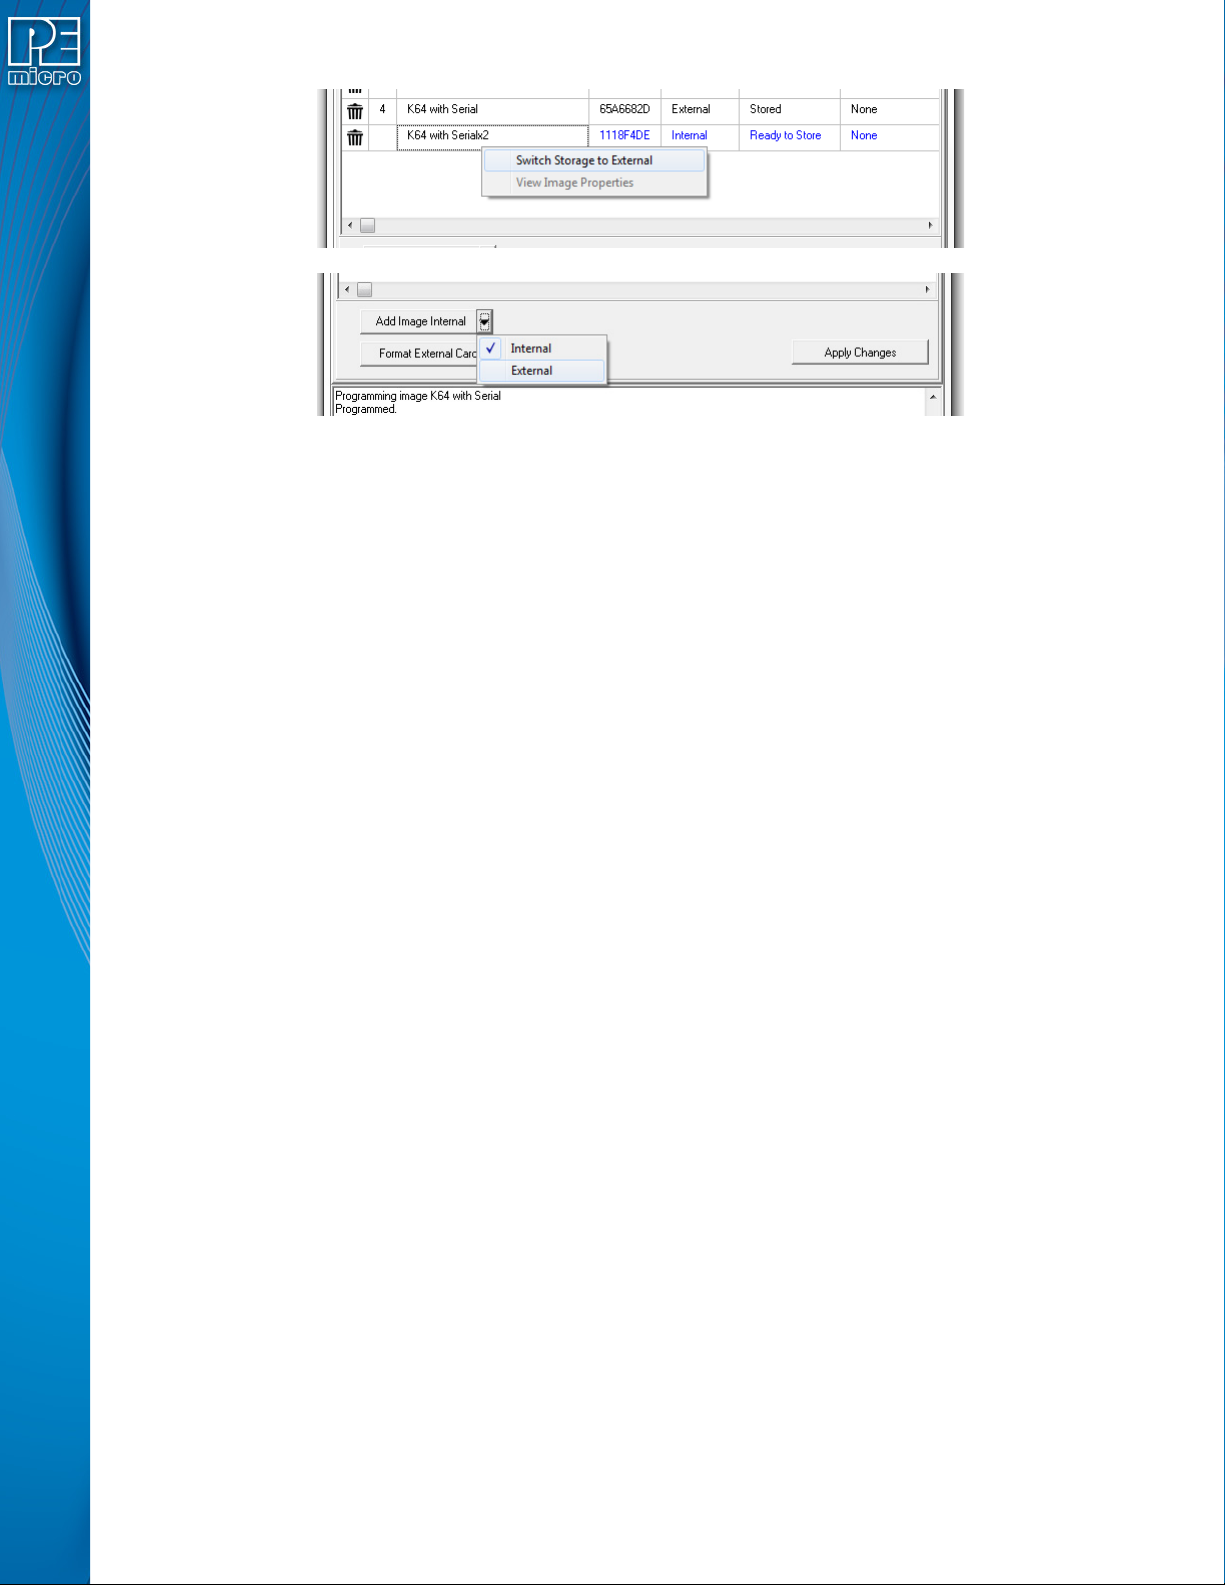
CYCLONE FX programmers and CYCLONE programmers with the SDHC Port Activation License
can also store images in external memory (an SDHC card). The storage area for the Add Image
button is toggled between Internal and External by clicking on the drop down arrow on the right of
the “Add Image” button. Users can also right-click on an uncommitted image to toggle the storage
between Internal and External.
User Manual For Cyclone LC Programmers 93
Figure 8-5: Changing Storage Area - Right Click or Drop-Down Selections
Note: An image displayed in blue is not yet committed, so disconnecting from the Cyclone before the
“Apply Changes” button is clicked will discard any changes not committed.
Erasing an image can be done by clicking on the trashcan icon at the left of the image, it can also
be done by selecting the image and click the DELETE key on the keyboard. The “Apply Changes”
buttons must be clicked for any changes to the Cyclone to take place.
To format the external memory card click on the “Format External Card” button. This will erase all
image information stored in the external card.
8.4.2.1.1 Categories
The following information is displayed for each image in the Images Tab:
Delete Image - Clicking the trash icon will designate an image for deletion. Apply Changes
must be clicked to execute this action.
Number - Displays the Cyclone’s numbering for each image.
Name - Displays the Image Name.
CRC - Displays the CRC value for each image.
Storage Area - “IN” designates that the image is stored in the Cyclone’s internal memory;
“EX” designates that it is stored in external memory (SDHC Card).
Status - This displays whether the image is “Stored” on the Cyclone, “Ready to store”, or
“Ready to erase”. A stored image that is encrypted but missing its ImageKey will always show
“Key Missing!” to indicate that the user must provision the Cyclone with this key in order to
program that encrypted image.
Encryption - Displays “Encrpyted” for encrypted images, and “None” for images that have not
been encrypted.
For more about encrypted programming images, please see Section 6.1.8 - ProCryption
Security License Features.
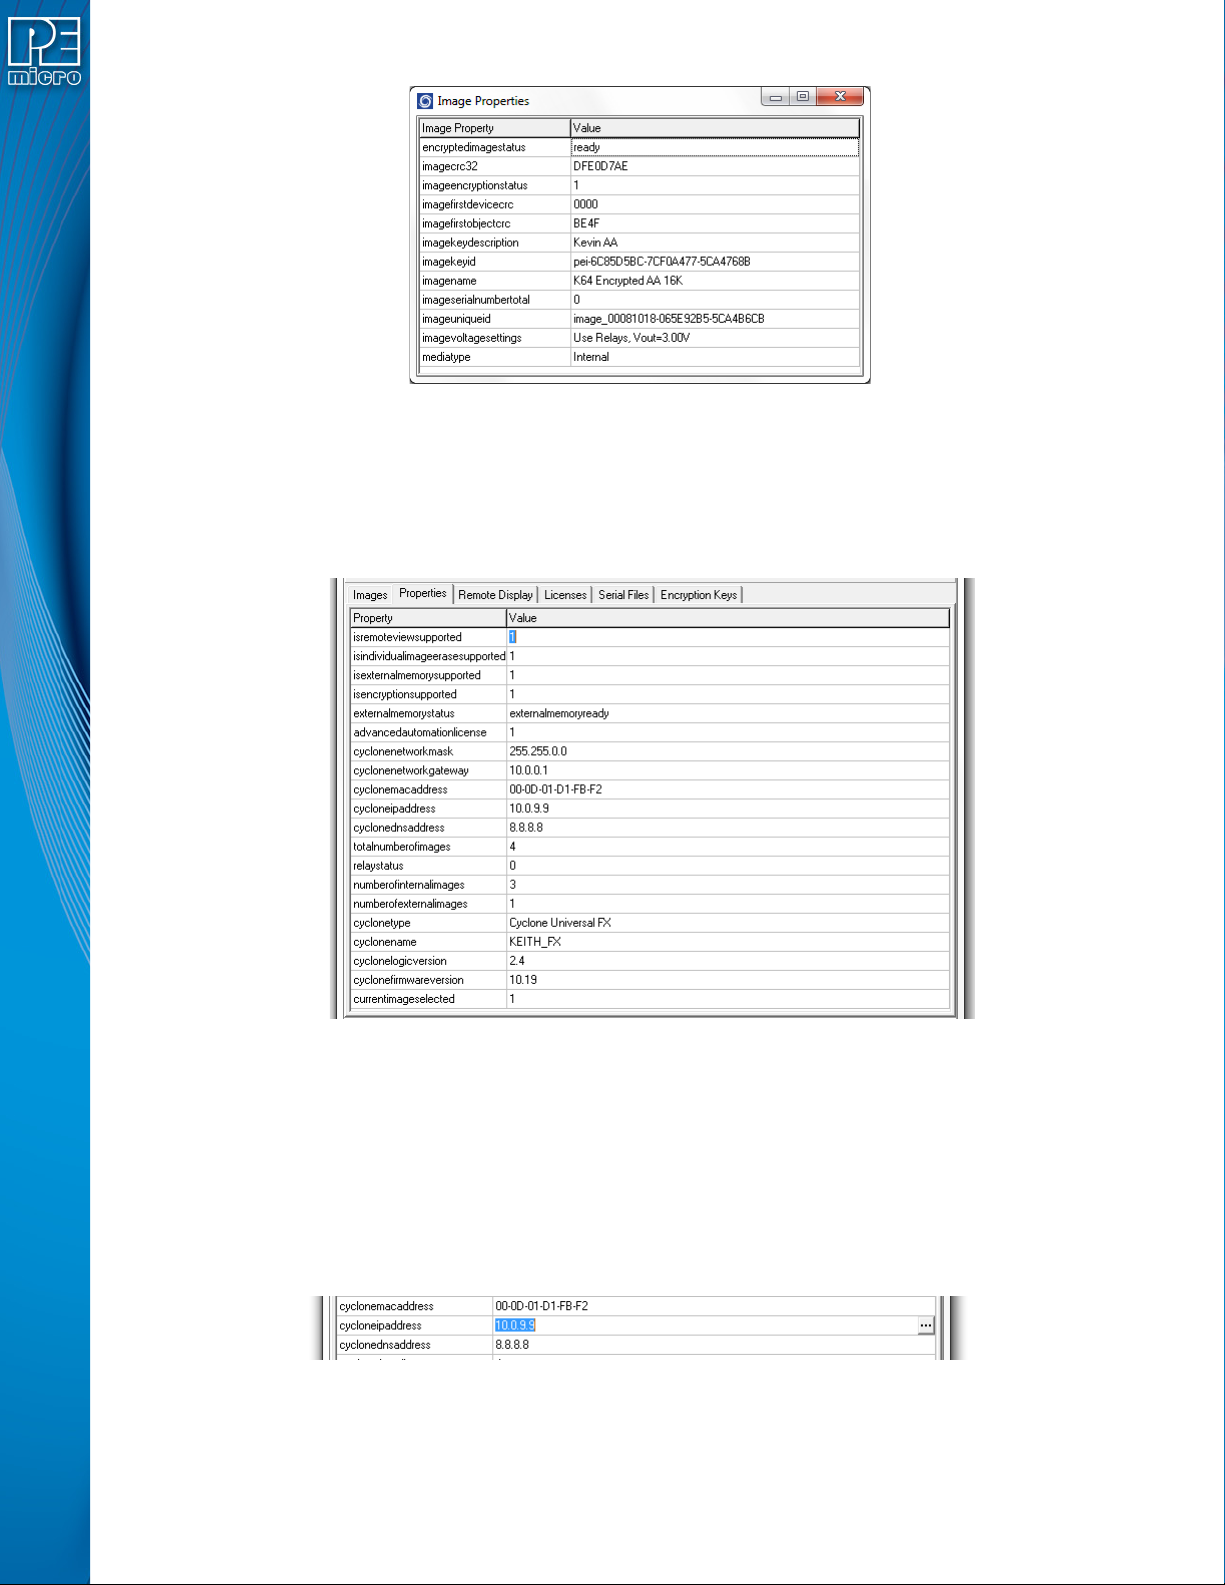
8.4.2.1.2 View Image Properties
From this tab a user can also access the image properties of images in the Cyclone. Just right click
on the image then click on “View Image Properties” and a window with public image properties will
pop up.
User Manual For Cyclone LC Programmers 94
Figure 8-6: Image Properties Window
Properties like the image name, the voltage settings, image CRC, encryption info, and all current
serial numbers can be viewed from this window. Use this feature to make sure your image settings
are correct or check that the serial numbers change accordingly.
8.4.2.2 Properties Tab
Figure 8-7: Properties Tab
The properties tab shows all the network, Cyclone and image properties. It also shows properties
for the supported features of the Cyclone. From this tab the Cyclone firmware and logic versions,
the cyclone type, and the number of images are available. Also from this tab some of the
properties can be modified.
8.4.2.2.1 Modifying A Cyclone Property
Some properties in the Cyclone are modifiable. Only the properties that can be modified will show
three dots to the right of the property when the property is selected.
Figure 8-8: Modifying Cyclone Properties
Clicking on the three dots or double clicking on the property value will bring up an edit window.
Write the new property value and click “OK”, the property window will refresh and the value