CYCLONE-User-Manual.pdf - 第12页
User Manual For Cyclone LC Programmers 12 If power is provided via the Cyclone, the user may need to configure the programming image accordingly . Image creation and configuration is discussed in Section 2.3 - Creating A…
User Manual For Cyclone LC Programmers 11
2 QUICK START GUIDE FOR SAP OPERATION
This guide will allow the user to set up and program a simple Stand-Alone Programming (SAP) image
with the Cyclone by completing the following steps.
• Installing the Cyclone software
• Setting up the Cyclone hardware
• Creating a stand-alone programming image
• Launching Cyclone programming
This guide is intended as a supplement to the Cyclone’s User Manual, which contains in-depth
information about the topics covered here and much more.
2.1 Installing The Cyclone Software
First, the Cyclone software should be installed on the user’s PC. It can be downloaded from the
Support & Downloads tab on the pemicro.com Cyclone product page, or directly from https://
www.pemicro.com/downloads/download_file.cfm?download_id=481.
Once the software is downloaded, the user should install it on their PC. If Cyclone software is already
installed on the PC, it is recommended that the old installation be removed before the user installs the
latest software.
2.2 Setting Up The Cyclone Hardware
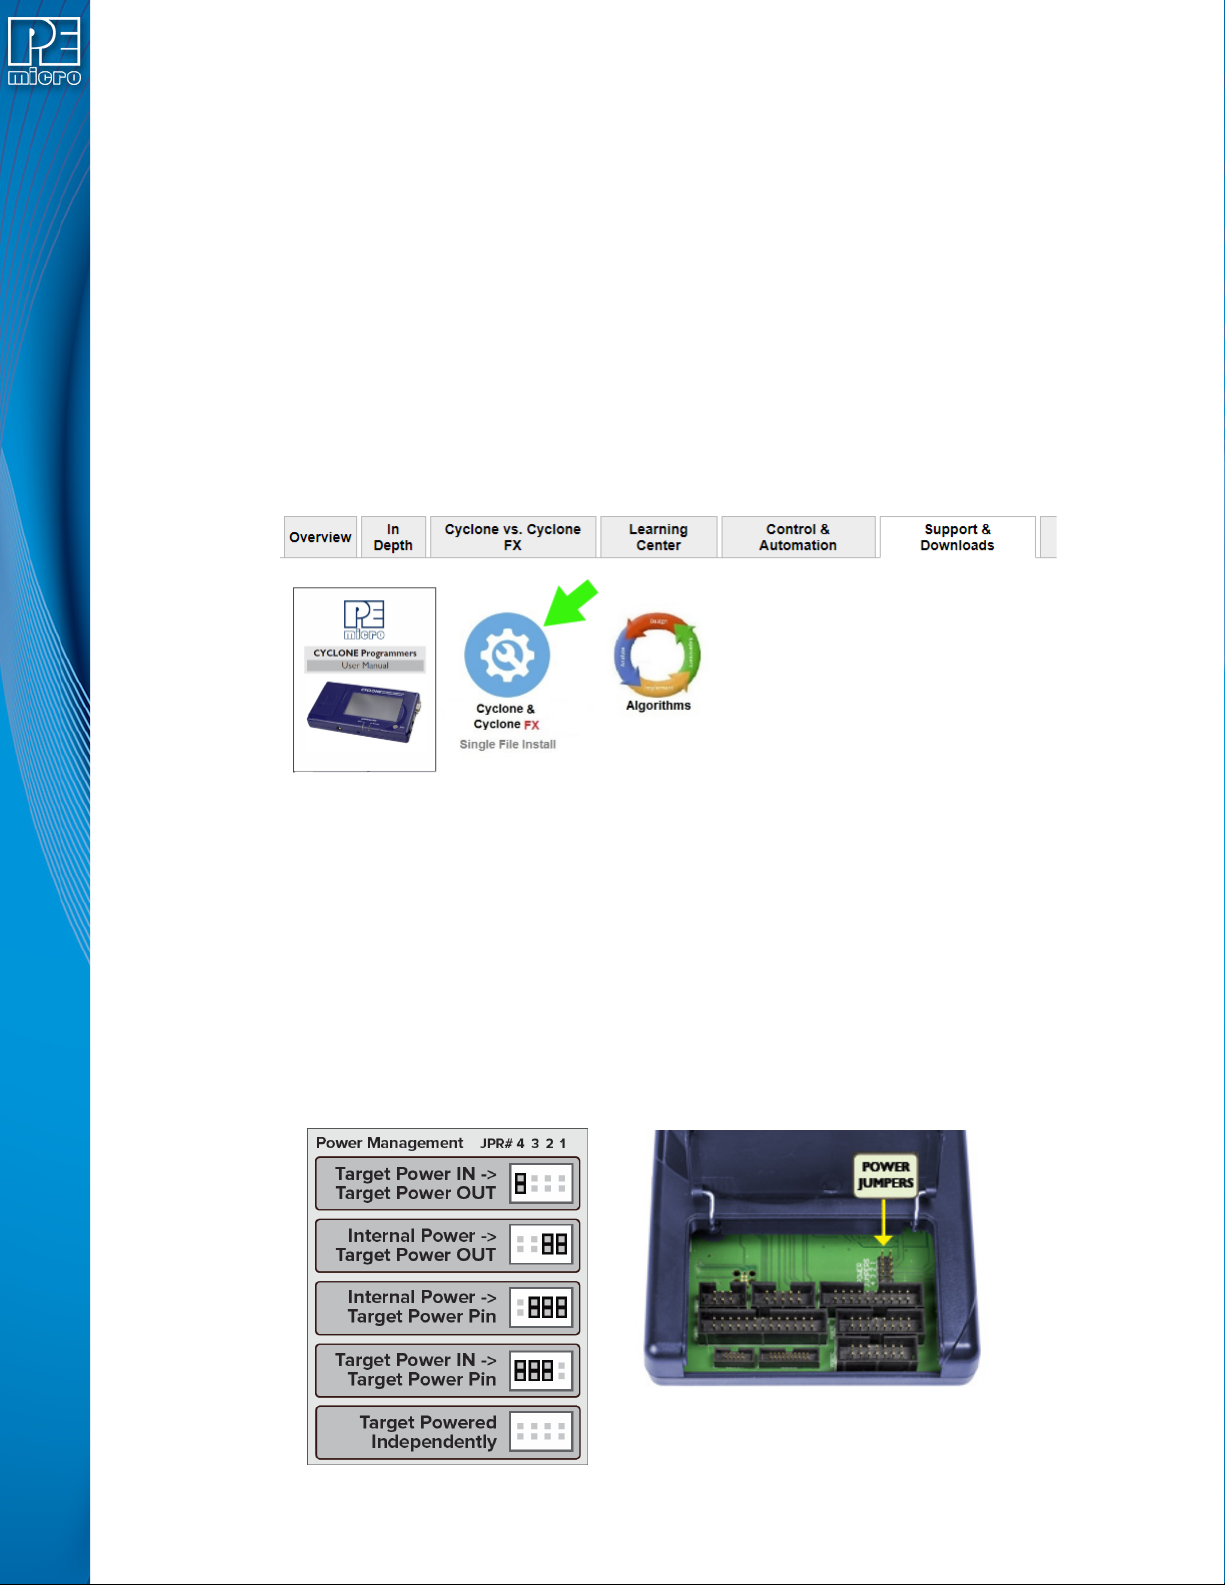
Step 1. Configure Cyclone power settings
The Cyclone has several different power configurations. The label on the bottom of the Cyclone
indicates the appropriate Jumper settings for each. The user should install the Jumpers as indicated
for their desired power configuration.
The Jumpers are located underneath the Cyclone’s access panel. They are labeled “Power Jumpers.”
and numbered from 1-4. The Cyclone-LC-ARM is shown in the example below; the jumper location will
be similar for all Cyclone models.
User Manual For Cyclone LC Programmers 12
If power is provided via the Cyclone, the user may need to configure the programming image
accordingly. Image creation and configuration is discussed in Section 2.3 - Creating A Stand-Alone
Programming Image.
For more information on the various power configurations, the user should refer to their Cyclone’s User
Manual. There is a also a blog post that covers this topic at: http://www.pemicro.com/blog/
index.cfm?post_id=121
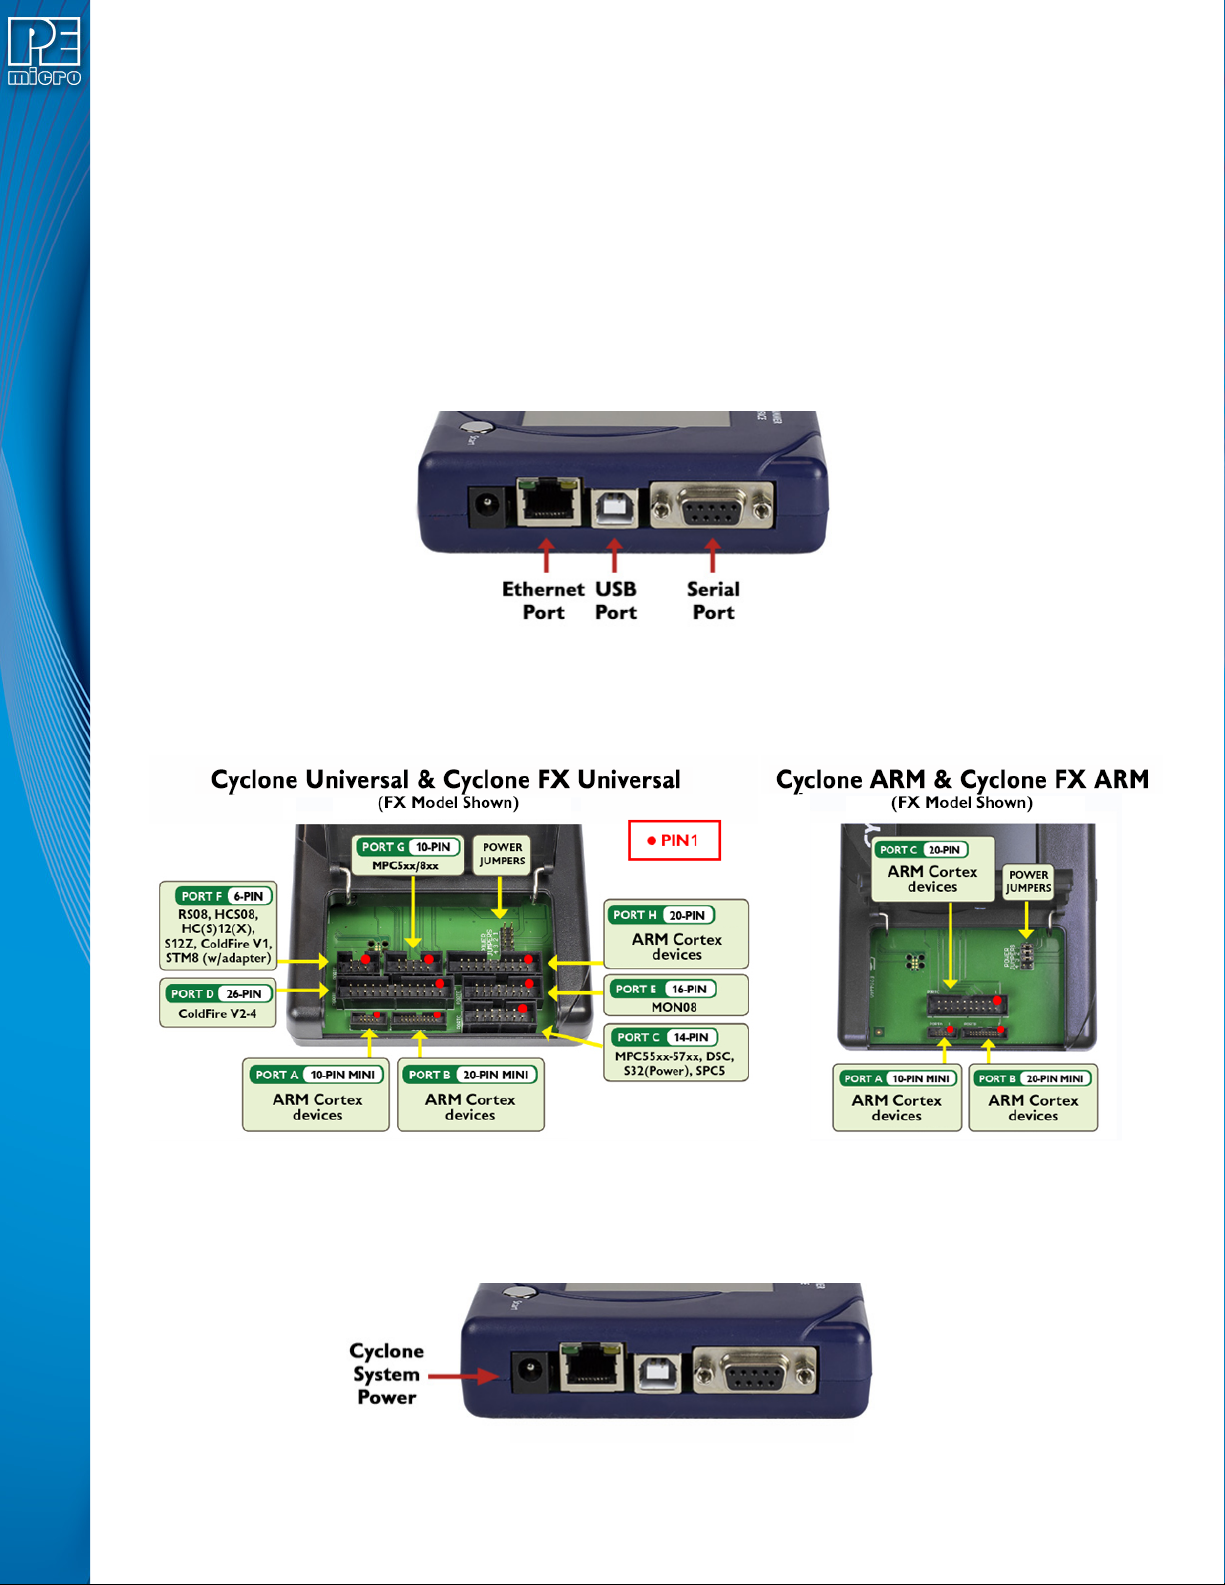
Step 2. Connect Cyclone to a PC (for programming image setup)
The Cyclone programmer should be connected to the PC via USB, Serial, or Ethernet. Cables for each
of these options are included with the Cyclone.
Note: An Ethernet connection requires IP setup on the Cyclone unit; please refer to the Cyclone’s User
Manual for more information.
Step 3. Connect Cyclone to target
A ribbon cable should be connected from the appropriate Cyclone header (located under the Cyclone’s
access panel) to the header for your target device. Ribbon cables are provided with the Cyclone.
Step 4. Plug in power to the Cyclone
The provided power supply should be plugged into the System Power jack of the Cyclone programmer.
Other power connections should be made according to the power configuration selected in Step 1.
On power-up the user may need to agree to a firmware update on the Cyclone unit.
User Manual For Cyclone LC Programmers 13
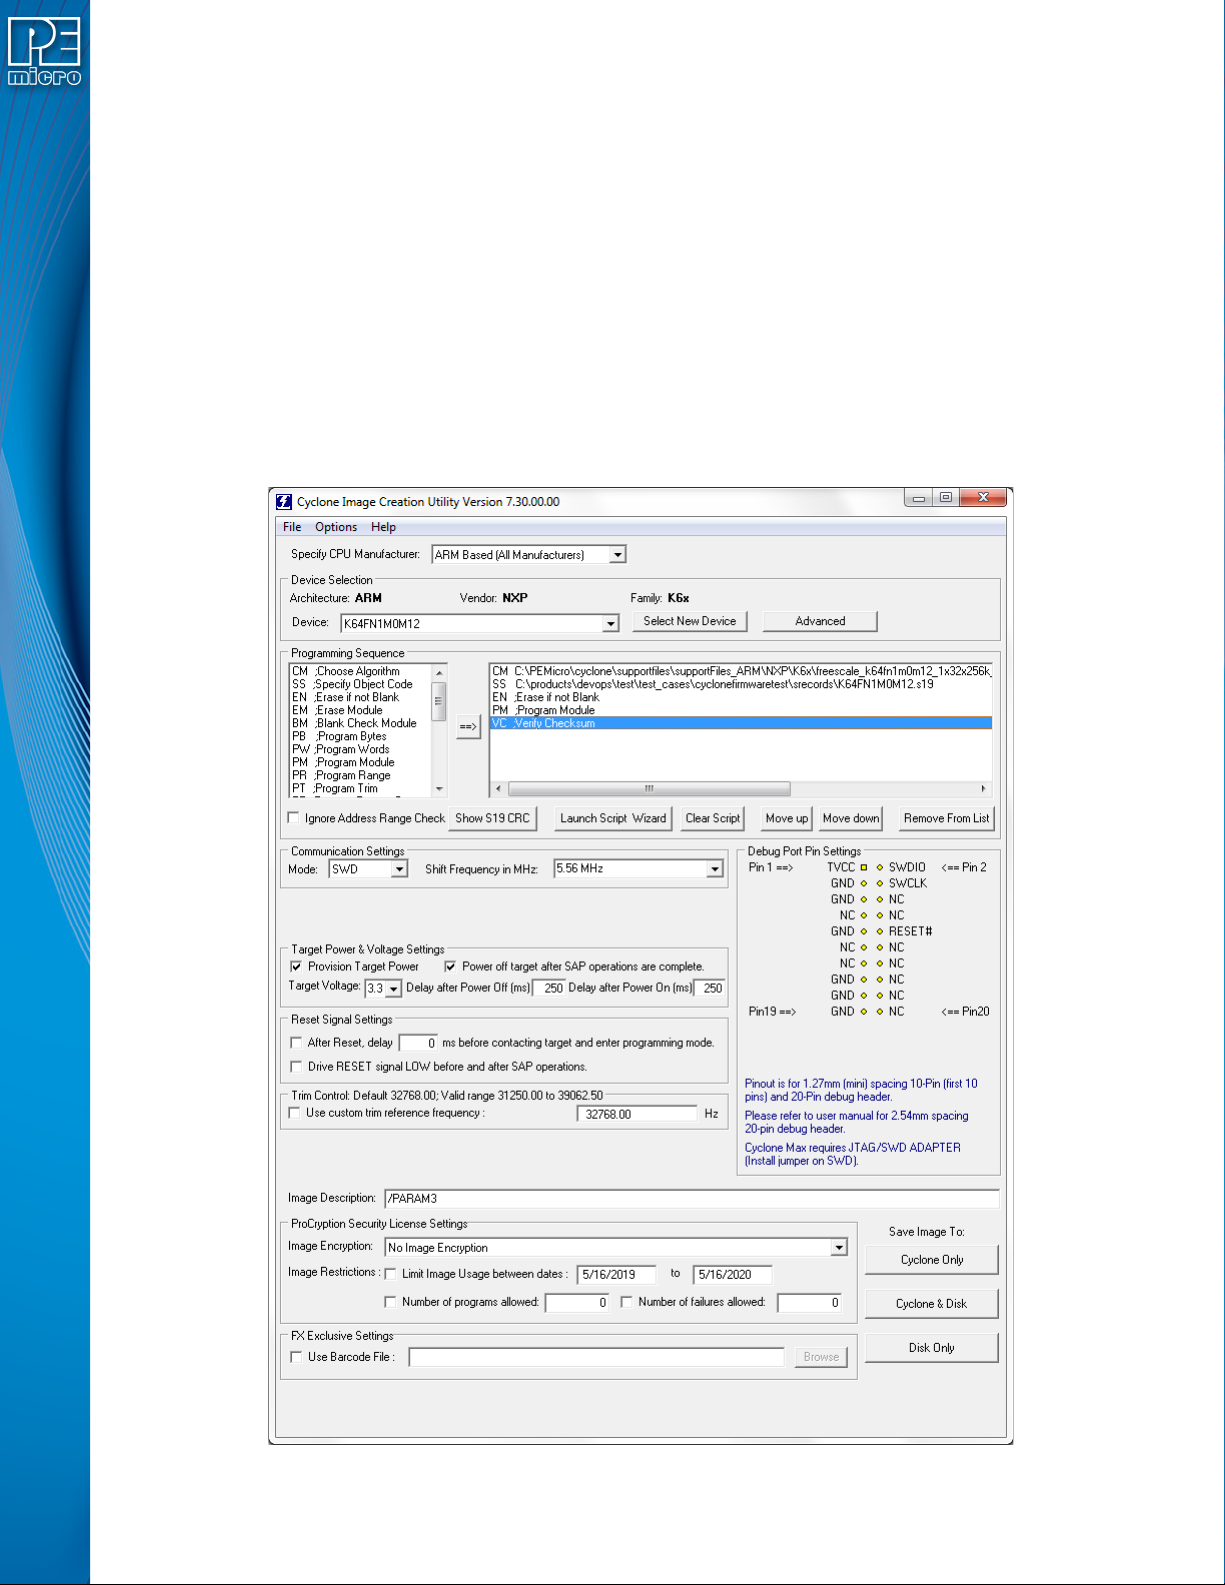
2.3 Creating A Stand-Alone Programming Image
A stand-alone programming (SAP) image is the result of pre-processing the programming algorithms,
data to be programmed, programming options, and scripted programming commands. These are
combined into a single encrypted file. This SAP image can then be loaded onto the Cyclone and used
to program, without need for the Cyclone to be connected to a PC.
The Cyclone Image Creation Utility, shown below, allows the user to configure and save SAP images.
A simple programming image can be created in 6 steps:
Step 1. Run Cyclone Image Creation Utility
Step 2. Select Device Manufacturer & Device
Step 3. Set Up Programming Sequence
Step 4. Add Basic Programming Commands
Step 5. Configure Additional Settings
Step 6. Save SAP Image To Cyclone